Branded Cooler Bags: Buyer's Guide to Cost, Performance, and Lead Time
A lunch-delivery team, a field sales crew, and a weekend promotion all want the same thing from branded cooler bags: keep contents cold long enough to matter, then keep the logo visible long after the ice melts. That makes this product more useful than a typical giveaway, but only if the size, insulation, closure, and decoration method actually fit the job.
From a buyer's point of view, the mistake is treating a cooler bag like a blank ad panel. It is a soft-sided insulated carrier first, a promotional item second. If the build is wrong, the bag feels flimsy, the print looks cramped, and the quote can jump for reasons that were avoidable at the start.
The stronger orders usually start with a simple question: what will this bag carry, how far will it travel, and how long does it need to hold temperature? Once those answers are clear, the spec becomes much easier to control.
What branded cooler bags actually do in the field

In practice, branded cooler bags show up where ordinary tote bags fail. They are used for boxed lunches, chilled beverages, meal delivery kits, pharmacy samples, retail grocery runs, employee onboarding packs, and event giveaways that need to feel more substantial than a t-shirt or pen. The appeal is straightforward: they work as a utility item and a repeated brand touchpoint at the same time.
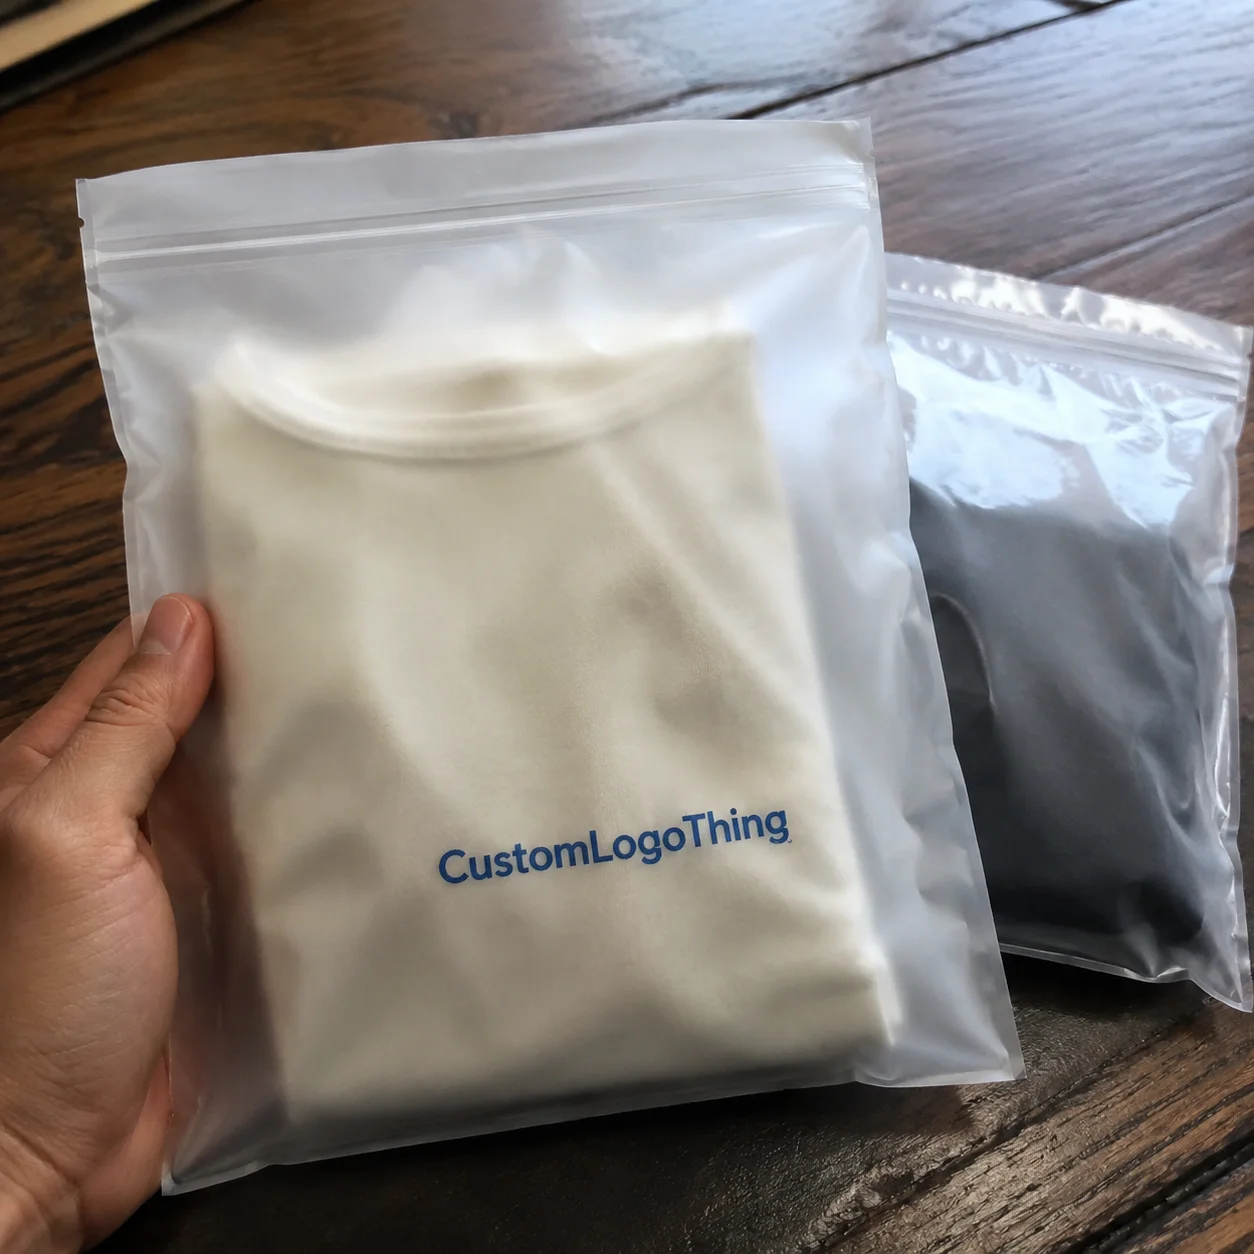
The construction is usually simple on paper. There is an outer shell, an insulating layer, an inner liner, and a closure that helps retain temperature. Decoration goes on the exterior panel, sometimes the front pocket or lid area, depending on seam placement and how much uninterrupted print space the bag provides. That sounds basic, but small changes affect the final result fast.
Most buyers underestimate how long a cooler bag stays in circulation. A cheap promo item may be used once and forgotten. A decent bag can live in a car, office fridge area, jobsite locker, or delivery route for months. That is why utility matters so much. If the bag feels easy to carry, easy to clean, and secure enough to hold cold items without dripping everywhere, the logo gets repeated exposure without feeling forced.
The best orders are rarely the ones with the biggest logo. They are the ones that match the real contents, the real carry distance, and the real temperature window. That usually means the buyer has defined the use case before asking for pricing, not after the first proof.
The strongest cooler bag order is the one that matches the load, the travel time, and the closure type before the artwork is even discussed.
That spec-first approach saves time and money. A lunch kit, a six-pack carrier, a grocery top-up bag, and a cold-chain-adjacent sample pack all need different proportions. Buyers who define the job first usually get a cleaner quote, fewer revisions, and a final product that feels intended rather than improvised.
How insulation, lining, and closures affect performance
The performance story starts with materials. Common outer shells include non-woven polypropylene for low-cost promotions, 210D or 300D polyester for a cleaner retail feel, and heavier denier fabrics when durability matters. Inside, you will often see PEVA, aluminum foil-type liners, or other wipe-clean surfaces paired with foam insulation. The combination changes both cold retention and the way the bag holds its shape.
Foam thickness matters, but more is not always better. A thin build around 2 to 3 mm can work for short carry times, event kits, or lunch use. Medium builds closer to 5 mm usually hold temperature better and feel more structured. Once you go thicker, bulk and shipping volume increase, and that can matter if the bag needs to fold flat, pack tightly, or ship in large quantities.
The liner deserves more attention than it usually gets. A wipe-clean interior is not a luxury detail; it determines whether the bag can handle condensation, melted ice, or the occasional spill without turning into a maintenance problem. PEVA liners are common because they are lighter and easier to clean. Foil-style linings can improve reflectivity, but they may crease or scuff if the bag is repeatedly compressed.
Closures matter more than many buyers expect. Zippers usually seal better and feel more premium. Hook-and-loop closures are cheaper and easier to open quickly, but they are less effective in hot conditions and can wear faster. Flap-top designs sit in the middle. If the bag is meant for a short event or a light lunch carry, a simple closure may be enough. If it needs to keep contents chilled through a commute or delivery route, zipper construction is usually the safer choice.
- Light promo use: non-woven shell, thin foam, PEVA liner, simple closure.
- Daily commuter use: polyester shell, medium foam, wipe-clean liner, zipper.
- Retail or employee kit use: heavier fabric, reinforced handle, structured base, better hardware.
Decoration space is tied to structure. Seams, gussets, piping, and curved panels can shrink the usable imprint area, which is why a logo that looks perfect in a mockup can look cramped on the actual bag. If the design has a detailed mark or small text, request a panel map before approval. That is a faster way to avoid surprises than trying to fix placement after production starts.
For buyers who care about transit performance as well as product feel, it helps to think in packaging terms rather than just retail terms. If these bags are going into e-commerce kits or event shipments, the outer packaging should be treated like a distribution item, not a decorative box. Standards from the ISTA organization are useful here because they push teams to think about drop, vibration, and compression risk instead of assuming the bag will arrive undamaged by luck.
Cost, pricing, and MOQ: what changes the quote
Quote variation usually comes from a short list of variables: size, material thickness, insulation level, print colors, decoration method, hardware, and add-ons like front pockets or reinforced handles. If two vendors are quoting the same-looking bag at very different prices, one of those inputs is almost always different even if the first email did not make it obvious.
Minimum order quantity changes the math in a big way. Lower quantities tend to cost more per unit because setup is spread across fewer bags. A 500-piece order often looks expensive next to a 5,000-piece run, but the unit price usually drops once tooling, print prep, and packaging setup are amortized across more pieces. That is normal, not a sign that someone is overcharging.
Setup charges also matter. Screen printing may involve a setup fee per color, while heat transfer and embroidery can bring digitizing or setup costs. Full-color decoration can push the price up if the artwork is complex or if the bag material needs a special transfer process to hold the image cleanly. Embroidery looks premium, but on soft insulated bags it can add stiffness and may not be the right answer if the panel is already narrow or highly structured.
| Order Size | Typical Unit Range | What Usually Changes | Best Fit |
|---|---|---|---|
| 250-500 pieces | $4.80-$8.50 | Higher setup impact, tighter material choices | Event giveaways, pilots, internal launches |
| 1,000-2,500 pieces | $3.20-$6.25 | Better pricing spread, more print options | Sales programs, onboarding kits, regional promos |
| 5,000+ pieces | $2.10-$4.50 | Lower per-unit cost, stronger negotiating room | National campaigns, retail programs, high-volume giveaways |
Those ranges assume a standard soft-sided build with one-color or limited decoration. Add complex full-color art, reinforced hardware, or a premium liner and the number moves up. Freight can also change the landed cost more than buyers expect, especially if the bags ship in bulky cartons rather than compact master packs. Sample charges, special inserts, and hang tags add smaller but still real costs.
Some buyers focus only on unit price and miss the landed cost. That is usually where surprises show up: carton count, oversize freight, inner packaging, and the cost of a proof or sample round. A cleaner quote is one that separates product cost, decoration cost, packaging cost, and freight cost. If those lines are blended together, comparisons become less reliable.
If the bag is part of a branded kit, ask whether the inserts or printed cards use FSC-certified stock. That does not solve the whole sustainability picture, but it is a more defensible choice than a vague eco claim with no backing. It also gives marketing a clearer story to tell without overselling the material.
Production steps and lead time from artwork to delivery
The process is usually more linear than buyers think. It starts with the Quote and Spec review, then moves into artwork preparation, proofing, material sourcing, production, quality check, packing, and shipment. When those steps are controlled, the order feels predictable. When one step slips, the schedule often moves by several days at once.
Artwork is one of the main delay points. If the logo file is low resolution, the colors are not specified, or the print area was never confirmed against the actual panel dimensions, the proofing round expands. A second common delay is a late change to the bag size or closure style after approval. That sounds minor, but it can affect pattern cutting, print placement, and carton count.
For straightforward orders with stock materials and simple decoration, lead time is often around 12-15 business days from proof approval. More complex builds, special fabrics, embroidery, or imported hardware can stretch that to 18-25 business days or more. Rush work exists, but it usually comes with either a price premium or a narrower material choice, and sometimes both.
There are a few checkpoints worth demanding before production starts. First, the proof should show exact dimensions, placement, and color reference. Second, the sample or pre-production approval should confirm zipper movement, handle length, and panel alignment. Third, the packing plan should state how many bags go in each carton, because a bag that ships too loosely can arrive creased and harder to present well.
For teams coordinating trade shows, seasonal launches, or onboarding shipments, backward planning matters. Confirm three things before releasing the order:
- The exact proof approval rule and who signs off.
- The production milestone dates, not just the ship date.
- The destination and freight method, especially if the bags need to arrive by a fixed event date.
If the order involves bundled kits, the bag should be treated as one part of a larger distribution plan, not an isolated product. Structured packaging and transit testing matter because the bag can pass inspection on a table and still arrive poorly presented if the outer carton fails under pressure or the pack-out method is loose.
If you need packaging or fulfillment benchmarks, the logic used in broader packaging programs is helpful here too. Teams that rely on structured distribution testing, including ISTA-style expectations, are usually better at spotting weak timelines before a carton is on a truck.
How to choose size, print method, and materials for your use case
Start with contents, not decoration. A lunch kit needs a different footprint than a six-pack carrier, and a retail grocery bag needs more usable volume than a giveaway meant for one chilled beverage and a snack. If you oversize the bag, the contents shift around and the product feels less premium. If you undersize it, the closure strains and the insulation becomes less useful because the bag is forced closed around the contents.
For lunch and commuter use, buyers often land in the compact range with enough room for one or two containers, a drink, and a small ice pack. For event giveaways, a medium size is usually safer because it feels useful without becoming bulky. For grocery or team supply use, a larger gusset and stronger handle set become more important than a flashy print finish.
Typical size decisions follow the use case more than the marketing brief. A 6 to 8 liter bag may be enough for a single person. A 10 to 15 liter build works better for family groceries, multiple containers, or a mixed beverage pack. Once the contents move beyond lunch-size items, the gusset, base reinforcement, and zipper length start mattering as much as the exterior look.
Choose print by artwork complexity
Simple one-color logos are the easiest and most economical to produce. They work especially well on textured shells and darker fabrics because the print does not need to carry a lot of detail. If the artwork includes gradients, fine type, or photographic elements, a full-color transfer often produces cleaner results, though it can cost more. Screen printing can be excellent for simple marks, but it needs enough flat area and enough contrast to stay legible.
Embroidery can look premium, but it is not always the best answer on soft insulated builds because thick thread can distort the panel or complicate cleaning. It also adds needle holes, which is rarely a problem in normal use but can be a poor match for thinner outer fabrics. If the bag has a curved front or a narrow pocket panel, a print transfer often gives a cleaner result than stitched decoration.
Choose materials by durability target
If the bag is meant for a short-term promotion, a lighter shell with a clean logo placement can be enough. If the bag will live in employee use or customer repeat use, step up the fabric weight, handle reinforcement, and liner quality. Also check the interior finish. A wipe-clean lining sounds basic, but it decides whether the bag still looks usable after the first spill. That is one of those details people only care about after the first complaint.
On the practical side, handle construction deserves the same attention as the print. Webbing handles should be stitched cleanly into the seam or reinforced with bartacks where the load sits. If the handle length is too short, the bag carries awkwardly. If it is too long, the bag swings and the contents shift. Small differences in handle geometry can change how premium the product feels far more than a logo upgrade does.
Before locking the configuration, ask for a sample or at least a specification sheet with dimensions, closure type, handle length, print area, and estimated packed weight. If you want to see how different build choices play out in real projects, our Case Studies page is useful because it shows how buyers balance cost, appearance, and performance instead of treating them as separate decisions.
For materials and add-ons, check whether the supplier can support recycled polyester, lower-impact inserts, or FSC-certified paper elements when those details matter to the brand story. The point is not to decorate the product with sustainability language and call it done. The spec has to back it up, and the quality control should be able to prove it.
Common mistakes that make cooler bag orders underperform
The biggest mistake is buying on price alone. A low quote can look attractive until the bag arrives with thin insulation, weak stitching, or a closure that does not hold under heat. At that point the item still carries the logo, but it has stopped doing the practical work that made it worth ordering in the first place.
Another common problem is logo sizing. Big artwork on a small front panel can make the bag look crowded and less premium. Tiny logos on textured material do the opposite; they vanish from arm's length. Good decoration sizing is a visibility question, not just a design preference. The best logo placement usually leaves breathing room around the mark so the bag reads clearly in motion.
Approval discipline matters too. Screen color on a monitor is not the same as print color on coated fabric. Skipping a pre-production sample or proofing only on a phone screen is a fast way to miss subtle issues like muddy contrast, wrong placement, or a zipper that covers part of the art. For a purchase that may be used for months, that is a weak place to save time.
Testing is often overlooked because the bag seems simple. It is not complicated machinery, but it still needs basic checks. Zippers should cycle smoothly. Handles should take repeated load without pulling loose. Seams should hold after a compression test. The liner should wipe clean without peeling at the corners. None of that is glamorous, but it is the difference between a bag that stays in service and one that gets discarded early.
- Do not ignore zipper quality, handle stitching, and seam finish.
- Do not approve artwork before checking the true print area.
- Do not tie the schedule to an event without building in proof and freight time.
- Do not assume a bag that looks good on screen will perform well in heat.
Timing errors are especially common with seasonal campaigns. Buyers often work backward from the event date instead of the ship date, which leaves no room for sampling, correction, or transit delays. That is how a simple order turns into a rushed one. A better plan gives the bag room to be produced correctly instead of merely quickly.
If you need paper inserts, hang tags, or packaging sleeves, choose clean print specs rather than vague marketing claims. A basic FSC-certified insert with a clear message is usually better than an overdesigned claim sheet that adds cost without adding credibility.
Next steps: compare specs, request samples, and place the order
The fastest way to make a better buying decision is to force the supplier quote into a simple comparison. Ask for two material options, two quantity breaks, and at least one decoration alternative. That gives you a real view of what the price is doing. It also shows whether the difference is driven by structure, print method, or packaging extras.
A practical buyer workflow looks like this:
- Define the use case and contents.
- Choose the quantity range before asking for price.
- Decide whether the bag needs a premium feel or just reliable utility.
- Request a sample, spec sheet, or production proof.
- Confirm lead time, freight method, and replacement terms before approval.
If your program involves multiple stakeholders, put the functional spec in writing before anyone comments on the logo. That keeps the conversation anchored to useful details like insulation thickness, liner type, handle strength, print area, and cleanability. It also prevents the usual back-and-forth where marketing wants a bigger mark and operations wants a tougher bag.
There is also a practical reason to keep the conversation anchored to the spec. The bag may be branded, but it is still a piece of working product. If it has to support refrigerated food, employee meals, samples, or retail carryout, the approval should respect how the item will actually be used. That approach usually produces a better result than trying to make every panel carry more design than the construction can support.
For buyers who want the product to do more than carry lunch, the right branded cooler bags order is one where spec, decoration, and timing all line up. Get those three pieces right and the bag becomes a practical brand surface instead of a costly compromise.
FAQ
What should I look for when ordering branded cooler bags in bulk?
Check insulation thickness, lining material, closure type, handle strength, and usable capacity before you compare price. Ask for a sample or a spec sheet so the final bag matches how it will actually be used. If the order will be shipped inside a larger kit, confirm the pack-out and carton count as well.
How much do branded cooler bags usually cost per unit?
Unit cost depends mainly on size, material, print method, quantity, and whether setup or decoration charges apply. Lower quantities usually cost more per bag because production setup is spread across fewer pieces. Freight and packaging can change the landed cost more than buyers expect, especially on bulky builds.
What is the typical production timeline for custom cooler bags?
Timeline usually includes proofing, material sourcing, production, quality checks, and shipping. Simple stock-material orders can often move in about 12-15 business days after proof approval, while more complex builds can run 18-25 business days or longer. Artwork revisions and rush requests can extend the schedule.
Which print method works best for branded cooler bags?
Simple logos often work well with economical single-color methods. Detailed artwork, gradients, or small text may need a higher-resolution decoration process for clean results. The right answer depends on the shell texture, the size of the imprint area, and how much contrast the artwork needs.
How do I choose the right size for branded cooler bags?
Match the size to the contents: lunch kits, six-packs, meal delivery, and event giveaways all need different dimensions. Avoid oversizing, because a bag that is too large for the contents can feel awkward and less premium. If the items will travel far or need longer temperature retention, a more structured build is usually safer.
Are premium materials always worth the extra cost?
Not always. A higher-denier shell, better liner, and stronger hardware make sense when the bag will be used repeatedly or needs a better presentation. For short promotions, a simpler build may be the better buy. The right spec depends on how long the bag needs to stay useful, not just how it looks on approval.