Buyer Fit Snapshot
| Best fit | Branded Mailers for Direct Shipments projects where brand print, material claims, artwork control, MOQ, and repeat-order consistency need to be specified before quoting. |
|---|---|
| Quote inputs | Share finished size, material target, print colors, finish, packing count, annual reorder estimate, ship-to region, and any compliance wording. |
| Proofing check | Approve dieline scale, logo placement, barcode or warning zones, color tolerance, closure strength, and carton packing before bulk production. |
| Main risk | Vague material claims, crowded artwork, missing packing details, or unclear freight terms can make a low unit price expensive after revisions. |
Fast answer: Branded Mailers for Direct Shipments: Film, Print, MOQ, and Carton Packing should be specified like a repeatable production item. The safest quote records material, print method, finish, artwork proof, packing count, and reorder notes in one written spec.
Production checks before approval
Compare the actual filled-product size with the drawing, then confirm tolerance on folds, seals, hang holes, label areas, and retail display edges. Reserve space for logos, QR codes, warning copy, and material claims before decorative graphics fill the panel.
Quote comparison points
Review material grade, print process, finish, sampling route, tooling charges, carton quantity, and freight assumptions side by side. A quote is only useful when the supplier can repeat the same color, closure quality, and packing count on the next order.
Branded Mailers for Direct Shipments: A Buyer's Guide That Skips the Sales Pitch
For a lot of ecommerce brands, branded mailers for direct shipments do more heavy lifting than the product photo, the ad copy, and sometimes the thank-you card that somebody approved and then forgot to print. They are the first physical proof that the order came from a real brand, not a generic fulfillment lane with a label printer at the end of it. Customers notice that faster than most teams expect.
The mailer has to do three jobs at once. It needs to protect the order in transit, present the brand clearly at the doorstep, and keep the packing team moving without making the shift miserable. If one of those breaks, the cheap-looking mistake usually costs more than the mailer did.
There is also a small psychological shift that buyers underestimate. A plain shipping bag says, “Here is your parcel.” A branded one says, “Someone planned this.” Same product. Different signal. That outside layer changes the feel of the order before the customer even touches what is inside.
That is why I would treat mailers as an operations decision first and a design choice second. The prettiest option is not always the right one. The right one fits the product, the pack line, the damage profile, and the budget without creating extra work for the people shipping orders every day.
The Hidden Role of Branded Mailers for Direct Shipments
Packaging teams love to talk about unboxing. Fine. The real first impression happens before the package opens, when it lands in the customer's hands and the logo is already doing its job. For direct-to-consumer orders, the mailer is often the only physical brand touchpoint before the product shows up. That gives it outsized influence for a very small piece of material.
Buyers should also think of the mailer as an operations filter. If the construction is strong, the seal is reliable, and the size fits the product cleanly, the pack line runs faster and with fewer exceptions. If not, the line slows down, repacks pile up, and the supposed savings from a cheaper bag get eaten by labor and damage.
Generic shipping bags handle the basic task, but they rarely add much beyond containment. Branded mailers for direct shipments add a second layer of value: they signal quality before the product gets touched. That matters for businesses shipping small, lightweight, or visually plain items, because the outer package can carry the emotion the product itself cannot.
There is a practical upside that gets overlooked. A brandable mailer gives fulfillment teams one consistent format to grab, fill, seal, and label. Once a company standardizes the right sizes, operators stop guessing which outer package to use. That removes friction in the middle of the shift, which is where a lot of waste hides.
“The best outer packaging is the one that disappears operationally and stands out visually.”
That sounds like a contradiction. It is not. Branded mailers should disappear in the sense that they do not create extra handling steps, while still standing out enough to make the shipment feel intentional. When those two things line up, they often beat a pile of inserts, tissue, and decorative filler inside the pack.
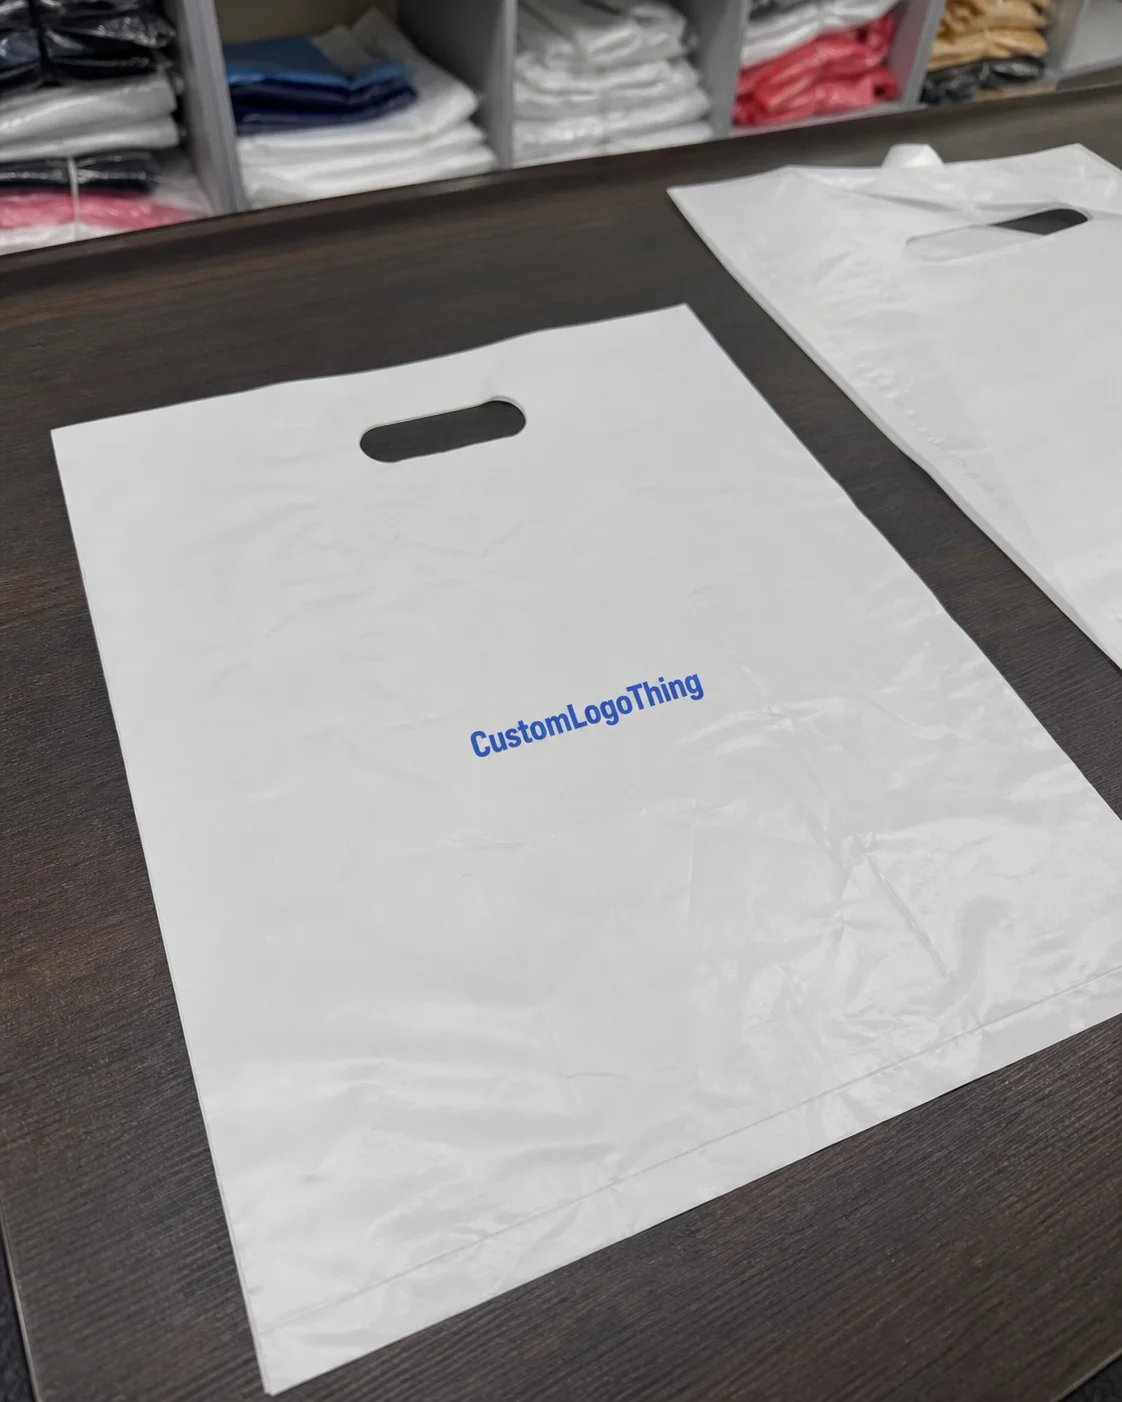
For retailers shipping apparel, subscription items, beauty kits, or slim accessories, the mailer often does more brand work than the product box ever will. If you ship a black T-shirt in a generic gray poly bag, it arrives as inventory. Put that same shirt in a well-specified branded mailer and the order feels finished before the customer opens it.
What Branded Mailers for Direct Shipments Actually Are
At the simplest level, branded mailers are shipping mailers printed or finished with logos, colors, patterns, taglines, or other brand identifiers before the customer opens them. They can be made from poly film, paper, padded structures, or specialty laminates. The branding can cover the whole surface or sit as a smaller mark on an otherwise plain exterior.
The category is broader than many buyers expect. A poly mailer is the default for apparel and soft goods. A paper mailer fits lighter items where recyclability matters and the pack-out does not need much moisture protection. Padded mailers work for accessories or slim electronics that need some cushioning. Specialty mailers may add tear strips, dual seals, tamper evidence, or extra abrasion resistance for rougher distribution routes.
It helps to separate mailers from the rest of the packing system. Boxes carry structure. Inserts stabilize product. Tissue adds a softer visual layer. Labels identify the shipment. The mailer sits at the outside edge of the system, which means it has to survive carrier abuse, carry branding, and keep the shipping workflow moving at the same time.
Here is a simple comparison that buyers often find useful:
| Mailer Type | Best For | Typical Strength | Branding Opportunity | Common Tradeoff |
|---|---|---|---|---|
| Poly mailer | Apparel, soft goods, light accessories | Good puncture and moisture resistance | High, with full-color print | Less premium feel than rigid formats |
| Paper mailer | Lightweight products, eco-positioned brands | Moderate, depending on construction | High on print clarity and texture | Less moisture protection than film-based options |
| Padded mailer | Accessories, small gift items, slim parts | Better cushioning than plain envelopes | Moderate to high | Bulkier and often costlier per unit |
| Specialty mailer | Fragile or higher-value shipments | Depends on spec and laminate | High, especially for premium presentation | Higher MOQ and longer lead times |
Common use cases include apparel, beauty products, accessories, subscription items, samples, and lightweight replacement parts. If the order is compact, fairly uniform, and shipped directly to the consumer, branded mailers for direct shipments can carry the brand experience without forcing the business into a box just because that is what everyone is used to.
For teams building out a broader packaging lineup, it can help to review the full range of options at Custom Packaging Products and then narrow the format to something like Custom Poly Mailers if the product mix leans toward soft goods or low-profile merchandise.
Production Process and Timeline for Branded Mailers
Most delays in custom packaging happen before the first unit gets printed. The process usually starts with a size review or dieline confirmation, followed by artwork placement, proofing, and sample approval. Only after that does production start, and even then the timeline depends on print method, material availability, and whether the order is standard or more specialized.
Each stage can expose a different kind of problem. Artwork may look perfect on screen and still land too close to a seam. A logo can shift once the bag folds. A color that reads cleanly in a PDF may print flatter or darker on film. Those are not cosmetic annoyances. They can break brand consistency and make labels harder to read.
For a straightforward run, a buyer may see something like this: 2 to 4 business days for artwork and proofing, 5 to 10 business days for sampling or pre-production review if samples are required, 10 to 20 business days for manufacturing, then extra time for freight and receiving. More complex jobs can take longer, especially if the factory is matching an existing color standard or adding finish elements.
Lead time can move quickly depending on print method and order volume. A simple one-color print on a standard poly mailer may move faster than a full-coverage design with multiple registration points. Larger quantities often reduce unit cost, but they can also stretch production time and require more coordination for inbound freight and storage.
Revisions create another quiet delay. A brand team may want a small logo shift or a tighter shade match, but every adjustment sends the proof back into the loop. That is normal. The fastest projects are usually the ones where the buyer already made the technical calls before asking for quotes.
If you want a cleaner approval path, gather the basics upfront:
- Exact finished size and acceptable size tolerance
- Product weight and pack-out configuration
- Artwork files in the required format
- Brand color references, ideally with Pantone guidance if color control matters
- Expected monthly volume and target order quantity
- Any carrier, marketplace, or recycling claims that must be accurate
That prep usually trims days off a project because the supplier can quote and sample against actual specifications instead of guesses. For teams comparing packaging partner performance, Case Studies can be a useful place to see how similar products were handled in practice.
Cost, Pricing, and MOQ Factors to Compare
Pricing for branded mailers for direct shipments is driven by several variables at once, and the lowest quote is not always the cheapest choice over time. Material type, print coverage, number of colors, closure style, dimensions, and finish options all affect the final number. So does the production method, which can change setup charges and repeatability from one run to the next.
The biggest mistake I see is buyers comparing unit price by itself. A mailer that costs a few cents less can still be more expensive if it slows packout, creates more waste, or shows up with a higher damage rate. The real comparison should include labor, freight, spoilage, and the brand value of the package itself.
MOQ is another place where budgeting gets messy. A higher minimum order quantity often lowers the per-piece price because the setup cost spreads across more units. That sounds attractive until the inventory sits in a warehouse while designs change, volumes dip, or the brand refreshes. Then the “cheap” purchase turns into dead stock with a logo on it.
Here is a practical pricing comparison to help frame the decision:
| Option | Typical Cost Behavior | Operational Impact | Best Fit |
|---|---|---|---|
| Plain mailer + sticker | Lowest upfront unit cost, but extra finishing step | More labor, more variable appearance | Very small brands testing demand |
| Custom branded mailer | Higher upfront cost, lower cost at scale | Cleaner workflow, stronger brand consistency | Repeat shipments and stable SKUs |
| Premium specialty mailer | Highest unit cost and often higher MOQ | Best presentation, more storage pressure | High-value or image-sensitive shipments |
Typical cost drivers include the following:
- Material type: poly film, kraft paper, padded construction, or layered specialty stock.
- Print coverage: a small logo near the flap costs less than full-bleed coverage.
- Color count: more colors generally add complexity and can raise setup costs.
- Closure style: peel-and-seal, pressure-sensitive seals, or tear-strip features affect pricing.
- Special finishes: matte, gloss, soft-touch, metallic, or tactile elements can add value and cost.
- Freight and warehousing: bulky runs often cost more to receive, store, and move.
Hidden costs deserve attention too. Sampling can be charged separately. Plate or setup fees may apply. Rush production usually comes with a premium. If inventory sits too long, storage becomes a cost center of its own. If a bad spec creates spoilage, the true price jumps far beyond the quoted unit rate.
There is also a commercial reality that gets ignored in a lot of packaging meetings: if your team spends an extra half-second orienting each mailer, a low-cost format starts to look less attractive very quickly. That does not mean the premium option wins automatically. It means the buyer should measure the whole workflow, not just the invoice.
Key Factors That Affect Performance in Direct Shipments
Performance starts with protection. A mailer that looks great and fails in transit is just a nicer-looking failure. For direct shipments, buyers should look at seam strength, puncture resistance, moisture protection, tamper evidence, and how the package behaves under carrier handling, conveyor friction, and the inevitable last-mile drop.
Size fit matters just as much. Oversized mailers waste material, can affect postage in certain shipping profiles, and make the order look sloppy. Undersized mailers slow fulfillment or stress the seams. The right fit lets the packer insert product quickly, close the package cleanly, and keep the outer footprint compact enough for efficient shipping.
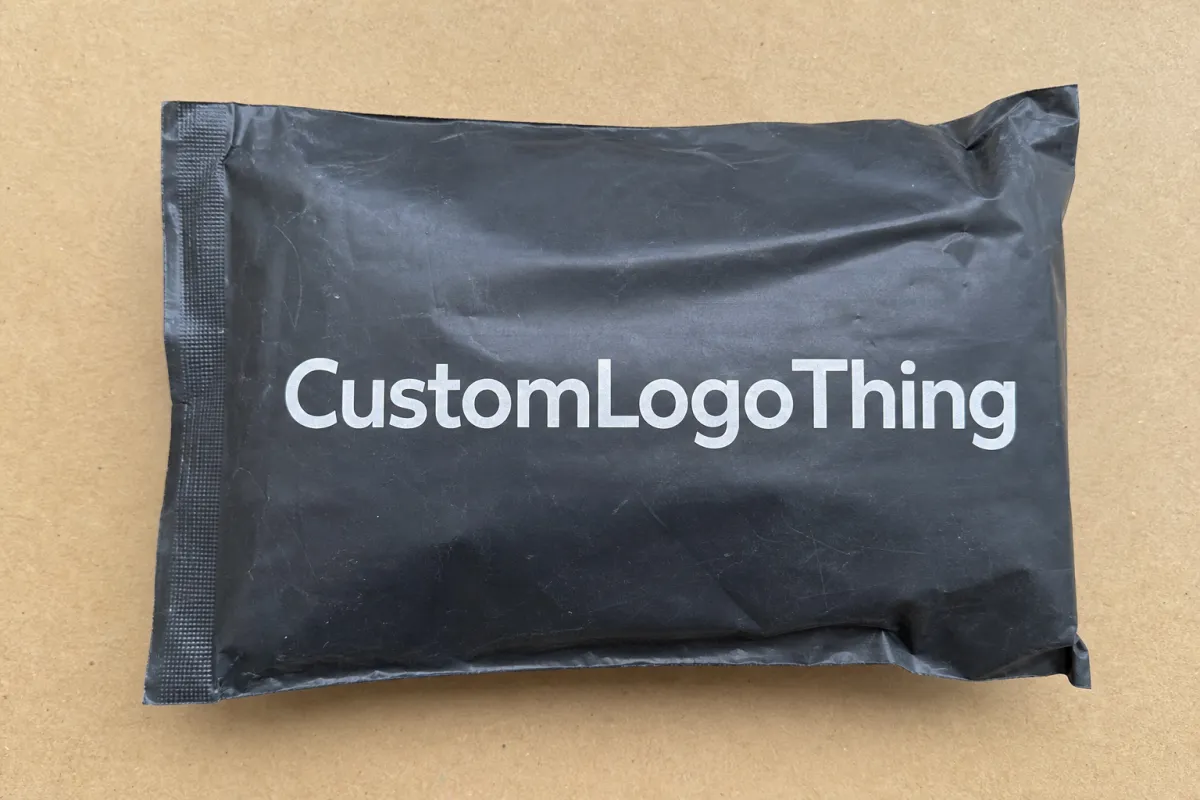
Branding choices matter operationally too. High-contrast logos stay legible after scuffing. Dark backgrounds hide dirt better, but they can show fold marks. Full-coverage prints can look rich, yet they need tighter color control. Placement matters because a logo that crosses a seal or crowds a shipping label creates a cluttered look and can interfere with scanning.
There is a tradeoff between visual impact and durability. A glossy finish can stand out on a doorstep, yet it may show abrasion faster than a matte surface. Recycled-content materials can support sustainability goals, but the structure still has to survive the trip. That balance is where testing earns its keep.
On the compliance side, buyers should be careful with environmental claims. If a mailer is described as recyclable, recycled, or FSC-certified, that claim should be traceable and suitable for the market where the packaging is sold. The U.S. EPA has useful recycling guidance at EPA recycling resources, and the Forest Stewardship Council provides certification information at FSC. For transit testing standards, buyers often reference ISTA protocols, while distribution simulation may also draw on ASTM methods depending on the product category.
In practice, a good direct-ship mailer must answer four questions at once:
- Will it protect the product through typical carrier handling?
- Will it fit the item without adding unnecessary material?
- Will the branding stay legible after abrasion, bends, and labels?
- Will it support the team packing orders at the speed they need?
That is why the spec sheet matters. It turns a design choice into a performance target, which makes the buying decision a lot less fuzzy.
If you ship in warm climates, through rough carrier networks, or across borders, testing matters even more. A mailer that survives a light domestic route may fail once humidity, stacking pressure, or longer dwell times enter the picture. That is not pessimism. That is normal packaging behavior pretending to be surprising.
Step-by-Step Guide to Choosing Branded Mailers
The easiest way to choose is to start with the product, not the packaging. Audit what actually ships: weight, dimensions, fragility, return rate, and whether orders are single-SKU or mixed-SKU. A mailer that works well for a lightweight tee may fail the moment the same business starts shipping boxed accessories, bundled sets, or items with sharper corners.
Next, match the structure to the shipping environment. If the package is likely to see moisture, abrasion, or rough handling, choose a format that can survive that reality. If the product is soft and low-risk, you may not need a padded or heavily reinforced structure. The goal is to select the lightest packaging that still gives acceptable protection and presentation.
Then narrow the print style and finish. This is where brand teams often overdo it. A busy graphic can look exciting on a screen and chaotic on a production line. A cleaner layout with a strong logo, a restrained color palette, and clear placement instructions usually prints more reliably and is easier for the team to inspect.
Before asking for quotes, gather the technical information vendors need to price accurately:
- Inside and outside dimensions
- Product category and weight range
- Artwork files and brand standards
- Expected annual volume and first-order quantity
- Preferred material and sustainability requirements
- Any special needs such as dual seals, tear lines, or tamper evidence
Then request samples. Not mockups. Actual samples. Put product inside them. Seal them. Label them. Drop them. Stack them. Run them through a small real-world test in your packing workflow, even if the trial batch is only a few dozen orders.
A simple testing sequence can tell you a lot:
- Pack the product with the normal operator workflow.
- Measure pack time for a small sample run.
- Check if labels stick and scan cleanly.
- Inspect seals, corners, and print rub after handling.
- Review a few shipped orders after transit.
This is also a good point to compare suppliers. A vendor with a useful sample process and clear proofing usually saves time later. If you need more proof of fit, ask for examples from similar programs in Case Studies. The right supplier should be able to explain what changed, why it changed, and what tradeoff was accepted to keep the project on schedule.
If the product line is broad, build the decision in layers. Start with the smallest SKU that still matters to revenue, confirm the mailer size and construction, then expand from there. That is a lot safer than ordering for the most demanding item first and hoping everything else fits.
Common Mistakes and Expert Tips for Direct Shipments
The most common mistake is choosing based on appearance alone. A beautiful mailer with weak seals or weak puncture resistance creates a false sense of quality. Once damage starts showing up in transit, the “premium” packaging becomes a liability and usually costs more to fix than the upgrade was worth.
Another error is ignoring the shipping environment. Last-mile delivery can be ugly. Packages get compressed in carts, rubbed against other parcels, left in damp conditions, or handled by multiple carriers. If the mailer cannot survive that route, the design is underbuilt for the job.
Oversized graphics cause their own problems. If a print competes with the shipping label, makes the exterior feel crowded, or hides seams the operators need to inspect, the package becomes harder to handle. Branding should guide the eye, not get in the way.
It is also risky to skip live-order testing. A sample on a desk can look excellent while the same mailer tears when packed with a real product. Real tests reveal issues such as static cling, unexpected crease lines, label placement conflicts, and problems with returns processing that only show up after customer use.
Here are a few practical tips that often improve results:
- Standardize a small number of sizes across as many SKUs as possible.
- Keep one fallback mailer SKU in stock for overflow or promo use.
- Track damage rates before and after the change so you know whether the upgrade paid off.
- Ask for print proofing that reflects the actual substrate, not just a screen rendering.
- Make sure the branding still reads clearly after tape, labels, and handling.
There is one more point that tends to get ignored: do not let packaging and marketing work in separate rooms. The best branded mailers for direct shipments usually happen when both sides agree on a few non-negotiables, such as maximum outer dimensions, print-safe zones, and acceptable cost per shipment. That prevents a lot of late-stage compromise.
If you are comparing package formats across categories, think in terms of process efficiency rather than pure visual polish. A mailer that shaves 8 to 12 seconds off pack time can beat a fancier option if you ship enough orders every day. That difference sounds tiny. Multiply it across thousands of shipments and it shows up on the labor line.
A small operational detail can also protect the customer experience: make sure the mailer opens in a predictable way. If the tear strip is awkward or the seal is inconsistent, the customer starts the unboxing already annoyed. Nobody needs that. Packaging should solve a problem, not create a new one with better graphics.
Expert Tips and Next Steps for Branded Mailers
Start small. A low-risk pilot is usually the smartest path. Pick one high-volume SKU, launch a test run, and compare the new mailer against the current package on three metrics: shipping speed, damage rate, and customer response. If the numbers improve or stay steady while the brand presentation gets better, you have a solid case to expand.
Build a scorecard before the trial starts. It does not need to be fancy. A simple one-page sheet usually works best because people actually use it. Include unit cost, freight impact, pack time, return rate, and comments from the warehouse team. The people packing the orders usually spot issues long before the spreadsheet does.
A packaging spec sheet matters just as much. Keep the dimensions, artwork rules, acceptable materials, closure type, and revision history in one place so purchasing, design, and operations are not working from different assumptions. One document can save a lot of back-and-forth.
One smart way to reduce risk is to compare a pilot against your current setup with the same test window. If the existing plain mailer plus sticker already gets acceptable results, a custom version should earn its place by improving either efficiency or brand impact enough to justify the premium. If it cannot, the plain version may still be the better commercial choice for that SKU.
That is where a disciplined vendor process matters. Ask for samples, run pack tests, review the proof carefully, then approve a pilot batch before scaling. When the order is stable, repeatable, and backed by data, branded mailers for direct shipments stop being a design experiment and start being a controlled packaging upgrade.
Final thought: the smartest packaging buyer does not ask whether branded mailers for direct shipments look better; the better question is whether they protect better, pack faster, and support the brand at a cost the business can actually carry. If those answers line up, the choice gets pretty easy.
How do I choose the right branded mailers for direct shipments?
Match the mailer to the product weight, fragility, and shipment size instead of choosing by appearance alone. Test closure strength, print placement, and label readability on real packed orders. Ask vendors for samples so you can compare protection, speed, and brand fit before ordering at scale. A short pilot will tell you more than a polished rendering ever will.
Are branded mailers for direct shipments more expensive than plain mailers?
Usually yes on a unit basis, but the gap can shrink as order volume rises. The real comparison should include labor saved, reduced label application, and stronger brand presentation. A plain mailer plus sticker may look cheaper, yet it can create more handling steps and less consistency. Cheap on the invoice does not always mean cheap in the warehouse.
What is a normal lead time for branded mailers?
Lead time depends on material, print method, proof approval, and MOQ, so there is no single standard answer. Samples and revisions often add time before production starts. Ask for a production schedule that separates proofing, manufacturing, freight, and receiving. That way, nobody pretends the package teleported from artwork to the dock.
Can branded mailers for direct shipments be made with recycled materials?
Yes, many mailer formats can use recycled content or recyclable structures when product requirements allow. The key is balancing sustainability claims with strength, sealing, and moisture protection. Confirm how the material should be disposed of so your claim matches real-world recycling conditions. Good intentions do not count if the mailer falls apart on the way there.
What should I test before launching branded mailers for direct shipments?
Test drop resistance, sealing, label adhesion, and pack-out speed with actual products. Check how the mailer performs in heat, moisture, and rough carrier handling. Review returns handling so the packaging works in both outbound and reverse logistics. If you skip the ugly part of the test, the ugly part usually shows up after launch.