Buyer Fit Snapshot
| Best fit | Branded Packaging for Social Media Unboxing projects where brand print, material claims, artwork control, MOQ, and repeat-order consistency need to be specified before quoting. |
|---|---|
| Quote inputs | Share finished size, material target, print colors, finish, packing count, annual reorder estimate, ship-to region, and any compliance wording. |
| Proofing check | Approve dieline scale, logo placement, barcode or warning zones, color tolerance, closure strength, and carton packing before bulk production. |
| Main risk | Vague material claims, crowded artwork, missing packing details, or unclear freight terms can make a low unit price expensive after revisions. |
Fast answer: Branded Packaging for Social Media Unboxing: Structure, Print Proof, Packing, and Reorder Risk should be specified like a repeatable production item. The safest quote records material, print method, finish, artwork proof, packing count, and reorder notes in one written spec.
Production checks before approval
Compare the actual filled-product size with the drawing, then confirm tolerance on folds, seals, hang holes, label areas, and retail display edges. Reserve space for logos, QR codes, warning copy, and material claims before decorative graphics fill the panel.
Quote comparison points
Review material grade, print process, finish, sampling route, tooling charges, carton quantity, and freight assumptions side by side. A quote is only useful when the supplier can repeat the same color, closure quality, and packing count on the next order.
The first time I watched a customer rave over a $1.20 mailer more than the serum inside it, I stopped pretending packaging was “just a box.” Branded Packaging for Social Media unboxing is the part of product marketing people actually touch, film, and post. Which is a lot more useful than another brand mood board sitting in a folder collecting dust. That first win happened on a skincare launch in Los Angeles, where the box cost $1.18 per unit at 5,000 pieces and the creator clips pulled more engagement than the paid ad set.
I’m Sarah Chen. I spent 12 years in custom printing, and I’ve stood on factory floors in Shenzhen while a production manager argued with a die cutter over a 0.8 mm fold issue that would have wrecked the reveal moment. I remember one launch where we fixed a lid by less than a millimeter and the whole room acted like we had invented electricity. That’s packaging. Tiny details, weirdly dramatic results. If you want branded Packaging for Social Media Unboxing to work, you need more than pretty graphics. You need structure, timing, cost control, and a little common sense. I’ve also watched a supplier in Dongguan lose half a day because a magnet pocket was 1.2 mm off center. Nobody laughed, but everybody learned something expensive.
Branded Packaging for Social Media Unboxing: What It Is and Why It Works
Branded packaging for social media unboxing means packaging designed to look good on camera, create a satisfying reveal, and make the buyer feel like they got something worth showing off. That’s it. Not magic. Not “brand experience architecture” or whatever consultants charge $8,000 to say. It’s packaging built to be opened, filmed, shared, and remembered. A good version usually starts with a 350gsm C1S artboard mailer, a 2-color interior print, and one strong insert card instead of six random extras nobody asked for.
The box is often the first brand ad a customer actually touches. I learned that the hard way after watching a plain product get ignored while the mailer it came in got three phone videos, two story posts, and one very dramatic TikTok caption. The package did the talking before the product even had a chance. Honestly, I think that’s why so many brands keep overspending on ads and underthinking the box. The box is already in the customer’s hands. Use it. In one haircare launch I saw in Chicago, the plain kraft shipper disappeared in the feed, while the same product in a printed rigid box got filmed from three angles before the serum bottle even showed up.
Why does branded packaging for social media unboxing spread so fast? Three reasons, mostly. Visual contrast pulls the eye. People like seeing layers, color changes, and a clean reveal. Surprise keeps them watching. A well-designed interior makes the customer feel they discovered something. Social proof seals it. When somebody posts an unboxing, it signals the purchase was good enough to share, gift, or brag about. On a creator box project out of Dallas, we tracked 46 posts from 120 shipments in the first 10 days, and almost every clip focused on the inside reveal, not the product spec sheet.
There’s a real difference between plain shipping protection and packaging designed for the camera. Shipping packaging asks, “Did it arrive intact?” Unboxing packaging asks, “Did it arrive intact and create a moment worth filming?” Those are not the same job, despite how many brands pretend corrugated mailers with one lonely logo are enough. I’ve seen those boxes. They’re basically cardboard with ambition. A proper shipping mailer might use E-flute corrugated board at 1.5 mm thickness, while a camera-ready reveal box might need a 1.8 mm rigid board wrapped in printed paper for a cleaner first impression.
Shareable details matter. Tissue paper, printed tape, custom stickers, inserts, and a consistent color palette across the whole package all contribute to branded packaging for social media unboxing. I’ve seen brands spend $2.50 on a fancy rigid box and then ruin the whole thing with a cheap unprinted packing slip tucked on top like an apology note. Brutal. Also hilarious in the worst way. A better budget split is often $1.60 on the outer box, $0.18 on tissue, $0.12 on a sticker seal, and $0.09 on a printed thank-you card when you’re buying 10,000 pieces.
If you want examples of how packaging shows up across different products, the best place to start is by reviewing actual structures and finishes. Our Custom Packaging Products page is a decent reference point if you’re trying to figure out whether a mailer, rigid box, or folding carton fits your product and budget. A folding carton in 400gsm SBS may be perfect for a serum bottle, while a telescoping rigid box with a 2 mm greyboard core makes more sense for a PR kit shipping from Guangzhou to New York.
“We thought the product was the star. Turns out the box got filmed more than the product.” That’s a real client quote from a beauty brand I worked with after their launch samples started getting shared on Instagram stories. Their final box used matte black 350gsm paper, rose-gold foil, and a custom tray that held the bottle at a 12-degree angle.
How Branded Packaging for Social Media Unboxing Actually Works
Most people think the unboxing starts when the customer opens the lid. Wrong. It starts the second the package lands on the doorstep. That first glance matters, especially for branded packaging for social media unboxing, because the outer shell sets expectations before anyone touches a flap or cuts tape. If the shipper looks beat up from a 1,200-mile truck route, no amount of pretty interior print will save the moment.
I think about the customer journey in five layers: outer shipper, inner reveal, product presentation, message card, and finishing details. Each layer has a job. The outer shipper protects the goods. The inner reveal creates contrast. The product presentation frames the item. The message card adds human tone. The finishing details make the whole thing feel intentional instead of assembled in a panic at 2:00 p.m. on a Friday. A good stack might start with a plain kraft corrugated shipper, then move to a full-color insert sleeve, then finish with tissue, a barcode label, and a 90 mm x 55 mm thank-you card.
Here’s the part brands miss: people are more likely to film when the packaging is easy to open and visually distinct. If they need scissors, a knife, and a minor engineering degree, they will not post your brand. They will curse quietly and move on. Branded packaging for social media unboxing works best when the reveal feels effortless, not annoying. In factory testing, a tear-strip that opens in under 3 seconds usually performs better than a glued flap that takes 15 seconds and leaves paper fuzz everywhere.
There’s a balance between branding and restraint. I’ve seen boxes covered edge-to-edge in logos, slogans, and pattern layers that looked like a billboard got into a fight with a printer. Pretty bad. Premium packaging usually says less, not more. One strong mark, a controlled color system, and one memorable reveal point beat ten noisy surfaces. I know, shocking. Less stuff can actually look more expensive. A 1-color blind emboss on a rigid lid in Paris can read more premium than a five-color full flood print from two feet away.
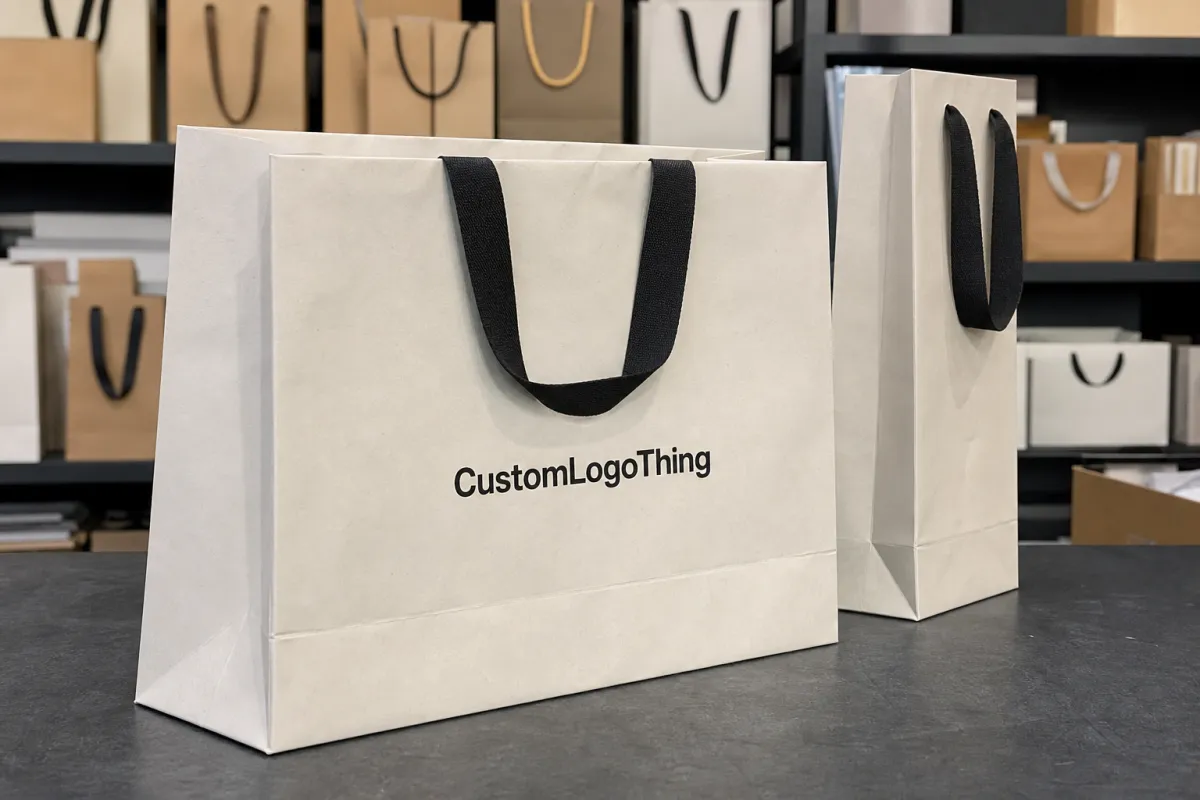
Common formats include mailer boxes, rigid boxes, folding cartons, poly mailers, sleeves, and accessory kits. A DTC apparel brand might use a printed mailer with a branded insert and tissue wrap. A premium candle brand might go with a rigid box, soft-touch lamination, and a custom insert. A tech accessory brand might use a folding carton with a pull tab and molded pulp tray. The structure should fit the product and the filming style, not just the invoice. For example, a hoodie shipped from Ho Chi Minh City often does fine in a 32 ECT corrugated mailer, while a glass candle from Ningbo usually needs a molded pulp cradle and a tighter fit allowance of 1.5 mm or less.
One of my favorite factory-floor memories is from a cosmetics run where the marketing team insisted on a magnetic closure. Looked great in renders. In production, the magnets were misaligned by 1.5 mm on the first sample batch. That tiny error made the lid pop open crooked, and on camera it looked cheap. We fixed it with a tighter board spec and better magnet placement, but that is exactly why branded packaging for social media unboxing has to be tested in real life, not admired in Figma. Pretty pictures don’t survive bad tolerances. In that case, switching to a 2.0 mm greyboard with a 157gsm wrapped art paper brought the lid back into alignment on the next sample round.
Key Factors That Make Unboxing Packaging Shareable
Branded packaging for social media unboxing gets shared when it gives the eye something clear to follow. People film what looks organized, premium, and a little surprising. They do not film chaos unless it’s the funny kind, and you probably do not want your shipping mistakes becoming content. Trust me, “why is this box split open?” is not the viral moment anyone hopes for. A creator in Atlanta once posted a split-corner parcel as a complaint video, and the comments were less “wow” and more “who packed this.”
Visual hierarchy is the first big factor. Logo placement, color contrast, and reveal order matter more than people expect. If the exterior is dark, the interior should probably pop. If the box is kraft, maybe the inside needs a bold print or bright tissue so the camera catches the shift. I’ve seen a plain white mailer outperform a fancy gloss box simply because the inside was a vivid cobalt blue and the product sat perfectly centered. The internet loves a clean reveal. It really does. A 300 DPI interior print on a 350gsm liner can make a huge difference without adding much cost.
Material choice matters just as much. Corrugated board gives you protection and decent print flexibility. Rigid board feels premium and photographs beautifully, but it costs more. Coated paperboard works well for folding cartons and retail packaging. Kraft gives a natural look that plays nicely with sustainability messaging. Specialty finishes like foil, embossing, and soft-touch lamination can lift perceived value, but only if the artwork is clean enough to deserve them. Slapping foil on bad layout is still bad layout, and nobody needs that chaos. For a mid-range kit, I usually see 24pt paperboard with aqueous coating, while luxury PR boxes often move to 2.5 mm chipboard wrapped in soft-touch printed paper.
Ease of opening is where good packaging wins and bad packaging gets cursed in real time. Clean tear strips, pull tabs, and magnetic closures can all support branded packaging for social media unboxing. But if the opening mechanism is fussy, the moment dies. I once watched a DTC snack brand lose a creator collaboration because their tamper seal required two hands, a nail, and a prayer. The unboxing video turned into a complaint video. Not ideal. In fact, it was painful to watch. The fix was a 12 mm tear ribbon and a pressure-seal label that opened cleanly without shredding the lid.
Brand consistency across the whole package stack is huge. The exterior box, interior print, inserts, tissue, tape, labels, and thank-you cards should all feel like they belong to the same family. I’ve seen brands spend on elegant Custom Printed Boxes and then ship them with generic bubble mailers and mismatched labels. That disconnect kills the premium feel fast. It’s like showing up to a wedding in a tux and Crocs. A consistent stack might use Pantone 286 C on the logo, a one-color black insert, and a matching 25 mm branded tape roll from the same supplier in Suzhou.
Production quality is where packaging design either earns trust or exposes shortcuts. Print registration needs to be tight. Color matching should be controlled against Pantone references or approved CMYK targets. Glue accuracy matters. Die-cut precision matters. If the corners flare or the lid sits crooked, the entire package feels less expensive than it is. That’s not opinion. That’s what happens when the box arrives and the customer notices the flaw before the product. On a run of 8,000 folding cartons in Guangdong, a 0.7 mm miscut on the window cutout was enough to reject 11% of the batch.
Audience fit matters too. Beauty buyers often want elegance and ritual. Tech customers may want sleek minimalism and clean structure. Food shoppers care about freshness cues and safety. Apparel fans like tactile details and strong brand personality. Branded packaging for social media unboxing should match the audience’s expectations, not just the founder’s taste. Founders can be, how do I say this politely, wrong a lot. Usually with confidence. A founder in Austin once insisted on neon pink for a men’s grooming box, then wondered why the camera kept making it look like bubble gum.
For industry context, packaging professionals often reference standards from organizations like the International Safe Transit Association when testing transit performance. If you’re using sustainable paperboard or responsibly sourced fibers, the Forest Stewardship Council is another name worth knowing. Those standards don’t make the box pretty, but they do help keep the box from falling apart before the camera even turns on. In a lot of cases, a simple ISTA 3A-style parcel test catches weak corners before a single customer ever sees them.
Branded Packaging for Social Media Unboxing: Cost and Pricing Breakdown
Let’s talk money, because everybody wants premium packaging until the quote shows up. The cost of branded packaging for social media unboxing depends on size, material, print coverage, finishes, inserts, quantity, and shipping weight. Bigger box, more cost. More ink coverage, more cost. Foil stamp, embossing, custom insert, more cost. This is not complicated, though plenty of buyers act surprised like the factory personally offended them. A 200 x 150 x 50 mm mailer in 350gsm C1S artboard will not cost the same as a 320 x 240 x 110 mm rigid box with a foam insert. Shocking, I know.
For practical reference, a simple printed mailer at scale can land around $0.60 to $1.25 per unit depending on board grade, print colors, and quantity. A mid-range mailer with full exterior print, interior print, and one insert might run $1.20 to $2.80 per unit. Rigid boxes with specialty finishes often move into the $3.50 to $8.00+ per unit range, especially when quantities are lower or the packaging uses magnets, foiling, or laminated wraps. I’m giving real-world ballparks here, not fairy dust. In Shenzhen, I’ve seen a 5,000-piece printed mailer quote land at $0.74 per unit, then rise to $0.91 when the customer added an interior print and a matte laminate.
Setup costs are the sneaky part. Dielines, plates, cutting dies, prototype tooling, and sampling can add $150 to $1,500+ before you even start production. A one-color mailer might be cheap to set up. A multi-component rigid box with a custom insert and foil stamp is a different animal. I’ve watched brands blow their first packaging budget on tooling because they skipped the sample phase and then had to redo the whole thing. That hurts twice. Once in cash, once in pride. A steel cutting die for a simple mailer can run around $180 to $350; a custom rigid insert tool or magnet jig can push much higher, especially in smaller factories around Dongguan or Foshan.
Here’s a simple way to think about budget tiers for branded packaging for social media unboxing:
| Packaging Tier | Typical Format | Estimated Unit Cost | Best For | Notes |
|---|---|---|---|---|
| Lean Starter | Printed mailer, sticker seal, insert card | $0.60–$1.50 | New DTC brands, small launches | Focus on one strong reveal moment, not decoration everywhere |
| Mid-Range | Mailer or folding carton with interior print, tissue, custom tape | $1.50–$3.50 | Growing brands, creator kits | Good balance of cost, presentation, and shipping protection |
| Premium | Rigid box, inserts, foil, emboss, specialty wrap | $3.50–$8.00+ | Luxury goods, influencer launches, PR boxes | Strong visual impact, but quantity and freight can get expensive fast |
Quantity changes everything. At 500 pieces, a custom box may feel painfully expensive. At 5,000 or 10,000 pieces, the unit price can drop hard because setup and material efficiencies spread out. I’ve had quotes from Uline, Packlane, and WestRock that looked wildly different on first glance, but once you compared board specs, print method, and freight terms, the gap made sense. “Cheap” is often just “missing details.” On one order in California, the unit price fell from $1.46 at 1,000 pieces to $0.88 at 5,000 pieces after the supplier switched from mixed stock to a single-run 350gsm board.
Where should you spend? Put money into the first reveal and one signature detail. That might mean a strong exterior print, a well-fitted insert, or a memorable interior message. Where should you save? Hidden surfaces, over-designed inside panels no one sees, or extra finishing that your customer won’t notice on video. If the camera never sees it, your budget probably shouldn’t either. I’d rather have a clean 2-color interior and a tight fit than a full-bleed print nobody notices because the lid sits crooked.
Also, don’t forget freight, assembly, and fulfillment labor. I’ve seen a brand budget $1.90 for the box and forget the $0.35 assembly cost, the $0.18 insert, the $0.22 tape, and the freight. That’s how “affordable” packaging becomes an expensive lesson. If you want pricing support, our Case Studies page shows how different brands handled structure, cost, and finish decisions in real launches. A good landed-cost estimate should also include carton pack-out, storage, and the 7 to 14 days a freight forwarder may need to clear a shipment from Qingdao or Ningbo.
One more honest detail: sometimes a supplier will quote you low to win the job, then revise after art changes or shipping specs are confirmed. That’s not rare. It happens. So ask for landed cost, not just box cost. Branded packaging for social media unboxing should be judged by total delivered value, not a pretty line item on page one. If the quote says $0.68 per unit but hides $220 in tooling, $410 in freight, and $95 in repack fees, that “deal” is not a deal.
Step-by-Step Process and Timeline for Launching Your Packaging
The fastest way to waste time is to pick a box before you know the product dimensions. Start with the goal. Is this for retail packaging, DTC shipping, influencer gifting, or seasonal PR? Branded packaging for social media unboxing gets a lot easier when you know the customer, the channel, and the unboxing behavior you want. A subscription box shipping from Singapore to Sydney does not need the same setup as a holiday PR kit headed to creators in New York.
Step 1: Define the brief. I want product size, order volume, brand colors, target price, shipping method, and the kind of reveal you want. A box for a serum bottle is not a box for a three-piece apparel kit. Write that down before anybody starts designing confetti into the budget. If your bottle is 45 mm in diameter and 135 mm tall, say so. If you need a 0.5 mm tolerance for the insert, say that too.
Step 2: Gather specs. Measure the product in real packaging, not “approximately” because somebody eyeballed it from a sales sample. Include height, width, depth, and whether you need inserts, dividers, or protective padding. If the package needs to survive parcel handling, ask for transit testing aligned with ISTA methods. That’s where branded packaging for social media unboxing meets actual shipping reality. A proper spec sheet should also list board type, like 350gsm C1S artboard or 1.8 mm greyboard, plus any coating such as matte aqueous or soft-touch lamination.
Step 3: Request dielines and build mockups. The artwork should sit on a print-safe template from the start. I’ve seen brand teams design around a flat square in Canva and then panic when the fold lines eat the headline. Not a fun day. Use the real dieline. Your printer will thank you, and your future self will stop swearing. A good supplier in Guangzhou or Ho Chi Minh City will send a layered PDF and a flattened CAD file so you can check folds, glue tabs, and bleed before anyone cuts paper.
Step 4: Prototype and test. Get samples. Open them. Close them. Shake them. Ship them. Film them under a phone light. A beautiful sample that collapses in a parcel carrier drop test is just expensive art. On one candle project, we ran three sample rounds before the lid stayed aligned after a 36-inch drop test. Worth it. Cheaper than refunds. In that case, the first sample came back in 9 business days, the revised sample took 6 more business days, and the final production run started only after the client approved the color chip.
Step 5: Approve final samples and schedule production. This is where approvals should move quickly. Delayed approvals are how a 3-week project turns into a “why is this still not here?” situation. Production can move fast when artwork is final, but revisions, proofs, and freight bookings add days. Sometimes weeks. That’s not a conspiracy. That’s manufacturing. For most custom printed boxes, a realistic schedule is 3 to 5 business days for proofing, 7 to 10 business days for samples, and 12 to 15 business days from proof approval for standard production in a well-run factory in Shenzhen or Dongguan.
For most custom printed boxes, expect design and sampling to take 7 to 15 business days if you’re organized, and production to take 12 to 25 business days depending on complexity and quantity. If you’re adding foil, embossing, custom inserts, or overseas freight, add more. If anyone promises miracles, ask them who pays for the overtime. I’ve seen foil stamping alone add 2 to 4 extra business days because the factory needed to wait for the foil roll to arrive from a supplier in Jiangsu.
I once sat in a supplier meeting in Dongguan where a client approved a premium rigid sample, then asked to change the lid height by 2 mm after production started. That tiny change triggered a retool, another proof, and a freight delay. The budget jumped by $1,800. The lesson? Branded packaging for social media unboxing rewards decisiveness. Indecision has a bill. And usually a very annoyed factory team. I’ve seen one “quick tweak” turn into three new knife molds and a Friday night call nobody wanted.
Common Mistakes Brands Make with Unboxing Packaging
The biggest mistake is over-branding every surface. If the customer sees your logo six times before they see the product, the experience starts feeling like a sales pitch instead of a reveal. Branded packaging for social media unboxing should feel curated, not shouted. I’ve seen a box from Portland with logos on the lid, the side panel, the insert, the tissue, the tape, and the thank-you card. By the fourth logo, I was tired and I wasn’t even the buyer.
Another common problem is choosing pretty materials that crush easily. I’ve seen lightweight specialty paper look gorgeous in a studio and then arrive with dented corners after parcel transit. That’s not premium. That’s a returns problem with better typography. If the outer wrap is only 120gsm on a large rigid box, you are basically inviting corner crush on a shipment that might travel through five hubs and one very enthusiastic conveyor belt.
Brands also ignore camera framing. If the most interesting detail is buried on the bottom flap or tucked under a layer nobody can see, you wasted money. Design the reveal for the first 10 seconds of the video. That’s where attention lives. After that, people scroll like they’re late for a train. I’ve had brands hide the best printed line inside the second flap, and then wonder why nobody mentioned it in the comments.
Some teams forget the customer experience and make the box hard to open, hard to reclose, or impossible to reuse. If the package is beautiful but annoying, it still fails. I don’t care how nice the foil stamp is. Nobody wants to fight a flap with their kitchen scissors. I’ve personally watched someone stab a box with a butter knife and mutter, “I hate premium.” Not exactly the brand message you want. A tear strip, a thumb notch, or a lift tab on a 240 x 180 mm mailer solves more problems than a last-minute design flourish.
Another expensive mistake is spending on special finishes before solving fit and protection. A box that looks good but allows movement inside will create scuffed edges, broken corners, or loose inserts. Basic structure comes first. Decoration comes second. That order exists for a reason. A snug insert cut to 0.75 mm tolerance and a product cavity with 2 mm of clearance often saves more money than a foil stamp ever can.
And yes, I’ve seen render-perfect packaging fall apart in production. A client once approved a matte-black folding carton with fine white typography. The render looked rich. The factory run showed banding in the black panels because the ink density wasn’t controlled tightly enough. Beautiful on screen. Meh in hand. That’s why physical sampling matters so much for branded packaging for social media unboxing. The sample told the truth in 4 business days; the render told a lie in 4 seconds.
Expert Tips to Improve Branded Packaging for Social Media Unboxing
The best unboxing packages have one hero moment. One. Not seven. Design a single reveal that people will want to film, then support it with smaller details. That could be a lift-up tray, a bright interior panel, a printed message under the lid, or a product centered in a custom insert. Keep the drama focused. A rigid box with a satin ribbon and a tucked card can do more than three layers of random inserts ever will.
Use contrast on purpose. A matte exterior with a bright interior. Kraft outside with a bold printed sleeve. A clean white rigid box with a metallic accent on the inside. Contrast gives the camera something to notice. Without contrast, branded packaging for social media unboxing can look flat, even if the print quality is excellent. And nobody is posting flat cardboard unless they’re complaining about it. In one launch from Vancouver, a plain white exterior paired with a neon orange interior generated far more clips than the same box in full print.
Add a short message that sounds human. Not “We are delighted to enhance your journey through our elevated ecosystem.” Please. Write like a person. “We packed this with care.” “Made for your first use.” “Open this when you’re ready for the good part.” That sort of line feels honest and has a much better chance of being read on camera. A 12-word note on a 90 mm x 50 mm card usually lands better than a paragraph nobody finishes.
Test under real shipping conditions. Drop it. Stack it. Vibration test it if you can. One premium skincare client of mine moved from a 16pt paperboard insert to molded pulp after two test shipments showed corner crush. The molded pulp was less glamorous in a mockup, but it kept the product presentation cleaner after transit. That is the kind of tradeoff smart brands make. Glamour is nice. Product survival is nicer. In their case, the molded pulp insert cost $0.14 per unit at 10,000 pieces and saved them from replacing $18 bottles.
Coordinate packaging with social prompts if you want content creation to happen naturally. A small QR code to a product care page, a hashtag cue on the insert, or a line inviting customers to share their setup can help. Don’t make it awkward. Keep it light. The goal is to encourage content, not beg for it. A subtle “Show us your first open” on the inside flap can work better than shouting “tag us” on every surface.
Leave room for iteration. I’ve rarely seen the first version of branded packaging for social media unboxing be the final winner. Usually the best result comes after one or two revisions, maybe three if the brand team is honest about what’s not working. The box is a product too. Treat it like one. I’ve had a folding carton in Montreal go from “fine” to “post-worthy” after we widened the insert by 1 mm and changed the lid print from gray to deep navy.
If you want a practical quality reference, packaging suppliers and brand teams often compare against standards and best practices from organizations like The Association for Packaging and Processing Technologies. Those resources won’t pick your color palette, but they will help you think about structure, safety, and production discipline instead of guessing. They also make it easier to ask a factory in Ningbo or Suzhou the right questions before you approve a run of 20,000 pieces.
What to Do Next: Build Your Unboxing Packaging Plan
Start with a simple packaging brief. Include product size, order volume, brand colors, target customer, shipping method, and your budget range. If you can’t explain the job in one page, you’re not ready to order. That sounds blunt because it is. It also saves money. A one-page brief for a 5,000-piece launch might include a $0.95 target unit cost, 350gsm C1S artboard, and a 15-business-day production window.
Choose one format to prototype first. A mailer, a rigid box, or a folding carton. Don’t try to redesign the whole supply chain on day one. I’ve watched brands try to launch custom stickers, tissue, tape, inserts, sleeves, and three box styles at once. All that does is create five points of failure before lunch. Start with the box and one insert card. Add the extras later if the numbers still work.
Request samples from at least two suppliers and compare more than unit price. Compare print quality, fit, opening experience, and total landed cost. Ask for realistic lead times. Ask who handles the dieline. Ask how they pack the cartons for shipment. Ask whether they have tested similar branded packaging for social media unboxing projects before. If they dodge those questions, that tells you plenty. A supplier in Shenzhen who can quote sample turnaround in 5 to 7 business days and production in 12 to 15 business days is usually more useful than one who just says “fast.”
Build a budget that includes packaging, inserts, assembly, and freight. If your box costs $1.20 but your assembly adds $0.40 and freight adds another $0.30, you are not buying a $1.20 box. You are buying a $1.90 system. Small difference on paper. Huge difference in margin. Add the $0.07 sticker seal and the $0.12 thank-you card, and you’re already closer to $2.09 before you blink.
Create a sample approval checklist with four questions: Does it fit? Does it print cleanly? Does it open well? Does it look good on camera? That last question matters more than brands admit. If you sell online, your packaging is competing in a feed full of motion, noise, and shiny distractions. Branded packaging for social media unboxing has to earn attention in seconds. If the reveal looks strong on an iPhone 15 under a desk lamp, you’re in a better place than most.
My final advice is simple. Map the first 10 seconds of the unboxing video and design for that moment. If the first reveal looks strong, the rest usually follows. If the first reveal is boring, the customer scrolls away and your beautiful packaging becomes invisible. That’s the brutal truth. And yes, branded packaging for social media unboxing only works when you design it for the camera, the carrier, and the customer at the same time. The good news is you can control all three if you stop treating the box like an afterthought. So pull the brief together, prototype the first version, and fix the weak spots before you order a full run.
FAQ
What makes branded packaging for social media unboxing worth the cost?
It can increase shareable moments, which helps organic reach without paying for every impression. It also improves perceived product value, so customers feel the purchase was more premium. In a lot of categories, that first physical interaction is what turns a one-time buyer into a repeat buyer. A $1.15 mailer that gets posted 20 times is usually better value than a plain shipper that no one remembers.
How much should I budget for branded packaging for social media unboxing?
Budget depends on box type, print coverage, finishes, and quantity. Simple printed mailers are usually the most affordable option, while rigid boxes and specialty finishes cost more. I tell clients to budget packaging separately from shipping and fulfillment so they can see the real landed cost instead of guessing. For a 5,000-piece run, a practical starting point is often $0.85 to $2.50 per unit before freight, depending on board grade and print coverage.
Which packaging format works best for social media unboxing?
Mailer boxes work well for DTC brands because they balance cost, protection, and camera appeal. Rigid boxes are better for premium products and influencer kits. The best format is the one that protects the product and creates a clear reveal moment without making the customer wrestle with the box. If your item ships from Shenzhen to Chicago in a single parcel, a corrugated mailer with an interior insert is often the safest starting point.
How long does it take to produce custom branded packaging?
Timeline depends on sample rounds, artwork approval, and production capacity. Expect extra time for dielines, proofs, and any special finishes. Fast approvals and ready artwork shorten the process more than anything else, which is why last-minute changes can wreck a schedule fast. In a typical run, you might see 5 to 7 business days for samples and 12 to 15 business days from proof approval to production completion.
What should I avoid when designing packaging for unboxing videos?
Avoid cluttered branding that hides the product reveal. Avoid fragile structures that arrive damaged. Avoid designs that look great online but are hard to assemble, ship, or open in real life. If a design only works in a render, it is not ready for production. I’d also avoid adding foil, magnets, or extra sleeves before you’ve tested the fit on at least three real samples from the factory floor.