Buyer Fit Snapshot
| Best fit | Branded Tamper Seal Stickers projects where brand print, material claims, artwork control, MOQ, and repeat-order consistency need to be specified before quoting. |
|---|---|
| Quote inputs | Share finished size, material target, print colors, finish, packing count, annual reorder estimate, ship-to region, and any compliance wording. |
| Proofing check | Approve dieline scale, logo placement, barcode or warning zones, color tolerance, closure strength, and carton packing before bulk production. |
| Main risk | Vague material claims, crowded artwork, missing packing details, or unclear freight terms can make a low unit price expensive after revisions. |
Fast answer: Branded Tamper Seal Stickers: Material, Adhesive, Artwork, and MOQ should be specified like a repeatable production item. The safest quote records material, print method, finish, artwork proof, packing count, and reorder notes in one written spec.
Production checks before approval
Compare the actual filled-product size with the drawing, then confirm tolerance on folds, seals, hang holes, label areas, and retail display edges. Reserve space for logos, QR codes, warning copy, and material claims before decorative graphics fill the panel.
Quote comparison points
Review material grade, print process, finish, sampling route, tooling charges, carton quantity, and freight assumptions side by side. A quote is only useful when the supplier can repeat the same color, closure quality, and packing count on the next order.
Branded Tamper Seal Stickers: How They Work and What to Know
A lifted carton flap tells a story fast. The customer does not need a lesson in proof of purchase, and they do not need a technical spec sheet either. They need a quick answer to a simple question: did this package arrive intact? That is the practical job of branded tamper seal stickers. They protect the closure, carry the logo, and make interference visible at the exact moment trust is being tested.
That matters more than many packaging buyers expect. In categories like cosmetics, supplements, electronics, and subscription kits, the seal is often the first thing a buyer notices after the outer shipper is opened. A clean-looking box can still feel wrong if the seal looks weak, lifted, or mismatched to the pack. A crisp seal can do the opposite and turn a routine unboxing into something reassuring. If you are comparing seal options against other label formats, it helps to look at related systems too, such as Custom Labels & Tags and the examples in our Case Studies library.
The tricky part is that branded tamper seal stickers are not just decorative labels. They are a functional security cue. If the adhesive is wrong, the stock is too forgiving, or the placement is sloppy, the seal can fail without leaving a clear sign. That is why material choice, adhesive performance, print clarity, and application discipline all matter at the same time. The best seals do not merely look secure; they behave secure.
What Branded Tamper Seal Stickers Actually Do
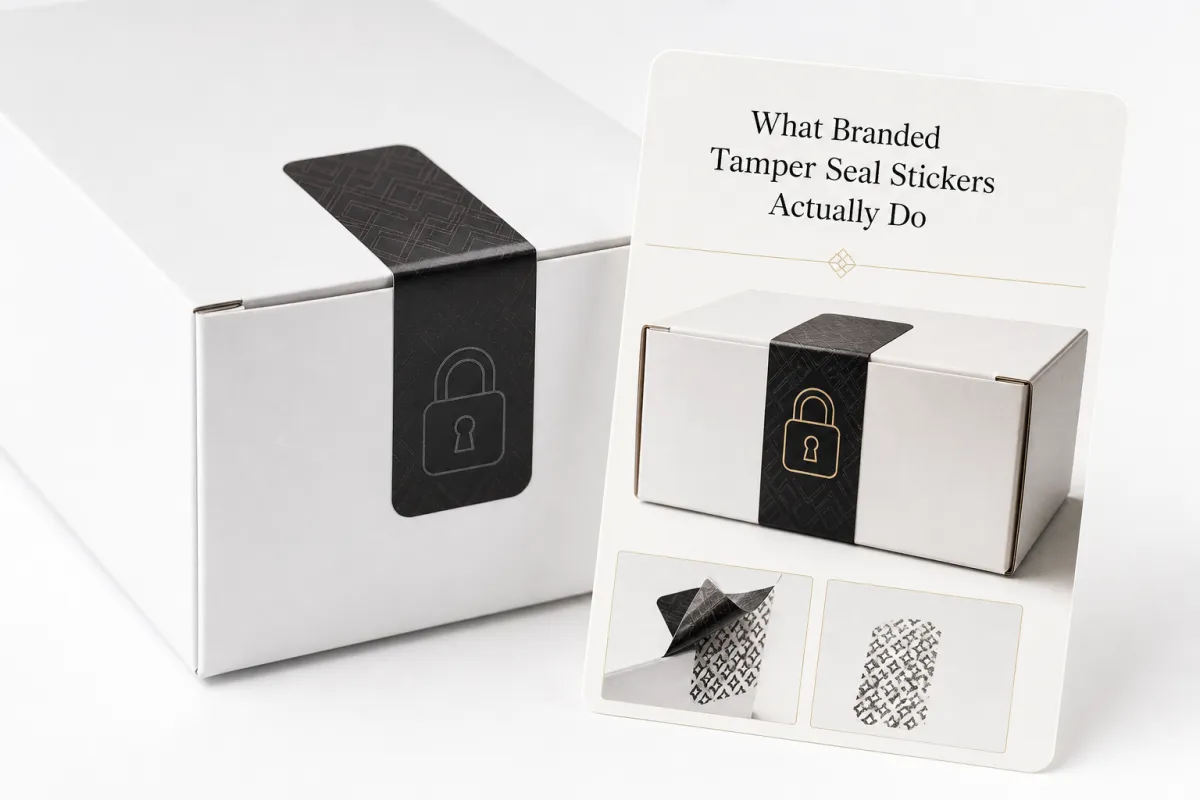
Picture the common failure point: a customer receives a box, lifts the outer flap, and notices the seal has a wrinkle at one edge. Maybe the box was opened during transit. Maybe it was inspected by a third party and resealed. Maybe nothing happened at all. The point is that the seal is supposed to answer that question quickly. Branded tamper seal stickers create a visible checkpoint, and that checkpoint changes how both customers and warehouse staff read the package.
Two jobs happen at once. First, the seal acts as evidence. If someone tries to lift it, tear it, or reposition it, the sticker should show that interference through residue, fragmentation, split film, or obvious damage. Second, the seal acts as branding. A logo, a repeat pattern, or even a simple one-color mark turns a security item into a recognizable touchpoint. That matters because buyers trust what they can identify. A generic seal may close a carton, but branded tamper seal stickers make the closure feel deliberate.
In crowded categories, that distinction affects repeat behavior. A supplement bottle with a clear seal feels more controlled than one with no visible closure cue. A cosmetics mailer with a crisp branded seal feels more premium than one that depends on tape alone. Electronics sellers see the same pattern: customers often connect a secure seal with lower return fraud risk and fewer “was this opened?” complaints. A small label can influence a surprisingly large amount of perception.
Here is the part many brands miss. Decorative labels and true tamper-evident solutions are not interchangeable. A glossy sticker can look polished and still peel cleanly from a carton flap. A seal can be beautifully printed and still give no meaningful evidence of interference. Branded tamper seal stickers only do their job if the stock, adhesive, and application point are chosen for the package they are actually protecting.
I have reviewed enough packaging specs to know that a seal problem is rarely just a label problem. More often, the issue sits at the intersection of box material, humidity, line speed, and human habits. That is the boring part, and it is also the part that keeps the customer from opening a box that feels half-touched.
A tamper seal is only useful if the customer can read it in a second and a warehouse team can apply it in a second. If either side struggles, the packaging system is carrying the wrong burden.
For packaging teams, the real question is not “Do we want a seal?” It is “What should the seal prove, on which surface, under which conditions, and at what cost per unit?” That is a very different conversation, and it usually leads to better ordering decisions.
How Branded Tamper Seal Stickers Work in Real Packaging
The mechanics are simple on paper. The sticker bridges a seam, closure, lid edge, flap, or opening point. If someone tries to open the package, the seal should either tear, split, leave residue, or clearly deform. That is the core promise of branded tamper seal stickers. The real challenge is that packaging surfaces are not all friendly to adhesive. Some are coated, some are textured, some are dusty, and some flex every time the box is handled.
Common applications include cartons, mailers, jars, blister packs, envelopes, and shrink-wrapped bundles. On a carton, the seal may bridge two top flaps. On a jar, it may sit across the lid and body or cover a closure band. On a mailer, it can secure the opening flap. On a blister pack, the sticker may supplement the primary pack closure to show if the secondary protection was disturbed. The same idea appears in different forms, but the goal stays the same: a clear visual signal that a package has been opened, or at least attempted.
Branding changes the psychology here. A custom mark is easier to recognize than an unprinted generic seal. It is also harder to fake casually because the artwork, shape, or pattern is tied to the brand. That does not make it counterfeit-proof; nothing printed on a label does. Still, a branded seal raises the bar. It makes an unauthorized reseal more obvious to staff and customers, and it turns branded tamper seal stickers into a useful anti-tamper cue rather than a simple closure accessory.
The actual tamper effect comes from one or more engineering choices:
- Destructible film that fractures when lifted.
- Void patterns that leave a visible message or pattern behind.
- Residue-transfer adhesives that leave evidence on the package surface.
- Perforations or slits that make removal impossible without damage.
- Serial numbering for traceability in higher-control environments.
Operational reality matters just as much as the material science. A seal is only as good as its placement, and placement is only as good as the person applying it. If the application point moves around the line, the seal may bridge poorly or land on a curved edge where adhesive contact is weak. If staff rush the job, they may touch the adhesive, trap dust, or misalign the logo. For that reason, branded tamper seal stickers should be treated as part of the packaging system, not as a last-minute add-on.
Packaging teams often test seals on the exact substrate they use in production, then compare open-and-close behavior after 24 hours, 48 hours, and after a short heat or humidity exposure. That is not overkill. It is basic risk control. If the package is going through distribution, the seal should be tested under a realistic set of conditions, not only on a clean desk under perfect lighting.
When a supplier talks about performance, I usually ask for two things: the adhesive family and the release behavior. If the answer is vague, the spec is probably vague too. A good vendor should be able to explain whether the seal is meant to fracture, transfer, leave a void message, or simply warn of opening damage. If they cannot explain that clearly, the order needs a closer look.
If the package travels through parcel networks, a little extra validation helps. The ISTA test protocols are useful because they push packaging beyond cosmetic inspection and into transit reality. That is where weak seals usually show themselves.
Design, Materials, and Security Features That Matter
Material choice is where many branded tamper seal stickers are won or lost. Paper can work well on flat cartons, especially if the brand wants a more natural look. Vinyl or polyester adds durability and can handle more handling. Destructible films are better when the seal must visibly fail on removal. The right choice depends on the surface, the shelf environment, and how much visible damage you want after a lift attempt.
Curved, textured, cold, or high-touch surfaces create different problems. A paper seal may look excellent on a smooth folding carton and struggle on a slightly rough recycled kraft box. A polyester seal may stay put on a rigid jar but dislike a soft poly mailer that flexes as it moves through fulfillment. On glass, surface energy usually helps adhesion; on some plastics, especially low-energy surfaces like certain HDPE containers, adhesive selection becomes more critical. Branded tamper seal stickers should be matched to the substrate, not just to the artwork.
Adhesive behavior changes with temperature, humidity, dust, and time. A sticker that grabs well in a climate-controlled sample room may perform differently in a hot warehouse or in a refrigerated pack-out area. That is why brands sometimes do two rounds of testing: one immediately after application, and one after a short dwell period. The peel result can change meaningfully after the adhesive has had time to wet out. This is especially true for cartons with fiber variation or recycled content.
Security features can work together in useful ways. A void pattern can make it obvious that a label was removed. A slit can cause the seal to split on peel. Serial numbering can help with lot control or internal audits. Custom artwork can make casual imitation less likely because the seal has a distinct identity. None of those features should be chosen in isolation. The best branded tamper seal stickers balance inspection speed with security value.
Design also affects brand impact. A small logo may be enough if the goal is mainly security. A larger logo or repeat pattern may be better if the seal is part of a premium unboxing moment. Finish matters too. Gloss feels more polished, matte feels quieter and often easier to read under strong light, and soft-touch coatings can create a tactile premium effect if the seal will be handled by consumers before disposal. Shape matters more than people think. Round, square, oval, or custom-die-cut forms can all change how quickly a package checker spots the seal.
There is a tradeoff, though. Overly busy artwork can slow visual checks. In fulfillment and retail, speed matters. A seal that is too ornate may look attractive but make it harder for staff to spot a broken edge or a lifted corner. Sometimes the better answer is a simpler layout with high contrast and a clear word or icon indicating tamper evidence. Clean design often does more work than crowded design.
For brands that also care about material sourcing, there is a second layer to think about. Paper-based seals and cartons can support a more fiber-forward packaging story, but only if the whole system is consistent. If the carton is FSC-certified, the seal should not undermine that story with a wasteful or mismatched spec. The FSC framework is useful here because it reminds buyers that packaging components are part of the same chain of responsibility, not separate purchases in a vacuum.
Branded tamper seal stickers should be evaluated on a short checklist:
- Will the adhesive bond to the real package surface, not just a sample sheet?
- Will the seal fail visibly if lifted?
- Will the logo and text stay readable after handling?
- Will staff be able to place it consistently at line speed?
- Will the design still make sense after shipping abrasion and customer handling?
That is the practical filter. Fancy specs matter only if they survive the pack-out table.
One honest caveat: not every package needs the strongest possible security construction. For a low-risk mailer, a simpler closure cue may be enough. For a regulated supplement or a higher-value electronics accessory, you may want a more aggressive tamper-evident build. The right answer depends on the risk, not on the romance of the spec sheet.
Cost, Pricing, and MOQ for Branded Tamper Seal Stickers
Pricing for branded tamper seal stickers is usually driven by five main variables: material, adhesive performance, print complexity, size, and special security features. If the order includes a custom die-cut, serial numbering, perforations, or variable data, the quote moves upward. If the design is a simple one-color seal on a standard stock, the unit price can stay much lower. That sounds obvious, but quote comparisons often hide important differences between suppliers.
Minimum order quantity matters just as much. Small runs usually carry more setup cost per piece because prepress, proofing, and machine setup are spread across fewer units. Larger volumes lower the unit cost, but they also increase inventory risk if the artwork changes or the packaging spec evolves. In practice, many buyers find that the “best” MOQ is not the lowest one. It is the quantity that balances cash flow, storage space, and the risk of reprinting.
For planning purposes, it helps to think in ranges rather than fixed quotes. A simple stock-based seal might land in a lower tier, while a destructible, fully custom security label can sit much higher. The exact numbers depend on size, coverage, and finishing, but these sample ranges are typical enough to help buyers benchmark conversations.
| Seal type | Typical use | Indicative price at 5,000 pieces | Notes |
|---|---|---|---|
| Paper custom seal | Cartons, mailers, light handling | $0.08-$0.16 per unit | Good for branding, lighter security cue |
| Vinyl or polyester seal | Higher abrasion, longer handling cycle | $0.12-$0.24 per unit | Better durability and dimensional stability |
| Destructible security film | Higher-risk closures, anti-reseal focus | $0.18-$0.34 per unit | Splits or fractures on removal |
| Serialized or variable-data seal | Traceability, controlled release, audit trail | $0.22-$0.42 per unit | Often used where batch control matters |
Those ranges are not universal. They move with print coverage, finishes, and the number of colors. A full-bleed design with soft-touch lamination will cost more than a simple one- or two-color seal. So will a custom shape that requires more waste on press. The comparison still helps because it exposes the part of the quote that is really being paid for: either security function, print complexity, or both.
Quote comparisons can be misleading if one supplier includes setup, proofs, or shipping and another does not. A slightly higher unit price may actually be cheaper if it includes design cleanup, preproduction samples, and freight. A lower price may become more expensive once those extras appear. Buyers should ask for the full landed cost and should ask for quantity tiers. A useful request is simple: show me the unit price at 1,000, 5,000, 10,000, and 25,000 pieces, and tell me exactly what changes in each tier.
It also makes sense to pay more for better adhesion or stronger stock when the product value is high. If the seal protects a premium cosmetic item, a regulated supplement, or an electronics accessory where tamper concerns affect returns, the cost difference is usually tiny compared with the cost of one failure. The same is true in compliance-sensitive packaging. Good branded tamper seal stickers are often cheap insurance.
One more useful rule: if the seal will be handled by a fulfillment team every day, do not buy on price alone. A sticker that saves two seconds per pack can matter more than a sticker that saves one cent per unit. Labor often dwarfs label cost, which means application speed and application consistency should be part of the buying decision. That is a packaging-buyer view, not a designer’s view.
Another practical check: ask whether the quoted pricing assumes a white base, full-color print, or a special finish. I have seen orders start out looking cheap and then creep upward once the team adds a second color, a matte laminate, or a more exacting die line. That is not a trick; it is just how custom label pricing works. Still, you want that math visible before approval, not after.
Process and Timeline: From Artwork to Delivery
The usual workflow is straightforward, but the details matter. It starts with specs: package type, surface material, closure point, desired security level, and print goals. Then the artwork is reviewed. Then a proof is issued. In some cases, samples are made before full production. Then manufacturing begins, followed by packing and shipment. Branded tamper seal stickers move fastest when the first round of inputs is complete and the package surface is clearly defined.
Most delays happen in the proof stage. Logos may need resizing. Barcode placement may need to shift. Bleed may need adjustment. A metallic finish can change contrast more than expected. If the order includes variable data or serials, the data file may need cleanup. None of that is unusual. It just means the proof is where the real job happens, not where the paperwork happens.
There is also a useful distinction between turnaround and lead time. Turnaround is the production window after everything is approved. Lead time includes the full span from artwork handoff to delivery. Buyers sometimes hear “ten business days” and assume that means the same thing in every situation. It does not. If the clock starts at final approval, that is different from a quote that starts at initial inquiry. If samples are required, the full schedule grows again. For branded tamper seal stickers, those distinctions matter.
Sample approval can shorten risk later. A simple bench test can reveal that the adhesive is too aggressive for a curved jar, or that the design looks too dark on recycled kraft. It is much cheaper to catch that on a sample set than on 20,000 finished labels. That is especially true for product launches, seasonal promotions, or packaging refreshes where a missed deadline has knock-on effects across inventory and marketing.
A realistic planning rule is to add extra time if the seals will be part of a launch. Build room for revisions, test application, and freight variability. If the packaging line is already busy, do not assume the label order will absorb last-minute changes without friction. Branded tamper seal stickers are small, but the workflow around them can still hold up a release if nobody leaves margin for proof approval.
For brands that want to benchmark their packaging process against other projects, it can help to study how similar packs were handled in the past. That is one reason our Case Studies pages are useful: they show how packaging choices affect implementation, not just appearance. The biggest lesson is usually the same. The more specific the brief, the less time gets wasted later.
Here is a realistic checklist before production:
- Confirm the exact substrate and finish.
- Verify the seal location on the actual package.
- Approve size, color, and contrast from a real mockup.
- Test adhesion on a clean and a slightly imperfect sample.
- Review any numbering, barcode, or variable data carefully.
That checklist looks small. It saves hours.
I would add one more step that often gets skipped: have the people who will actually apply the seal look at the proof. A spec that seems perfect to a designer can still be awkward at a packing table. If the team has to rotate the carton, chase the peel liner, or eyeball placement every time, the process is gonna drift.
Common Mistakes When Ordering Branded Tamper Seal Stickers
The first mistake is buying on appearance alone. A seal can look expensive and still peel too cleanly. It can have beautiful foil detail and still fail on a recycled carton. It can match the brand palette perfectly and still offer very little tamper evidence. Branded tamper seal stickers are packaging components, not just graphics exercises.
The second mistake is ignoring surface conditions. Condensation is a common issue for refrigerated or chilled goods. Powdery coatings can interfere with adhesion. Curved jars reduce contact area. Recycled cardboard can be uneven. Poly mailers flex. Each one changes how the sticker behaves. A supplier can only recommend the right stock if the buyer shares the real surface and the real environment.
The third mistake is under-specifying the application point. If staff are supposed to place the seal across a flap edge, the seal must be sized for that flap, and the placement must be repeatable under normal line speed. Too small, and it fails to bridge. Too rigid, and it lifts at the corners. Too oddly shaped, and the line team starts improvising. Once that happens, consistency disappears. That is a problem for both security and brand presentation.
Artwork mistakes are just as common. Tiny text disappears. Weak contrast blends into the box. Busy layouts make the tamper message hard to read. If the seal needs to communicate “do not use if broken,” that message has to be obvious. This is where a simple layout often wins. A clean mark with high contrast can outperform a decorative seal that needs explanation.
Operational mistakes may be the most expensive. I have seen enough packaging feedback to know that gloved hands, rushed fulfillment, and no application training can ruin a good spec. Staff need to know what a properly sealed package should look like and what counts as a defect. If the seal is sometimes pressed twice, sometimes skewed, and sometimes partially overlapping print, the package line is creating inconsistency faster than the label supplier can fix it.
A few failure patterns are worth watching for:
- Seals applied to dusty surfaces.
- Application before the carton adhesive or coating has fully set.
- Low-contrast artwork that is hard to inspect.
- Trying to use one seal format for both rigid boxes and flexible mailers.
- Skipping real-world tests because the sample “looked fine.”
None of those are exotic mistakes. They are normal, repeatable, and expensive. The packaging buyer who catches them early usually saves time, rework, and customer complaints. Branded tamper seal stickers reward boring discipline more than creative bravado.
There is also a trust issue here. If the package is supposed to signal tamper evidence but the team accepts a crooked or half-adhered seal on the line, the customer sees the result immediately. The packaging system only works if the standard is held every day, not just during sampling.
Expert Tips and Next Steps for Better Ordering Decisions
Start with a packaging audit. Measure the closure area. Note the surface material. Identify the exact point where a seal should fail visibly if tampered with. If the package is a carton, look at flap width and coating. If it is a jar, look at lid curvature and sidewall texture. If it is a mailer, test the flap under real folding pressure. That kind of audit gives you a far better brief for branded tamper seal stickers than a vague request for “something secure.”
Request sample sets that reflect real conditions, not just a clean desk test. Test on the actual boxes, jars, or mailers you use. Leave them in the room overnight. If heat, humidity, or refrigeration matters, include that too. A seal should earn trust in the environment where it will be used, not only in the place where it was approved. That is also where resale, returns, and customer perception get shaped.
Decide your priority order before quoting. Is the top goal strongest security? Fastest application? Premium appearance? Lowest unit cost? Longest shelf stability? You cannot optimize every variable equally, so the order of priority matters. A packaging team that names the priority first usually gets better recommendations from the supplier and fewer compromises in production.
Build a simple internal acceptance checklist. Keep it short. Check adhesion, readability, placement, and removal behavior. Make everyone use the same criteria across runs. That sounds basic, and it is. Yet basic systems are what stop drift. If the line accepts one slightly weak run, the next run will likely drift a little further. Branded tamper seal stickers work best when the standard is documented and repeatable.
Use the seal as part of a controlled packaging system, not a last-minute purchase. Document how it will be inspected, stored, and applied across teams. If there are multiple fulfillment sites, standardize the placement template. If seasonal staff handle the line, add visual examples. If the product moves into a new carton or mailer, retest the adhesive immediately. Small changes in packaging can create big changes in seal behavior.
Here is the practical decision ladder I would use:
- First: verify the package surface and failure point.
- Second: choose the tamper mechanism that gives visible proof.
- Third: confirm the artwork is easy to inspect.
- Fourth: test the seal in the real workflow.
- Fifth: lock the placement method before scaling the order.
That sequence keeps the conversation grounded. It avoids the common trap of starting with artwork and ending with a seal that does not perform. Branded tamper seal stickers should protect the package first and support the brand second, even though both jobs matter.
If you want a useful benchmark, compare a simple seal spec against a higher-security version and ask what each one actually buys you. Sometimes the answer is better protection. Sometimes it is better confidence. Sometimes it is just a nicer unboxing moment. Honest comparisons beat vague assumptions every time.
And if you are building a broader packaging update, this is a good time to line up related components such as label systems, carton marks, and internal inspection rules. That is where Custom Labels & Tags can sit naturally beside your seal spec, rather than being treated as an afterthought. A controlled system is easier to scale than a patchwork of ad hoc purchases.
In practice, the best orders for branded tamper seal stickers are the ones that start with a real packaging sample, a clear security goal, and a willingness to test twice before buying once. That is the difference between a label that merely looks like protection and a seal that actually supports trust.
If you are putting a spec together this week, the most useful next move is simple: pick one real package, one realistic environment, and one exact failure point, then test a sample seal against all three. That single exercise will tell you more than a page of guesses.
What are branded tamper seal stickers used for in packaging?
They show whether a box, bag, jar, or mailer has been opened or disturbed before the customer receives it. They also carry brand identity, so branded tamper seal stickers double as a professional finishing touch rather than a plain security mark.
How do I know if branded tamper seal stickers will stick to my packaging?
Test them on the exact surface you use, because coated cardboard, plastic, glass, and textured materials behave differently. Check for heat, moisture, dust, and curvature, since those factors often decide whether branded tamper seal stickers perform reliably.
What affects the price of branded tamper seal stickers the most?
Material choice, print complexity, size, finish, and security features like destructible stock or serial numbers usually drive price changes. Quantity matters too, since larger runs typically reduce unit cost while smaller runs carry more setup cost per piece for branded tamper seal stickers.
How long does the process usually take from artwork to delivery?
The timeline depends on proof approval, sample needs, and production capacity, so the fastest projects are the ones with final artwork ready early. If you need testing or revisions, add extra time before production so branded tamper seal stickers do not become a launch bottleneck.
What is the best way to apply branded tamper seal stickers without slowing fulfillment?
Use a clear placement template and train staff on one consistent application point, so every package gets sealed the same way. Choose a size and adhesive strength that your team can apply quickly by hand or with light automation, which keeps branded tamper seal stickers practical at line speed.
For buyers who want packaging that feels secure, looks intentional, and survives real handling, branded tamper seal stickers are usually worth the work of specifying properly. The payoff is simple: better protection, clearer inspection, and a more trustworthy unboxing experience.


