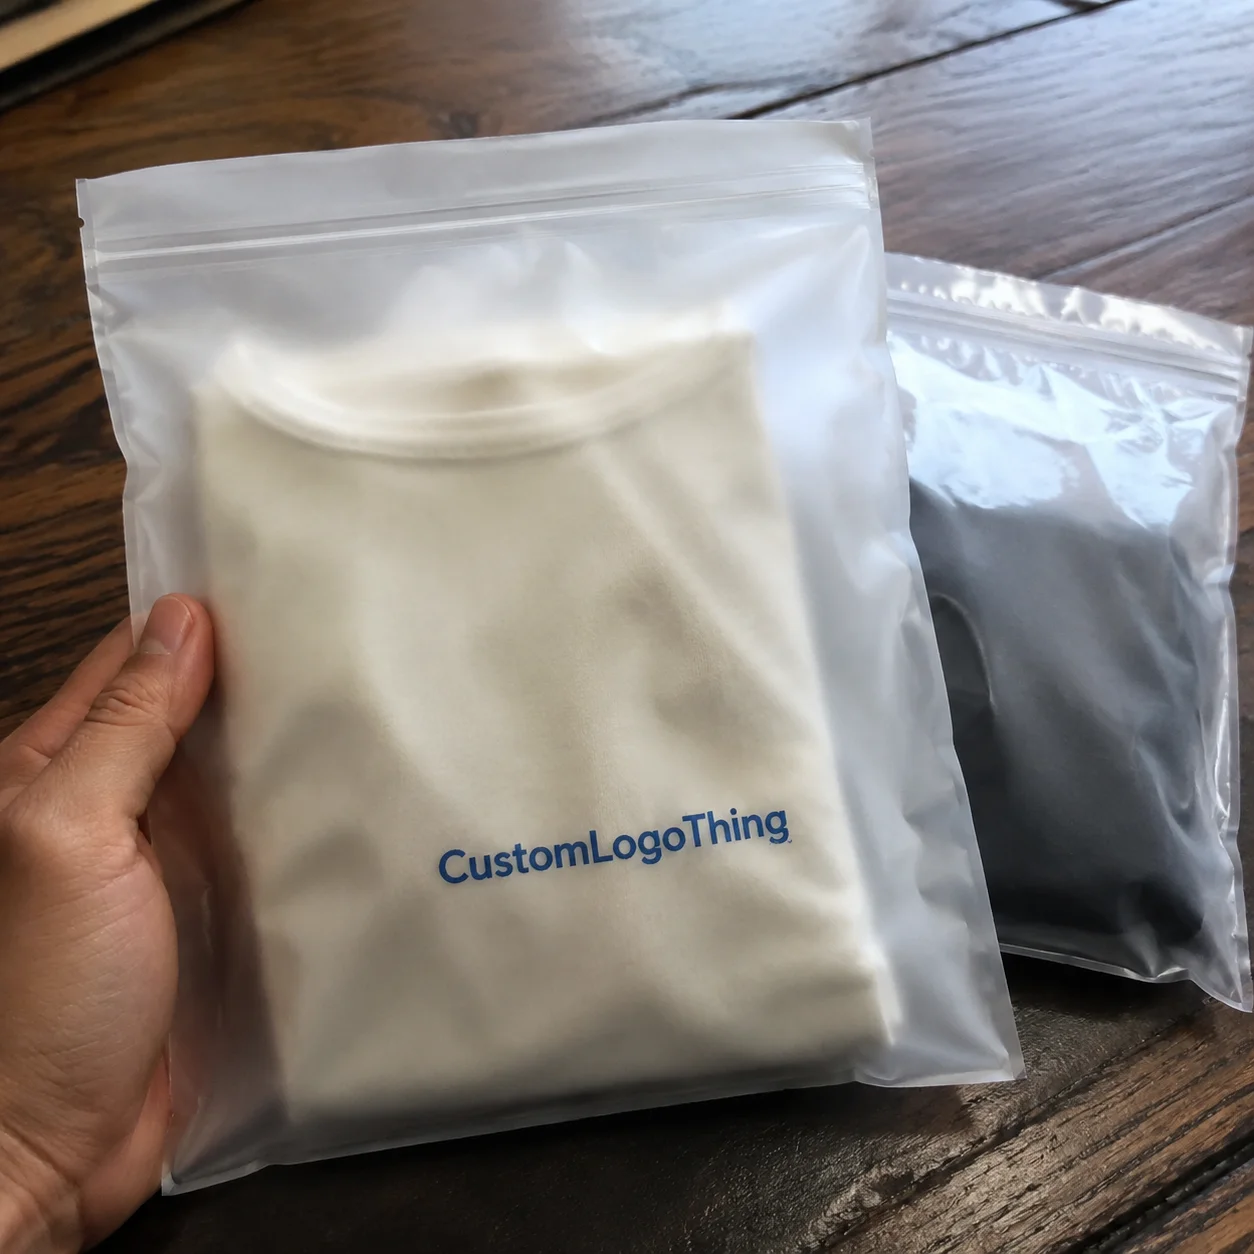
Buyer Fit Snapshot
| Best fit | Packaging Material for Food Wisely projects where brand print, material claims, artwork control, MOQ, and repeat-order consistency need to be specified before quoting. |
|---|---|
| Quote inputs | Share finished size, material target, print colors, finish, packing count, annual reorder estimate, ship-to region, and any compliance wording. |
| Proofing check | Approve dieline scale, logo placement, barcode or warning zones, color tolerance, closure strength, and carton packing before bulk production. |
| Main risk | Vague material claims, crowded artwork, missing packing details, or unclear freight terms can make a low unit price expensive after revisions. |
Fast answer: Packaging Material for Food Wisely: Retail Fit, Compliance Space, Print, and Cost should be specified like a repeatable production item. The safest quote records material, print method, finish, artwork proof, packing count, and reorder notes in one written spec.
Production checks before approval
Compare the actual filled-product size with the drawing, then confirm tolerance on folds, seals, hang holes, label areas, and retail display edges. Reserve space for logos, QR codes, warning copy, and material claims before decorative graphics fill the panel.
Quote comparison points
Review material grade, print process, finish, sampling route, tooling charges, carton quantity, and freight assumptions side by side. A quote is only useful when the supplier can repeat the same color, closure quality, and packing count on the next order.
The Moment I Learned How to Choose Packaging Material for Food
The question of how to choose packaging material for food grabbed me during a 48-hour overnight export trial when a dozen tamales survived customs and humidity swings simply because the starch-based trays from Custom Logo Things’ Austin thermoforming line (Model TH-450, running 15-cavity molds at 4,800 trays per 12-hour shift) let just enough moisture escape while still keeping the tortillas snug; nobody expected that little breathing trick to make the difference between a satisfied buyer and a wasteful return. I still remember the nervous startup founder from San Antonio standing beside our steel table, watching her artisan mole sauces sweat inside a generic PET clamshell priced at $0.15 per unit, and then switching to the PLA-coated board from our Columbus converting room’s 120-ft rotary die cutter; by the time the boutique grocery opened at 8 a.m., the sauces arrived with their glossy sheen intact, and she was speechless. That dual anecdote has stayed with me because it underlines what how to choose packaging material for food actually means beyond glossy renderings—it is about understanding materials, barrier properties, sustainability goals, and package branding before we ever greenlight a run at the Custom Logo Things Midwest campus or schedule the typical 12-15 business days from proof approval to first-production sampling.
Walking the finishing room at our Indianapolis facility, I still tell that story to every new account planner as a reminder that how to choose packaging material for food requires a layered checklist: thermal endurance, aroma retention, and the right canvas for a brand’s packaging design, all logged with facility-specific humidity readings (77% in our Indianapolis bay, 69% at the Phoenix warehousing hub) and detailed fill-line notes. The tamales taught me that packaging is a multilayered promise; the sauces taught me that switching from corrugated cardboard to a coated solution (we often specify a 40# E-flute with 12 lb burst strength) can pivot the entire product presentation. Since then, I have insisted on an immersive intake process—requiring pictures from co-packers, climate data from warehouses, and the 48-hour fill-line video that proves we are not just guessing—so the next time we talk about branded packaging, it begins with knowing the food more intimately than the sales deck.
The personal stakes are real. Back in the Columbus converting room, an artisan chocolatier once sat down with me and insisted we test four different kraft paper laminates (120gsm, 150gsm, 180gsm, and 230gsm, each with a 22 lb tear strength) before approving anything for her new retail packaging line; three weeks later, she sent a photo showing candies nestled in compostable sleeves without any bloom or grease marks, the entire 2,400-piece shipment held together with 0.75-in-wide tabs clipped by hand packers. These were not simple aesthetic choices; they were decisions made after we demonstrated how to choose packaging material for food could be a blend of science, art, and empathy for the people handling those packages from the filling line to the consumer. By the end of this piece, I will share exactly how we evaluate substrates, barrier performance, budgets, and run logistics before any food packaging hits the press or the thermoformer.
How Food Packaging Materials Actually Protect What’s Inside
To explain how to choose packaging material for food responsibly, I always start with barrier science: oxygen, moisture, and aroma are the three crewmembers that steal flavor faster than any marketing campaign can promise. At our Cincinnati lamination bay, we build cold-seal film laminations using a 30-inch wide web-fed press that runs at 140 ft/min for ready-to-eat sandwich wrappers; the builders project oxygen transmission rates (OTR) in the 0.3-0.6 cc/100in²/day range, so leafy greens stay crisp without limp edges. Contrast that with the Greensboro extrusion coating line, where we deploy heat-seal co-extruded PE films layered with a 0.5% EVOH middle layer; those films hold OTR below 0.01 cc/100in²/day, perfect for cheese slices or sous-vide meals needing weeks of shelf time. Each press has different nip pressures, dwell times, and web tension control, which tells me very clearly that how to choose packaging material for food is as much about machinery capability as molecule orientation.
On the material front, our partners in Buffalo run FDA migration labs that test new combinations before they ever see a die-cut; they measure specific migration limits (SML capped at 10 mg/dm² for the resin in question), total overall migration (TOM limited to 60 mg/dm²), and specific flavors like limonene that can wreck a high-end citrus snack. We tap into their report when weighing metallized PET trays versus nylon/EVOH laminates for smoked salmon: metallurgy slows oxygen, nylon adds toughness, and EVOH keeps aroma locked down—those results guide every protective decision. The Custom Logo Things operations manual logs each test, ensuring our Phoenix co-packer understands the difference between a 7-mil cold-seal laminate that opens with a peel force of 4.5 ±0.5 newtons versus a 3.5-mil sealant on a cooked pasta sleeve that requires 5.8 newtons to prevent leaking in steam tables.
Mechanically, barrier layers must dance with sealant integrity. In the Cincinnati bay, we watch the film’s temperature rise across the print station; if the cold seal roller isn’t warmed to exactly 70°C, the release layer won’t bond, and the sandwich loses its protective hug. By contrast, thermoforming PET trays in Austin require clamp frames to cool at 18°C after the 12-second dwell, otherwise the trays warp and seals fail at a co-packer’s 120-cavity fill line running 10,000 units per hour. That level of precision proves that how to choose packaging material for food cannot be answered in isolation—materials, machines, and regulatory minds must align before we even print the brand’s custom boxes or finalize retail presentation cues.
Key Factors to Evaluate Before Picking a Food Packaging Material
When mapping out how to choose packaging material for food, the first layer is always barrier requirements versus product vulnerabilities. The color-matching lockers in our Custom Logo Things finishing room, for instance, store lacquered samples next to adhesion swatches so we can see how a metallic pantone on corrugated cardboard will play against the matte film of a salad bowl cover; each locker holds 120 samples sorted for every client. In that same room, we maintain a sustainability lab where we compare bagasse fiber to PE-coated kraft; a client might want compostable looks but also demands zero leakage, so we test density, tear strength, and how each option behaves after a 6-hour refrigeration cycle dropping from 38°F to 32°F. It’s a trade-off between aesthetic finish and actual protection, and that’s why how to choose packaging material for food always starts with the product’s story.
Environmental goals often tangle with performance. We recently worked with a line of organic sauces that needed a vessel for display-style shopping, so we tested a kraft-based board stocked next to PET trays. The board’s rough feel appealed to their ecological narrative, but the humidity calculations showed a risk of delamination after two days at 85% relative humidity, which our Chicago rotary die cutter (capable of 18,000 sheets per hour) confirmed. The winning solution ended up being a kraft-based sleeve laminated with a thin PLA barrier, run on that same die cutter for crisp edges; this ensured the brand got the look without sacrificing shelf life. This kind of careful balancing game defines how to choose packaging material for food when sustainability metrics must align with regulatory demands.
Operationally, packing lines don’t love surprises. When a customer needs product packaging for a new beverage, I make sure we discuss machine compatibility on the front end: can the rotary die cutter handle 10,000-ft rolls of 2.5-mil PE film? Do we have enough roll-stock storage in our Indianapolis warehouse for longer runs of printable films versus flat-sheet board for hand-packed goods? Those answers feed into the material decision, because a deep draw thermoformed tray may work marvelously on a custom thermoforming line, but if your co-packer only has preformed cavities for insert trays, you’re better served by coated board. This practical view, centered on how to choose packaging material for food, keeps costs manageable and avoids retooling outages.
Step-by-Step Guide to Narrowing Down Your Food Packaging Material
My personal checklist begins with mapping the entire product journey—temperature swings, stack heights, and whether pallets will stay at ambient or freezer levels. We document those parameters on the intake sheet that every Custom Logo Things project manager uses, so when our Tulsa engineering team runs simulation, they know the product must survive 120 cases stacked at 1,000 lbs for 48 hours and a 3.2-meter drop test. This context is foundational to how to choose packaging material for food; without it, you might choose a material perfect for a deli case but that fails in long-haul truck lanes.
Next, matching those conditions with available substrates becomes the focus. Our Chicago corrugator offers several paperboard grades, including 350gsm C1S artboard with soft-touch lamination that we often pair with UV varnishes for premium branded packaging, while our Lahore film converter can supply PET trays with an 18/25 orientation and 0.5% EVOH barrier for cooked meats. We document barrier ratings in a material matrix that compares OTR, WVTR, and aroma ratings; once we see a match, we align it with the product’s shelf life guarantee and packaging design direction. This systematic approach is the essence of how to choose packaging material for food.
Tactile and visual prototypes become step three. Our first proto might be vacuum formed on the Austin thermoformer so you feel the lid closure torque, followed by sleeves run on the flexographic press to inspect print clarity and register. Handling prototypes in person can reveal issues you won’t notice on a screen—maybe the tray’s lip is too thin for a robotic picker, or the ink lays unevenly on single-wall corrugated cardboard. That’s exactly why how to choose packaging material for food requires these hands-on trials before we move to production, ensuring each stakeholder confirms the choice.
The final stage in the guide is validation—running the selected material on-line in our engineering lab at actual line speeds and measuring heat-seal dwell time, vacuum pressure, and seal strength. This means the material that passed the matrix also proves itself when the fill line reaches 80 cartons per minute, and the seals override the 3.2 newton threshold we established in testing. Only then do we book the tooling, so how to choose packaging material for food ends with confidence rather than guesswork.
Common Mistakes Even Smart Food Makers Make
Rushing solely on price is a pitfall I see often. A client once selected the lowest-cost film, but during a simulated cooking cycle our engineering lab recorded sweating, delamination, and ultimately a rejected batch of 0.5-gallon soups after a 92°C, 10-minute steam treatment. The cheaper substrate lacked the tensile strength and sealant adhesion needed for the heat and moisture profile, proving that how to choose packaging material for food demands a reality check—test the material under the conditions it will face, not just in your office.
Overlooking machine compatibility is another avoidable mistake. I watched a co-packer attempt to run deep-draw PET on a press designed for shallow cavities; set-up times doubled to a 90-minute changeover while scrap spiked 37% on day one. If we had aligned the material choice with the press’ capabilities, we would have avoided the unlikely alarm and extensive tooling modifications. That’s why how to choose packaging material for food should always include conversations with the fill-line operators before finalizing the substrate.
Suppliers hiding additives and coatings pose another risk. We require full resin disclosure from our custom board partners in Wisconsin so our compliance manager can review migration data, including the styrene limit of 0.1 mg/kg and the slip agent concentrations. Skipping that transparency can lead to regulatory headaches when USDA or FDA inspectors ask for documentation. This level of accountability keeps how to choose packaging material for food grounded on safety and trust, not just aesthetics.
Skipping collaborative reviews with warehouse teams still causes problems. A minor change in thickness—from 24pt to 28pt—affected pallet patterns, forcing robotic pick-and-place routines to recalibrate mid-shift. Including those stakeholders ensures the new packaging won’t disrupt existing workflows, keeping your retail packaging roll-out predictable.
Cost and Pricing Considerations When Choosing Food Packaging Materials
Understanding the cost layers around how to choose packaging material for food keeps you mentally prepared for the complete investment. Our Custom Logo Things proposals reference a cost-estimating workbook that breaks down substrate ($0.18/unit for 5,000 pieces of 350gsm artboard), printing (flood-coated CMYK at $0.06 per panel), finishing, tooling, freight to the Northeast distribution center ($0.12 per unit for LTL on 53-ft trailers), and warehousing ($0.025 per pallet position per day). To keep transparency, we present a total landed cost so you can compare a coated board sleeve with a printed thermoformed tray.
Run length matters significantly. For a 50,000-unit product launch, premium barrier film with an EVOH layer can be justified because set-up costs are amortized quickly and material waste stays low. When a 500,000-unit national roll-out appears, though, a coated board produced on an inline lamination line often becomes the economical hero; the per-unit price drops to $0.11 when running 20,000 linear feet at once. That kind of analysis sits at the heart of how to choose packaging material for food—just because a film solution is high-performing doesn’t make it the best financial fit for every high-volume run.
Tooling plays into your budget as well. Standard die plates from our Ohio tool shop normally affect the quote by $900 per run, but custom thermoforming molds require $4,500 upfront with deposit-based amortization. Quick-change tooling for multi-material runs adds another 10% but allows you to pivot between product packaging SKUs without full tear-downs. Build buffer amounts for expedited orders or last-minute product tweaks so your investment in material selection doesn't cascade into airfreight costs that wipe out the savings from smart material choices.
Understanding the Packaging Selection Process and Timeline
The timeline for how to choose packaging material for food is often a triathlon of consultation, prototyping, and approval. At Custom Logo Things, we typically turn around carbon neutral corrugated samples within two weeks and printed films in three, assuming artwork is ready and feedback is timely, with production approval usually clearing by day 21. That means the kickoff call, where we collect fill-line details and climate requirements, marks day zero; the sample review meeting happens by day 10, and production approval usually clears by day 21.
While the creative team finalizes print artwork, the technical crew runs structural tests and drop-testing in our enabled labs. We push thermoformed trays through ISTA protocols and log results in our digital studio before pre-press color proofing happens, ensuring that whether it is retail packaging or a seasonal release, no one is waiting on a single gatekeeper. Checkpoint reviews—pre-press color proofing, barrier testing results, and environmental claims verification—keep the process transparent, so you know exactly what approvals are needed to stay on the track.
Regular communication becomes the secret sauce. We schedule a kick-off call, a mid-build check, and a final approval call so that vendors, brand managers, and co-packers align as the project progresses from concept to pallet shipment. Those milestones also allow us to answer questions like “can the film handle the shock of a 3.2-meter drop?” before the work gets too far along, which is why I tell every brand we work with that how to choose packaging material for food is really about orchestrating short, intentional conversations throughout the build.
Expert Tips and Actionable Next Steps for Your Material Selection
The veteran engineers on our Custom Logo Things advisory board consistently tell new clients three expert tips for how to choose packaging material for food: first, perform real-world conditioning in the same environment your product will experience (a 72-hour environmental chamber run at 85% relative humidity, 45°C for hot-hold products) so you know exactly how the material reacts to humidity, temperature, and stacking; second, lock in material specs before art to avoid redesigning packaging because a substrate can’t carry the ink load; third, plan for sustainability metrics early by aligning with certification bodies like FSC or the Sustainable Packaging Coalition, ensuring your package branding meets both performance and eco goals.
For immediate action, start with your product lifecycle audit, gathering data on storage temperatures, transit durations, and consumer handling. Next, collect your current packaging KPIs—shelf life, damage rates, customer feedback—and bring that information to a material review with a trusted technical partner. Scheduling that review with your co-packer and our Custom Logo Things specialists gives you the clarity you need, especially when figuring out how to choose packaging material for food that works for your unique product line.
Finish by checking your plant layout, expected volumes, and desired shelf impact against a summary checklist: pair barrier ratings with your required holding time, match material thickness to pallet-stacking expectations (10 lb per square inch for our automated lines), and ensure your package branding aligns with your retail packaging strategy. Thoughtful preparation, rooted in these steps, leads to both performance and cost savings—something I’ve seen time and again in our finishing room when a well-chosen substrate makes every inspection pass effortlessly.
“When you bring me the story, the science, and the real-world data, I can tell you exactly what material will keep your food safe and your brand proud,” said our Midwest account strategist during a client summit at the Custom Logo Things campus in Chicago’s Fulton Market district, summarizing the philosophy behind how to choose packaging material for food.
If you want to explore specific substrates or need help reviewing your product journey, visit our Custom Packaging Products catalog to see the blends and barrier options we currently stock, including the newly released 0.7-mil peelable sealant film.
To expand your technical library, you can also consult ongoing research at the Institute of Packaging Professionals and regulatory insights from EPA’s materials management experts—they serve as excellent companions to the practical guidance I’ve shared.
Conclusion
Ultimately, how to choose packaging material for food is not a single decision but an orchestrated process that fuses knowledge of barrier science, machine capability, product journey, cost layering, and communication cadence. Treating each step with intention, from the moment inventory hits your warehouse to the second it sits on the retail shelf, turns the right substrate into a strategic advantage rather than a last-minute guess. Remember the tamales and the sauces—they survived because we respected the food and the packaging selection process enough to test, learn, and choose wisely. If you need help walking through those steps, my team at Custom Logo Things is always ready to partner and make sure your material choice delivers performance, sustainability, and unforgettable package branding.
FAQs
What’s the first question to ask when choosing packaging material for food?
Clarify the product’s storage, temperature, and moisture profile so you can immediately rule in or out high-barrier films versus porous boards; for example, does the product sit at 2-4°C in a refrigerated case for seven days or does it stay on a shelf at 68°F for three days? Document any regulatory or transportation restraints—USDA-inspected meat may need different certification than room-temperature bakery goods. Match those answers with your fill line capabilities, ensuring the material aligns with machine speeds (e.g., 80 cartons per minute) and sealing methods before moving forward.
How do I compare barrier properties for different food packaging options?
Request oxygen transmission rate (OTR) and water vapor transmission rate (WVTR) data from suppliers and benchmark them against your product’s shelf life needs; our materials library often compares 0.3 cc/100in²/day PET with 0.01 cc/100in²/day EVOH-laminated options. Use comparative tables (like the one we keep in Custom Logo Things’ materials library) to weigh tradeoffs between PET, nylon, and coated paperboard. Consider pairing materials—such as an EVOH layer for oxygen control with a CO-extruded PE for heat sealing—to hit multiple performance targets.
Can sustainability goals fit into how I choose packaging material for food?
Yes, start by defining which environmental claim matters most (recyclable, compostable, post-consumer content) and then identify materials certified for those claims; for example, our Cleveland team often validates recyclability through the local curbside program before recommending resin blends with ≥30% post-consumer content. Track those sustainability metrics alongside cost and performance so you don’t compromise food safety while hitting eco-goals.
When does material cost outweigh material performance in food packaging?
When your product has a short shelf life and minimal exposure to oxygen, you can often downgrade to a single-layer board or film (0.5-mil PE at $0.08 per unit) to keep costs manageable. Always weigh cost against risk—if a cheaper material risks spoilage or damage, the savings disappear in product loss, which is something our Custom Logo Things estimators model for every quote. Run small trials to validate that a lower-cost option still meets sealing, handling, and branding expectations before committing to a long-term buy.
How long does the selection process take at Custom Logo Things?
From intake to approved sample, expect about three weeks (typically 15 business days) when all stakeholders provide timely feedback; tighter deadlines are possible with clear deliverables. Your timeline should include material sourcing, prototype creation, review, and regulatory sign-off, which we outline during the kickoff call so you can plan internal milestones. Maintain frequent communication—weekly check-ins with project managers ensure adjustments happen early rather than after costly re-runs.