Clear Zipper Bags Logo Placement Buyers Should Nail
Clear Zipper Bags Logo Placement Starts With What the Buyer Sees First
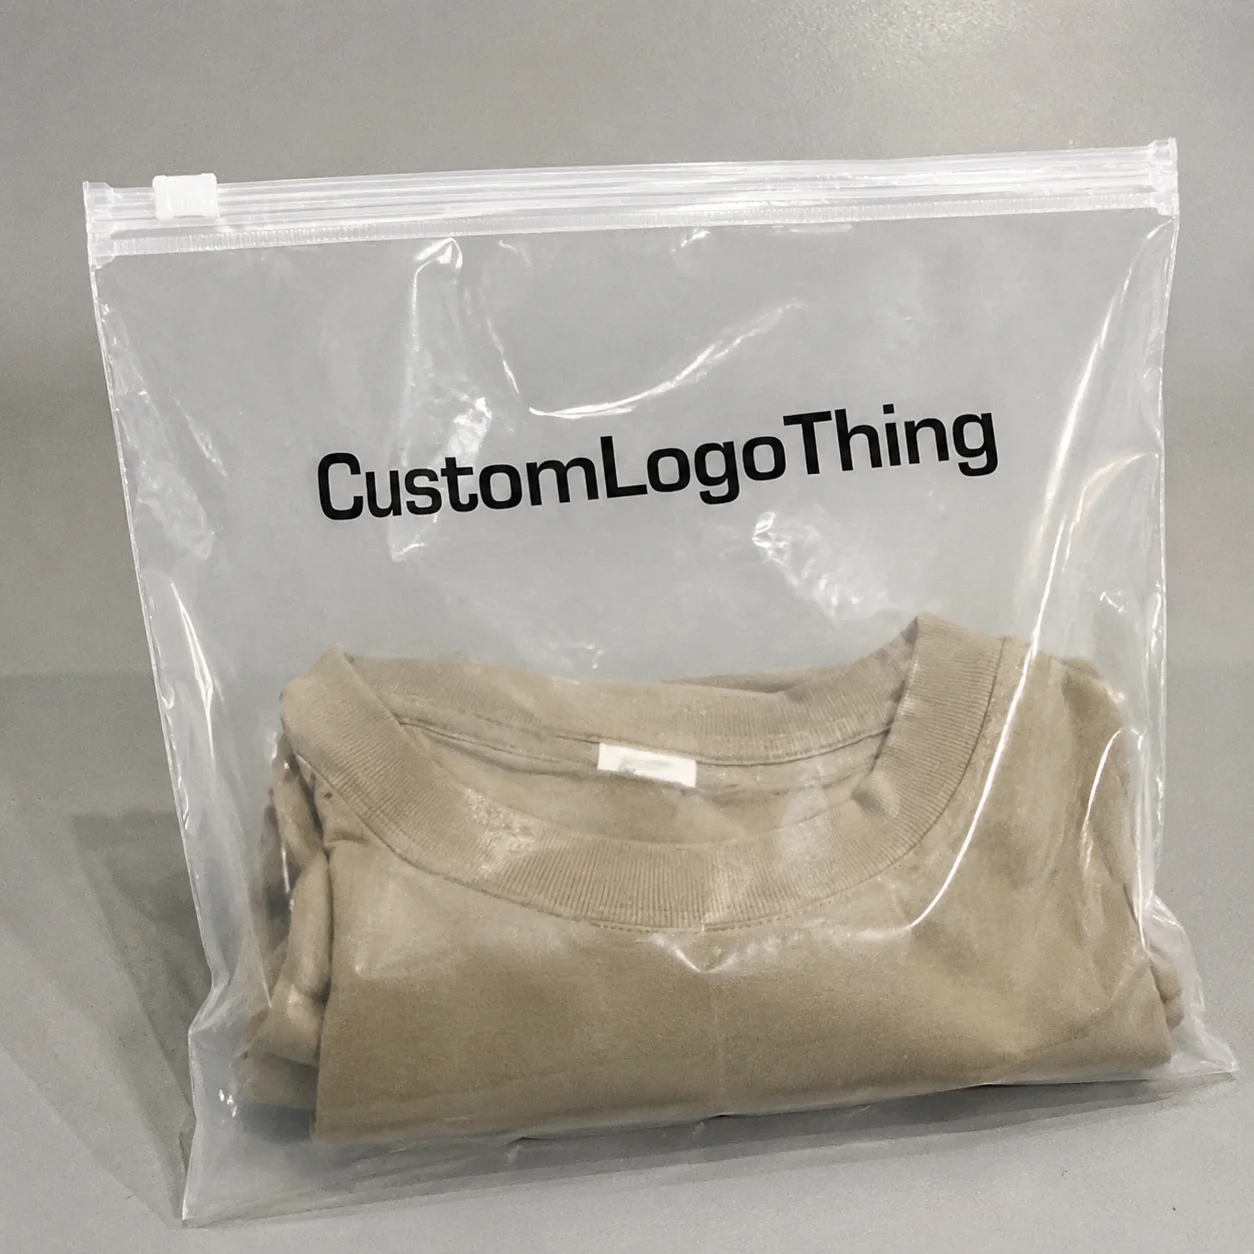
A clear zipper bag gives weak artwork almost nowhere to hide. Clear Zipper Bags logo placement is not decoration parked on plastic; it decides whether the customer sees the brand, the product, or a confused collision of both.
That clear panel has a crowded job description. It shows the product. It carries the zipper track. It may need a hang hole. It has side seals, sometimes a gusset, and still needs room for a logo that looks intentional. Then come the extras: label, lot code, barcode, nutrition facts, warning copy, recycling mark. Small surface. Long invoice of demands.
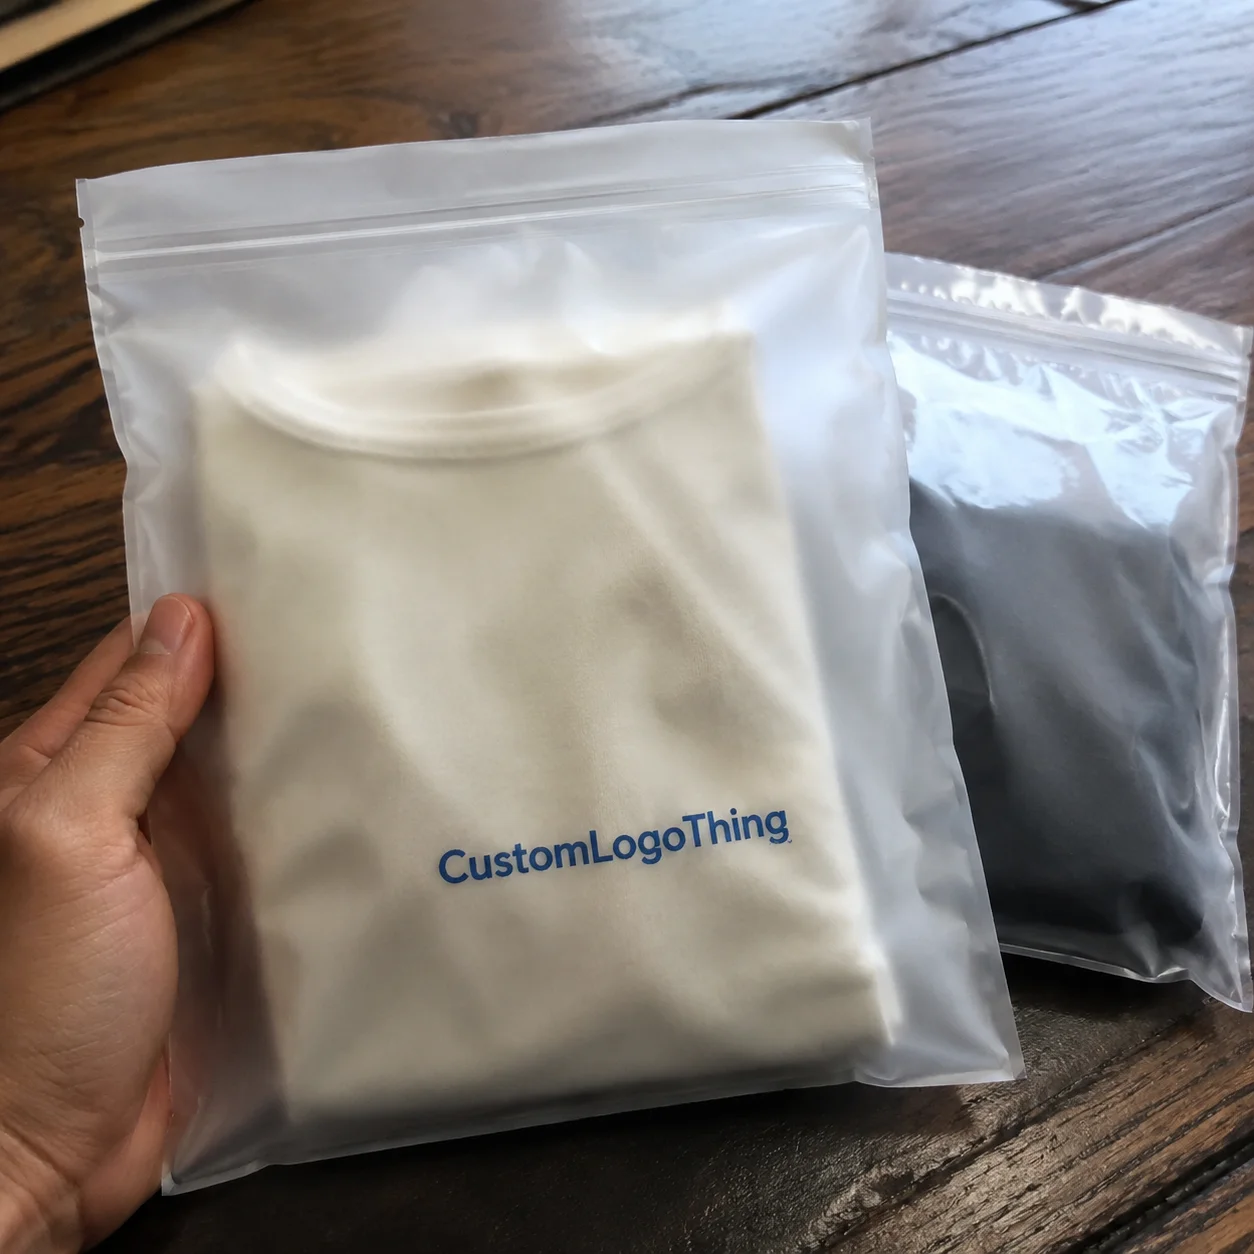
Clear bags behave differently from paper pouches, folding cartons, or solid-color mailers because the contents become part of the design. That can help. It can also ruin readability if nobody studies the product texture. A black logo printed over trail mix, hardware parts, colorful cosmetics, beads, bath salts, or mixed candy may disappear the moment the bag is filled. Lovely PDF. Dead shelf read. Familiar story.
The goal is blunt: put the logo where it stays readable after filling, sealing, shipping, merchandising, and being handled by actual customers. Good placement is judged on a filled bag, not only on a flat blank dieline floating in perfect white space.
The main zones to evaluate are the upper front, center front, lower front, back panel, header area, and optional label zone. Each one gives something up. Some protect brand visibility. Some keep the product as the hero. Some save money. Some look fine until the bag is filled 90% and the logo starts riding a plastic hill.
How Logo Printing Works on Clear Zipper Bags
Most custom printed zipper bags use one of four practical branding methods: screen printing, flexographic printing, digital printing, or printed labels. Screen printing suits simple logos, low color counts, and bold ink coverage. Flexographic printing often makes sense for larger runs because plates support efficient repeat production. Digital printing can help with short tests, variable designs, or small packaging runs where plate costs would hurt the budget. Labels are less exciting. They are also often the cheapest honest answer for low quantities.
Printing usually happens on flat film or finished bags before the bags are packed. Artwork has to respect seams, zipper tracks, bottom gussets, hang holes, tear notches, and the way the front panel expands after filling. A 6 x 9 inch flat bag stops being a neat rectangle once it holds 8 ounces of granola or a chunky hardware kit.
Ink opacity matters on transparent packaging. A one-color black logo may look crisp on an empty clear PE bag, then lose contrast once the product sits behind it. White ink backing, often called a white underprint or flood behind the logo, can make brand marks pop. It also adds cost and another production variable. Readability rarely comes free.
Some flexible packaging uses reverse printing, with ink printed on the inside of a film layer and protected by lamination. That can reduce scuffing on certain PET-based or laminated structures. Many simple clear zipper bags use surface printing instead. Neither method automatically wins. Material, order size, usage, handling, and retail exposure all change the answer.
Clear PE, PP, and PET-based films can print differently. Some need corona treatment or another surface treatment so ink adheres properly. Boring? Maybe. Still relevant when the logo rubs off during pack-out. ASTM packaging test methods can help evaluate material behavior, and ISTA transit testing is useful when filled bags will move through rough ecommerce channels. The International Safe Transit Association publishes testing resources that packaging buyers should know before assuming a bag will survive shipping.
Artwork basics still matter: vector files, Pantone or CMYK color calls, minimum line thickness, safe zones, and proof approvals. For logo printing on plastic bags, fine lines should usually stay above roughly 0.5 pt when possible, and tiny reverse type needs printer approval. Thin script logos and delicate icons can break down fast. Pretty on a monitor, mushy in ink. A small trap with a long memory.
Clear zipper bags logo placement also depends on restricted print areas. Zones near the zipper, side seals, and gusset may be limited because bag construction can interfere with registration or ink consistency. Ask for the print zone before building final artwork. Guessing is just a slower way to pay for revisions.
Best Clear Zipper Bags Logo Placement Zones for Front, Back, and Header Areas
The upper front zone is usually the safest retail choice. It stays visible when product settles toward the bottom and is less likely to distort around bulging contents. For many 5 x 8 inch, 6 x 9 inch, and 8 x 10 inch zipper bags, a logo in the upper third gives the brand a clean read while leaving the product visible below. That is why upper-front placement shows up so often in retail packaging.
Center-front placement can work under the right conditions. Flat products, uniform contents, light-colored items, or neatly arranged goods make center logos easier to read. Think apparel accessories, face masks, stationery, craft sheets, sample cards, or pale cosmetic tools. A logo centered over mixed screws or dark roasted nuts? That is optimism wearing a printer's apron.
Lower-front logos carry more risk. They can be covered, distorted, or visually buried when the bag fills out. Bulky snacks, hardware, accessories, pet treats, and anything with uneven volume tend to push the lower panel forward. If the logo sits too low, wrinkles may run through the artwork or the product mass may hide part of the mark.
Header placement above or near the zipper can work for small logos, sample-size packs, and peg displays. Space is tight. A hang hole, zipper track, tear notch, and logo all competing across a 1 to 1.5 inch header band can look crowded fast. Leave at least 0.25 inch clearance from the hang hole and zipper hardware unless your manufacturer gives different safe-zone guidance.
The back panel is useful for secondary branding, QR codes, instructions, batch information, recycling marks, or regulatory details. If the front needs to show the product cleanly, move supporting information to the back. That does not mean turning the back panel into a junk drawer. Keep the hierarchy under control.
Offset placement, either left or right, deserves more attention. It works well for cosmetics, apparel accessories, premium samples, and products where the item itself should remain the hero. A logo in the upper-left or upper-right zone can build recognition without covering the product's strongest visual area. In that situation, the brand mark works almost like a museum label: present, readable, but not blocking the object.
A practical starting point: logo width often works best at roughly 25% to 45% of the bag width. On a 6 inch wide bag, that means a logo around 1.5 to 2.7 inches wide. On a tiny 3 x 5 inch sample bag, use a simplified mark or short wordmark instead of a full logo lockup with a tagline nobody can read anyway.
| Placement Zone | Best For | Main Risk | Practical Logo Size Range |
|---|---|---|---|
| Upper front | Retail display, mixed contents, snacks, accessories | Can crowd zipper or hang hole if placed too high | 25% to 40% of bag width |
| Center front | Flat, pale, uniform, or neatly packed products | Logo may disappear over busy contents | 30% to 45% of bag width |
| Lower front | Light fill levels or products displayed flat | Bulging, wrinkles, product coverage | 20% to 35% of bag width |
| Header area | Small bags, peg displays, sample packs | Very tight space near zipper and hang hole | 15% to 30% of bag width |
| Back panel | QR codes, instructions, regulatory copy | Less immediate brand visibility | 20% to 40% of bag width |
Key Factors That Change the Right Logo Position
Product color and texture should drive the first decision. Dark contents need light ink, white backing, or a clean label zone. Busy contents need breathing room. Transparent packaging is not magic glass; it is a negotiation between product and artwork.
Fill level changes everything. A bag filled 30% behaves nothing like a bag filled 90%. The lower panel may stay flat at a light fill and balloon outward at a heavy fill. For clear zipper bags logo placement, approval should include a filled sample or at least a filled mockup using the real product. Empty bag proofs help with print boundaries. They do not tell the full story.
Bag size and orientation matter too. A 3 x 5 inch sample bag has brutal space limits. A 9 x 12 inch bag can carry a logo, product name, flavor, QR code, barcode, and compliance copy without looking like a yard sale sign. Tall portrait bags usually favor upper-front placement. Wide landscape bags may support offset logos or a longer wordmark.
Construction details create no-print and caution zones. Zipper tracks, tear notches, hang holes, side seals, bottom gussets, rounded corners, and heat-sealed edges all reduce the clean print area. Many suppliers recommend keeping art at least 0.125 to 0.25 inch away from seals, though the exact number depends on the bag style and equipment. Ask for the marked dieline. Do not eyeball it from a product photo.
Merchandising style is another quiet troublemaker. A logo that looks perfect in flat lay photography may sit too low on a peg display. Bin displays hide the bottom of the bag. Subscription box inserts are viewed from above or at an angle. Ecommerce shipments need scuff resistance and barcode readability more than shelf theater. Smart placement follows the actual viewing angle, not the prettiest rendering.
Barcode, nutrition facts, warning copy, recycling marks, and lot codes are not glamorous. They still need space. For recyclability claims and disposal guidance, buyers should review current guidance from sources like the U.S. Environmental Protection Agency, then confirm what applies to the exact material structure. A mono-material PE bag, a laminated PET/PE pouch, and a labeled bag may not carry the same instructions.
Brand hierarchy needs discipline: logo, product name, flavor or variant, usage claim, QR code, and compliance copy should not all scream at the same volume. Pick the winner. Let the other elements support it. Packaging that makes everything first priority usually looks desperate, and shoppers can detect desperate faster than brands admit.
Process and Timeline From Artwork to Approved Bags
The normal process starts with bag size and material. Next come zipper style, print zones, artwork submission, digital proof, revisions if needed, sampling when appropriate, and production. Simple enough on paper. Problems usually appear when buyers choose artwork before confirming the actual bag construction.
Timeline depends on the build. Simple one-color printed stock zipper bags often run about 2 to 4 weeks after artwork approval. Custom film, multi-color flexo printing, laminated structures, specialty zippers, hang holes, or high-volume production can run 4 to 8+ weeks. Sampling may add 1 to 3 weeks depending on method and production queue. Not universal, but realistic enough for planning.
Proofing is where most clear zipper bags logo placement mistakes should be caught. A useful proof should show trim size, safe zones, zipper location, hang hole, gusset, print dimensions, and color references. If the proof only shows a logo floating on a blank rectangle, ask for more detail. You are buying packaging, not wall art.
For visually busy, bulky, oily, powdery, or irregular products, request a filled mockup or test a printed sample with the actual product. Powders can leave residue inside the bag and reduce clarity. Oily products may affect appearance or require a different film. Hardware can scratch the plastic. Candy and cosmetics can create glare and color confusion. Real product testing catches problems that mockups politely skip.
Buyer reality check: moving a logo 1 inch sounds tiny until plates, screens, or print files have already been prepared. Then it becomes a bill. Funny how that works.
Approval checkpoints should include logo scale, ink color, white backing, barcode readability, regulatory copy, orientation, and how the bag will be viewed upright or flat. If the product will hang on a peg, approve the layout while hanging. If it will sit in a bin, check what stays visible above the bin wall. If it ships in an ecommerce box, rub-test the printed area and confirm the logo is still readable after handling.
Rush options may exist, but compressed timelines reduce flexibility. Less time for proofing means fewer chances to catch poor logo placement. Less time for sampling means the logo problem may appear after inventory arrives. That is not a packaging strategy. That is a very expensive surprise with a zipper.
Cost, MOQ, and Quote Factors for Printed Zipper Bags
Main cost drivers include bag size, material thickness, order quantity, number of print colors, print coverage, white ink backing, setup fees, plate or screen charges, and whether the bag is stock or fully custom. A 2 mil PE zipper bag with a one-color logo lives in a different pricing lane than a thicker PET/PE laminated pouch with opaque white underprint, hang hole, and multi-panel artwork.
Small runs with labels or digital printing can be smart for testing. A few hundred to 1,000 stock bags with custom labels may cost more per unit, but the setup risk stays low. Printed stock clear zipper bags may start in the low thousands. Custom film or multi-color production may require several thousand to tens of thousands of units depending on specs, film width, press setup, and supplier minimums.
For broad planning, labeled stock bags might land around $0.18 to $0.55 per unit at smaller quantities, depending on bag size and label quality. One-color printed stock zipper bags at 5,000 pieces may land around $0.12 to $0.35 per unit for common sizes, plus setup. Larger custom printed runs can reduce unit cost, but plates, freight, sampling, and waste still belong in the math before anyone celebrates half a cent.
Clear zipper bags logo placement affects cost because print coverage affects ink, setup, and sometimes waste. A small one-color front logo is usually cheaper than large full-panel coverage, multi-side printing, or artwork that needs opaque white underprint. Printing near complex construction areas can also require tighter registration control or a different approach.
Do not compare quotes unless the specs match. A 2 mil LDPE bag is not the same as a 4 mil PET/PE pouch. A single black logo is not comparable to a two-color logo with white backing. A hand-applied label is not the same as direct flexo printing. Buyers love to ask, "Why is this quote higher?" Usually because one quote includes the thing they actually need and the other quote conveniently forgot it.
Include these details in a quote request: bag dimensions, material preference, thickness, quantity, print colors, artwork file, zipper type, gusset requirement, hang hole, fill product, pack-out method, target delivery date, and any retail compliance needs. If food contact is involved, say so early. If the bag must pass a retailer's barcode or labeling rules, say that before production, not after.
Saving half a cent per bag means little if the logo disappears once the product is packed. Cheap and invisible is still expensive. Clear packaging makes the product a design element, and that element can either support the brand mark or eat it alive.
Common Logo Placement Mistakes Buyers Make
The biggest mistake is approving artwork on an empty flat bag template without considering how the filled product changes the front panel. A flat dieline is useful for print boundaries. It is not proof that the logo will work after the bag contains 6 ounces of trail mix, 20 metal parts, or a stack of uneven accessories.
Another common problem is placing the logo too close to the zipper. It can look cramped, get visually interrupted by the track, or land where fingers naturally grip the bag. For small bags, even 0.25 inch of extra breathing room can make the difference between "intentional" and "someone ran out of space."
Dark logos over dark contents fail constantly. So do delicate marks over detailed product textures. If the product is brown, black, multicolor, reflective, or patterned, use white backing, lighter ink, a label zone, or a logo position with cleaner contrast. The point of clear zipper bags logo placement is visibility under real conditions, not theoretical elegance.
Oversized logos create their own mess. Bigger can be better, but not when the logo blocks product visibility, covers required copy, or makes the bag look like a promo giveaway instead of retail packaging. A logo around 25% to 45% of bag width is a sane starting range. Test from there against the filled product.
Logos across gussets or seal areas are another expensive little habit. These areas bend, distort, or may not accept print consistently depending on construction. A bottom gusset can make a logo curve away from the viewer. A side seal can break a clean edge. Great if you enjoy paying for packaging that looks damaged before anyone opens it.
Display method gets ignored too often. A logo designed for flat photography may sit too low when the bag hangs on a peg. A front panel designed for shelf standing may disappear in a bin. A back-panel QR code may be useless if the bag is always displayed flat with the back hidden. Strong clear zipper bags logo placement starts with the selling environment.
Fine script logos, tiny taglines, and delicate icons can break down on flexible plastic. Minimum type size depends on the print method, but anything below about 5 to 6 pt needs scrutiny. Thin strokes, reversed-out text, and tight letter spacing are not friendly on small clear bags.
Digital mockups also lie by omission. They have perfect lighting, perfect product distribution, no fingerprints, no glare, no wrinkles, and no store shelf chaos. Real shelves and real reflections are less polite. Approve with that reality in the room.
How Should Buyers Approve Clear Zipper Bags Logo Placement?
Before final approval, use a short checklist. Confirm filled bag appearance, logo visibility, print zone, zipper clearance, hang hole clearance, gusset behavior, barcode scan, compliance copy, and ink contrast. If the product will be packed by hand, check how workers naturally hold and seal the bag. Fingers often land exactly where a designer wanted the logo. Of course they do.
- Print the artwork at actual size and hold it against a filled bag.
- Check the logo from 3 to 6 feet away, not only close up.
- Test the bag upright, flat, and hanging if those display styles apply.
- Scan the barcode on a curved or filled bag, not only on the proof.
- Confirm white backing if the contents are dark, colorful, or textured.
- Ask for a marked dieline showing safe zones and restricted areas.
A screen can lie. A full-size printout is harder to fool. It is not glamorous, but it works. Print two versions if the decision is close: one logo near the upper front and one offset or centered lower depending on how much product visibility matters. Tape them to filled bags. Put them on a shelf. Step back. The weaker option usually exposes itself quickly.
Request a physical sample for high-value retail launches, dark or busy contents, multi-color logos, metallic ink, white backing, or anything going into national retail. Sampling costs money and time, but so does receiving 10,000 bags with a logo that disappears behind chocolate-covered almonds.
Decide what must win visually: brand, product visibility, flavor or variant, compliance copy, or QR code. Packaging cannot make everything the hero without looking desperate. Before approving clear zipper bags logo placement, review the bag filled, sealed, displayed, and photographed so the logo works in the real buying moment.
FAQs
Where is the best logo placement on clear zipper bags?
The upper front panel is usually the safest placement because it stays visible when the product settles at the bottom. Center placement can work well for flat, uniform, or light-colored products. Avoid areas too close to the zipper, side seals, hang holes, or gussets unless the manufacturer confirms the print zone.
Does clear zipper bags logo placement affect printing cost?
Yes. Small one-color logos usually cost less than large coverage, multi-color artwork, or designs needing white ink backing. Printing on multiple panels or near complex construction areas can increase setup time or require different production handling. Placement can also affect waste if the design is harder to register consistently.
Should I use white ink behind my logo on clear plastic bags?
Use white backing when the product inside is dark, colorful, textured, or visually busy. Without white ink, some logo colors can look weak or disappear against the contents. White backing adds cost, but it often protects readability. That is usually the whole point of printing the logo.
How big should a logo be on a clear zipper pouch?
A practical starting range is about 25% to 45% of the bag width. Smaller bags may need a simpler logo mark instead of a full lockup with tagline. Judge the logo on a filled bag, not only on a flat dieline.
How long does custom logo printing on zipper bags take?
Simple printed stock zipper bags often take about 2 to 4 weeks after artwork approval. Custom materials, multi-color printing, special finishes, or higher-volume production can take 4 to 8+ weeks. Sampling, artwork revisions, and delayed proof approvals can extend the timeline.
What is the safest way to test clear zipper bags logo placement before production?
Print the artwork at full size, place it on a filled bag, and view it in the same position customers will see it: hanging, standing, flat, or inside a shipping box. For larger orders, request a physical sample. Testing clear zipper bags logo placement with the actual product is the fastest way to catch contrast, glare, wrinkle, and fill-level problems before production.