Buyer Fit Snapshot
| Best fit | Compare Bubble Interior Poly Mailers Performance Review projects where brand print, material claims, artwork control, MOQ, and repeat-order consistency need to be specified before quoting. |
|---|---|
| Quote inputs | Share finished size, material target, print colors, finish, packing count, annual reorder estimate, ship-to region, and any compliance wording. |
| Proofing check | Approve dieline scale, logo placement, barcode or warning zones, color tolerance, closure strength, and carton packing before bulk production. |
| Main risk | Vague material claims, crowded artwork, missing packing details, or unclear freight terms can make a low unit price expensive after revisions. |
Fast answer: Compare Bubble Interior Poly Mailers Performance Review should be specified like a repeatable production item. The safest quote records material, print method, finish, artwork proof, packing count, and reorder notes in one written spec.
Production checks before approval
Compare the actual filled-product size with the drawing, then confirm tolerance on folds, seals, hang holes, label areas, and retail display edges. Reserve space for logos, QR codes, warning copy, and material claims before decorative graphics fill the panel.
Quote comparison points
Review material grade, print process, finish, sampling route, tooling charges, carton quantity, and freight assumptions side by side. A quote is only useful when the supplier can repeat the same color, closure quality, and packing count on the next order.
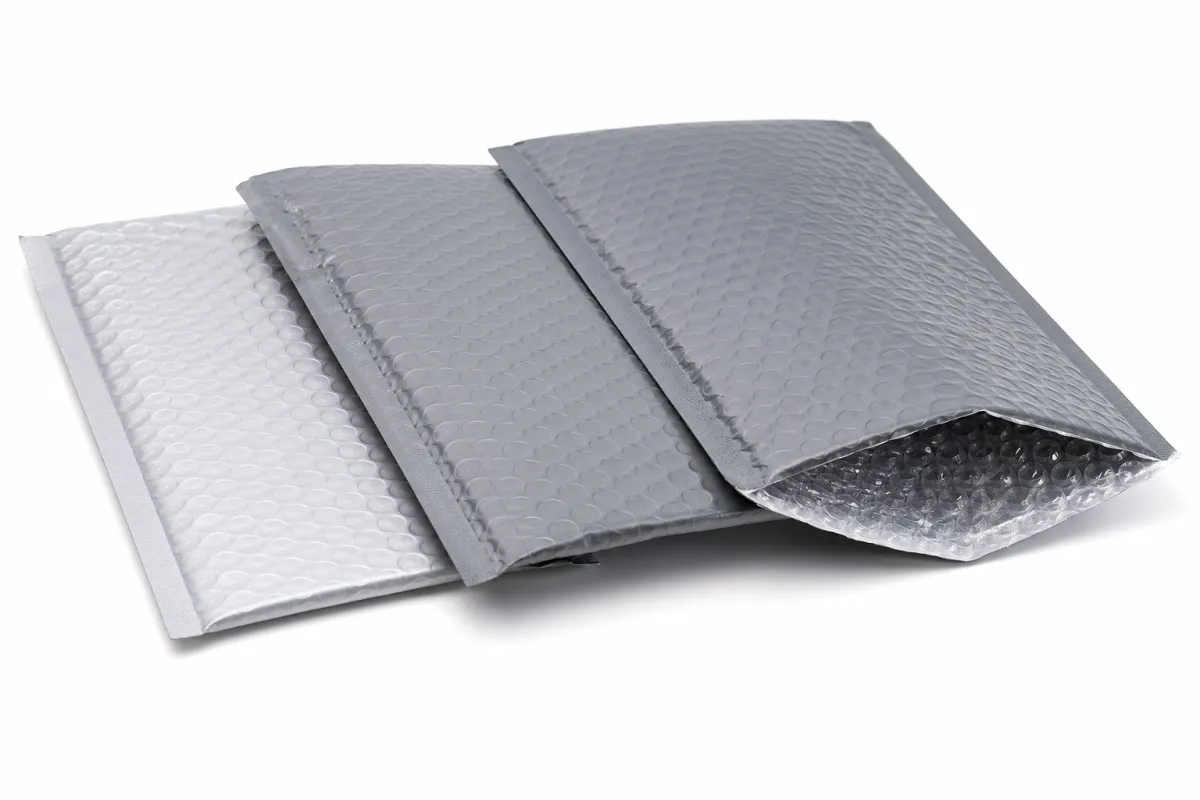
If you want to compare bubble interior poly mailers performance without getting tricked by marketing copy and eye-catching sample photos, start with failure evidence, not brochure language. In operations work, a 1 mm change in internal cushion behavior can shift failure patterns at the seam, under compression, and after long transfer lanes more than most teams expect. I’ve seen teams spend weeks arguing about “bubble size” while operators keep reporting the same split seams at the same station.
Custom Logo Things supports teams that ship real products, to real customers, through real carrier hands. My team usually deals with apparel, supplements, beauty kits, and compact hardware. A good mailer keeps repeat handling costs lower and helps fulfillment keep moving, especially during peak weeks when every extra second counts. The wrong bag does not usually explode in one month-end meeting; it quietly spreads rework across procurement, customer support, and reverse logistics.
There is nothing glamorous about mailers at first glance. What matters is whether they hold up after heat, vibration, stacking, and returns, and whether people can use them without feeling like they’re fighting the bag. That combination is what this guide sticks to.
Quick Answer: Compare Bubble Interior Poly Mailers Performance
For anyone trying to compare bubble interior poly mailers performance in a way that still helps budgets and service levels, the practical answer is simple: skip the obvious shortcuts. The winning choice is rarely the thickest shell, the biggest bubble, or the loudest print color. It is the bag that matches your actual item profile, handling risks, and seam requirements.
In active fulfillment operations, a commercial-grade option often wins for non-fragile goods, because it usually balances durability with flow speed. Apparel, soft goods, and low-risk accessories generally perform well with a stable film build and dependable seal behavior. Returns become the tipping point when they climb. Once return rates rise, you need higher seam security, stronger barrier stability, and closures that remain honest after heat cycles, cold docks, and dust or talc on the line.
My baseline when I compare bubble interior poly mailers performance is always the same:
- Puncture resistance: whether a clip, corner, or conveyor lip tears through film under pressure.
- Bottom compression strength: how it survives stacking, pallet movement, and vibration over long routes.
- Seam durability: if seam failures appear before the buyer signs off at delivery.
- Seal integrity: if the closure stays stable during dwell time and repeated handling.
- Fill speed: whether operators can align, insert, and close with a rhythm that doesn’t drag throughput down.
That last category usually decides which “cheap” choice survives actual shipping. A bag three cents cheaper is a fake win if it slows packing by even two seconds per unit, because labor, exception handling, and reinsert cost scale ruthlessly. My compare bubble interior poly mailers performance view is always based on landed outcomes, not line-item prices.
A useful data point from field work: moving from around 1.5 mm to 3 mm internal cushioning can materially lower damage on unstable transport routes, even if package dimensions stay unchanged. I’m not using a generic manufacturer sheet for that claim; it comes from multiple runs where route turbulence mattered more than appearance. That said, not every SKU needs the heavier profile.
A mailer that clears one checkpoint is not done; it has to survive loading, sorting, transfer shocks, and the final unboxing moment.
A practical rule to start with is to select the lightest construction that passes your damage threshold in a pilot that reflects daily shipping behavior. Soft goods often justify a commercial-tier baseline first. Add rigid inserts, edge-loaded product, or elevated return risk, and the score moves to stronger construction. Bubble count can help, but it is not the final decider.
For broader planning, compare this category against other packaging formats in Custom Packaging Products, then narrow to a validated structure in Custom Poly Mailers once your internal risk map is locked. It is usually the safer path, even if people initially ask why not just pick one SKU now.
If you need external references for supplier conversations, use ISTA test protocol library and packaging references from packaging.org. Those resources do not replace hands-on verification, but they narrow the negotiation space and cut through vague claims.
Top Options Compared: compare bubble interior poly mailers performance by design
The easiest way to keep this decision logical is to map three families: entry, commercial, and pro-grade. If you start by comparing a thin promotional piece with a reinforced operations bag, your results will be distorted before the test even starts. Then the sales team wins, not your metrics.
Entry-tier options generally pair a light film with smaller bubbles and minimal adhesive, and they work in short-distance, low-risk, soft SKU streams. Commercial-tier designs usually bring better thickness consistency, stronger seams, and stronger recovery after compression. Pro-grade builds add deeper reliability with tougher outer films, stronger seals, and more predictable bubble stability under repeated weight cycles.
Bubble pattern selection is often the most under-discussed variable. Micro-cell patterns cushion light loads well and can be cost-effective, but in some lanes they flatten quickly after repeated stacking. Standard-cell patterns sit near the middle for mixed fulfillment. Reinforced geometries usually hold better under puncture-heavy handling when outer film is around 2.5 to 3 mil and closure area is broad enough to reduce peel drift over time.
Film architecture becomes decisive as routes get aggressive. Mono-layer polyethylene is cheap and easy to process, while co-extruded or reinforced films usually deliver better seal force and abrasion life. If bags hit tight corner turns, rough bagging lanes, or abrasive sortation machinery, I usually see meaningful return reduction from film upgrades. The cost often pays for itself on the first serious wave of avoided rework events.
Here is a practical matrix I keep for initial screening:
| Design Tier | Typical Thickness | Best For | Price Range at 5,000 Units | Main Risk |
|---|---|---|---|---|
| Entry | 1.8-2.2 mil outer film | Apparel, non-fragile soft goods | $0.12-$0.20 per unit | Higher seam and puncture failure on rough routes |
| Commercial | 2.2-2.8 mil outer film | Mixed ecommerce SKUs, light accessories | $0.18-$0.28 per unit | Can deform under heavy stack pressure |
| Pro-grade | 2.8-4.0 mil outer film | Electronics, hard goods, high return-risk orders | $0.26-$0.42 per unit | Higher freight cost and slower fill if overbuilt |
This is where teams get misled by the price tag. A unit at the low end may still destroy margin if it drives a 1.2% increase in defects and rework. I compare performance using five checkpoints: puncture force, seal peel force, compression recovery, fill speed, and observed defect rate. When one field metric drifts, the whole story changes.
Specialty variants can still be useful, but only with a clear use-case. Anti-static films can be right for electronics handling. Recyclable blends may support marketing goals but do not automatically solve seam risk. Reseal channels may lower returns on reverse logistics routes, though poor adhesive placement can create an operator slowdown that wipes out any gain.
In ordinary domestic conditions with soft goods, commercial tiers often provide the best baseline value. Hard edges, uncertain carrier behavior, and elevated return rates usually push teams toward pro-grade material. That is where compare bubble interior poly mailers performance becomes a risk-control process, not a materials debate.
Detailed Reviews: Compare Bubble Interior Poly Mailers Performance in Use
To compare bubble interior poly mailers performance in real fulfillment, treat each product family as its own test case. A hoodie does not fail the same way as a charger. A perfume insert does not fail the same way as a metal lid. Bags that look acceptable in still photos can fail within days under route, handling, and return conditions.
Apparel usually reveals operational friction before catastrophic failure. The material may not need extreme puncture defense, but it needs stable opening behavior, controlled insert fit, and no edge snapping after repeated closures. A commercial mailer with smooth bubble response and reliable peel strip can hold apparel lines well in volume. In many of my projects, the top complaint is not rupture but ergonomic friction: film memory, snag points, and operators needing extra hand motion on close.
Electronics behave like a different universe. Power banks, adapters, and compact modules expose seam fatigue faster than most teams expect. With electronics, re-close and relabel events are more common, so weak adhesives and poor seam control multiply costs quickly. I’ve had cases where a bag passed initial visual acceptance yet failed under repeat station handling after a day of relabeling and return prep.
Glassware and brittle items are the truth serum for bad designs. In this category I usually require denser bubble geometry, reinforced seams, and clearly documented peel thresholds before approving. A realistic standard is a 10-kg corner-crush reference plus consistent peel targets under defined test conditions. If a supplier can only share marketing language and not method details, that option does not belong in a serious comparison.
Catalogs, inserts, and printed sets can look fine yet still disappoint customers if the edge has abrasion and soft tear paths. Presentation quality is an operating outcome, not an aesthetic afterthought, especially in humid climates or where humidity and vibration combine on the route. A controlled closure and stable bubble recovery protect print and visual clarity more than a simple plain bag.
Across several pilots, the same issues repeat:
- Loading slip caused by narrow openings, slick film, or unbalanced static is common in low-end options.
- Heat spikes in docks or storage can reduce adhesive hold in weak films, even if first seals look good.
- Seam failures often appear around a few hundred units, so tiny samples can lie.
- Thin films flatten under stack loads and may not recover after repeated compression cycles.
- Higher-quality designs often improve line handling because they feed cleaner and seal with more predictability.
That last point is not cosmetic. In a 1,000-piece test, I measured reseating events, off-spec seal counts, and wrinkle or snag events that interrupted labeling. A bag can pass visual checks and still cost several seconds per unit in hidden labor. At scale, those seconds become measurable losses.
My field protocol combines mixed-drop simulation, conveyor scrape tests, corner-crush exposure, and vibration trials after a 48-hour transport delay. The goal is not to punish suppliers; it is to find weak spots before customers do. Keep content, folds, closure force, and route assumptions identical across options to keep the comparison valid.
An unexpected pattern from multiple campaigns: sometimes a lower-cost mailer outperforms a premium-looking option in puncture resistance when the bubble density and film toughness are better. Visual finish and technical reliability do not move in lockstep. If the print looks premium but corners fail, the replacement cycle still tells the truth.
“Equivalent” is not a real answer unless you define it. Ask for peel-force profiles, gauge tolerance windows, and defect limits. Ask whether the data is first-article, pre-production, or production lot sampling. Ask whether your mailer is co-extruded or single-layer in the final configuration. Any vague response introduces unknown risk.
In purchasing terms, the top performer is the bag that absorbs worst-case handling without hurting throughput. The second-best choice is often a little pricier but clearly lowers returns and exceptions. The weakest option is usually a low-cost bag that creates line delays and recurring rework. Savings on paper can become a service burden very fast.
Price Comparison and Total Cost of Performance
Unit price is easy to compare and easy to misuse. To compare bubble interior poly mailers performance in a way finance will trust, use landed cost per shipped unit. That includes inbound freight, handling labor, rework overhead, returns, and write-offs, not just the piece price. Safe arrival and service continuity are the target, not the lowest decimal on the quote.
At a glance, $0.14 looks better than $0.24. In one pilot, adding 1.5 minutes of troubleshooting per 100 units and a 1% rise in returns made the two options equivalent by month-end. Every team then faces the same reality: labor penalty, replacement costs, and extra support touches become the real line items.
Freight density and cube effects can flip the math too. A thicker bag may reduce breakage but also increase package dimensions and raise lane-level costs. The cheaper bag can become the pricier one before your parcel exits the last fulfillment center, especially under tight shipping lanes.
Use this formula early in business reviews:
True delivered value per 1,000 units = (unit cost x 1,000) + initial setup + inbound freight + average returns cost + labor penalty + rework cost
Return costs need hard numbers, not adjectives. A damage replacement can run $8-$18 once outbound freight, support time, and replenishment handling are included. On low-margin catalog and subscription SKUs, that number can erase margin quickly if it drifts upward by even a few basis points.
Build the table below into your shortlist review before committing to volume:
| Option | Indicative Unit Cost | Packing Speed | Damage Risk | Best Use Case |
|---|---|---|---|---|
| Entry | $0.12-$0.20 | Fast if fit is simple | Higher on rough routes | Low-risk soft goods, promotions, local fulfillment |
| Commercial | $0.18-$0.28 | Usually the best balance | Moderate | General ecommerce, mixed SKU sets, standard domestic shipping |
| Pro-grade | $0.26-$0.42 | Can slow fill if overbuilt | Lowest when used correctly | Fragile, high-value, or high-return SKUs |
Setup spend is easy to underestimate. Color approval, pre-production proofing, and packaging prep have labor and delay costs that sit outside unit cost. If artwork leadership drives the decision before mechanical performance, teams may end up redesigning too late. I recommend locking structure behavior first, then running graphics.
Oversizing quietly kills margin, too. Too much internal space causes movement, abrasion paths, and noise during handling. A tighter but compliant size profile usually performs better than a bulky shell that looks impressive while creating internal friction. If things are rattling around, the bag is not controlling the payload.
The lowest price is usually correct only in narrow cases: short campaigns, soft non-fragile goods, and tightly controlled local routes. Outside those conditions, hidden costs from returns and labor usually catch up. This part of compare bubble interior poly mailers performance is not glamorous, but it is the part that matters in a monthly P&L review.
Shipping Process and Testing Timeline for Bubble Interior Poly Mailers Performance
A solid comparison needs a short, structured pilot plus disciplined execution. A 14-day window is usually enough to see seam issues, handling failures, and return movement without stalling operations. In every run I run, I lock product mix, station instructions, closure method, route exposure, and operators so the dataset stays comparable.
Use a timeline like this:
- Days 1-2: sample receipt, station calibration, and first-fit checks at packing.
- Days 3-6: controlled trials of 200-300 units per option with documented seal checks.
- Days 7-10: route stress checks with drop, vibration, and temperature variation.
- Days 11-14: claim review, damage logging, and cost reconciliation with photos and reason coding.
Sample size is more important than pretty setup. A sample of 24 units mostly catches obvious defects. Two to three hundred units per option usually exposes seam splits, peel drift, and puncture trends while keeping disruption manageable. A supplier unable to support that scale is not yet a mature comparison partner in my book.
Set pass/fail rules before day one so teams do not negotiate outcomes later. I typically use:
- Seal integrity: at least 95% pass after a 48-hour dwell period.
- Seam complaints: under 2% internal or customer complaint incidence.
- Visual defect rejection: no more than 1% of inspected units.
- Damage delta: no more than 1.5% increase versus current benchmark.
Those thresholds are a baseline, not law. Fragile products need tighter gates. Stable low-risk flows may tolerate wider variation. Consistency is the variable that makes a decision defensible; every team has a slightly different appetite, but no team gets a robust conclusion without shared criteria.
Plan and timeline risk also belongs in your scorecard. Print revisions, die cuts, and replenishment lead times create bottlenecks earlier than material failure in many operations. During season peaks, that gap shows up fast when packaging becomes the first bottleneck, not the last.
During testing, track daily damage, labor impact, and exception notes by category. Photos create visibility, while reason codes improve decision quality. If you can separate puncture, compression, seam, and fit defects, your final choice becomes much clearer. If not, people debate anecdotes and never settle.
A stop rule prevents endless pilots. If a mailer is 1.5% worse on damage or returns in week one, remove it unless another metric has clear proof. Keep the runner-up alive and keep moving toward evidence, not politics.
For practicality, pair internal pilot work with ISTA-style simulation and one standardized line checklist. That gives enough rigor for management decisions without building a full external laboratory workflow.
How do you compare bubble interior poly mailers performance for your shipping mix?
Use a weighted scorecard tied to your actual flow: durability, total cost, fill speed, presentation quality, and return profile. This makes your choice measurable and stops people from arguing from memory instead of data.
My default weights are a good starting point if your mix is mixed ecommerce: durability 35%, total cost 25%, fill speed 20%, brand presentation 10%, and return-policy impact 10%. The exact split shifts by business model, but this framework gets decisions made fast.
Different operations move priorities in different directions. Fashion and beauty teams usually emphasize branding and throughput. Electronics and hardware teams usually prioritize durability and closure control. Exchange-heavy programs usually need stronger reclose and return-cycle behavior. The right answer is always your order mix, not an internet benchmark.
Product type still decides construction. Tools with metal-free edges, cosmetics in glass packaging, compact electronics, and odd-shaped accessories generally need stronger corner design and puncture defense. Flat soft garments usually do not need that level of armor. One-size-fits-all purchasing sounds efficient, but it often means overpaying on low-risk SKUs and underprotecting high-risk ones.
Fit is the biggest performance lever I see missed. Too much slack creates friction and movement. Too little gap increases closure stress and operator effort. Both raise defect risk. In many lanes, tightening your size matrix improves compare bubble interior poly mailers performance more than a one-level jump in bubble depth.
These questions usually expose hidden risk early:
- What is the maximum package weight this mailer will carry?
- How many hard edges or corners are likely per order?
- What is your route profile: dwell time, transfer roughness, and temperature exposure?
- What is your current return rate and where do returns cluster?
- Is unboxing presentation or damage prevention the primary requirement?
Route instability and frequent exchanges usually justify keeping a premium option in your approved stack. Stable, short-haul domestic flows with soft goods can often stay on a commercial tier without reliability loss. Most teams do not need the priciest mailer at all volumes. They need one that kills avoidable failures.
Ask variance data before committing final volumes. Batch inconsistency is the silent margin killer. A strong sample can hide weak lot quality if incoming tolerance varies. If a supplier cannot explain thickness tolerance, seam consistency, and lot-level defect behavior, you are carrying that risk in your balance sheet.
Design still matters for brand experience, especially when unboxing influences repeat buys, yet performance must sit first. A premium look with weak closure creates both branding and logistics issues. I would rather run a simpler visual when it consistently survives than keep a “nice” style that causes returns and rebox churn.
For many teams, a two-tier model is the best compromise: one premium-reliability option for fragile or high-return SKUs, and one commercial tier for standard orders. It keeps operational complexity manageable while putting risk control where it matters most, and yes, that tends to be where the returns are highest.
Our Recommendation and Next Steps for Final Selection
My recommendation is practical, not fancy: use one premium-reliability bag for fragile and high-return SKUs, one commercial-tier bag for routine fulfillment, and run both through a full-cycle comparison before volume commitment. That keeps compare bubble interior poly mailers performance decisions based on evidence instead of assumptions.
Step one: map your top three risk zones, usually drop impact, puncture points, and friction scuffing. Score each option against the same risk list. If return prevention drives your economics, give seam and puncture higher weight. If labor bottlenecks are your pain point, increase fill speed and handling comfort in the scorecard.
Step two: source three samples per supplier and run each through the same packing process with shared SKUs, closure pressure, labels, and operators. Capture photos at intake, post-seal, and post-delivery. Tag anomalies with reason codes so “bad” is traceable, not subjective.
Step three: run a 14-day pilot with 50 orders per option per route. That duration usually reveals whether transit stress, return behavior, and labor impact improve enough to justify cost. If a candidate misses early checkpoints, don’t keep it around for appearance reasons; looks do not make bags resilient.
Step four: schedule a quarterly check-in to prevent specification drift. Film lots change, adhesive suppliers switch, and print process settings drift with time. A light re-test protects your current service level and catches weak batches before they become recurring volume pain.
In procurement language, the winner is usually not the lowest sticker price but the lowest preventable total expense. A cheap bag that increases failures becomes expensive fast. A slightly heavier bag that protects fragile goods can be the right business choice. Honest compare bubble interior poly mailers performance starts with route-level data, clear logs, and transparent cost modeling.
If I had to set a rule for teams under pressure, it is this: pick the design that improves actual damage, labor efficiency, and return cost in your top-risk lanes, then prove it in a 14-day cycle before you sign the full purchase order. If you do that, you’ll probably spend less, rework less, and spend less time arguing.
How do I compare bubble interior poly mailers performance for brittle products like glassware?
Use higher-density bubble geometry, reinforced side seams, and friction-aware inner surfaces. Require a documented 10-kg corner crush benchmark and a published seam peel threshold. Route brittle SKUs separately, and apply a strict reject rule if seam peel defects appear, even if the stronger choice adds 10%-15% unit cost. In my experience, that added cost is usually lower than one full breakage replacement cycle. I am not saying the exact threshold is universal, but it is a solid minimum for most domestic operations.
What is the fastest process to compare bubble interior poly mailers performance before switching suppliers?
Run a 14-day comparison pilot with fixed routes and a standardized packing method. Map damage reason codes to each option and keep rejection gates visible from day one. A practical trigger is if an option is 1.5% worse on damage or returns after week one, then it should leave the shortlist unless another approved metric proves a clear offset. This keeps teams from dragging a weak lot through a prolonged trial.
Which metrics should be in bubble interior poly mailers performance price comparison?
Track landed cost per shipped unit, rejection rate, return handling cost per case, packing labor per order, and claim costs. Bubble count is useful only as a component metric. What usually moves margin are puncture behavior, seam retention, and compression response under warehouse stacking. Those factors should dominate your comparison model even when suppliers talk up graphics.
Can I predict timeline risk when sourcing low-cost bubble interior poly mailers?
Yes, with realistic planning inputs. Include sample lead times, proof cycles, and replenishment buffers in one timeline model before purchase. Ask for lot-level shipment dates and include extra cushion stock for seasonality spikes. Many sourcing failures I have seen come from late arrivals and process delays, not just raw material failures.
How many returns are acceptable when comparing bubble interior poly mailers performance?
For many ecommerce programs, sustained damage-related returns under 1% on standard goods are workable. Crossing 1.5% is usually a signal that material choice, process handling, or both are misaligned. Separate avoidable and unavoidable return costs, and hold a higher-risk option only if the speed or unit cost gains are documented and intentional.


