What Custom Anime Stickers Are and Why Small Details Matter
Custom anime stickers can look flawless on screen and still disappoint in hand. The usual culprits are not dramatic. Thin linework. Weak contrast. A cut path that nips into the hair. A glossy finish that turns pale highlights into glare. Tiny eyes that looked crisp at 600% zoom and turn muddy on a 2.5-inch die-cut sticker.
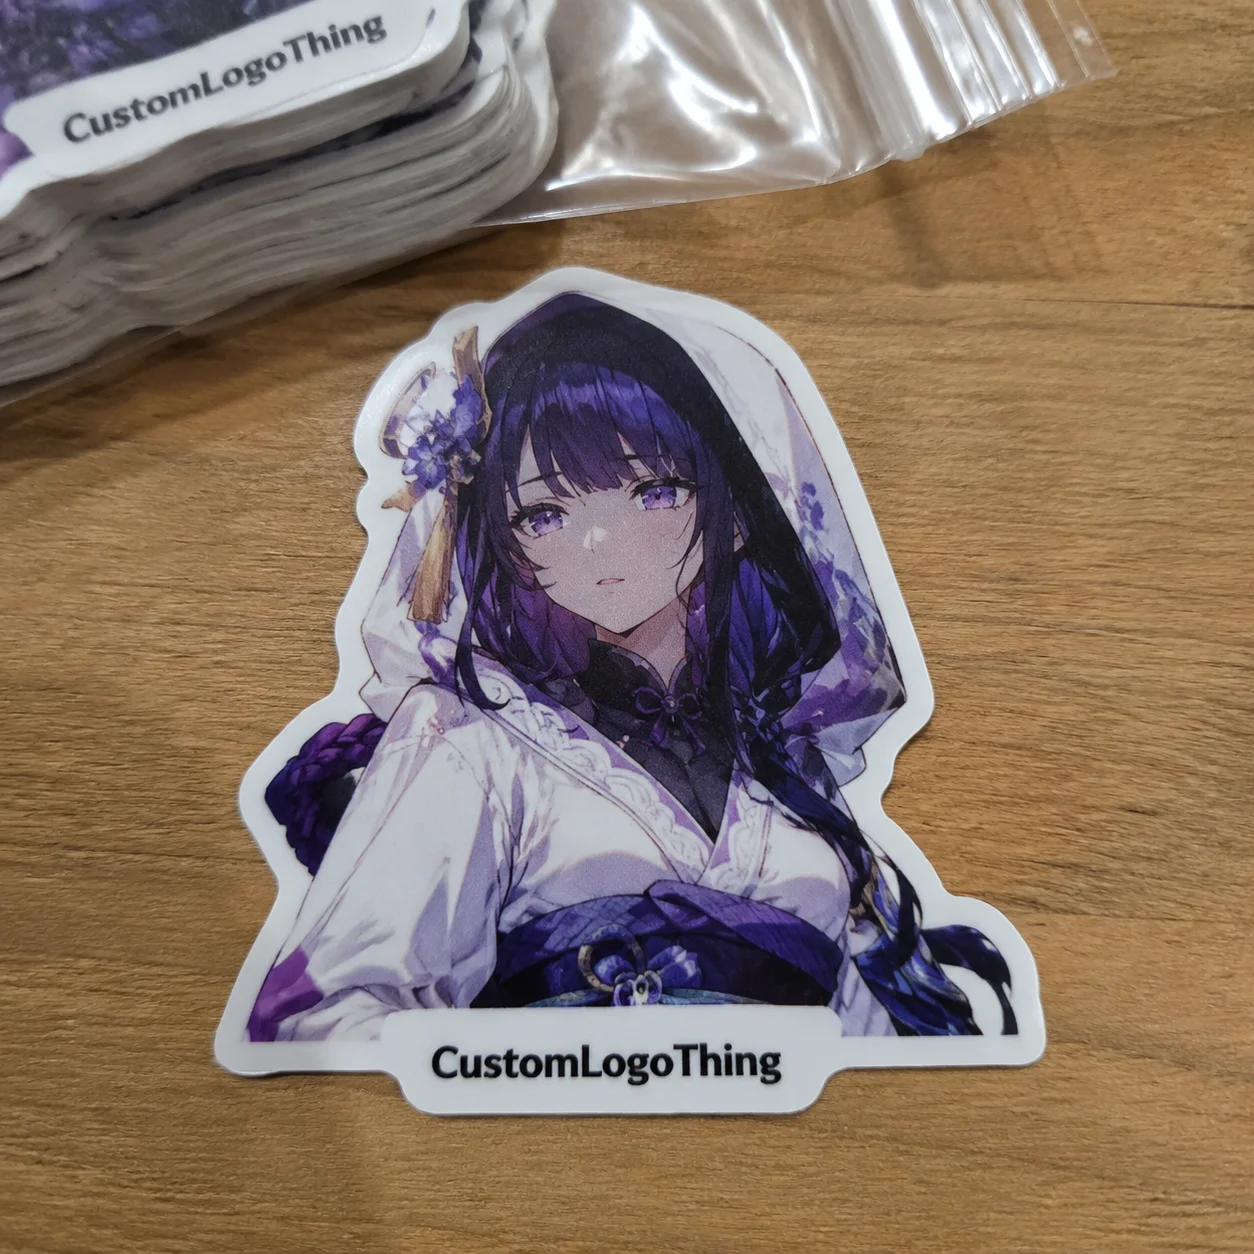
In production terms, custom anime stickers are printed adhesive graphics based on original characters, mascot art, manga-inspired panels, chibi designs, fan-style illustrations, logos, themed brand artwork, or character-driven packaging. They show up as artist merch, convention giveaways, ecommerce inserts, subscription box extras, laptop decals, water bottle stickers, phone case decoration, planner sheets, and collector packs with different expressions or poses.
Buyers often use “sticker,” “label,” and “decal” as if they are interchangeable. Printers usually do not. A decorative sticker is made to be displayed, collected, traded, or sold as merch. A label needs readable product information, adhesive compatibility, and sometimes roll format for faster application. A decal is often expected to be tougher, more surface-specific, or outdoor-rated.
Format matters too. Kiss-cut sheets leave the backing intact while each sticker peels out individually. Die-cut singles trim both the printed sticker and liner to the final silhouette. Vinyl is usually chosen for moisture resistance and handling durability. Paper stock works for short-term indoor use, packaging seals, journals, and low-cost inserts. None of this is glamorous, but it decides whether the finished piece feels like merch or a cheap afterthought.
Buyer-side rule: do not stop at “Can this be printed?” Ask, “Will it stay sharp, peel cleanly, match the art style, and feel worth keeping?”
Anime-style artwork asks more from the file than a simple one-color logo. Fine outlines, saturated color, gradients, eye highlights, blush tones, hair reflections, speech bubbles, and tiny facial details all need enough resolution, contrast, and breathing room around the cut edge. A sticker is small. Small is ruthless.
How Anime Sticker Printing Works From Artwork to Finished Sheet
The normal production path starts with artwork review, color setup, bleed creation, cut line setup, proofing, printing, lamination or coating, cutting, quality check, packing, and shipping. Each step protects against a boring but expensive failure: fuzzy lines, shifted cuts, dull color, poor peel performance, scratched surfaces, or bent corners in transit.
Digital printing is the standard choice for short to medium runs because it handles full-color anime art, gradients, shadows, and multiple designs efficiently. A batch might include ten expressions, three mascot poses, and a handful of mini icons on one sheet. Digital print keeps those variations manageable without the setup burden of plate-based production. For larger repeat runs, the production plan may change, but most sticker projects start here because flexibility matters.
Kiss-cut and die-cut deserve clean definitions. A kiss-cut sticker is cut through the printed sticker layer but not through the backing liner, so the customer peels it from a larger sheet or square backing. A die-cut sticker is trimmed all the way through the liner, giving the whole piece the same outer shape as the art. Die-cut singles look merch-ready. Kiss-cut pieces are easier to peel, especially for small shapes, thin tails, weapons, hair spikes, wings, and tiny accessories.
Sticker sheets need more planning than buyers expect. Character sets, expressions, poses, icons, speech effects, and mini-scenes all need spacing between kiss-cut lines. A practical starting range is about 0.08 to 0.125 inch, depending on material, sheet size, and cutter tolerance. Peel tabs can help. Rounded corners help. Fewer needle-thin bridges help even more. A sheet that looks cute but needs tweezers to peel is not a premium experience. It is a small punishment.
Even when the illustration is raster artwork, the cut line is usually vector. That path tells the cutter where to travel. Clean paths matter around hair, weapons, wings, tails, speech bubbles, and magical effects. Smooth curves reduce ragged edges. Fewer anchor points make cutting more predictable. Overly detailed paths can slow production and increase the chance of a rough edge or weak shape.
Proofing is the checkpoint buyers should treat seriously. Review spelling, final size, color expectations, border thickness, cut margins, sheet layout, quantity per design, and whether white ink or clear material changes the finished look. A proof is not just a polite formality. It is the last cheap place to catch a problem.
Materials, Adhesives, and Finishes That Fit Anime Artwork
Material choice drives how the art looks, how the sticker feels, and where it can survive. White vinyl gives strong opacity and bright color because the print sits on a stable white base. Clear vinyl works when the design intentionally uses the background surface, such as a transparent aura around a character or a window-style decal. Holographic and glitter films add movement and collector appeal, but they can swallow delicate linework if the illustration is already crowded.
Paper sticker stock is economical and useful for journals, packaging seals, thank-you inserts, and short-term indoor promotions. Matte BOPP is common for product label applications because it resists moisture better than plain paper and has a smooth retail packaging feel. Removable materials are useful for planners, temporary promotions, collector pages, and surfaces where buyers do not want residue. They are usually not as durable as permanent adhesive, so the use case has to lead the decision.
| Material or Finish | Best Use | Buyer Watch-Out | Typical Cost Impact |
|---|---|---|---|
| White vinyl with gloss laminate | Laptops, bottles, merch singles, convention giveaways | Gloss can show glare under bright display lighting | Standard to moderate |
| White vinyl with matte laminate | Premium illustration stickers, soft character art, collector packs | Matte may slightly soften perceived saturation | Standard to moderate |
| Clear vinyl with white ink | Window effects, transparent borders, glass or plastic surfaces | White underbase must be planned or pale colors may disappear | Moderate to higher |
| Holographic or glitter film | Special drops, chase stickers, magical effects, collector items | Fine facial details can lose contrast over busy reflective film | Higher |
| Paper stock | Packaging inserts, journals, indoor labels, low-cost handouts | Not ideal for water bottles or heavy handling | Lower |
Laminate changes the art more than many buyers expect. Gloss boosts saturation and shine, which can make bold chibi art and high-contrast mascot artwork pop. Matte cuts glare and gives a print-like finish that suits softer palettes, manga-style linework, and premium packaging. Holographic and sparkle effects work best when the art includes open areas that let the film show through. If every square inch is packed with tiny details, the shine has nowhere to go except straight over the face.
Adhesive should match the surface. Permanent adhesive is common for bottles, laptops, hard cases, and merch customers who expect the sticker to stay put. Removable adhesive fits planner use, temporary promotions, and collector pages. Repositionable adhesive can be useful, but it depends on the stock and supplier capability. Durability adds another layer: water resistance, scratch resistance, UV exposure, freezer use, and outdoor use can push the spec toward vinyl, BOPP, added laminate, or a more specialized adhesive.
Clear and specialty films need extra care. Thin white highlights, pastel hair, pale skin tones, and tiny eye details may need a white underbase or stronger contrast. Without it, the surface color can show through and flatten the character. For branded packaging, check whether the sticker must match labels, insert cards, or Custom Labels & Tags. A character sticker in soft matte next to a high-gloss label can look accidental unless the contrast is intentional.
Pricing, MOQ, and Unit Cost Factors Buyers Should Expect
Sticker pricing comes from a stack of small decisions: size, quantity, number of designs, material, finish, cut complexity, sheet layout, proofing time, packing style, and shipping method. A simple 2-inch round sticker on white vinyl is faster and cheaper to set up than an intricate die-cut character with hair spikes, props, wings, tails, and narrow negative spaces. The machine time is different. The setup risk is different. The inspection time is different too.
MOQ, or minimum order quantity, is not only about whether a manufacturer can print a small batch. Many digital producers can make low quantities, but the unit cost drops when artwork review, proofing, machine setup, material handling, and packing labor are spread across more pieces. A run of 100 die-cut stickers may feel expensive per unit because setup time is nearly the same as a larger run. At 500 or 1,000 pieces, that setup cost is distributed more efficiently.
Multiple designs can be efficient if they are ganged together on a shared sheet or printed in the same batch. Still, every design needs review and cut setup. Ten character expressions may be a smart merch collection, but the producer still checks line quality, bleed, safe margins, and cut paths for each face or pose. If sizes, materials, or finishes vary, quoting gets less tidy. Shocking, I know.
Premium add-ons raise cost in predictable ways. Holographic film, glitter film, spot effects, extra-thick laminate, individual bagging, backing card assembly, barcode labeling, and retail pack-out all add material or labor. A backing card may be worth it for retail because it makes the sticker feel like a finished product instead of a loose insert. For ecommerce bundles, a lower-cost kiss-cut sheet may do the job without extra packaging.
Actual prices vary by supplier, country, material market, and shipping method, but the pattern is consistent. Plain paper stickers are usually the budget tier. White vinyl with standard gloss or matte laminate sits in the practical middle. Clear film with white ink, holographic film, glitter film, heavy laminate, and individual packing move into higher-cost territory. Rush production and air freight can wreck a tidy budget fast. Nobody enjoys discovering that after the quote is approved.
| Spec Example | Common Use | Typical Price Behavior |
|---|---|---|
| 2-inch round paper sticker, 500 pieces | Packaging seals or thank-you inserts | Lower unit cost, limited durability |
| 3-inch die-cut white vinyl, 1,000 pieces | Artist merch or laptop decals | Moderate unit cost, strong all-purpose value |
| 5-by-7-inch kiss-cut character sheet, 500 sheets | Collector sets, planners, convention tables | Cost depends heavily on number of cuts |
| Holographic die-cut sticker with bagging | Limited drops or premium merch packs | Higher cost from specialty film and packing labor |
For a clean quote, send exact specs: size, quantity per design, material, finish, cut style, indoor or outdoor use, packaging needs, delivery location, and target deadline. If the stickers will be bundled with custom printed boxes, mailers, cards, or other Custom Packaging Products, say that early. Color, finish, and packing flow are easier to align before the order is split across separate jobs.
Process and Timeline: What Happens Before Stickers Ship
A normal ordering sequence is simple: prepare artwork, submit specs, receive a quote, approve pricing, review the digital proof, approve production, print, finish, cut, inspect, pack, and ship. The buyer controls the front end most. Clean files and quick proof responses can save days. Unclear sizing, missing bleed, or vague finish notes can stall the order before a press runs.
Proofing is often the biggest controllable timeline variable. Low-resolution files, flattened screenshots, missing transparent backgrounds, uncertain sticker dimensions, and unclear packing notes all create questions. A proof should show final dimensions, cut line placement, border thickness, color notes, quantity per design, sheet layout, and whether backing cards, bagging, or retail-ready packing are included.
Timeline depends on volume, material availability, finish complexity, queue capacity, revision count, inspection requirements, and shipping distance. Standard vinyl singles with clean artwork usually move faster than specialty holographic sheets with many kiss-cut shapes and individual retail packing. Rush orders may be possible when artwork is clean and materials are standard. Specialty films, complex sheet layouts, and many versions reduce speed because they require more setup and inspection.
Build buffer time for conventions, product launches, subscription box assembly, retail drops, influencer mailers, and holiday promotions. If the launch date is fixed, work backward from the date the stickers must be in hand, not the date they ship. Packaging teams still need time to assemble bundles, apply labels, pack cartons, and handle freight or parcel delivery. For shipping reliability and transit testing concepts, the International Safe Transit Association is a useful authority to know, especially if stickers are part of a larger kit or packaged product.
One practical habit helps: approve proofs from a desktop monitor, not only from a phone. Phone screens exaggerate brightness, and small art can look deceptively crisp when scaled down. Check the proof at actual size if possible. A 0.75-inch face detail that looks fine on a phone preview may not hold up on a physical sticker.
Common Mistakes That Make Anime Stickers Harder to Print
The first mistake is uploading low-resolution screenshots, compressed social media images, or artwork flattened at the wrong size. Anime linework and facial details blur quickly when a 900-pixel image is stretched into a 4-inch sticker. For raster art, 300 DPI at final print size is a practical baseline. Higher resolution can help for detailed illustrations, but it cannot restore detail that was never in the file.
Extremely thin outlines create another problem. A 0.25-point hairline may be visible on screen but weak in print, especially after laminate, cut tolerance, and normal viewing distance are considered. Tiny text, narrow cut bridges, sharp interior corners, and sliver shapes can create weak stickers or difficult peeling. If a character has hair spikes, swords, ears, horns, or floating effects, simplify the cut path enough to protect the shape.
Missing bleed and unsafe borders are common. Bleed means artwork extends beyond the cut line, often around 0.0625 to 0.125 inch depending on the supplier’s requirement. Safe margin means critical details sit inside the cut line with room to spare. Without bleed, tiny shifts can reveal white slivers. Without safe margin, the cut may trim into eyes, fingers, lettering, or outlines.
Color expectation is a quieter mistake. Neon RGB colors, screen brightness, and specialty effects cannot be judged accurately from a phone display. CMYK printing has a different color range than a backlit screen. Holographic and glitter films change appearance with angle and light. Clear film changes with the surface behind it. If a precise brand color matters for package branding, share reference values and ask what tolerance is realistic.
Copyright and licensing deserve a direct mention. Buyers should use original art, commissioned artwork with commercial rights, licensed properties, or brand-owned characters. Pulling an anime image from search results and printing it for resale can create legal problems, and many responsible printers will refuse the job. The safest file is one you own or have written permission to use commercially.
Ordering mistakes can be just as costly as art mistakes. Paper stock is usually a poor choice for water bottles. Loose singles may not work for retail if the store expects barcode labels or hang-ready packs. Approving a proof without checking scale can turn a detailed manga panel into a tiny unreadable rectangle. If the sticker is part of a broader packaging program, line up the sticker spec with the box, insert card, label, and unboxing experience before production starts.
Next Steps to Prepare Files and Place a Confident Order
A good order starts with a plain checklist. Choose the sticker purpose, surface, size, quantity, finish, cut style, and format. Decide whether you need die-cut singles, kiss-cut singles, rolls, or sheets. A merch table may need individual die-cut pieces that are easy to display. A subscription box may need compact sheets that pack flat. A packaging seal may be better as a roll label if it will be applied in volume.
- Purpose: merch, giveaway, packaging insert, product label, collector sheet, or retail pack.
- Surface: laptop, bottle, phone case, paperboard box, glass, pouch, journal, or planner page.
- Material: white vinyl, clear film, holographic film, glitter film, paper, BOPP, removable stock, or outdoor-rated vinyl.
- Finish: gloss, matte, soft-touch style laminate, sparkle effect, or specialty film.
- Cut style: die-cut single, kiss-cut single, kiss-cut sheet, roll label, or square-backed decal.
- Pack-out: loose bulk, counted bundles, individual bags, backing cards, barcode labels, or retail-ready sets.
Prepare artwork at final size or larger, ideally 300 DPI for raster illustrations. Keep edges clean. Separate the background if the sticker needs a shaped cut. Leave room for bleed and safe margins. If vector art exists, keep editable paths available. If the art is painted or raster-based, a vector cut line can still be added around the silhouette.
Name files clearly. “Sticker-final-final2.png” helps nobody. “ChibiDragon_3in_WhiteVinyl_Matte_500pcs.png” tells the estimator and prepress team far more. For larger sets, create a simple spec sheet listing each design, dimensions, material, finish, cut type, quantity, packaging request, and deadline. A clean spreadsheet or PDF is enough.
Ask for guidance if you are choosing between holographic and gloss vinyl, converting artwork for cut lines, laying out sticker sheets, or balancing budget against durability. A small adjustment before proofing can prevent a whole batch from feeling off. For sustainability claims, certified paper sources, recycled paperboard, or mixed-material packaging questions, the Forest Stewardship Council is a useful reference point, especially if stickers are paired with backing cards or printed inserts.
Custom anime stickers come out best when artwork, material, finish, Cost, and Timeline are treated as one connected production decision. Guessing from a screen preview is how small defects sneak in. A better order is built around real size, real surfaces, real handling, and a proof that has actually been checked. That is how you get a sticker that prints cleanly, peels well, survives its intended use, and feels like something fans or customers want to keep.
FAQ
What file type is best for custom anime sticker printing?
Vector files such as AI, EPS, or PDF are best for cut lines and simple artwork because they keep edges clean and scalable. High-resolution PNG, PSD, or TIFF files can work well for detailed anime illustrations if they are at least 300 DPI at final print size. Avoid screenshots, low-resolution JPEGs, and images pulled from social media because compression can soften outlines, gradients, and small facial details.
Are vinyl anime stickers better than paper anime stickers?
Vinyl is usually better for laptops, bottles, helmets, phone cases, outdoor use, or anything exposed to moisture and handling. Paper stickers can be a good budget choice for journals, packaging seals, thank-you inserts, or short-term indoor use. The right choice depends on the surface, durability expectations, finish, and price target.
How much do custom anime decals cost per piece?
Unit cost depends on size, order quantity, material, finish, cut complexity, number of designs, and packing requirements. Larger runs usually reduce unit cost because setup, proofing, and machine time are spread across more stickers. For an accurate quote, provide dimensions, quantity per design, material preference, finish, cut style, packaging needs, and deadline.
How long does it take to make custom manga-style stickers?
The timeline usually includes quoting, proofing, production, finishing, cutting, inspection, packing, and shipping. Clean print-ready artwork and fast proof approval help shorten the process. Specialty materials, complex sticker sheets, many designs, or rush shipping can change the schedule, so fixed event dates should be shared before quoting.
Can I order custom anime sticker sheets instead of single stickers?
Yes, sticker sheets are useful for character sets, expressions, mini icons, planner stickers, and collector packs. Each sticker shape needs enough spacing for clean cutting and easy peeling. Sheet pricing depends on sheet size, number of kiss-cut shapes, material, finish, and quantity.