Custom Rubik's Cube Stickers: Design and Order Tips
A puzzle cube feels premium or cheap before anyone solves a single side. Slightly crooked grids, sharp lifting corners, muddy print registration, or a glossy finish that scuffs after one afternoon can make a clever branded cube look like a leftover trade show trinket. Tiny product. Very visible flaws.
That is why custom rubik's cube stickers deserve more attention than buyers often give them. The cube mechanism matters, of course, but the stickers carry the branding, color, tactile feel, and most of the close-up inspection. A strong sticker set can turn a basic cube into a polished promotional giveaway, educational tool, retail novelty, desk gift, club item, or limited-edition merch piece. A weak set starts peeling before the campaign is over.
What Custom Rubik's Cube Stickers Really Change
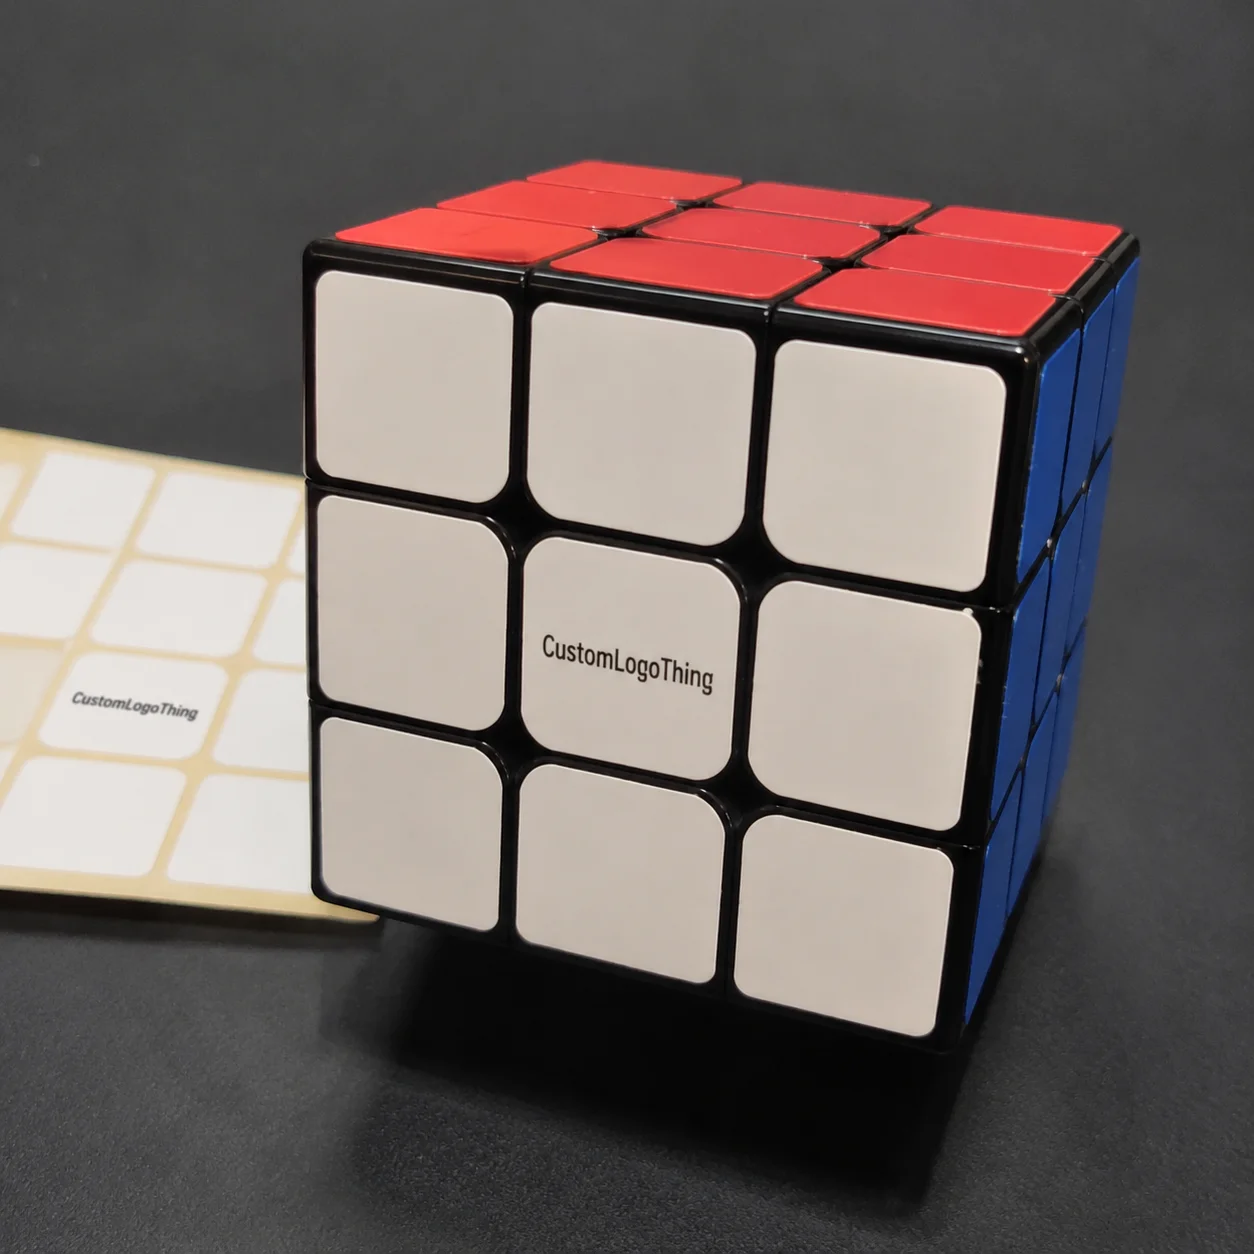
Custom rubik's cube stickers are precision-cut adhesive label sets made to cover or replace the visible square faces of a puzzle cube. Most are printed in full color on vinyl, PET, or coated label stock, then cut with rounded corners so each square sits with a consistent border.
They are not ordinary square labels. A cube sticker has to bond to plastic, tolerate finger oils, survive repeated rotation, resist corner abrasion, and still look clean from 8 to 12 inches away. That is a much tougher job than sitting flat on a box panel. Users keep touching the same tiny edges. The cube keeps moving. The tolerances do not care about anyone’s deadline.
Small differences show up fast. A 0.5 mm size change can make margins look uneven. A corner radius that is too sharp can lift. A thick laminate may feel durable on the spec sheet but rough along the moving gaps. On a playable cube, every face has to look intentional and turn without drag.
The first buyer decision is simple: is the cube meant to be played with, displayed, or handed out at the lowest practical cost? Playable branded cubes need better adhesive, cleaner die-cutting, and a finish that resists scuffing. Display cubes can handle more complex artwork because the stickers are not constantly scrambled. Low-cost event giveaways can use simpler materials, as long as expectations are realistic from the start.
Practical callout: Treat a cube sticker order like a small precision packaging project. The part is tiny. The tolerance is not.
How Sticker Materials, Adhesives, and Finishes Work on a Cube
Material choice controls the look, feel, durability, and price of custom rubik's cube stickers. Vinyl is often the most forgiving option because it has flexibility, decent scuff resistance, and good conformity on plastic faces. White gloss vinyl in the 70 to 100 micron range is common for promotional cubes that will be handled regularly.
PET, often called polyester film, feels crisper. It has better dimensional stability than soft vinyl, cuts cleanly, and gives a sharper edge profile. PET suits polished retail programs, premium desk gifts, and branded kits where the cube needs to look more refined. The tradeoff: PET is less forgiving during hand application because it does not stretch much. A crooked placement stays crooked.
Paper-based label stock is the budget route. Coated paper can look fine for a display cube, classroom activity, short-term sample, or one-day event. It is also more vulnerable to edge wear, moisture from hands, and scuffing in bags or pockets. I would not choose plain paper for a cube expected to look good after dozens of solves. That is asking a paper label to do a film label’s job.
Adhesive matters as much as face stock. A removable or repositionable adhesive helps during application, especially if someone is placing 54 tiny stickers by hand. A stronger permanent adhesive usually performs better after curing, often over 24 to 72 hours depending on the chemistry, pressure, surface cleanliness, and temperature. Some cube plastics are low-energy surfaces, which means a generic adhesive may not bond well even if the sticker looks fine on day one.
Finish changes appearance and handling. Gloss makes colors pop and helps bright brand palettes feel lively. Matte reduces glare and hides minor fingerprints better. Satin or soft-touch coatings can feel more upscale, but too much coating thickness around the edge can affect the feel of the cube. Lamination or a protective varnish is useful when cubes will sit in pockets, ship inside kits, or be handled at a trade show table all day.
Die-cut accuracy is the quiet hero. Each sticker needs consistent margins so the cube turns cleanly and the final grid looks balanced. A common target is a slight gap between stickers and moving cube edges, often around 0.5 to 1.0 mm depending on cube size and construction. The correct number comes from the actual cube, not a random template downloaded because it “looks close.” Famous last words.
| Material or Finish | Best Use | Typical Strength | Watch-Out |
|---|---|---|---|
| White vinyl | Handled promotional cubes | Flexible, durable, good color | Can feel softer at edges |
| White PET | Premium branded cubes | Crisp cut, stable dimensions | Less forgiving during application |
| Coated paper label stock | Short-use display or budget giveaways | Lower cost, easy printing | Scuffs and lifts faster |
| Gloss laminate | Bright retail or event graphics | Color pop, scuff protection | Shows fingerprints more readily |
| Matte or satin coating | Premium desk gifts | Reduced glare, refined feel | Can mute very dark colors |
Artwork Specs That Keep Tiny Cube Graphics Sharp
Cube stickers do not offer much visual real estate. On many standard 3x3 cubes, each individual sticker is roughly 14 to 16 mm square, though speed cubes, mini cubes, and novelty cubes vary. That size punishes clutter. Simple artwork, strong contrast, and bold brand elements usually beat detailed photos, thin line art, or five-word slogans.
Vector files are preferred for logos and icons. AI, EPS, or clean PDF artwork with outlined fonts keeps edges sharp during scaling. Embedded color values reduce accidental shifts. Raster artwork can work if it is high resolution, but a 300 dpi file that looks acceptable on a postcard may still feel soft on a tiny sticker because people inspect cubes up close.
Bleed, safe zone, and corner radius are basic print terms, but they matter more here than buyers expect. Bleed means printed color extends beyond the cut line, often 1 to 2 mm, so minor cutting variation does not leave a white hairline. The safe zone keeps key details away from the edge, where rubbing and lifting are most likely. Rounded corners reduce peel points and help the sticker match the cube’s molded geometry.
Multi-face designs need a reality check. If the cube will be played with, adjacent squares rotate out of position almost immediately. A large image spread across all nine stickers on one face can look great in the first photo and confusing after ten turns. For playable cubes, repeating logos, solid brand-color faces, icons, color blocks, or simple patterns tend to hold up visually. For display cubes, one larger image can work if the proof clearly shows face order and orientation.
QR codes deserve extra caution. They can work on cube stickers, but only if the printed square is large enough, the quiet zone is preserved, contrast is high, and the code is tested after application on the actual cube. A QR code squeezed onto a 15 mm sticker with a logo in the middle may scan in a proof PDF and fail under normal office lighting.
Treat the cube like small product packaging. Decide which face carries the main logo, which faces carry secondary colors, and whether the bottom face needs a URL, campaign code, or legal copy. Keep type large. If you cannot read it on a printed proof from arm’s length, the end user probably will not read it on the cube. No amount of brand enthusiasm changes optics.
Process and Timeline From File Check to Finished Sticker Sets
A typical order starts with artwork review and cube size confirmation. Then the dieline is matched to the cube model, a proof is prepared, material and finish are confirmed, and the job moves into print setup. After printing, the sheets are cut, weeded or sheet-finished, inspected, and packed. If the stickers are applied to cubes before shipment, application and final inspection add another labor step.
The buyer should provide cube dimensions or, better, a physical sample when stickers must fit a specific cube. Small differences in face size, corner radius, or molded gaps can create visible fit problems. A sticker that fits one 57 mm cube may look crowded on another cube with the same nominal size because the plastic tiles and moving gaps are not identical.
Digital proofing is where layout, color placement, cut lines, and face order get confirmed. Slow down here. Check whether each side has the correct logo orientation, whether brand colors are assigned to the right faces, and whether any text sits too close to a rounded corner. If the design forms a sequence or larger image, ask for a face-by-face layout rather than only a flat sheet view.
Lead time depends on quantity, finish complexity, proof approval speed, material availability, and whether stickers ship loose or pre-applied. For many digitally printed sticker sets, 7 to 12 business days after proof approval is a realistic planning range. Applied cube programs, specialty finishes, retail kit packing, or larger quantities often land closer to 15 to 25 business days. These are planning ranges, not promises carved into stone. Freight and material availability can still ruin everyone’s mood.
Rush orders are easier when artwork is clean, cube size is standard, and the finish is in stock. A simple white vinyl gloss sticker set can usually move faster than a PET satin-laminated set with a new dieline and hand-applied assembly. The cleanest rush files include vector logos, outlined fonts, clear Pantone or CMYK targets, and exact cube measurements.
Build in sampling time if the cube will be sold at retail, packed into kits, mailed to influencers, or handed out at a high-visibility event. A sample lets you test turning, edge comfort, color, scuff resistance, and adhesive performance before committing to a larger run. One extra week can cost much less than replacing 2,000 cubes with peeling stickers.
For broader packaging and transit planning, resources from groups such as ISTA can help buyers think through handling and distribution testing, especially when cubes are part of a shipped kit. If sustainability claims or paper-based materials are involved, FSC certification may also be relevant for surrounding printed components.
Cost, MOQ, and Quote Factors for Branded Cube Stickers
Pricing is usually driven by sticker size, number of stickers per cube, material, finish, print coverage, cut complexity, order quantity, and whether application labor is included. A full 3x3 cube set usually means 54 small stickers, not one label, so the quote should be evaluated per finished cube set rather than per individual square.
Minimum order quantity varies by production method. Digital printing can suit smaller runs because setup is lighter and full-color changes are easier. Larger quantities spread setup, proofing, and cutting costs across more units. As a rough planning range, loose basic vinyl sets may land around $0.35 to $1.25 per cube set at higher volume. Smaller custom runs, PET films, specialty laminates, tight color matching, or pre-applied labor can push the finished cost higher. Exact pricing depends on the specs, which is the boring answer because it is also the true one.
Application labor is often the hidden cost. Placing 54 small labels on every cube takes time, consistency, and inspection. For 1,000 pre-applied cubes, that is 54,000 placement actions before packing. Jigs and trained hands help, but labor still adds up. Loose sticker sheets cost less, but they move the application work to your team or the end user.
Add-ons can shift a quote quickly. Lamination, specialty finishes, custom dielines, sample proofs, replacement sheets, individual bagging, labeled face sets, and retail-ready packaging all affect cost. If the cube belongs inside a larger product packaging program with Custom Packaging Products, quote the sticker set and outer pack together so color, fit, and timing stay aligned.
A useful quote request includes cube dimensions, quantity, artwork file, desired finish, indoor or outdoor use, expected handling level, deadline, and whether the manufacturer is supplying the cubes. If existing brand assets were created for Custom Labels & Tags, share those files too. Consistent logo files and color references save proofing time.
The cheapest option is not automatically wrong. A coated paper label may be fine for a one-day event where the cube is mainly a visual handout. For long-term promotional use, retail packaging, or any cube that will be handled repeatedly, better film, adhesive, and protection are usually worth the upgrade.
Step-by-Step Guide to Ordering Stickers That Fit Correctly
- Define the purpose. Decide whether the cube is a playable puzzle, branded desk item, retail product, event giveaway, classroom tool, or display piece. This choice affects material, artwork, finish, and budget.
- Measure the cube carefully. Measure the visible sticker area on one small square, not only the full cube face. Note the square size, corner radius, and gap needed between stickers so the pieces can rotate without catching.
- Choose the material and finish. Match vinyl, PET, or coated paper to the expected handling level. Then choose gloss, matte, satin, or laminated protection based on appearance and durability goals.
- Prepare artwork on a dieline. Keep logos centered, type readable, and important elements inside the safe zone. Add bleed beyond the cut line so color reaches the edge cleanly.
- Review the proof carefully. Check orientation, face order, color contrast, cut shape, and anything that could look misaligned once placed on a cube.
- Approve a sample or pilot run. Sampling is smart for retail, influencer, trade show, or customer-facing programs because it catches fit and handling issues early.
- Confirm packing details. Decide whether stickers ship in sheet format, with replacement extras, as labeled face sets, or pre-applied to cubes for faster fulfillment.
From a packaging buyer’s view, the measuring step is the one most often rushed. Use calipers if available. If not, use a ruler with millimeter marks and take photos straight-on, not at an angle. For replacement stickers, remove one old label and measure the actual sticker instead of guessing from the plastic tile.
For pre-applied orders, ask how finished cubes will be packed. A cube tossed loose into a polybag with a sharp insert card can pick up scratches before it reaches the recipient. Small protective trays, individual bags, or snug paperboard cartons may be worthwhile if the cube is tied to premium package branding or a launch kit.
Common Mistakes That Make Cube Stickers Peel, Scuff, or Look Off-Center
The first mistake is using generic square labels without accounting for rounded corners, rotation gaps, finger friction, and the specific plastic surface of the cube. A label that works on a folder or mailer is not automatically right for a moving puzzle surface. The cube stresses sticker edges every time someone turns it.
The second mistake is overloading the artwork. Tiny type, thin strokes, complex brand marks, and photographic detail may print cleanly but still be unreadable at cube scale. A logo does not need to say everything. One simplified icon plus a strong brand color often does more work than a miniature brochure squeezed onto nine squares.
Poor surface preparation causes many bond failures. Dust, mold release residue, hand oils, or leftover adhesive from old stickers can interfere with bond strength. Before applying custom printed stickers, the cube face should be clean, dry, and free of loose residue. A light wipe with an appropriate cleaner may help, but harsh solvents can damage some plastics, so test first.
Overbuilding the sticker is another common problem. A thick face stock plus heavy ink plus laminate may look durable on paper, yet feel rough around the edges or interfere with smooth turning. The goal is not maximum thickness. The goal is the right balance of durability, edge comfort, and clean rotation.
Application pressure matters too. Inconsistent pressure creates bubbles, tilted stickers, and uneven borders. A small squeegee, fingertip pressure with a clean glove, or a simple alignment jig can improve consistency. After placement, many pressure-sensitive adhesives benefit from firm, even pressure and a short cure window before heavy handling.
Skipping proof review creates the most avoidable visual problems. Face orientation becomes critical when artwork forms a larger image, directional logo, arrow, URL, or sequence across multiple sides. Once thousands of stickers are cut, a rotated logo is no longer a design discussion. It is rework.
Final Checks Before You Approve Production
Before approving production, run through a short checklist: confirm the cube model, measure the sticker size, choose material, decide finish, prepare artwork, review proof, and confirm the deadline. If the project includes Custom Printed Boxes, instruction cards, sleeves, or other branded packaging, align those components early so color targets and delivery dates do not drift apart.
Test one applied set before scaling. Rotate the cube repeatedly, check for edge lift, inspect color under normal office or retail lighting, and feel whether the sticker edges are comfortable. Put the cube in a pocket or sample mailer for a day if that reflects real use. Practical abuse tells you more than a perfect studio photo.
Ask for extras or replacement sheets if the stickers will be hand-applied. Small cube labels are easy to misplace, tilt, or touch with oily fingers during placement. A 2% to 5% overage can prevent a packing delay, especially when volunteers, event staff, or multiple assembly stations are involved.
Photograph the approved sample and keep the final dieline on file. Reorders are much easier when the cube model, sticker dimensions, material, finish, and artwork version are documented. That record also helps if the idea later expands into retail packaging, seasonal colorways, or a larger promotional kit.
The best custom rubik's cube stickers come from treating the order as a precise, handled component with real material choices, not just a sheet of tiny labels. Ask for production input if cube dimensions are unclear, artwork spans multiple faces, the QR code is small, the deadline is tight, the finish is unusual, or adhesive performance is uncertain. Guessing is faster. Fixing a bad run is not.
FAQ
What material is best for custom cube stickers?
Vinyl is a strong all-around choice for handled cubes because it is flexible, scuff-resistant, and bonds well to plastic when paired with the right adhesive. PET can be better when the buyer wants a crisp, stable sticker with a premium feel and clean die-cut edges. Paper-based label stock is usually best reserved for short-term, display, or budget giveaway projects.
Can custom Rubik's Cube label sets include logos on every side?
Yes, logos can be printed on every side, but the artwork should be simplified so it stays readable at small scale. For playable cubes, repeating logos or solid brand-color faces usually work better than one complex image spread across rotating pieces. For display cubes, a larger image across multiple stickers can work if orientation is carefully proofed.
How do I measure a cube before ordering replacement stickers?
Measure the visible sticker area on one small square, not just the full cube face. Leave a small gap around each sticker so the cube can turn without edges rubbing or catching. If possible, provide a physical sample or clear photos with measurements so the dieline can be matched accurately.
Do custom puzzle cube stickers peel off easily?
They should not peel easily when the material, adhesive, surface preparation, and application pressure are matched to the cube plastic. Peeling is more likely when the cube surface has dust, oil, residue, or when stickers are cut too close to moving edges. A protective laminate can help reduce scuffing and edge wear on cubes that will be handled often.
What affects the price of branded Rubik's Cube stickers most?
Quantity, material, finish, number of stickers per set, print coverage, and cut precision are the biggest cost drivers. Application labor, sample proofs, specialty coatings, and individual packing can also change the quote. The most useful quote request includes cube dimensions, artwork, quantity, deadline, finish preference, and whether stickers are supplied loose or pre-applied.


