Lightweight products usually don’t fail because of one dramatic drop. They get damaged by abrasion, corner crush, and the kind of repeated rubbing that happens when a parcel gets sorted, stacked, and tossed around more than anyone wants to admit. That is why custom bubble mailers can be the right middle ground for certain SKUs: they add cushioning, reduce empty space, and keep postage weight under control. For brands shipping cosmetics, accessories, supplements, apparel, or small electronics, that balance often matters more than a fancy carton.
The packaging also says something before the customer opens it. Buyers notice whether the parcel feels deliberate or improvised. Good branded packaging can support trust, cut down on returns, and make the unboxing feel considered without adding much dimensional weight. That is not decoration. That is operations with a logo on top.
Custom Bubble Mailers: What They Are and Why They Stand Out
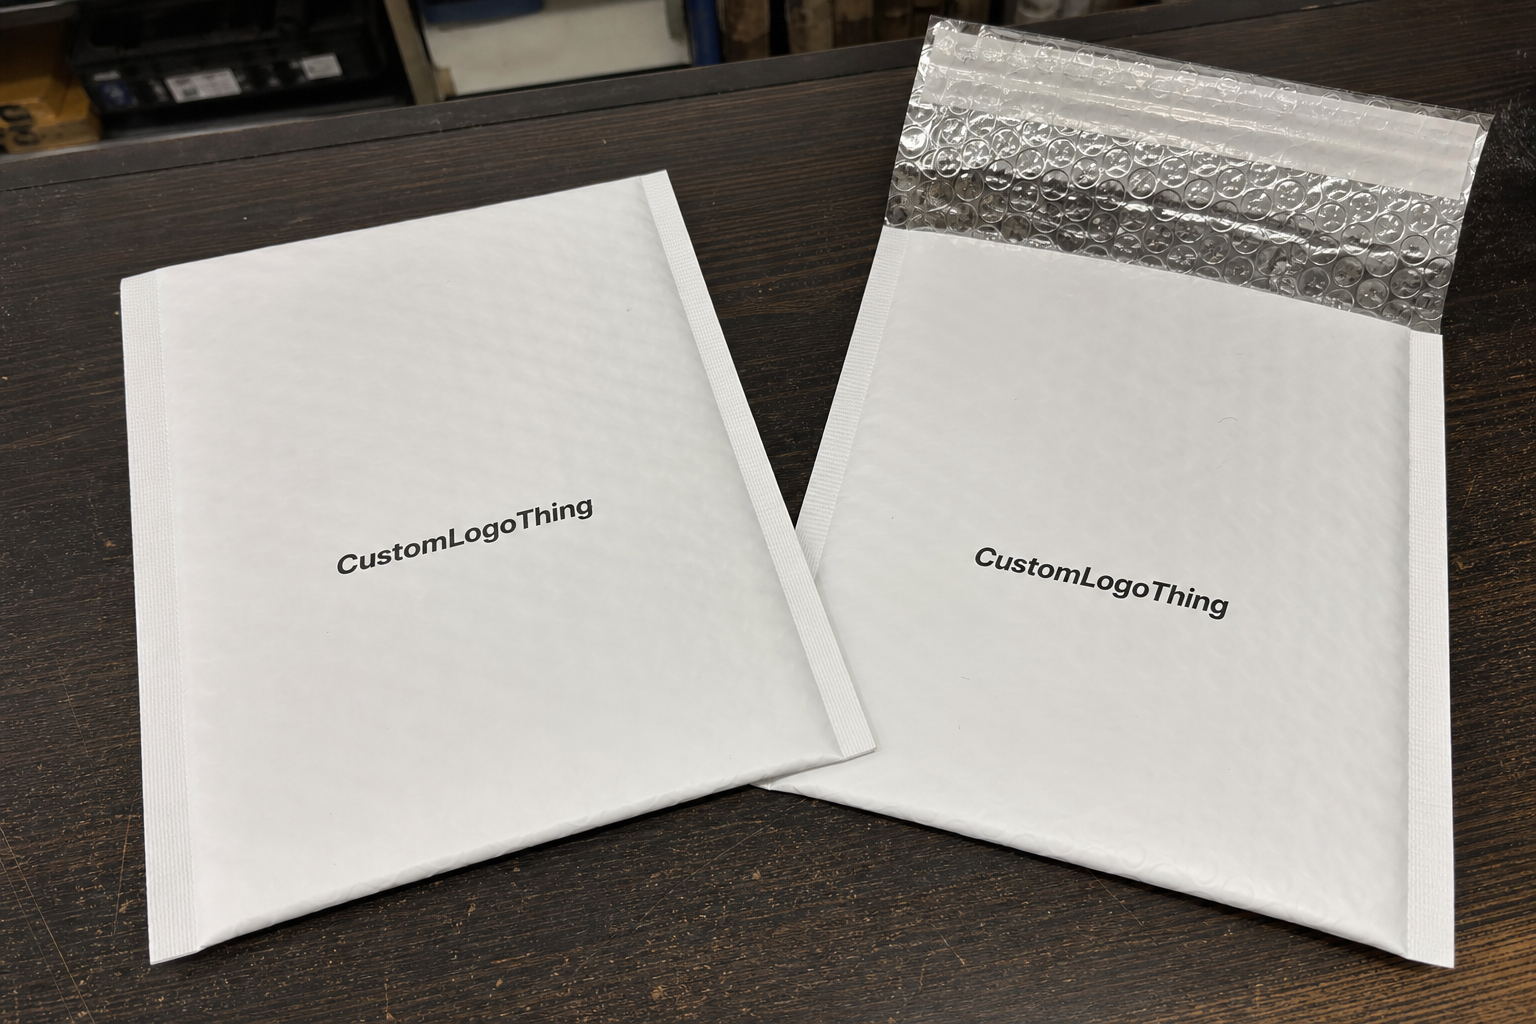
A bubble mailer is a lightweight envelope with a cushioned interior layer. Add custom printing, sizing, and closure choices, and it becomes a shipping format that sits between a plain poly mailer and a rigid box. That middle ground is exactly why custom bubble mailers show up so often in direct-to-consumer fulfillment.
The value is in the overlap: protection, branding, and shipping efficiency. A plain poly mailer gives you low weight and low cost, but very little impact protection. A rigid mailer resists bending better, yet may still leave product surfaces exposed to scuffing. Bubble cushioning adds real value for items that can scratch, dent, or rub against inserts during transit.
Here’s the simple way to think about it: if the item is soft but scuff-prone, a padded mailer is often enough. If the product needs hard-sided protection, then boxes or Custom Packaging Products built around inserts are the better move. The “best” mailer is not the thickest one. It is the one matched to the product, the carrier route, and the customer’s expectation when opening the parcel.
In practice, bubble mailers are a strong fit for:
- Apparel accessories and small textiles
- Cosmetics, skincare, and sample kits
- Books, journals, and printed collateral
- Small electronics and cable accessories
- Supplement packs and lightweight wellness products
That last category matters because retail packaging has to do more than protect. It has to fit the brand story. A well-designed mailer can reinforce package branding without the expense or weight of custom printed boxes.
How the Cushioning and Closure System Works
The structure looks simple, but the details drive performance. Most bubble mailers use three key layers: an outer film, an internal bubble layer, and a sealed edge construction that keeps the padding intact. The outer film is usually polyethylene or a similar plastic structure. The inner bubbles create the cushioning barrier that absorbs light impact and reduces friction.
Bubble size and bubble density matter more than many buyers realize. Smaller bubbles tend to spread pressure more evenly across the surface. Larger bubbles can feel plusher, but they do not automatically perform better. Film thickness also plays a role. A heavier gauge can improve puncture resistance, though it may add cost and, depending on dimensions and carrier rules, a little shipping weight.
The seal system is another place where real-world performance lives or dies. Self-seal adhesive speeds packing and helps create tamper resistance, especially on high-volume lines where every extra second adds up. Heat-sealed or reinforced seams can improve durability for heavier contents. If the mailer is going through a humid route or carrying a denser product, that closure deserves attention.
There’s also a detail that gets missed all the time: sometimes the bubble layer is doing more work against surface damage than against impact. A pair of earrings in a pouch, a skincare bottle in a carton, or a slim device accessory can arrive unscuffed because the mailer reduces rubbing. In a lot of categories, that matters just as much as shock absorption.
“The cheapest solution often becomes the most expensive once you count damage claims, re-ships, and customer service time.”
If you want to compare how much structure you actually need, think in terms of use case instead of material hype. A mailer that is slightly larger, better padded, and easier to seal can reduce returns if the product arrives scratched, bent, or dinged. That is a more useful metric than a vague promise of premium quality.
Key Specs That Drive Cost, Protection, and Branding
For custom bubble mailers, four specs do most of the work: dimensions, film gauge, bubble structure, and print coverage. Those inputs shape protection, cost, and the visual result. If you are buying for a brand, the goal is to choose the minimum structure that still protects the product and reflects the packaging design you want customers to remember.
Mailer dimensions should be based on the packed product, not the bare item. A folded sweatshirt with tissue, a boxed serum, or a carded accessory can need a very different footprint than the item alone suggests. Oversizing creates wasted space and a sloppy presentation. Undersizing makes sealing difficult and can stress seams.
Print coverage has a direct effect on setup complexity. A single-color logo is usually simpler than a full-surface, multicolor print with registration demands. On small runs, that difference can affect unit cost more than buyers expect. If the artwork needs exact color matching, ask how the supplier handles proofs and whether they are working from a Pantone target or a general visual match.
Material choice influences both appearance and postage. Heavier structures may feel more substantial in hand, but they can raise shipping costs across large volumes. For some brands, that trade-off is worth it. For others, the extra grams add expense without improving real protection. I’ve seen buyers specify too much material because they want a “better” mailer, when a standard construction would have done the job just fine.
Sustainability options are expanding too. Some suppliers offer recycled-content films or reduced-plastic constructions. Those can be useful, especially when brands are aligning retail packaging with broader environmental goals. But the structure still has to pass basic performance checks. A greener claim that fails in transit is not a smart trade.
For buyers comparing formats, it helps to stack options side by side.
| Mailer Type | Typical Strength | Approximate Best Fit | Relative Cost |
|---|---|---|---|
| Plain poly mailer | Light moisture resistance, minimal protection | Soft goods, low-risk shipments | Lowest |
| Custom bubble mailers | Cushioning plus surface protection | Light, semi-fragile products | Moderate |
| Rigid mailer | Better bend resistance | Flat items needing shape retention | Moderate to higher |
| Small corrugated box | Strongest crush protection | Heavier or more fragile items | Highest |
That comparison is why many brands use bubble mailers as a bridge between Custom Poly Mailers and box-based retail packaging. It is not about finding the fanciest format. It is about matching the package to the product and the ship method.
For sourcing teams, the useful question is simple: does this protect margins, protect products, and support recognition on the doorstep? Anything beyond that should be justified by data, not habit.
Custom Bubble Mailers Pricing, MOQ, and Quote Basics
Pricing is usually shaped by order quantity, print complexity, material thickness, size, and freight. That sounds obvious, but the interaction between them is easy to underestimate. A larger quantity can drop the unit price sharply, while a richer print format or thicker gauge can push it back up. The quote that looks cheapest on paper is not always the cheapest landed cost.
MOQ means minimum order quantity. In plain English, it is the smallest run a supplier will accept. That matters for newer brands, seasonal collections, and subscription businesses because inventory risk is real. If artwork changes, a launch shifts, or a SKU gets discontinued, leftover packaging becomes dead stock. I would rather see a buyer order a little less and test the response than sit on pallets of the wrong size.
Here is a practical way to compare pricing:
| Quote Factor | What It Changes | Buyer Question to Ask |
|---|---|---|
| Quantity | Unit price and total spend | What happens at 3,000, 5,000, and 10,000 pieces? |
| Print coverage | Setup and color cost | Is this one-color, two-color, or full coverage? |
| Material gauge | Protection and weight | What thickness is included in the quote? |
| Freight destination | Landed cost | Is shipping included or billed separately? |
For context, small-to-mid custom runs often price very differently depending on the print method and build. A buyer might see a meaningful spread between a simple branded pattern and a full-coverage design. That is why side-by-side quotes matter. Ask for more than one size or one material grade. Then compare true landed cost, not just the base factory number.
Also ask directly about plates, setup, color matching, and freight. Those items are the usual surprise line items. A clean quote should make it obvious what is included and what is not.
A realistic price range depends heavily on region, material, and quantity, but buyers typically see the sharpest savings once they move past the smallest trial runs. Short runs can carry noticeably higher unit pricing because setup is spread across fewer pieces. Larger orders reduce that burden, though storage costs and forecast risk go up with volume. There is no free lunch. Packaging never got the memo.
Production Steps and Timeline From Artwork to Delivery
The process is straightforward, but the speed depends on decisions. It usually starts with a brief and a spec sheet: dimensions, closure style, print area, and quantity. Then comes dieline or layout confirmation, artwork prep, proofing, production approval, printing, curing or inspection, packing, and shipping. Each stage has its own chance for delay.
Artwork is where most schedules slip. Missing bleed, low-resolution logos, and late color revisions are common. If text sits too close to a seam or edge, the proof may need to be revised. That sounds small. It can add days. Sometimes more. The manufacturing step is often faster than the approval loop surrounding it.
A practical planning frame helps. Custom packaging is rarely instant, especially if the order includes special finishes or multiple colors. If you are building toward a launch, a seasonal push, or a retail promotion, leave buffer time before the target ship date. If the order is produced overseas, also account for freight and customs. Those two steps can matter as much as the press run itself.
Sampling is the best insurance policy. A pre-production proof or physical sample lets you catch color drift, seal weakness, or sizing errors before full manufacturing. For a hero SKU, that step is cheap compared with a full reprint. It also gives you a chance to test how the packaging behaves with the actual product, not a dummy insert.
For teams comparing package formats, it helps to remember that custom bubble mailers are often chosen because they simplify fulfillment. One piece, one seal, one shipment. That can reduce pack-out time compared with more complex custom printed boxes that need inserts, tape, or extra void fill.
Typical timelines vary by order size and print complexity. A simple run with approved artwork may move faster than a full-coverage design with custom sizing, and overseas freight adds a separate clock. For planning purposes, buyers usually need enough lead time to absorb proof revisions, production, and transit without pushing a launch into a corner. That is how rush fees happen. Usually right after someone says, “We only need it a little earlier.”
Common Mistakes Buyers Make Before Ordering
The most common mistake is sizing the mailer to the product itself instead of the packed product. Once you add tissue, sleeves, cartons, or protection inserts, the dimensions change. If the fit is too tight, the seal struggles and the product can wrinkle or stress the seam. If it is too loose, the package moves around and loses presentation quality.
Another issue is seal performance. Not all adhesives behave the same way in humid environments or on heavier contents. A closure that looks fine in a clean sample can fail after temperature changes, rough handling, or repeated sorting. If the contents are dense or slightly sharp-edged, test the seal with real weight.
Artwork mistakes are expensive because they are preventable. Low-resolution logos print poorly on film. Light colors can disappear against certain backgrounds. Text placed too close to a fold or edge can become unreadable once the mailer is filled. A proof needs to be reviewed like a production tool, not like a presentation slide.
Then there is the overspec problem. Some buyers assume they need the thickest possible construction because it sounds safer. Often, they do not. They just need the right balance of strength and cost. Overbuying material can inflate both unit price and postage. Underbuying, on the other hand, can create damage and replacement costs that are much worse than the savings.
Skipping sample testing is the big one. It seems efficient until the returns start. A scratched bottle, a bent accessory case, or a torn seam can cost more than the original packaging order saved. That is a hard lesson, but a common one.
For brands that want a wider view of packaging structure and sourcing options, Custom Packaging Products can help frame the decision alongside other mailer and box formats. Sometimes the answer is not a better mailer. It is a different format.
Expert Tips for Better Performance and Cleaner Branding
Match the finish to the brand story. Matte can read as understated and premium. Glossy can feel energetic and retail-forward. Neither is automatically better. The right choice depends on the product category and how the customer should feel on first touch.
Keep the graphics disciplined. One or two brand colors used well often outperform a crowded layout. A busy surface can make a package feel cheaper, not richer. That is one of those packaging design lessons that sounds subjective until you compare the results side by side. Clarity wins more often than decoration.
Test with actual products. Not mock items. Not “close enough” substitutes. Real pack-outs tell you whether the mailer seals cleanly, whether the product shifts, and whether fulfillment staff can pack it at speed without fighting the format. If your team ships hundreds of units a day, even a few seconds saved per pack can matter.
Another practical point: simpler packaging often performs better operationally than more decorated formats. If your team has to fold, insert, tape, or align multiple elements, speed drops. A streamlined mailer can do more for fulfillment efficiency than an extra accent ever will.
If you are launching a hero SKU, or shipping through routes known for rough handling, request a pre-production sample and test it under normal warehouse conditions. For brands selling internationally, that testing should also reflect export cartons, palletization, and the realities of transit under standards such as ISTA protocols. You can learn more at ISTA or review sustainability and material guidance from EPA. For fiber-based alternatives and sourcing signals, FSC is a useful reference point.
Honestly, the cleanest packaging usually comes from restraint. A strong logo, a clear hierarchy, and a mailer that fits the product well will do more for package branding than a crowded design ever will.
Next Steps: How to Spec, Test, and Place a Better Order
Start with a product audit. List the item weight, fragile areas, dimensions after packing, closure needs, and shipping channels. Then compare two or three size options. If you are unsure, request samples. A slightly larger mailer can often improve both fit and packing speed, which is useful when staff are filling orders in volume.
Before you place the order, build a simple checklist:
- Artwork files in the correct format
- Color expectations stated clearly
- Quantity target and acceptable overrun
- Target ship date with buffer time
- Questions about setup, freight, and sampling
That sounds basic, but it prevents most of the expensive back-and-forth. The best orders are the ones where the buyer has already thought through the product packaging as a system, not as a single item. Does the mailer protect the product? Does it fit the brand? Does it keep postage in a sensible range? If the answer is yes on all three, you are probably on the right track.
Custom bubble mailers are not a decorative afterthought. They are a shipping decision, a branding decision, and a cost-control decision all at once. Buy them that way, and they work harder for your business.
Frequently Asked Questions
What products are best suited for custom bubble mailers?
They work best for lightweight, semi-fragile items such as cosmetics, apparel accessories, books, small electronics, supplements, and gift items. They are less ideal for very heavy, very sharp, or high-value products that need rigid protection. They make sense when you want cushioning, branding, and low shipping weight in one package.
How do I choose the right size for custom bubble mailers?
Measure the product after it is packed with inserts, tissue, sleeves, or protective cartons, not just the bare item. Leave room for a clean seal without forcing the contents into the corners. If you are unsure, order samples in two or three sizes; a slightly larger mailer can reduce damage and speed packing.
What affects the price of custom bubble mailers the most?
Order quantity, print coverage, material gauge, size, and freight usually have the biggest impact. Setup and color matching can also change pricing, especially on smaller runs. Always compare landed cost, not only the base unit price, because shipping and setup can shift the real number significantly.
How long does production usually take for custom bubble mailers?
Timeline depends on artwork approval, proofing speed, order size, and the production queue. Delays usually come from file corrections or late approvals rather than the manufacturing stage itself. Add more time if you need samples, special finishes, or international shipping.
What should I check before approving a sample?
Check size fit, seal strength, print clarity, color accuracy, and how the mailer feels in real packing use. Test with actual products and shipping conditions whenever possible. If the sample fails any one of those checks, revise before placing the full order.