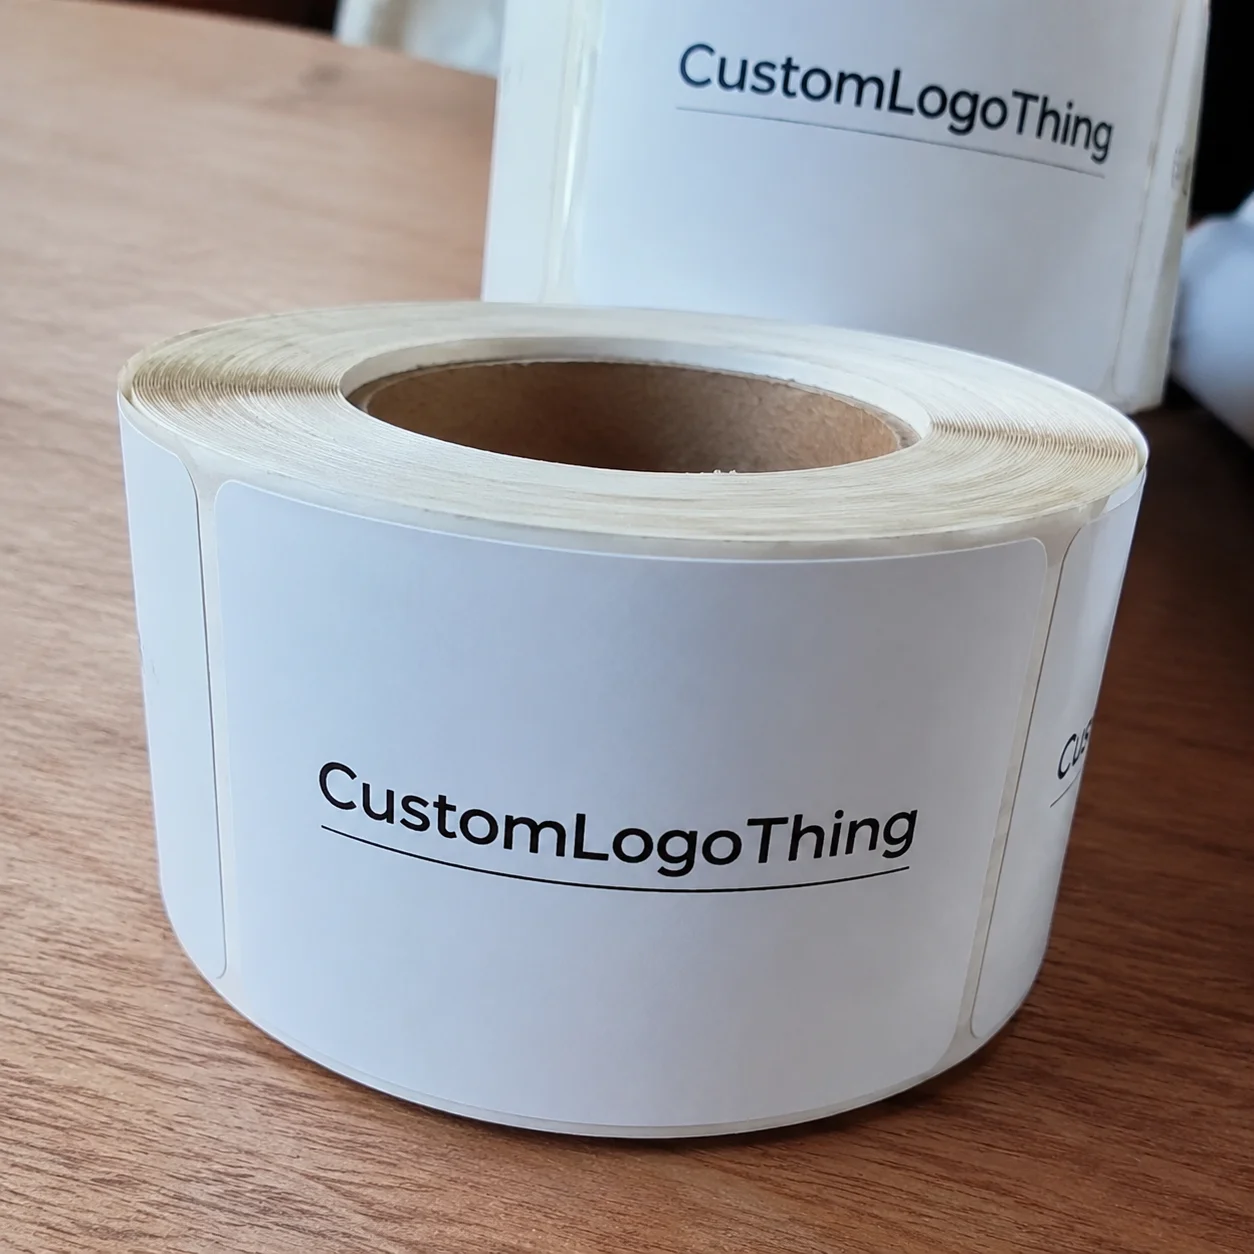
Buyer Fit Snapshot
| Best fit | Custom Canvas Tote Bag Printing Methods projects where brand print, material claims, artwork control, MOQ, and repeat-order consistency need to be specified before quoting. |
|---|---|
| Quote inputs | Share finished size, material target, print colors, finish, packing count, annual reorder estimate, ship-to region, and any compliance wording. |
| Proofing check | Approve dieline scale, logo placement, barcode or warning zones, color tolerance, closure strength, and carton packing before bulk production. |
| Main risk | Vague material claims, crowded artwork, missing packing details, or unclear freight terms can make a low unit price expensive after revisions. |
Fast answer: Custom Canvas Tote Bag Printing Methods: Film, Print, MOQ, and Carton Packing should be specified like a repeatable production item. The safest quote records material, print method, finish, artwork proof, packing count, and reorder notes in one written spec.
Production checks before approval
Compare the actual filled-product size with the drawing, then confirm tolerance on folds, seals, hang holes, label areas, and retail display edges. Reserve space for logos, QR codes, warning copy, and material claims before decorative graphics fill the panel.
Quote comparison points
Review material grade, print process, finish, sampling route, tooling charges, carton quantity, and freight assumptions side by side. A quote is only useful when the supplier can repeat the same color, closure quality, and packing count on the next order.
Two canvas totes can look nearly identical on a mockup and still behave like different animals on press, and that is exactly why Custom Canvas Tote bag printing methods deserve more attention than most buyers give them. I’ve stood beside a dryer line in a Dongguan shop where a 12 oz natural canvas tote held a crisp, clean one-color logo, while the next tote in the stack, made from a looser weave, drank in ink and softened the edge enough to change the whole feel of the piece. I remember thinking, very clearly, that canvas has a sneaky way of humbling even the prettiest artwork, especially when the fabric is a 10 oz open-weave cotton from Zhejiang and the ink is trying to bridge every little valley between threads.
That kind of difference matters whether you are building branded packaging for a retail launch, packing sample kits for a trade show, or creating durable giveaway bags that people will keep in their car for grocery runs. In my experience, the right Custom Canvas Tote bag printing methods choice is never just about what looks good on a screen; it is about fabric weight, ink behavior, order quantity, turnaround time, and how hard the tote will be used after it leaves the carton. A 500-piece event run in Los Angeles has very different economics from a 5,000-piece retail program in Ningbo, and a bag that looks perfect on approval can still fail if the coating, cure temperature, or stitch density is wrong. Honestly, I think that last part gets ignored far too often, and then everybody acts surprised when the bag that looked gorgeous on approval starts looking a little tired after a week of real life.
Custom canvas tote bag printing methods are the different ways artwork gets transferred, bonded, stitched, or cured onto canvas fabric. Some methods sit on top of the fibers, some sink into them, and some add dimension through stitching or specialty coatings. The best result depends on whether you need a soft-hand retail finish, a bold event giveaway, or a heavy-duty bag that can take daily abuse without the logo cracking off after a few uses. A 350gsm C1S artboard proof may look immaculate on a desk, but the same design can behave very differently once it is pressed onto a 14 oz cotton canvas tote with a reactive-dyed finish.
Why custom canvas tote bag printing methods matter more than you think
Canvas is a very different surface from a smooth carton panel or a coated paper label. I’ve watched buyers compare it to packaging design on custom printed boxes, then get surprised when the same artwork behaves differently once it meets a woven cotton substrate. The weave, the absorbency, and the little valleys between threads all affect coverage, sharpness, and the final touch of the printed area. That texture is part of the charm, of course, but it can also be the reason a perfectly respectable logo suddenly looks like it had one too many espresso shots, especially on an undyed 11 oz canvas from Hebei with a coarse slub.
That is why custom canvas tote bag printing methods should be chosen with the bag itself in mind, not just the artwork. A 10 oz cotton canvas tote, a recycled canvas bag, and a coated canvas blend can all accept decoration differently, even if the bags are the same size and the logo is the same two-color mark. I think this is where a lot of rushed purchase orders go sideways: people approve a mockup and assume the factory floor will somehow make every substrate behave the same way. If only manufacturing were that forgiving, especially when the sewing line in Guangzhou is running 8,000 pieces per day and the print department is trying to keep pace.
Here is the simple version. Screen printing is usually the workhorse for larger runs and bold logos. Digital printing or direct-to-fabric style decoration can help with complex artwork and shorter runs. Heat transfer works well for fast turnarounds and detailed designs, while embroidery adds a premium stitched look that many retail packaging teams like for higher-end programs. Specialty effects such as puff ink or foil can make a tote feel more elevated, but they also bring more cost and more risk if the fabric or design is not suited to them. A one-color screen print on 3,000 units from a factory in Xiamen may come in around $0.15 per unit for the print portion, while a foil-accented transfer on 250 bags can climb to $1.10 to $1.80 per unit depending on labor and setup.
The right choice is a balance of durability, color accuracy, and production efficiency. A tote for a local farmers market is not the same as a tote for a luxury brand’s employee welcome kit, and the right custom canvas tote bag printing methods for one can be the wrong answer for the other. A 14 oz tote with reinforced handles and a 2-color logo can survive a year of weekly use in San Diego, while a lightweight 8 oz tote for a single-day conference in Chicago may only need to look sharp for one afternoon and still stay under a $1.25 landed decoration target.
On one project for a beverage client, I remember a sample room debate in Suzhou that lasted nearly an hour over two nearly identical bags. The screen printed version looked slightly flatter but held the logo edges beautifully after repeated folding, while the heat transfer version looked sharper out of the box but showed more edge lift after a rough wash test. Somebody even joked that the transfer was all confidence and no stamina, which, frankly, was rude but not entirely wrong. That kind of real-world difference is exactly why custom canvas tote bag printing methods need to be discussed before production starts, not after cartons are already labeled.
For buyers who are also coordinating broader package branding, it helps to think of the tote as part of the same visual system as your labels, inserts, and shipping materials. A well-printed tote can support branded packaging just as effectively as a sleeve or carton, especially when it arrives with the same logo treatment and color story used across product packaging. I’ve seen brands pair a canvas tote with a 350gsm C1S artboard hangtag, a matte laminated insert card, and a mailer printed in the same PMS 186 C red, and the result feels intentional in a way that plain swag rarely does.
How custom canvas tote bag printing methods work on different fabrics
Screen printing is still the method I reach for first when the order is medium to large and the artwork is clean. The process starts with artwork separation, which means each ink color gets its own screen. Those screens are exposed, washed out, and mounted on the press. Then the printer floods ink across the mesh, pulls it through with a squeegee, and cures the print in a conveyor dryer or under a flash unit so the ink fully sets into the canvas fibers. It is not glamorous work, but when it is done well, it has a kind of satisfying honesty to it, especially in a plant where the dryer zone is held at 160°C for plastisol and the conveyor speed is measured to the second.
On 12 oz and 14 oz canvas, that ink deposit can be strong and even, but it depends on mesh count, squeegee pressure, and whether the fabric needs an underbase. Lighter natural canvas often prints differently from dark dyed canvas, and if the bag is too rough or too porous, fine details can spread just enough to soften the logo. In practice, the best custom canvas tote bag printing methods for screen work are usually simple, bold, and built around 1 to 3 spot colors. A 156-mesh screen can hold tighter detail than a 110-mesh screen, but the latter may lay down more ink on a heavily textured 10 oz bag from Shandong.
Heat transfer and vinyl-based processes work differently. The artwork is printed or cut first, then transferred onto the bag with heat and pressure. This can be useful for short runs, names, variable data, or multi-color art that would be expensive to separate for screens. The downside is that some transfer films can feel thicker, and on heavily folded canvas the edges may show wear sooner than a properly cured screen print. I’ve peeled up enough unhappy corners in sample review sessions to know that “looks sharp” is not the same thing as “will survive the week,” especially when the tote is going into a student welcome kit or a weekend market bag that gets stuffed, flattened, and stuffed again.
Embroidery is not ink-based printing, but buyers ask for it often enough that I always include it in the conversation about custom canvas tote bag printing methods. Stitching gives a premium, dimensional look, and it performs especially well on heavier canvas tote bags where the fabric can support the thread without puckering too much. A tight satin stitch logo on a 14 oz tote can look fantastic, though it will cost more per unit and may not suit very small text or complex gradients. I personally like embroidery for the right project, but I also think it gets oversold by people who forget that thread has opinions about detail levels, needle count, and stitch density.
Specialty options are where things get interesting. Puff ink gives a raised feel if the art is bold enough and the fabric can support the extra ink load. Foil accents can add metallic detail, although they are not always the best fit for a tote that will be tossed into a trunk or washed frequently. Discharge-style effects are less common on totes than on garments, but they can create a softer, more absorbed appearance on certain cotton fabrics. The catch is that every specialty finish adds another variable to the production window and another point where quality control has to stay sharp, particularly if the factory is balancing work across Ningbo, Wenzhou, and a subcontracted print room in Foshan.
Canvas weight and weave density matter a lot. Natural cotton canvas tends to be more absorbent and textured, which can give prints a classic look but can also soften tiny details. Recycled canvas can vary from batch to batch, so I always advise sampling if the logo has tight registration or brand-critical color matching. Coated canvas blends are smoother, which can help with sharp edges, but sometimes they need different pretreatment or curing settings to avoid surface issues. A 320gsm recycled canvas from Jiangsu may not behave exactly like a 14 oz organic cotton canvas from Tianjin, and that difference can show up immediately in edge sharpness and ink holdout.
Here is a practical way to think about the feel of the decoration:
- Soft-hand prints sit closer to the fabric and feel lighter to the touch.
- Thicker screen prints can feel more substantial, especially on dark totes.
- Heat transfers often have a more noticeable edge or film texture.
- Embroidery adds thread relief and a premium tactile profile.
That tactile difference matters in retail packaging and in branded packaging programs where the tote is part of the unboxing or gifting experience. A tote that feels refined can support the same perception you are building with custom printed boxes, insert cards, and other touchpoints across the order. Even a small shift, like switching from a glossy transfer to a matte cured screen print, can change how the whole package reads when a customer opens it on a counter in Boston or a showroom in Dallas.
| Method | Best for | Typical feel | Relative cost | Durability |
|---|---|---|---|---|
| Screen printing | Large orders, bold logos, 1-3 colors | Soft to medium | Low at scale | High when cured properly |
| Heat transfer | Short runs, detailed art, names or variable data | Noticeable film or textured hand | Moderate | Moderate |
| Digital printing | Full-color graphics, samples, limited quantities | Soft to medium | Moderate to high | Varies by ink and curing |
| Embroidery | Premium branding, simple logos, heavier totes | Raised stitched texture | Higher | Very high |
| Puff or foil accents | Special promotions and premium presentation | Highly tactile or reflective | Higher | Depends on handling |
If you want to compare these choices against other production formats, it can help to review broader Manufacturing Capabilities and the full range of Custom Packaging Products available for your campaign. I often tell clients that tote decoration should be selected with the same discipline they use for offset printing, digital printing, and any other part of the product launch, especially when there is a 15-business-day window from proof approval to ship date and the whole order has to land in a distribution center outside Atlanta.
Custom canvas tote bag printing methods: pricing and quality factors
The biggest pricing drivers are usually the same ones I’ve seen quoted in factory sheets for years: quantity, number of colors, number of print locations, setup time, artwork complexity, and any finishing steps after print. If you want a practical rule of thumb, the more time a factory spends preparing screens, testing registration, or handling specialty finishes, the more the unit cost moves upward. On a 1,000-piece run in Yiwu, a one-color front print may cost far less than a two-location logo plus inside label, because every extra setup minute adds labor even before the first bag reaches the dryer.
For screen printing, the setup is where the cost is concentrated. A one-color logo on 5,000 totes can land around $0.15 per unit for the print portion in some factories, while a two-color design with multiple placements might move closer to $0.32 to $0.48 per unit depending on ink and labor. Those figures are examples, not promises, because fabric, bag size, and plant efficiency change the math. Still, they show why quantity matters so much: once the screens are ready, the press can keep moving, and a facility in Dongguan or Ningbo can spread that setup across a much larger run.
Higher quantities usually lower the per-unit cost because the fixed setup gets spread across more pieces. That is one reason I often recommend screen printing for large event orders, retail promotions, and recurring programs. On a smaller run of 100 or 200 totes, heat transfer or digital printing may make more sense because you are not paying for the same level of screen setup before the first good bag even comes off the line. If your factory quote includes a $45 screen fee per color and a $25 flashing charge, you will feel that difference very quickly on a 150-piece order.
Ink type matters too. Water-based inks can feel softer but may require different curing control. Plastisol-style inks often give stronger opacity on dark canvas and can tolerate more aggressive handling during production, though they may feel heavier. Mesh count affects how much ink lands on the fabric, and the curing method determines whether the print holds up after folding, rubbing, or washing. I’ve seen a pressroom in Guangdong reject an entire lot because the cure test showed ink transfer after a simple abrasion rub; that is the kind of thing a solid QC team catches before shipment, and it saves everybody money. No one enjoys that conversation, but it beats finding out after the freight has already left the dock.
Lighter natural canvas often needs a different ink strategy than dark or dyed canvas. On darker fabric, a white underbase might be needed to keep brand colors from looking muddy. That adds labor, and it can also change how the print feels. If your brand color is a pale blue or a delicate pastel, you may need a sample strike-off to see whether the tone stays true over the rougher weave of canvas. A pastel mint that reads beautifully on a coated label can look flat on 12 oz raw canvas unless the printer adjusts opacity and cure temperature.
Quality factors are not just about ink. Logo size, line thickness, and placement matter a great deal. Tiny type can disappear into the weave, and a logo printed too close to a seam, pocket, or gusset can distort when the tote is sewn and folded. I always tell clients to leave breathing room in the layout and to think about how the tote will be viewed from 3 to 5 feet away, not just on a design proof. A 1.2 mm line that looks crisp in Illustrator can turn into a fuzzy suggestion once it hits a coarser 10 oz canvas.
Finishing also affects total price. A tote with woven labels, custom hangtags, inner tags, or individual polybagging will cost more than a plain bulk-packed bag. But those extras can materially improve the perceived value, especially in retail packaging programs where the tote is one part of a broader presentation. If the bag is being used as part of product packaging for influencer kits or PR mailers, the premium presentation can justify the added spend. A simple polybag might add $0.06 to $0.12 per unit, while a custom folded insert card on 350gsm C1S artboard can add another $0.08 to $0.20 depending on quantity and finishing.
Here is a pricing-related point that gets missed all the time: the cheapest print method is not always the lowest-cost outcome. If the decoration fails after the first few uses, or if the logo looks dull and off-brand because the weave bled into it, then the real cost includes reprints, complaints, and a damaged impression. That is why custom canvas tote bag printing methods should be viewed as part of the brand’s physical marketing plan, not as an isolated line item. A factory in Quzhou may quote a lower decoration price than a plant in Shenzhen, but if the cure rate is inconsistent or the packing department is slow, the “cheap” order can become the expensive one very quickly.
For buyers who need a proof of sustainability or sourcing discipline, it can also be worth checking whether the canvas is certified under programs like the FSC chain of custody for related packaging components, and whether any inks or processes align with environmental expectations. For broader packaging standards and industry references, I also like to keep an eye on resources from ISTA and the EPA, especially when programs involve shipping, warehouse handling, or material compliance. Those references matter when a tote is shipping alongside a kraft mailer, a printed carton, or an insert set that has to survive a 1,200-mile truck route.
Step-by-step process and timeline for tote bag printing
Most smooth projects follow a simple sequence: artwork review, method selection, sample approval, production, curing, finishing, and packaging. When a client sends clean files and answers the basic questions early, the schedule is much easier to protect. When they do not, the factory spends extra time chasing details that should have been settled before a screen was burned or a transfer was cut. I have lived through enough “just one small revision” emails to know that small revisions have a mysterious talent for multiplying, especially if the buyer is juggling a launch in New York and a retail rollout in Phoenix at the same time.
The supplier needs more than a logo file. I always ask for final vector artwork, Pantone color targets, tote dimensions, fabric weight, and the intended use. A tote for groceries, for example, may need stronger stitching and a tougher print than a tote used once at a conference. If the buyer is treating the bag as a brand touchpoint alongside custom printed boxes, label inserts, and store handout materials, then the decoration method should align with that overall packaging design system. A 14 oz canvas bag with a 9-inch gusset, for example, will typically need different placement logic than a flat 8 oz tote with no side seams.
Sampling is where good projects get protected. A digital mockup is useful, but it is only the beginning. Strike-offs and pre-production samples reveal what happens when the ink meets the actual canvas, not the idealized proof. That is when you catch issues like color shift, line gain, logo misplacement, or an underbase that makes the art look too heavy. For a serious order, I like to see at least one physical sample approved before the line commits to a 3,000- or 5,000-piece run.
In a supplier meeting I had in Ningbo, a buyer almost skipped sampling to save ten days. We convinced them to do a strike-off anyway, and the sample showed that their 0.5 mm rule lines vanished into the weave of a 10 oz bag. They changed the art before production, and that one decision prevented a very expensive pile of unusable inventory. I still remember the buyer staring at the sample, then at the proof, then back at the sample like the bag had personally betrayed them. The revised version printed cleanly on a 12 oz canvas tote from Zhejiang, and the final order shipped 14 business days after approval.
Timeline depends on complexity. A simple one-color screen print order can move quickly once proof approval is complete, while multi-color, multi-location, or specialty finishes will add time. As a rough framework, a straightforward run typically takes 12 to 15 business days from proof approval to finished goods, while more complex work can stretch to 15 to 20 business days or more, especially if there are sample revisions or packaging requirements. If the order needs custom folding, insert cards, polybags, or carton labeling, plan additional time for those finishing steps. A 2,000-piece order that includes individual folding, barcode labels, and carton marks may need an extra 2 to 4 business days just for packing.
Production bottlenecks usually come from the same places: screen prep, dryer capacity, registration checks, and post-print QC. On a busy floor, the dryer is often the heartbeat of the line. If the line speed is too fast, cure quality drops. If it is too slow, the schedule slips. I’ve seen a shop in southern China run half a shift behind because one conveyor dryer needed a belt adjustment; that kind of issue is normal in manufacturing, but it is why clear lead-time communication matters. A good plant in Shenzhen or Foshan will build a 1-day buffer into the schedule when the order requires both print and hand packing.
Here is a simple production path many buyers find useful:
- Send art, tote specs, and quantity.
- Review the best custom canvas tote bag printing methods for the job.
- Approve a digital proof or sample.
- Confirm color targets and placement.
- Print, cure, and inspect.
- Fold, bag, label, and carton pack.
- Ship with final QC records if required.
Packaging and finishing can be a quiet schedule killer if they are not discussed early. A tote that is bulk packed in cartons is one thing. A tote that has to be polybagged individually, folded to a fixed size, fitted with a hangtag, and shipped with carton labels and master case marks is another. The print might only take a day or two, but the finishing line can take just as long if there are labor constraints. A single manual folding station in an outsourced warehouse near Ningbo can slow a 4,000-piece run more than the printing press itself.
Common mistakes when choosing custom canvas tote bag printing methods
The first mistake is choosing based only on price. I understand the temptation, especially on promotional projects where the buyer has a tight number to hit. But a low quote that ignores durability can cost more later if the print cracks, fades, or looks uneven after a few uses. For retail totes, event giveaways, or reusable shopping bags, the decoration has to survive actual handling, not just the unboxing moment. A quote that saves $0.07 per unit can become a headache if the order comes back with weak cure or off-center placement.
The second mistake is submitting the wrong artwork format. Raster logos at low resolution can look fine on a laptop and still print with fuzzy edges. Vector files are usually the right choice because they preserve clean lines and allow the printer to separate colors properly. If you are working with custom canvas tote bag printing methods that depend on crisp edges, tiny text and thin strokes need extra care. I would rather see a properly outlined .ai or .eps file at 100% size than a 150 dpi JPEG that has been passed through five different email chains.
Another common error is trying to force overly detailed art onto coarse canvas. The weave can swallow hairline strokes, soft gradients, and micro text. A design that looks rich on paper may need to be simplified so it reads clearly at a normal viewing distance. I once saw a fashion client insist on a delicate script font only 4 mm tall on a raw canvas bag, and the result looked more like texture than lettering. Beautiful in theory, messy in practice, and completely predictable once you know how an 11 oz open-weave fabric behaves under a 156-mesh screen.
Color can also trip people up. Tote color and fabric finish change how the print appears, especially for brand colors that need to stay consistent across multiple touchpoints. If your campaign includes retail packaging, shipping cartons, and printed totes, the visual system has to work across different materials. A bright red on coated stock will not behave the same way on natural canvas, and that is not a factory mistake; that is a substrate reality. A PMS 186 C that looks rich on a matte mailer can look slightly muted on a tan 10 oz canvas tote if the underbase is too thin.
Skipping sample approval is a classic way to invite rework. The mockup may be accurate in concept, but only a physical sample tells you whether the logo placement is correct, whether the print feels too thick, and whether the art is legible after folding. For complex custom canvas tote bag printing methods, a sample is cheap insurance compared with scrapping 2,000 units. I’ve seen a buyer in Milan save nearly $2,000 in rework just by approving one strike-off on a dark charcoal tote before production rolled forward.
The last mistake I see often is mismatching the decoration method to the use case. A delicate foil accent may look beautiful on a premium gift tote, but it is a poor choice for a heavy grocery bag that will be rubbed, folded, and stuffed repeatedly. Likewise, embroidery can look fantastic on a structured canvas tote, but it may be too costly for a mass-market trade show program. The method should fit the mission, and the mission should be spelled out before the factory quotes anything beyond a rough estimate.
Expert tips for better results with custom canvas tote bag printing methods
If you want better results, simplify the art first. Bold shapes, clear typography, and deliberate negative space tend to perform better on canvas and usually look more premium too. I know some brands want to put everything on the bag, but a clean logo with good breathing room often prints better and gets remembered more easily than a crowded layout. Plus, your printer will silently thank you, which is never a bad thing, especially when they are trying to keep a 2-color run moving at 900 pieces per hour in a factory outside Wenzhou.
Match the method to the quantity. That sounds basic, yet it is where a lot of buyers make expensive decisions. Screen printing is usually the smart choice for larger runs and recurring programs. Heat transfer or digital printing can be the better fit for small batches, test markets, or projects where artwork may still change. The right custom canvas tote bag printing methods choice often saves money long before the bag reaches the customer. If your order is 250 pieces, paying a few cents more per unit for a lower setup process may be smarter than funding a full screen room for no reason.
Ask for Pantone targets early if color matters. If the brand is strict about color, get the target in writing and ask whether the factory can produce a lab dip, printed strike-off, or both. Color on canvas is affected by absorbency and weave, so a side-by-side sample is worth far more than a vague promise that it will “match closely.” A buyer who approves a 5% color shift on a matte art paper proof may be surprised when the same tone looks 10% darker on a 14 oz natural canvas tote.
Placement is another detail that separates decent tote work from excellent tote work. Keep logos away from seams, handles, and gussets if possible. Those areas distort the print area and can complicate registration. I’ve stood at a press where one-half inch of logo drift onto a seam turned a clean badge into a crooked badge that no client would have signed off on. It was the sort of moment that makes everyone in the room go quiet for a second, which is never a reassuring sound, especially in a factory where the QC table is only a few feet away from the stitching station.
Think about the end use. Trade shows, retail handouts, employee welcome kits, and grocery bags all ask something different of the tote. A trade show bag may need a sharp front-facing logo and lighter weight to control cost. A grocery tote may need heavier fabric and stronger stitching. A retail packaging tote might need a premium finish, folding consistency, and branded inserts to support the broader unboxing story. A 600-piece conference order in Las Vegas and a 6,000-piece retail order in Seattle will rarely benefit from the same decoration strategy.
Those finishing details matter more than many buyers expect. A folded presentation, a tissue insert, or a small branded card can lift the perceived value without changing the print method at all. In some programs, that presentation does as much for package branding as the decoration itself, especially if the tote is part of a gift set or paired with Custom Packaging Products like sleeves, mailers, or rigid cartons. I’ve seen a plain canvas tote paired with a 350gsm C1S card insert and a neat belly band outperform a more elaborate print simply because the overall presentation felt considered.
I also suggest asking the supplier to explain why one method beats another for your exact design. A good factory partner will not simply push the cheapest process; they will compare ink coverage, line fidelity, setup time, and downstream durability. If they cannot explain the tradeoffs in practical terms, that is a sign to slow down and ask better questions. A knowledgeable production manager in Shenzhen should be able to tell you, in plain language, whether your art belongs on screen print, transfer, or embroidery, and why the difference matters for a tote that will be carried 30 or 40 times.
“A tote bag is not just a bag. It is a moving piece of branding, and the printing method has to survive the life the customer will actually give it.”
Best next steps after choosing your tote printing method
Once you have narrowed the choice, gather the essentials: artwork, fabric weight, tote color, quantity, and the priority between durability, speed, and premium feel. That simple package of information gives your supplier enough context to recommend the best custom canvas tote bag printing methods instead of guessing from a single logo file. A supplier can quote far more accurately when they know whether the tote is 10 oz cotton, 12 oz recycled canvas, or 14 oz brushed canvas from a mill in Hebei.
Ask for a side-by-side recommendation if you are unsure. For example, have the manufacturer compare screen printing versus heat transfer on the same bag size and art. If the logo is detailed, ask for a mockup showing how each method will handle fine lines and edge sharpness. If the project is tied to retail packaging or a launch kit, compare the tote with other package branding components so the whole presentation stays consistent. A simple comparison sheet with two options, two unit prices, and a lead time of 12 to 15 business days from proof approval can clear up a lot of back-and-forth.
If there is any uncertainty around texture, detail, or cost, request a sample or a mockup comparison before full production. I would rather spend a little time approving one sample than spend days explaining why a production lot missed the mark. That is especially true when the order is tied to a retailer, a conference deadline, or a product packaging rollout with fixed ship dates. A physical sample from a factory in Guangzhou or Ningbo can tell you more in ten minutes than a dozen email threads ever will.
Confirm milestones in writing. At minimum, I want to see proof approval, sample approval if needed, production start, in-line QC, completion, and ship date. If the order includes custom folding, labeling, or polybagging, list those separately so nobody assumes they are already included. A clean milestone sheet saves real arguments later. If the factory says final packing will take 2 business days and export cartons are 50 pieces per case, write that down before the line starts moving.
Here is the checklist I recommend before you release an order:
- Artwork: vector file, outlined fonts, correct color references.
- Placement: print size, exact distance from seam or handle.
- Method: screen print, transfer, embroidery, or specialty effect.
- Fabric: weight, color, weave, and any coating.
- Finish: fold style, labels, hangtags, inserts, packaging.
- Logistics: carton count, master pack, ship date, destination.
In my experience, the best projects are the ones where the buyer treats the tote like a small manufacturing program, not just a swag item. That mindset leads to better print quality, cleaner timelines, and fewer surprises. It also helps the tote support your broader retail packaging strategy rather than sitting off to the side as an afterthought, whether the order is shipping to a warehouse in Orlando or a distributor in Toronto.
So if you are comparing custom canvas tote bag printing methods for your next order, start with the end use, then work backward through the artwork, fabric, and volume. The right choice should balance brand presentation, production efficiency, and real-world durability. If you get those three pieces right, the tote will do its job long after the box has been opened and the event table has been packed away, and the print should still look good after 20 or more carries instead of falling apart after the first grocery run.
FAQs
Which custom canvas tote bag printing method is best for large orders?
Screen printing is usually the best fit for large orders because setup costs are spread across more units, and the process is very efficient once the press is dialed in. It works especially well for one- to three-color logos on standard canvas totes, and it tends to hold up well when properly cured. For 2,000 pieces or more, it is often the most economical option among custom canvas tote bag printing methods, particularly if the factory can run the line for 12 to 15 business days from proof approval without extra packaging steps.
What is the most durable custom canvas tote bag printing method?
Screen printing with properly cured ink is typically one of the most durable choices for canvas totes. Embroidery is also highly durable, although it changes the look and feel more than ink-based decoration. True durability depends on fabric weight, cure quality, and how much stress the tote sees in daily use, so the exact answer can shift with the project. A 14 oz canvas tote with a well-cured 1-color print from a factory in Dongguan will usually outlast a lightweight transfer on a 10 oz bag.
How do I keep my logo sharp on textured canvas?
Use vector artwork, avoid tiny text, and keep linework bold enough to survive the weave of the canvas. Choose a print method that can hold detail well, and ask for a sample proof before production starts. If the tote fabric is coarse, simplify gradients and micro-details so the design reads clearly from a normal viewing distance. A minimum stroke width of 0.75 mm is often safer than a hairline rule when the substrate is an 11 oz raw canvas from a mill in Zhejiang.
What affects the cost of custom canvas tote bag printing methods the most?
Quantity, number of colors, print locations, and setup time usually drive cost the most. Specialty finishes, custom packaging, and tight turnaround requests can also add to the total. Method choice matters too, because screen printing becomes more economical as order size increases, while short-run digital or transfer work can cost more per unit but save setup time. On a 5,000-piece run, a one-color screen print may land near $0.15 per unit for the print portion, while a 250-piece transfer job could be several times higher.
How long does it take to produce printed canvas tote bags?
Simple runs can move quickly after artwork approval, while multi-color or specialty jobs take longer. Sampling, screen preparation, curing, and finishing all add time to the schedule. If you need precise timing, ask for a production calendar that includes proof approval, sample approval if applicable, and shipping milestones so there is no confusion later. A typical straightforward order runs 12 to 15 business days from proof approval, while complex finishing or packaging can extend the schedule by a few more business days.