A custom engraved box changes the conversation before the product is even lifted out. The surface does part of the selling. In premium packaging, that first impression can matter more than a long spec sheet, especially when the box is meant to signal restraint, craft, or a higher tier of value.
That does not mean engraving is always the right move. It is a finish with opinions. It looks strongest when the structure is solid, the artwork is disciplined, and the use case justifies a more tactile presentation. If the box is doing mostly shipping work, print or label-based branding may be the better spend. If the box is part of the product story, engraving can do a lot with very little.
What an Engraved Box Actually Changes
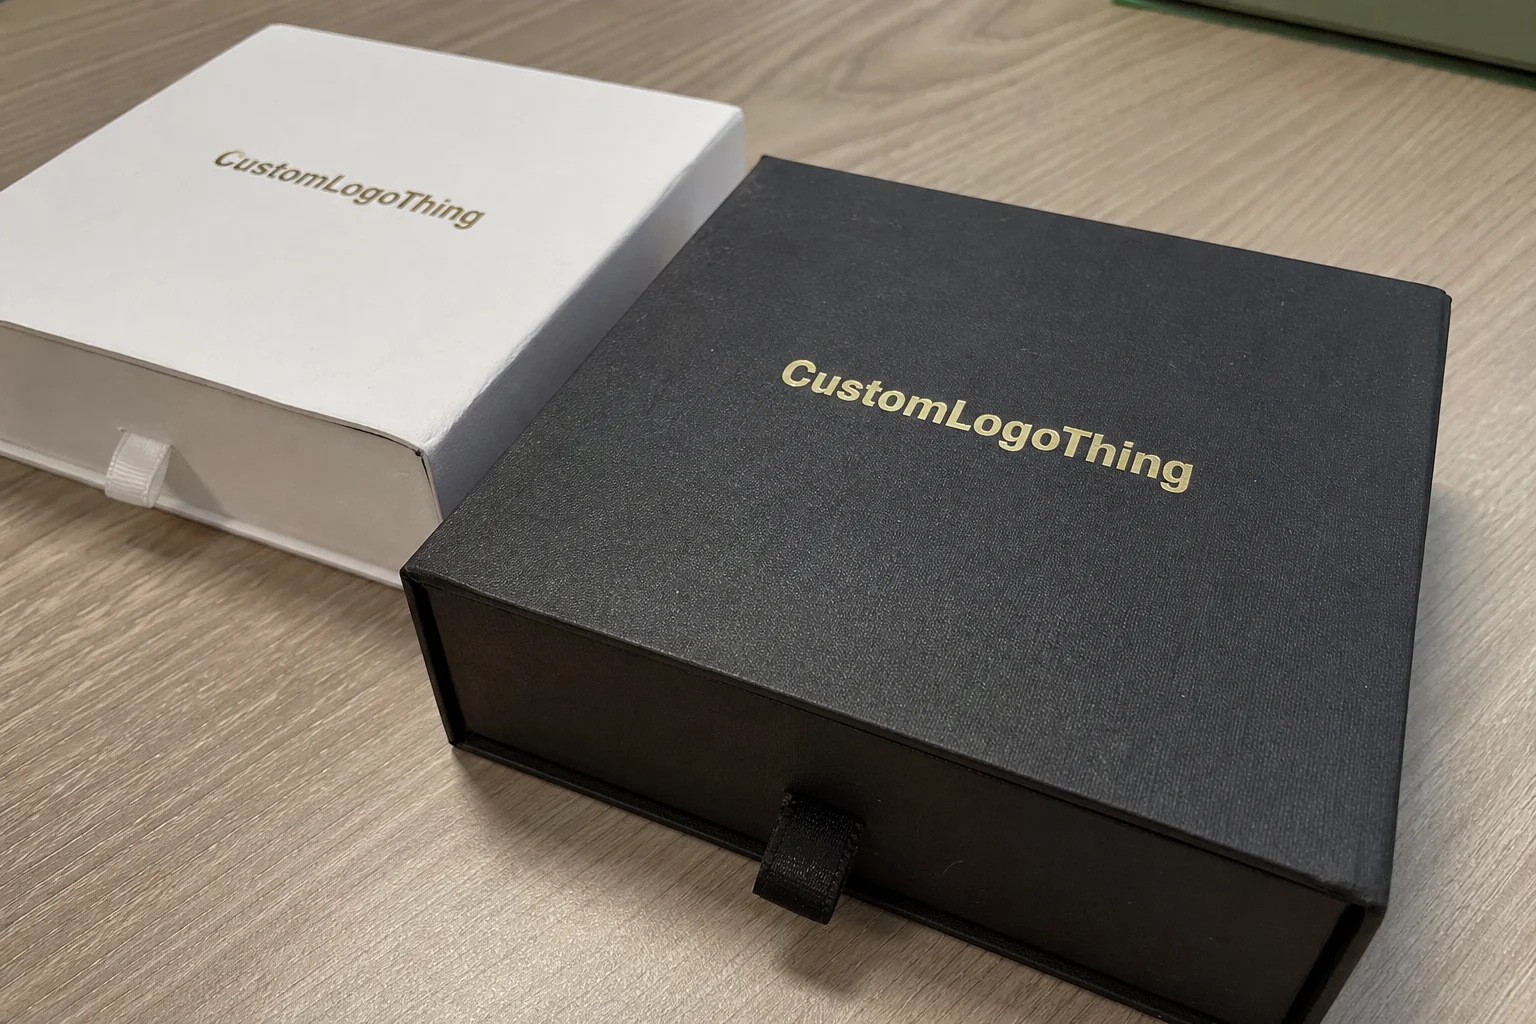
Engraving is not just decoration. It changes how a package reads in the hand, under light, and on camera. A plain carton can still protect the product, but a custom engraved box tells people someone made decisions about presentation instead of defaulting to a generic shell. That matters for gifting, PR samples, limited releases, and any item where the packaging is part of the perceived value.
From a buyer’s point of view, the real question is simple: do you need the box to feel permanent and tactile, or do you only need it to arrive cleanly and efficiently? If the answer is mostly logistics, Custom Packaging Products with print or label work may be smarter. If the box needs to feel deliberate, premium, and a little quieter than full-color branding, engraving earns its keep.
In practice, engraved finishes work best on rigid gift boxes, presentation boxes, drawer boxes, and certain specialty mailers. They are less useful on high-volume shipping packs where speed, stacking strength, and print efficiency matter more than surface detail. That is why packaging design should start with the job the box has to do, not with the finish someone prefers in a mockup. Branded packaging only works if it fits the channel.
“The box should make sense the second it is touched. If it feels expensive but the product inside is ordinary, you overspent. If it feels ordinary and the product is premium, the package is underbuilt.”
One common mistake is treating engraving as a rescue move for weak packaging. It is not. A custom engraved box is most effective when the structure, insert, and artwork already support the same message. If the box shape is wrong, engraving just makes the mismatch more expensive. Strong product packaging usually gets built as a system: box style, closure method, insert, finish, and shipping method all need to work together.
There is also a perception issue that buyers underestimate. Cheap packaging looks temporary. Engraved packaging looks intentional. That does not mean it is always the right spend, because a lot of launches need custom printed boxes that can carry color, regulatory copy, and campaign messaging more efficiently. But if the goal is a restrained, physical brand signal, engraving gets there quickly.
One practical upside is consistency across small runs. A mark etched or cut into a surface can look cleaner than ink on some substrates, especially when the box has a natural or matte finish. The downside is just as real: engraving exposes material behavior, so any weakness in the board, coating, or laminate tends to show up faster than it would with print alone. That makes material selection more important than most first-time buyers expect.
How the Engraving Process Works
The process starts with the substrate, and that is where people often get tripped up. Different plastics, coated boards, wood-look materials, and laminates react differently to heat, depth, and edge detail. A finish that looks crisp on a dense coated board may char on a softer surface, and a laser that gives a dark mark on one material can barely register on another. Material choice comes before artwork polish, not after.
There are three common approaches. Laser engraving removes or alters the top layer and is usually the most flexible for detailed logos and small marks. Mechanical etching cuts the surface more literally, which can feel more tactile but may be slower or less suitable for fine graphics. Die-based marking can be efficient for repeat runs, though it tends to favor simpler artwork and stable volumes. The method affects edge crispness, contrast, and production speed, so the vendor should be able to explain why one method is being recommended over the others.
Artwork cleanup is usually necessary. Tight corners, nested shapes, tiny text, and thin strokes are the first things to fail. A logo that looks polished in a browser window can fill in or soften once it is reduced to production size. As a rule, line weights below 0.25 mm deserve caution, and text under 5 to 6 pt should be treated carefully unless the substrate and method have already been proven on sample work.
A proof stage is not optional if the design has detail. The box may be a gift item, but the process is still manufacturing, which means there are tolerance limits and failure points. Good vendors will show a digital mockup, then a production proof or sample if the design is sensitive. If the box has to survive shipping and handling, ask whether the structure has been tested against transit standards such as ISTA guidance. That matters more than many teams realize, especially for premium retail packaging that still has to move through carrier networks without getting crushed.
There is one more choice hidden inside the method discussion: what is permanent and what is cosmetic. Some engraving processes remove material. Others mostly alter the top layer or create contrast through heat. Permanent removal gives a more authentic feel, but it can also reveal the underlying color in a way that is harder to control. Decorative marks can be Faster and Cleaner, but they may age differently. If durability is part of the value proposition, ask for a scratch and rub expectation before the run is approved.
If paper-based sourcing matters, ask for documentation from FSC if the box uses certified paperboard or paper components. That does not make the packaging better by default, but it does provide traceability when a retailer or customer asks for it. In buyer conversations, that detail often removes friction that would otherwise show up late in the approval cycle.
Cost and Pricing: What Drives the Quote
Pricing is usually driven by quantity, engraving area, material type, setup complexity, and whether the artwork needs cleanup or proof revisions. The short version: the more custom the surface and the tighter the detail, the more you pay. That is not a trick. It is just how production time and reject risk work.
Small orders carry a higher unit cost because the setup has to be spread across fewer boxes. A test run of 100 to 250 units can look expensive on paper, but it may still be the smartest move if the design or demand is uncertain. Once you move into mid-volume or full production, the unit price usually improves quickly, then levels off when storage, freight, or handling starts becoming the real cost.
| Order size | Typical unit price | What usually drives it | Best fit |
|---|---|---|---|
| Sample or proof set | $8-$20 per unit | Setup, file review, one-off production, shipping | Artwork validation, sales approval, investor decks |
| Short run, 100-250 units | $2.40-$5.50 per unit | Setup spread over fewer boxes, higher scrap risk | Launches, gifting, limited promotions |
| Mid-volume, 500-1,000 units | $0.90-$2.10 per unit | Better production efficiency, fewer per-unit setup penalties | Regular retail packaging or premium subscription packs |
| Higher volume, 5,000+ units | $0.38-$1.10 per unit | Run speed, standardized setup, stable materials | Repeat programs and controlled replenishment |
Those ranges are directional, not a promise. Coated rigid board with simple engraving is usually cheaper than specialty laminate with deep contrast work. Multi-location engraving, metallic substrates, inserts, and unusual box geometry all push the number up. If the quote includes custom tooling, a setup charge of roughly $75 to $250 is common, and it can climb if the design needs multiple proof rounds or file corrections.
Do not compare unit price alone. Compare the full landed cost: artwork cleanup, mockup time, proofing, packaging, freight, insurance, and any rework if the first file is wrong. Buyers often celebrate a low per-unit number, then discover the total invoice was higher because every add-on was hiding in a separate line. That is not a savings plan. That is a spreadsheet trap.
There is also a budget split that matters. If the box is carrying a premium product, it often makes sense to spend more on the structure and less on decorative extras. If the box is a retail-facing display piece, the engraved surface may deserve more of the budget. Good packaging design is not about maxing out every feature. It is about putting money where the customer actually notices it.
One more cost detail gets overlooked: reject rate. The tighter the engraving and the more complex the substrate, the more likely the first run includes scrap, touch-up, or rework. A clean, simple mark on a stable board can run efficiently. A dense graphic on an unpredictable surface can turn a low quote into a costly recovery job. That is why vendors who talk openly about tolerances usually end up being easier to work with than vendors who only talk about the best possible result.
Process and Timeline: From Artwork to Delivery
The normal flow is straightforward: inquiry, file review, mockup, proof approval, production, inspection, and shipping. The trouble starts when buyers try to skip the boring steps. File review is where the vendor catches problems with size, placement, depth, and readability. The proof stage is where the team decides whether the visual balance is right. Cut either one, and the odds of a costly correction go up fast.
Lead time depends on material availability, setup complexity, and order size. A simple run can move quickly once the artwork is clean and the substrate is in stock. A detailed custom engraved box with revisions, special inserts, or a nonstandard finish will take longer. A realistic planning window is often 12 to 15 business days after proof approval for straightforward jobs, and longer if the material has to be sourced or a sample round is needed first.
Ask whether the quote is based on business days or calendar days. That one detail creates most deadline confusion. If a vendor says 10 days and means business days, you are already looking at two full weeks before shipping. Add carrier time, and a “two-week” project can turn into a month with very little drama, just math.
Build in time for decisions. Marketing teams often wait three days to debate whether a logo should move 4 mm left. Production does not care about the debate. The schedule cares about approval. If the box is tied to a launch, product drop, or event kit, make one person responsible for final sign-off and set that expectation early.
Quality control should happen at more than one stage. A good shop checks file legibility before production, then verifies placement and depth during the run, then inspects random units before release. On a premium box, a small shift in registration or an uneven mark can be obvious. What looks acceptable on a screen can look off-center in the hand. That is one reason sample approval matters so much: it turns abstract expectations into a physical standard.
For teams comparing structure, finish, and channel requirements, it helps to look at packaging as a system instead of a single object. If you need help narrowing options, start by reviewing the box styles in our packaging options and match the format to the product weight, retail environment, and shipping path. A premium box that fails in transit is just an expensive problem.
Step-by-Step Ordering Checklist
Define the product dimensions first. Not approximate dimensions. Actual dimensions, including the insert, closure, and any cushioning. The box should fit the product and the shipping method, not just the item itself. If you skip this, the rest of the spec is built on a guess.
Choose the role before you choose the finish. Is this retail packaging, a gift box, a subscription mailer, or a protective shipper? Each one changes the engineering. A retail-facing box can spend more time on presentation and less on crush performance. A shipper needs the opposite balance. A luxury mailer still needs structure, because a pretty box with weak walls is just a damaged box with good intentions.
Prepare artwork in vector format whenever possible. AI, EPS, and PDF are the safest starting points because they keep edges sharp and scale cleanly. If all you have is a raster logo, expect cleanup time. If the logo contains very thin strokes or tiny type, ask the vendor to simplify it before production instead of hoping the machine will forgive it. It will not.
Request a mockup or dieline with exact placement marks. Guessing is expensive. The box is not the place to freestyle. If the engraving sits too close to a fold, hinge, or closure point, the detail can distort or disappear. Good placement is usually measured in millimeters, not “looks about right.”
Lock quantity, material, and turnaround before approval. Otherwise the quote can move after the creative team signs off, which is a classic packaging headache. Ask for a clear note on acceptable tolerances: engraving depth, logo clarity, box dimensions, and any allowable color shift if the substrate is toned or coated. That written agreement prevents a lot of arguments later.
- Confirm the box dimensions and insert depth.
- Choose the engraving method and substrate.
- Approve a proof with exact placement marks.
- Set quantity tiers before final sign-off.
- Write down inspection criteria and tolerance limits.
That checklist sounds basic because it is basic. The expensive part is what happens when one of those steps gets skipped. A little discipline here saves more money than trying to negotiate a lower unit price after the file is already wrong.
Common Mistakes That Waste Money
The first mistake is choosing detail the material cannot hold cleanly. If the engraving is too fine, the final result can look muddy instead of premium. People tend to assume more detail equals more value. On packaging, that is often wrong. Strong contrast and clean spacing usually read better than a busy mark that only looks good on a monitor.
The second mistake is approving artwork without checking line thickness, text size, and negative space. Tiny elements are where good packaging goes to die. If you cannot see the logo clearly at actual size in a proof, the machine will not magically improve it. Ask the vendor to show the worst-case detail, not just the nicest hero render.
The third mistake is ignoring the real use case. A luxury gift box and a shipping-first box are not the same spec, even if both are technically boxes. One is selling a mood. The other is surviving a carrier network. If the buyer tries to make one box do both jobs without compromise, something usually gives.
The fourth mistake is ordering too late. Rush work, split shipments, and substitute materials all cost money. Worse, they often reduce quality in ways that only show up after the job is paid for. I would rather see a buyer place a smaller, cleaner order on time than a bigger order that arrives after the launch window has already passed.
The fifth mistake is comparing vendors on price only. The lowest bid often excludes proofing, revisions, or basic quality control. That can look clever right up until the first batch arrives and the logo is off-center or the engraving depth varies across the run. A lower quote is not a lower cost if half the work is missing from it.
The sixth mistake is ignoring how the box will be opened and handled. If the logo sits where fingers rub the lid every day, the finish needs to tolerate handling. If the box is stacked in transit, the surface may need more resistance to scuffing and pressure. Packaging failures are often not dramatic; they are just small wear points that make a premium item feel less premium after a few touches.
Expert Tips and Next Steps
Ask for one sample that represents the hardest part of your design, not the easiest. If your logo has a tiny subline, a sharp corner, or a thin icon element, that is the section you want tested. A perfect mockup does not tell you much. A sample that proves the weak point tells you plenty.
If quantity is uncertain, price three scenarios: test run, expected demand, and best case. That gives you a clean view of the breakpoints and helps you avoid overbuying. For packaging teams, the smartest order is rarely the biggest one. It is the one that matches demand without choking storage or cash flow.
Use one decision owner for final approval. Packaging projects slow down when five people all want to be the last person to touch the file. One owner can gather feedback; one owner should sign off. That is not a political statement. It is how you keep the schedule from turning into mush.
If the box is part of a larger launch, treat the Order Like a Production milestone, not a design preference. Gather dimensions, finalize artwork, request tiered pricing, and ask for a proof before production starts. If you are comparing formats, look through Custom Packaging Products early so the structural choice fits the product instead of forcing the product to fit the box.
A custom engraved box works best when the spec is tight, the artwork is simple enough to reproduce cleanly, and the timeline includes room for proofing. That is the practical formula. Nothing flashy. Just the discipline that makes premium packaging look expensive for the right reasons.
FAQ
What makes a custom engraved box different from printed packaging?
Engraving changes the surface itself, so the effect is more tactile and more permanent than print. Printed packaging usually gives you more color flexibility and easier messaging. Choose a Custom engraved box when texture, restraint, and durability matter more than full-color graphics.
How much does a custom engraved box usually cost?
Cost depends on quantity, material, engraving area, artwork complexity, and setup work. Small runs usually have a higher unit price because setup is spread across fewer boxes. Ask for tiered pricing so you can see the breakpoints instead of guessing.
How long is the lead time for a custom engraved box order?
Lead time depends on proof approval, material availability, and order volume. Simple jobs move faster; detailed artwork or special finishes add time. If you need a hard deadline, ask whether the quote is based on business days and when proof approval is due.
What file do I need to order engraved packaging?
Vector artwork is the safest starting point because it keeps edges sharp during production. Clean line weights and simplified details help the engraving stay readable. If you only have a raster logo, expect cleanup or redraw time before approval.
What is the best quantity for a custom engraved box order?
The best quantity is the one that balances unit cost, storage, and demand certainty. If demand is unproven, a smaller test run is usually smarter than overbuying. If the box is tied to a launch or premium program, compare three tiers before you commit, then choose the custom engraved box quantity that fits your actual plan.