A packaging checklist is not extra work. It is the difference between a paper bag that supports the sale and one that shows up with weak glue, crooked print, or handles that fail under normal use. The first problem with custom retail bags is that the mockup usually looks fine. The second problem is that the approved sample can still hide production risks, especially when the supplier changes paper caliper, glue type, or handle reinforcement during bulk production.
For buyers, the job is to define what must pass before bulk production, final payment, and shipment. Clear specs reduce reprints, delays, and disputes. Vague specs turn quality control into damage control, which is slower and more expensive. A good checklist should include measurable limits for size, color, load capacity, finish quality, carton counts, and inspection method.
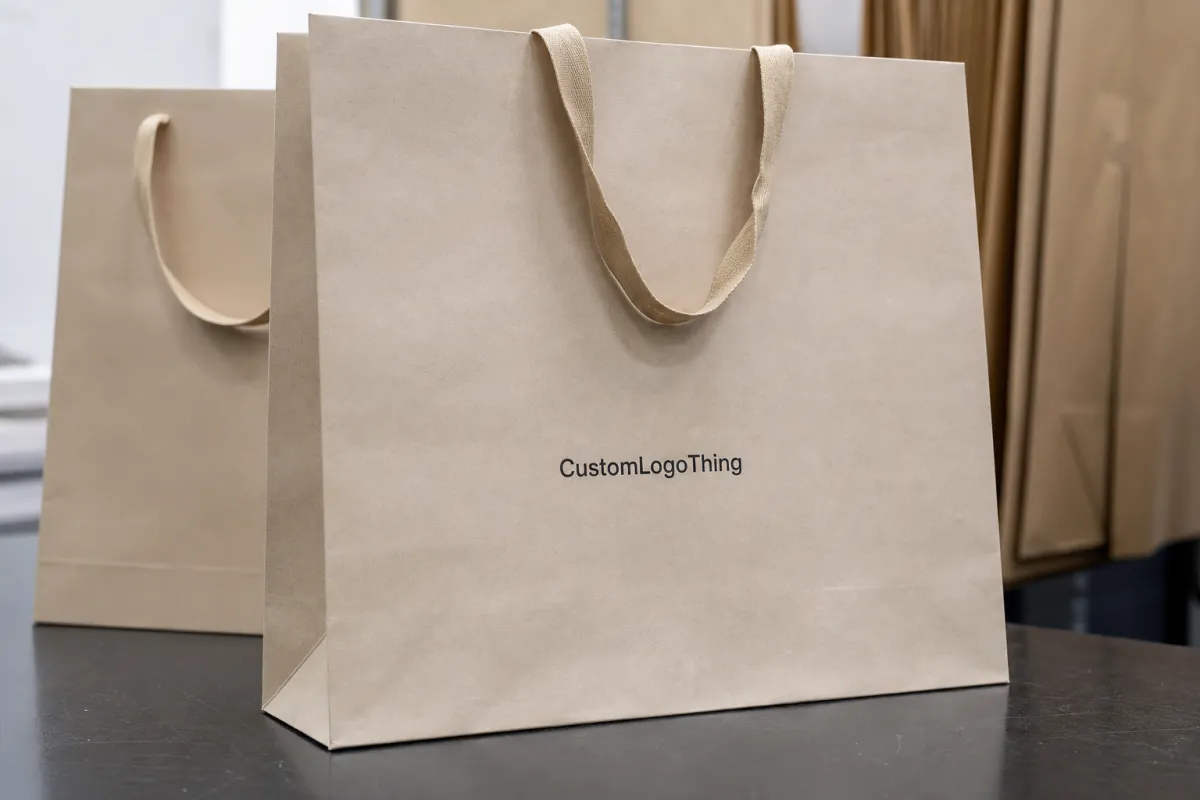
Custom clothing store paper bags quality control checklist: what fails fast
A bag can look premium on screen and still fail in the hand. The fastest failures are usually obvious: a logo printed too low, a seam opening under light pressure, a handle pulling loose, or paper stock that feels too thin for the product inside. Those defects are visible to staff and customers immediately, often within the first 10 to 20 uses in-store.
A practical checklist should cover three buyer priorities:
- Brand image - the bag should support the store presentation, not weaken it.
- Consistency - cartons should match the approved sample within agreed tolerances, usually within +/- 2 mm for size and +/- 1.5 mm for print placement on common retail bags.
- Reorder speed - the supplier should know the standard well enough to repeat it without a new round of trial-and-error.
“A premium-looking bag is not a premium bag until it survives folding, handling, and load testing.”
The main mistake is approving by eye and skipping written limits. If the factory does not know the acceptable range for print shift, paper weight, handle strength, and carton packing, it will use its own version of acceptable. That version may be good enough for the factory and wrong for the store. Ask the supplier to confirm the test method in writing: how many lifts, what load, which paper grade, and what defect count triggers rework or rejection.
Use the checklist as a gate before production, not as a cleanup tool after the order is already late.
How paper bag production and inspection steps work
Paper bag production usually follows a fixed sequence: artwork approval, paper selection, printing, cutting, folding, gluing, handle attachment, and carton packing. Each stage has its own failure points, and problems introduced early often appear late. For example, incorrect die-cutting can force the bottom panel out of square, while weak adhesive can pass visual inspection but fail after 2 to 3 carry cycles.
Start with the artwork proof. Lock logo size, placement, bleed, taglines, barcodes, and any foil or varnish effects. Then confirm paper selection, because stock affects stiffness, fold memory, ink appearance, and overall feel. Printing, die-cutting, and folding can all drift if machine setup is even slightly off. A typical production line may use a 4-color offset press for coated paper, a flexographic press for kraft paper, an automatic paper bag making machine for folding and gluing, a hot-melt glue system for reinforcement, and a rope-insertion or handle-pasting station depending on the bag style.
Useful inspection points include:
- Pre-production sample - confirms structure, finish, and look before the bulk run; usually 1 to 2 physical samples are sent for approval.
- First-article check - verifies the first pieces from the line match the sample, including glue coverage, handle alignment, and print registration.
- In-line check - catches drift before thousands of units are affected; typical checkpoints are every 30 to 60 minutes or every 500 to 1,000 bags, depending on order size.
- Final random inspection - checks cartons, counts, dimensions, and visible defects before shipment; many buyers use AQL 2.5 for major defects and 4.0 for minor defects.
The supplier should confirm die line accuracy, glue placement, handle attachment, carton counts, and visible print quality. The buyer should confirm the sample standard, acceptable defect rate, load expectations, and whether final shipment photos are required before balance payment. For higher-risk orders, require a carton drop test, a handle pull test, and a moisture check if the bags will be used in humid retail storage.
If the bag fails at sample stage, do not push it into production because the deadline is tight. Deadlines are not quality control. They are just pressure with a calendar.
For broader packaging programs, it helps to keep bags, tissue, and inserts under one spec set in the Custom Packaging Products catalog.
Paper stock, print, and build specs that decide pass or fail
The spec sheet is where a checklist becomes useful. Words like “nice paper,” “strong handles,” or “premium finish” do not control production. Give the supplier numbers, materials, and acceptance limits.
Paper weight is the first decision. For small boutique bags, 180gsm to 200gsm kraft may be enough if the bag is modest and the handle style is simple. For heavier garments, 250gsm to 300gsm art board or coated paper is safer because it holds shape better and resists corner crush. Ask how the stock behaves after folding, since some papers look sharp flat and weak once creased. If the bag needs a luxury feel, 300gsm art paper with matte lamination or soft-touch lamination is common, but the coating should be tested for scuff resistance before you approve the run.
Grain direction matters too. If the grain runs the wrong way, the bag can curl, crack on folds, or resist a clean crease. Coating also changes performance: matte, gloss, and soft-touch lamination affect scuff resistance, feel, and folding behavior. For paper sourced from recycled fibers, ask whether the fiber content is certified and whether the recycled claim matches the invoice and packing list.
For sourcing credibility, ask for FSC paperwork for the material itself, not just a logo on the quote. Check the certificate scope and product eligibility, and make sure it matches the actual stock. FSC’s public site is a useful reference: FSC. If the supplier offers recycled-content claims, ask for GRS documentation when the paper or accessory component uses verified recycled input. For textile or rope handles, ask for OEKO-TEX Standard 100 if the handle fabric or cord is in direct contact with the product and GOTS if the cotton component is organic-certified.
Print quality should be defined with real tolerances. Set logo placement in millimeters. Decide whether a small shift is acceptable. If color matters, use an agreed standard instead of arguing over screens. A Pantone target or approved printed sample is more reliable than a monitor, and small type below 6 pt should be checked for legibility on textured stock. For premium retail bags, many buyers also specify Delta E at or below 2.0 against the approved master sample.
Construction is where weak bags usually reveal themselves. Look at handle attachment points, bottom seam, gusset alignment, and glue coverage. Thin or uneven glue can open a seam after a few loads. A crooked gusset can make the bag stand off-center on the counter. Weak reinforcement at the handle area can turn a decent-looking bag into a carry-away failure. Ask whether the bag uses folded top reinforcement, cardboard inserts, or eyelet reinforcement, and confirm the material thickness if any insert is used.
Finish defects matter more than many suppliers admit. Scuffing, micro-cracks in lamination, odor from poor adhesive, or a surface that feels overly plastic can all make the bag look cheap even when it still functions. Adhesive odor is a useful quality signal: strong solvent smell often points to rushed drying or poor ventilation, which can also affect long-term glue performance.
- Pass - the paper holds a crease cleanly, the logo sits within tolerance, the handles pull evenly, and the bag stands square.
- Fail - the corners crush easily, ink rubs off, glue bleeds, or the surface cracks after folding.
Cost, pricing, MOQ, and quote checks before you sign
Price is where many buyers stop reading, but the headline number only tells part of the story. A low quote can hide weak stock, thin handles, poor finishing, or a loose inspection standard. Always compare the quote against the exact paper gsm, lamination, handle material, carton count, and test standard.
The main cost drivers are paper grade, print colors, handle style, finish, size, and carton packaging. A one-color kraft bag with twisted paper handles costs less than a full-color art paper bag with rope handles and soft-touch lamination. Small upgrades add up quickly, especially when you add foil stamping, embossing, UV spot coating, or custom die cuts.
| Bag option | Typical unit price range | What changes | QC risk to watch |
|---|---|---|---|
| 180gsm kraft, 1-color print, twisted handles | $0.18-$0.30 at 5,000 pcs | Lower material cost, simpler finish | Handle pull strength and fold memory |
| 250gsm coated stock, full-color print, rope handles | $0.32-$0.55 at 5,000 pcs | Better print appearance, stronger structure | Color drift and glue consistency |
| 300gsm art board, matte or soft-touch finish, premium handle | $0.60-$1.10 at 3,000 pcs | Higher-end feel, more finishing steps | Scuffing, lamination cracks, carton damage |
| Rigid premium paper bag with foil, emboss, and reinforced rope handles | $2.50-$4.00 at 500 MOQ | Multiple finishing steps, lower run efficiency | Registration error, cracking on folds, higher reject rate |
MOQ affects unit price because setup costs get spread across fewer bags. A lower minimum can help a small shop test a design, but it usually increases cost per unit. A seasonal brand may save more by ordering deeper and planning inventory earlier. Typical MOQ ranges are 500-1,000 pcs for premium custom paper bags, 1,000-3,000 pcs for coated or laminated retail bags, and 3,000-5,000 pcs for simpler kraft programs.
Compare quote line items, not just the first number. Tooling, sample charges, freight, third-party inspection, and replacement policy can all change the total. A standard sample charge may be $30-$120 depending on structure, while dieline or cutting-die tooling can range from $50-$300. If you are also ordering inserts, tissue, or matching cartons, keep the packaging system aligned through one spec set in the packaging options catalog.
A stricter QC plan costs more up front, but a reprint costs more later. In most cases, the cheapest extra line item is a final random inspection. If a supplier offers WRAP or BSCI certification, ask for the current certificate number, audit date, and scope. Those certifications do not prove product quality by themselves, but they help verify social compliance and basic manufacturing controls.
Process and timeline checks from sample approval to shipment
A realistic schedule matters because paper bags do not appear by magic. For a standard custom order, the typical timeline is 18-22 business days from sample approval to shipment, assuming artwork is final and no new tooling is needed. Complex finishes such as foil, embossing, special lamination, or custom handles can add 5-7 business days.
A practical timeline looks like this:
- Artwork and dieline confirmation - 1-2 business days if the die line is already available and content is final.
- Sample production - 5-7 business days for a physical pre-production sample, including print setup and handle assembly.
- Sample review and revision - 2-4 business days depending on the number of corrections.
- Bulk production - 10-14 business days for a standard run after approval.
- Final inspection and packing - 1-2 business days, including carton counts and pallet checks.
Buyers should ask three timing questions before they approve the order: how long until the sample is ready, how long until the first bulk cartons are packed, and whether the quote includes time for rework if the first run misses the standard. If a supplier says it can ship in 3-5 days for a fully custom premium bag with multiple finishes, that usually means something important is being skipped.
Sample steps should be specific. First, review the digital proof and dieline. Second, approve the paper stock and finish. Third, inspect the physical sample for size, color, handle placement, and fold quality. Fourth, check a pull test on the handle and a load test on the finished bag. A common retail target is to hold 3-5 kg for 30 seconds without tearing, but the exact target should match the product weight and customer use case.
Inspection checkpoints should also be explicit. Ask for photos of the first-off line sample, in-line production, and finished cartons. Confirm that the factory records dimensions, print placement, handle attachment, and carton count. For higher-value orders, require a pre-shipment report with defect photos and batch numbers so you can match the cartons to the approved lot.
If the shipment is time-critical, build a buffer. A one-week cushion is useful; a two-week cushion is better if the order uses custom lamination, imported raw paper, or a new handle style.
Common mistakes that turn a usable bag into a dead shipment
The most common mistake is treating a paper bag as if it were a simple print job. It is a structural product with print, finishing, and load-bearing requirements. If one part is vague, the whole order becomes risky.
Other common mistakes include:
- No written tolerance - the buyer never states acceptable size variance, print shift, or color range.
- Wrong paper for the load - a light stock is approved for a heavy garment, so handles or bottoms fail in use.
- Overlooking handle construction - twisted paper, cotton rope, ribbon, and flat tape each need different reinforcement and test methods.
- Skipping sample approval - the factory starts production before the buyer signs off on the actual sample.
- Ignoring carton protection - bags arrive scuffed or crushed because inserts, shrink wrap, or divider sheets were not specified.
A useful internal check is to ask: would this bag still look acceptable after transport, shelf handling, and a customer carrying it twice? If the answer is no, the spec is incomplete. The best way to avoid a dead shipment is to define what the bag must survive before anyone starts cutting paper.
If the supplier claims a certification, verify that it is relevant to the product. FSC applies to paper sourcing. GRS applies to verified recycled content. OEKO-TEX Standard 100 applies to textile components and chemicals in direct contact applications. GOTS applies to organic textile components. WRAP and BSCI apply to manufacturing compliance systems. None of these replace physical inspection of the bag itself.
What to do next before you place the order
Before you sign, send the supplier one complete spec sheet. Include bag dimensions, paper gsm, finish, handle type, print method, artwork files, tolerance limits, carton pack count, target lead time, and inspection standard. If you want one quote that is easy to compare, ask every supplier to use the same assumptions.
Use this pre-order checklist:
- Confirm exact size in mm, including gusset width and handle drop.
- Specify paper grade and gsm, plus any lamination or coating.
- State the print standard, Pantone reference, or approved sample reference.
- Request sample lead time, bulk lead time, and final shipment date.
- Ask for certificate copies where relevant: FSC for paper, GRS for recycled content, OEKO-TEX Standard 100 or GOTS for textile handles, WRAP or BSCI for factory compliance.
- Set inspection rules before production starts, including AQL level and load test method.
If you want to reduce risk further, ask for a pre-production sample and a pre-shipment inspection report before the balance payment is released. That is usually the fastest way to catch problems while they are still fixable.
For stores that reorder often, keep one master spec sheet and do not change it casually. Small changes such as switching from matte to gloss, or changing from twisted paper handles to rope handles, can affect price, timeline, and failure rate.
FAQ
What is the safest MOQ for a new custom paper bag design?
For a first order, 500-1,000 pcs is a common test range for premium bags, while 1,000-3,000 pcs is more typical for standard retail styles. Lower MOQ is useful for testing, but unit price usually rises fast.
What certifications matter most for paper bags?
FSC is the most common for paper sourcing. GRS matters if recycled content is part of the claim. OEKO-TEX Standard 100 and GOTS are relevant when the bag uses textile or cotton handles. WRAP and BSCI help verify social compliance and factory systems.
What should a sample prove before bulk production?
It should prove structure, print placement, finish, handle strength, and fold behavior. A sample that looks good but fails a 3-5 kg load test is not ready for production.
How long does a standard order usually take?
A typical timeline is 18-22 business days from sample approval to shipment for a standard custom bag, with extra time needed for foil, embossing, special laminations, or new tooling.
What defects should I reject immediately?
Reject bags with open seams, crooked handles, serious print misregistration, crushed corners, glue bleed, cracked lamination, or any load failure during pull testing.

