Cheap paper labels on a bike frame last about as long as a clean drivetrain in a wet gravel race. Custom cycling stickers are small, exposed brand assets. They get hit with sun, road spray, chain grease, sweat, bottle-cage rub, cleaning products, gloved hands, and the occasional bad decision involving a pressure washer.
That changes the buying decision. A sticker for a shipping box is not the same product as a die-cut sponsor decal for a carbon frame. A helmet decal has different adhesive demands than a retail packaging seal. A race packet label can be temporary. A team logo on a bottle may need to survive dish soap, flex, and a rider grabbing it dozens of times per ride.
The best sticker specification starts with one plain question: where will it live?
What Custom Cycling Stickers Are Really Used For
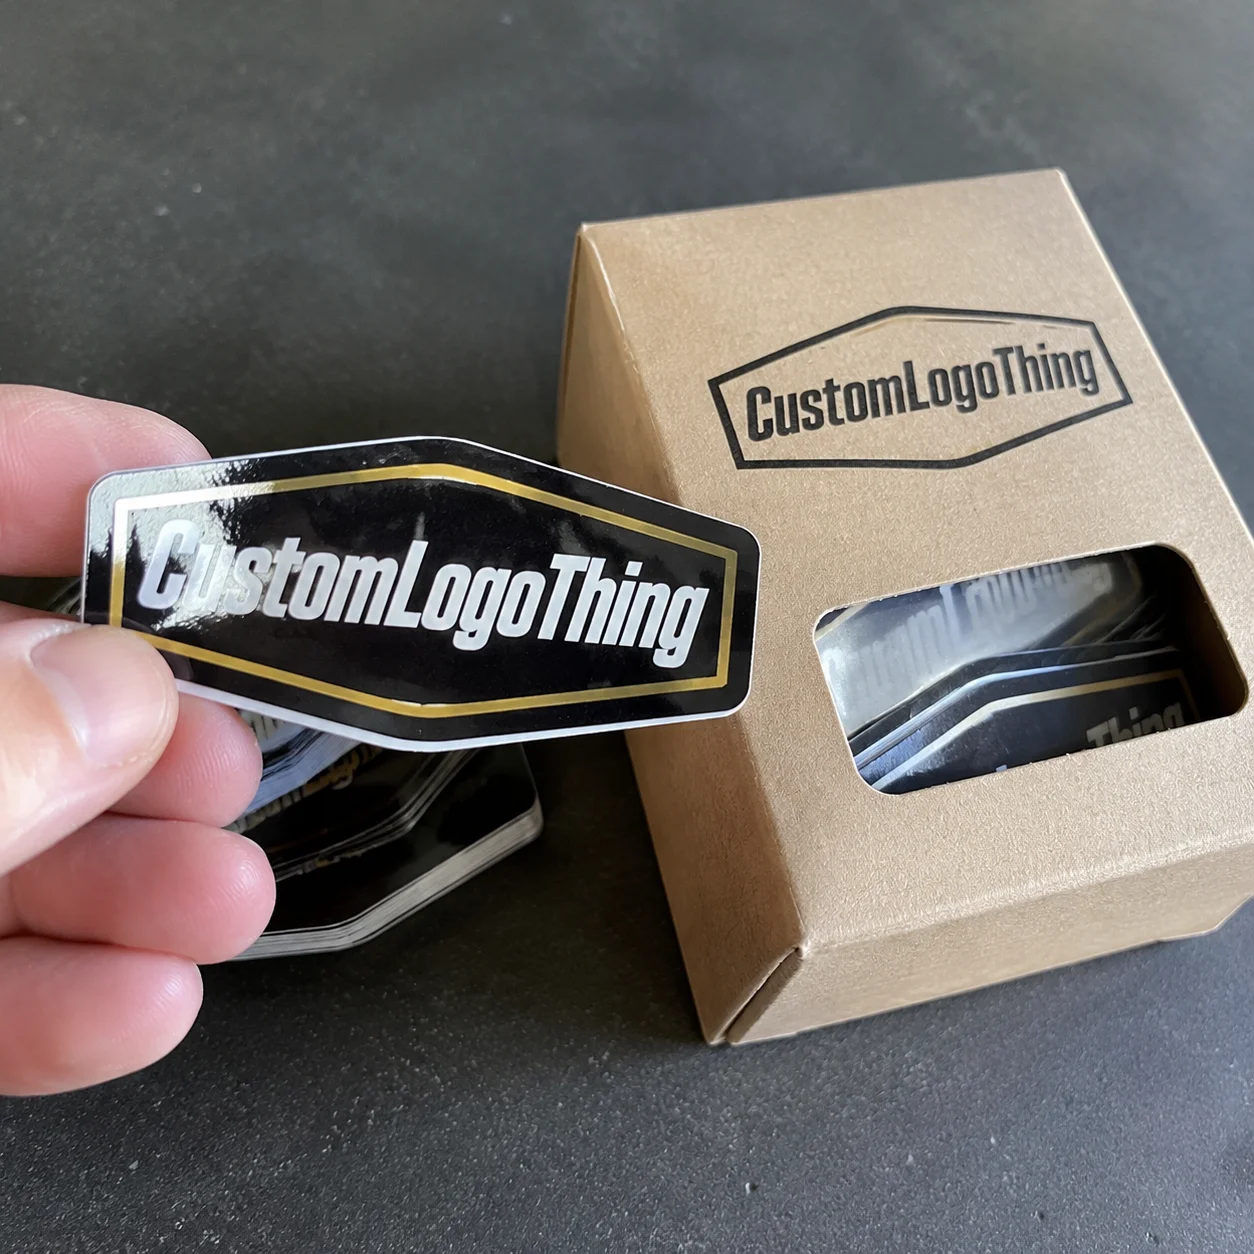
Custom cycling stickers are printed decals made for bike frames, helmets, water bottles, race packets, repair shops, product packaging, retail displays, event swag, sponsor kits, and rider personalization. The category sounds simple. It is not. The right spec depends on the surface, the expected lifespan, the finish of the object, and how much abuse the decal will see after application.
A bike frame decal usually needs an outdoor-rated film, clean edges, and a pressure-sensitive adhesive that can hold on curved tubes. Helmet stickers need a material that sits neatly on compound curves without wrinkling. Bottle stickers need flexibility and moisture resistance. Shipping box stickers can use more economical label stock because they only need to survive fulfillment, transit, and the opening experience.
Race number labels, shop service stickers, and event packet labels sit in another lane. Many need fast application, readable type, batch organization, and sometimes removable adhesive. Nobody wants a temporary sponsor decal that leaves glue ghosts on demo bikes for six months. Unless the goal is annoying everyone. Bold strategy.
For packaging buyers, the real choice is a tradeoff between appearance, durability, removability, and budget. Everyone wants all four. Reality has other plans. Outdoor performance, specialty film, lamination, white ink, custom cutting, and kit packing all move the price. The trick is not buying the toughest sticker possible. The trick is buying the right sticker for the job.
That distinction matters for cycling brands because decals often sit in public view. A failed box seal is annoying. A peeling sponsor mark on a down tube is visible from across the start corral. Small product, large reputational surface area.
How Bike and Event Decals Work From File to Finish
The normal production path is straightforward: artwork setup, file review, proofing, material selection, printing, coating or lamination, cutting, quality check, packing, and shipping. Most failures begin early. A weak logo file or vague size request can waste more time than the print run itself.
Digital printing is usually the practical choice for short runs, multiple names, sponsor versions, mixed sticker packs, and full-color graphics. It supports lower minimums and allows more variation without making the setup cost ridiculous. Screen printing can make sense for larger runs with simple spot colors, especially where opacity and repeat consistency matter. Specialty production enters the picture for reflective films, metallic effects, clear decals with white ink, holographic merch, or high-tack applications.
Lamination deserves more attention than it gets. For cycling use, a clear laminate protects the ink from UV exposure, abrasion, sweat, rain, mud, cleaning sprays, and the casual abuse riders inflict on gear they supposedly love. Gloss laminate gives brighter color and stronger contrast. Matte laminate looks quieter and often fits better with premium bike brands, apparel labels, and higher-end packaging.
Cutting style changes the user experience. Kiss-cut stickers are cut through the top sticker layer but left on a backing sheet, which makes them easy to peel and useful for sheets, packs, and event handouts. Die-cut stickers are cut through both the sticker and backing into a custom shape. They look cleaner for merch, team decals, and sponsor giveaways.
Backing format should match the work. Individual decals are simple for merch and handouts. Rolls suit shop counters, fulfillment benches, and automated label application. Sheets are efficient for sticker packs, team kits, and race packets. Bundled decal packs can combine frame logos, helmet stickers, sponsor marks, and bottle decals in one branded set, but the packing labor should be included in the quote. Someone has to count, collate, bag, and check those kits.
Practical rule: if the sticker touches a curved, coated, textured, or high-value surface, test the material before placing a full order. A $75 test batch can prevent a $2,000 correction.
Curved bike frames, matte finishes, powder-coated parts, textured bottles, and silicone-like coatings behave differently. Adhesive bonds are chemical and mechanical. They are not magic. If the surface has wax, oil, silicone residue, heavy texture, or low surface energy, even a well-made decal can lift.
File preparation matters just as much. Vector artwork is preferred for logos and cut paths. Raster artwork should be high resolution at final size, not pulled from a social media post and enlarged until it looks like a mosaic. Thin strokes, tiny type, and narrow negative spaces can disappear once the piece is printed, laminated, and cut.
Materials, Adhesives, and Finishes That Survive Real Riding
Material choice is where custom cycling stickers either earn their keep or embarrass the brand. Vinyl is the common workhorse for outdoor bike decals because it is flexible, printable, and available in gloss, matte, clear, removable, and permanent constructions. Polyester is usually stiffer but can offer excellent dimensional stability, chemical resistance, and durability. BOPP is common in label work and can be a smart choice for bottles, packaging, and short-to-medium-duty branding. Paper is fine for packaging inserts and retail packaging seals. Paper on a bike frame? Please don’t.
Reflective films add visibility and a premium effect, but they cost more and can have longer lead times. They also need disciplined artwork. Tiny sponsor text on reflective stock can turn into glittery mush from three feet away.
Adhesive should follow the surface and lifespan. Permanent adhesive fits long-term frame decals, shop branding, and bottle stickers that should stay put. Removable adhesive works better for demo bikes, event labels, rental fleets, and temporary sponsor placements. High-tack adhesive helps with textured plastics, powder-coated parts, and difficult surfaces, but removal can be rough. Low-residue adhesive is the polite option for short-term use where cleanup matters.
Finish choices are not only visual. Gloss creates contrast and color punch. Matte looks cleaner on premium bikes, apparel packaging, and modern product packaging. Clear film gives minimal branding, but it may require white ink behind light colors so the art does not vanish on dark frames. Holographic stock works for merch and youth-oriented events. Reflective film makes sense for visibility-focused clubs, night rides, safety campaigns, and sponsor kits.
Weather resistance needs precise language. Water-resistant is not the same as waterproof. Outdoor durability depends on film, adhesive, ink system, laminate, surface prep, and riding conditions. A laminated vinyl decal on a clean painted frame can perform well outdoors for years. The same decal applied over wax, dust, or a textured bottle might lift at the edge after a few rides.
Prepress details prevent visible mistakes. Add bleed, usually around 0.0625 to 0.125 inches depending on the supplier’s setup. Keep key text inside a safe zone. Use vector cut lines. Confirm whether clear decals need white ink. Ask for color guidance if matching team colors, sponsor marks, or branded packaging elements. Pantone references can help, but material, laminate, and lighting still affect the final look.
Quality control should check more than whether the sticker “looks good.” Useful checks include print registration, color consistency, cut alignment, edge cleanliness, laminate bubbles, backing release, adhesive contamination, count accuracy, and pack labeling. For rolls, unwind direction and core size can matter. For sheets, curl and sheet flatness matter. For individual decals, the backing should release without tearing or fighting the user like a cheap hotel shampoo packet.
Cost and Pricing Factors for Cycling Sticker Orders
Pricing for custom cycling stickers depends on quantity, size, shape complexity, material, adhesive, finish, lamination, number of designs, packaging format, proofing needs, and shipping speed. A simple 2-inch vinyl logo sticker costs less than a reflective die-cut frame decal with laminate and five sponsor versions. Shocking, I know.
Small runs have higher unit costs because setup, proofing, cutting, and handling do not disappear just because the order is tiny. Larger runs reduce unit cost because that fixed work gets spread across more pieces. Digital printing can support lower minimums, while screen printing, specialty films, roll formats, and custom packs may require higher order quantities.
| Sticker Type | Typical Use | Common Spec | Price Behavior |
|---|---|---|---|
| Simple vinyl logo sticker | Shops, clubs, event swag | 2 to 3 inches, gloss or matte laminate | Lower unit cost at 500+ pieces; small batches cost more per sticker |
| Bike frame decal | Teams, sponsors, brand marks | Outdoor vinyl or polyester, die-cut, laminated | Higher cost due to material, precision cutting, and finish requirements |
| Reflective decal | Safety campaigns, night rides, premium merch | Reflective film with custom shape | Specialty material raises cost and may increase minimums |
| Packaging label | Boxes, mailers, retail packaging seals | Paper, BOPP, or standard label stock | Usually more economical, especially on rolls |
| Sticker sheet or decal pack | Team kits, merch, race packets | Kiss-cut sheet with multiple designs | Cost depends heavily on sheet size and number of cut paths |
As a practical range, basic digitally printed vinyl stickers can price very differently at 100 pieces versus 5,000 pieces. A 2-inch laminated logo sticker might land somewhere around $0.18 to $0.75 per piece depending on quantity, finish, and cutting. Specialty reflective or clear decals can run higher, especially with individual cutting, white ink, multiple SKUs, or hand-packed kits. Treat any quote without material and finish details as incomplete. That is where surprise junk comes from.
For a clean quote, provide size, quantity, intended surface, indoor or outdoor use, artwork file, finish preference, deadline, and packaging format. Say whether the stickers need to be individually cut, sheeted, rolled, or packed as kits. If the decals support custom printed boxes, retail display kits, or broader Custom Packaging Products, mention that too. It helps align colors, finish, and brand presentation.
Spend more on material and lamination for stickers applied to bikes, helmets, bottles, and gear. Save money on simpler branded packaging stickers that only need to survive storage, shipping, and opening. Overbuilding a box seal is wasteful. Underbuilding a frame decal is worse because failure happens in public.
Freight can also distort the math. Stickers are light, but rolls, sheets, rigid mailers, and kit cartons take space. Expedited shipping can cost more than the print upgrade the buyer rejected two emails earlier. If the order is event-driven, price the deadline honestly instead of pretending ground transit will bend to optimism.
Process, Timeline, and Turnaround From Proof to Delivery
A realistic timeline includes inquiry, quote, file review, digital proof, approval, production, quality check, packing, and shipping. Simple digital sticker orders can move within several business days after proof approval if materials are standard and the schedule is open. More complex jobs take longer: custom shapes, reflective film, large quantities, multiple versions, kit packing, or special roll formats add steps.
Proof approval is the biggest controllable delay. Production usually does not start until the customer signs off on size, color, cut line, material, quantity, and sometimes roll direction or sheet layout. If three people need to approve the same sponsor logo, build that into the calendar. Your printer cannot approve the art for you, and you do not want them guessing.
Rush orders come with tradeoffs. Faster turnaround may limit material choices, finishing options, revision time, or specialty cutting. Expedited shipping only helps after production is complete. Tiny detail. Somehow always forgotten.
Buyers can avoid delays by sending vector artwork, confirming final quantities early, specifying application surfaces, approving proofs quickly, and not changing size after the cut line is built. If race season, team kit release, expo season, sponsorship deadlines, or a product launch is driving the order, say that during quoting. A deadline hidden until the last email is not a strategy.
For shipping and transit planning, standards from organizations such as ISTA are useful for understanding packaged-product distribution testing. Stickers are small, but boxes, rolls, sheets, and finished kits still need to arrive flat, clean, and usable. Crushed corners and curled sheets make application harder than it needs to be.
For larger programs, ask how finished goods will be packed and labeled. A club order with ten sponsor designs, four rider categories, and two event dates can turn chaotic fast. Clear carton labels, version counts, and packing slips are not glamorous. They are the difference between smooth distribution and volunteers sorting decals on a folding table at 5:30 a.m.
Common Ordering Mistakes That Make Cycling Decals Fail
The most common mistake is ordering on lowest price without matching the sticker to the surface, exposure, and expected lifespan. A low-cost packaging label can be perfect for a mailer and terrible for a down tube. Same artwork. Different job.
Artwork mistakes are just as common. Low-resolution logos print soft. Tiny sponsor text vanishes on moving bikes. Missing bleed creates white slivers at the edge. Thin outlines can break during cutting. Colors that look bright on a laptop can disappear on dark frames, clear materials, or matte finishes. Screens lie beautifully. Measure and proof anyway.
Material mismatch causes most real-world failures. Paper on bottles gets sad fast. Weak adhesive on powder-coated frames can lift at corners. Aggressive adhesive on temporary event decals can leave residue or damage delicate finishes. Glossy stickers on a matte premium product line can look cheap, even if the print quality is fine.
Sizing deserves more respect. A decal that looks balanced on a mockup may be unreadable on a bike moving at 18 mph. A logo that looks bold at 4 inches wide may not fit a narrow seat stay. Frame tubes curve, bottle grip zones get squeezed, and helmet vents interrupt placement. If the sticker has a job beyond “exist,” test the scale on the actual object.
Skipping samples is risky for complex orders, especially reflective, metallic, clear, or multi-surface applications. Sample testing does not need to be dramatic. Apply a few decals, wait 24 to 72 hours, rub the edges, expose them to water, and check whether they lift, haze, wrinkle, or shift color.
Application mistakes can ruin good materials. Clean the surface with the right prep method. Avoid wax, silicone, grease, and trapped moisture. Do not stretch vinyl aggressively around curves unless the material is made for it. Give adhesive time to cure before water, heat, or heavy handling. ASTM pressure-sensitive adhesive test methods, including peel and tack testing, exist for a reason; adhesion is measurable, not mystical.
One more quiet failure: unclear version control. Cycling orders often involve sponsor updates, team names, race dates, category labels, or late logo swaps. Name files carefully. Retire old proofs. Confirm which version is approved. The wrong sponsor mark printed perfectly is still wrong.
Next Steps Before You Request a Sticker Quote
Before asking for production pricing, decide where the stickers will be applied and how long they need to last. Bikes, helmets, bottles, packaging, events, merch, and shop use all point to different specs. If the sticker supports packaging design or package branding, think about how it will look beside cartons, hang tags, mailers, and Custom Labels & Tags.
Measure the actual application area instead of guessing from a laptop mockup. Use a ruler, calipers, or a paper template. Check curves, bottle grip areas, helmet vents, and frame tube widths. Scale is where many decent designs go to die.
- Surface: painted frame, matte carbon, helmet shell, plastic bottle, paperboard box, mailer, or retail display.
- Lifespan: one-day event, race season, long-term brand mark, temporary sponsor placement, or packaging seal.
- Artwork: vector logo, brand colors, cut line, bleed, safe zone, and white ink notes for clear film.
- Format: individual decals, rolls, sheets, sticker packs, or fulfillment-ready bundles.
- Deadline: proof approval date, in-hands date, event date, shipping location, and any rush requirement.
If the decals will touch unusual surfaces, high-end frames, matte coatings, rental fleets, or products exposed to heavy weather, request material guidance or order a small test batch. For sustainability claims or paper-based packaging components, certifications from groups such as FSC may matter, especially for retail packaging programs and branded packaging sold through larger channels.
Compare quotes fairly. Check material, adhesive, finish, size, quantity, packaging format, proofing, shipping, and turnaround instead of only comparing the final total. A quote for laminated outdoor vinyl is not equal to a quote for unlaminated paper just because both lines say “stickers.” That small detail has ruined plenty of orders.
Custom cycling stickers are easiest to order when the buyer knows the surface, lifespan, artwork, quantity, finish, packaging format, and deadline before asking for production pricing. Bring those details upfront, and the quote gets cleaner, proofing moves faster, and the finished decals have a much better chance of surviving real riding.
FAQ
What material is best for custom bike stickers?
Outdoor vinyl or polyester is usually best for bike frames, helmets, and bottles because it handles moisture, sunlight, and abrasion better than paper. Add lamination if the stickers will face regular riding, cleaning, sweat, mud, or frequent handling. Use paper or standard BOPP mainly for packaging, inserts, or short-term event labeling where outdoor durability is not required.
Are custom cycling decals waterproof?
They can be made highly water-resistant or waterproof depending on the material, adhesive, ink system, and protective laminate. For bikes, bottles, and helmets, ask for outdoor-rated vinyl or polyester with a waterproof laminate. Waterproof does not mean indestructible; pressure washing, harsh solvents, poor surface prep, and edge abrasion can still cause lifting.
How much do custom cycling stickers cost?
Cost depends on size, quantity, material, finish, shape, adhesive, lamination, number of designs, and whether stickers are individually cut, sheeted, rolled, or packed as kits. Higher quantities usually lower the unit cost because setup and proofing are spread across more stickers. A fair quote should specify material and finish, not just give a total price with no details.
How long does it take to produce custom bicycle stickers?
Simple digital sticker orders can often be produced faster than specialty decals, large runs, reflective films, or complex die-cut packs. The timeline usually includes quote review, artwork check, proof approval, production, quality control, packing, and shipping. Buyers can speed things up by sending vector artwork, clear dimensions, final quantities, and fast proof approval.
Can custom cycling stickers be removed without damaging a bike?
Removability depends on the adhesive, surface finish, application time, heat exposure, and the bike’s paint or coating condition. Removable or low-residue adhesives are better for temporary event decals, rentals, demo bikes, and short-term sponsor placements. For high-end frames or delicate finishes, test first and avoid aggressive adhesives unless permanent branding is the goal.


