Custom Waterbottle Stickers: Order Smarter Labels Now
Custom Waterbottle Stickers Are Tiny Labels With a Big Job

The bottle rarely fails first. The sticker does. Cheap paper stock hits condensation, sunscreen, ice water, gym-bag friction, or dishwasher heat, and suddenly the branding looks like a craft project that escaped supervision.
Cute artwork is not the problem. Weak material choices are. A sticker that looks sharp on a proof can still curl at the edge after two hours in a cooler if the face stock, adhesive, and finish were chosen for price alone.
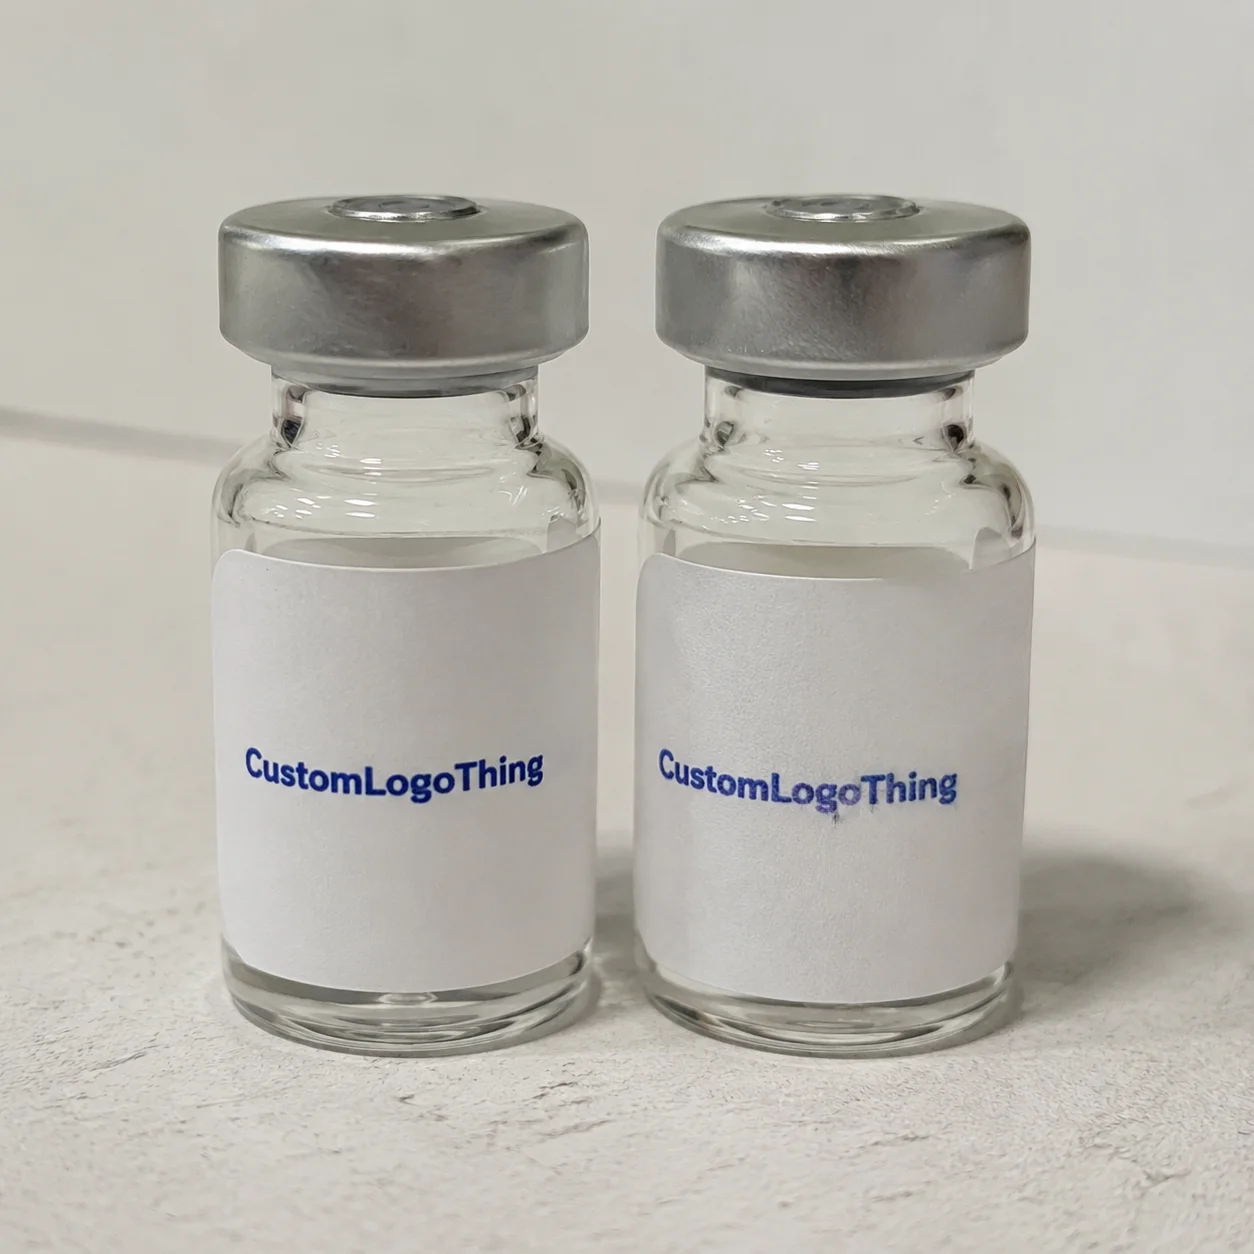
Custom waterbottle stickers are printed adhesive labels or decals made for reusable bottles, promotional drinkware, retail beverage containers, event giveaways, team gear, and branded merch. They can be small logo decals, full wrap labels, QR code stickers, cap labels, or bold die-cut brand marks. Same general product family. Very different performance requirements.
A decorative laptop-style sticker is not the same as a product label for retail packaging. A waterproof decal is not automatically a removable event sticker. A removable sticker for a one-night fundraiser should not be expected to survive six months on a powder-coated stainless bottle. That mismatch is how buyers get burned.
From a packaging buyer’s point of view, the goal is plain: good-looking branding that survives moisture, handling, temperature swings, and repeated use without smearing, bubbling, lifting, or fading into sadness. To get there, you need to match the sticker to the bottle, not just the brand guide.
How Bottle Sticker Materials, Adhesives, and Finishes Work
Durability starts with the face stock, the printable material on the front of the sticker. For bottle use, common choices include vinyl, BOPP, and polyester. These films resist moisture far better than paper. Paper can work for short-term indoor use, especially if the bottle stays dry, but it does not enjoy an ice bucket.
Vinyl is a strong all-around option for durable decals, sports bottles, and promotional drinkware. It bends well, handles everyday abrasion reasonably well, and supports bright full-color printing. BOPP, short for biaxially oriented polypropylene, is popular for product-style labels because it prints cleanly and performs well around moisture. Polyester usually costs more, but it can offer stronger heat, abrasion, and chemical resistance when the bottle will face rough handling.
Material color matters too. White film gives strong opacity and makes brand colors more predictable. Clear film creates a no-label look on glass or smooth plastic, but the design may need white ink backing so colors do not disappear against dark liquid or dark bottle surfaces. Metallic, silver, or holographic stocks add flash, though readability can suffer if the logo is thin, pale, or overly detailed. Shiny is fun. Illegible is not.
Adhesive is the quiet troublemaker. Permanent adhesive is the default for long-term branding. Removable adhesive works for temporary campaigns, event check-in labels, or short-life giveaways. Freezer-grade adhesive is useful if bottles sit in coolers, ice baths, or refrigerated retail displays. Aggressive adhesive may be needed for textured plastic, powder-coated stainless steel, or curved surfaces that naturally push edges upward.
Finish adds another layer of performance. Gloss finish makes colors pop and usually feels bright and commercial. Matte finish looks more subdued, which can suit wellness, outdoor, or minimalist packaging design. Soft-touch can look expensive, but it may scuff depending on the coating and use case. Lamination adds real protection against water, abrasion, oils, and repeated handling.
Printing method affects the buying decision as well. Digital printing is practical for lower quantities, full-color artwork, variable designs, and short lead times. Flexographic printing can make sense for larger roll label runs where speed and repeatability matter. Screen printing may be used for specialty effects, thick ink deposits, or certain durable decal applications. You do not need a pressroom lecture to order smartly. You do need to ask which method fits your quantity, material, and finish.
Buyer reality check: waterproof does not automatically mean dishwasher-safe. Water resistance, abrasion resistance, detergent resistance, and heat resistance are separate performance claims. Labels apparently enjoy having loopholes.
If you are comparing bottle labels to broader branded packaging needs, it helps to treat stickers as part of the same visual system as cartons, mailers, inserts, and Custom Labels & Tags. The sticker may be small, but it carries the package branding after the box is gone.
Key Specs That Decide Whether Your Bottle Labels Last
The bottle surface decides more than the mockup does. Straight-sided bottles are forgiving because the sticker sits flat and tension stays low. Tapered bottles, ribbed bottles, deep curves, pebbled plastic, and powder-coated finishes need more careful sizing and adhesive testing. A sticker that is too tall on a curved bottle will wrinkle. One that is too wide may lift at the edges.
Common shapes include rectangles, squares, circles, ovals, die-cut logo shapes, wraparound labels, neck labels, and small cap stickers. Rectangles are efficient and easy to apply, especially on rolls. Circles and ovals look polished but waste more material on sheets. Die-cut logo shapes feel more custom, but they can cost more because of cutting complexity and slower finishing. Wraparound labels offer maximum brand area, yet they demand tighter measurements.
Readability deserves more respect. Tiny QR codes, thin script fonts, low-contrast colors, and cramped logos often look fine on a screen and terrible on a curved bottle. Screens lie. Bottles tell the truth. For QR codes, a practical minimum is often around 0.8 to 1 inch square, with quiet space around the code and placement on a relatively flat area. Smaller can work, but test it with actual phones, not optimism.
Artwork setup affects production quality. Bleed is the extra artwork beyond the cut line, commonly around 0.0625 to 0.125 inch depending on the supplier. Safe area keeps important text and logos away from the trim edge. The cut line tells production where the sticker should be shaped. Clear stickers may need white ink behind the design so colors remain visible. Skip that white backing on a clear label and your logo may turn into a ghost on a black bottle. Very mysterious. Also useless.
Exposure conditions should guide the spec. Think about condensation, coolers, direct sun, gym bags, oils, soap, sanitizer, dishwasher cycles, and outdoor use. The sticker should match the worst realistic condition, not the prettiest sales mockup. If bottles will be used outdoors, ask about UV resistance. If they go into ice, ask about cold exposure. If they are handled by kids, assume abrasion, drops, and mystery substances. Children are basically ASTM tests with snacks.
For formal distribution, ask suppliers how they test or validate durability. You may hear references to ASTM test methods for adhesion, abrasion, or exposure, depending on the product. For shipping full bottle kits, ISTA procedures can help frame transit testing, especially if stickers are applied before shipment. For sustainability claims on paper-based components, FSC certification may matter, though film bottle stickers are usually chosen for performance first.
Samples are cheap compared with a failed run. Order samples or a small batch if the bottle surface is unusual, the design has fine detail, the sticker must survive real moisture, or the campaign quantity is high enough to hurt if it goes wrong. For serious use, test application after 24 hours, then expose the bottle to water, friction, cold, and normal handling for several days.
Pricing, MOQ, and Unit Cost for Custom Bottle Stickers
Pricing for custom waterbottle stickers depends on material, size, shape, quantity, finish, adhesive type, color complexity, roll versus sheet format, proofing needs, and whether the artwork requires white ink or lamination. Anyone giving a universal price without those details is guessing. Maybe confidently. Still guessing.
Small short-run orders carry a higher unit cost because setup, proofing, file handling, cutting, and packing are spread across fewer pieces. Larger runs lower the per-sticker cost because production time becomes more efficient. A simple 2-inch white vinyl circle can price very differently at 100 pieces than at 1,000 pieces, even if the artwork never changes.
As a practical planning range, small custom sticker runs may land around $0.45 to $1.50 per piece for lower quantities, depending heavily on size and finish. Mid-size runs may drop into the $0.18 to $0.55 range. Larger roll label quantities can go lower, but specialty materials, laminates, metallic stocks, outdoor durability, and Custom Die Cuts push costs back up. These are planning ranges, not promises. The bottle, spec, and supplier matter.
MOQ, or minimum order quantity, is production math. Some digital sticker orders can start in low quantities, such as 50, 100, or 250 pieces. Specialty materials, roll labels, metallic effects, custom dies, or screen-printed durable decals may require higher minimums. If the supplier has to set up a press, order a special stock, or build a die, a 37-piece order is not going to make anyone cheerful.
| Option | Best Use | Typical Quantity Logic | Cost Impact |
|---|---|---|---|
| Sheet stickers | Giveaways, small teams, hand application, sample kits | Often practical from low quantities | Convenient, but slower to apply in volume |
| Roll labels | Retail bottles, production lines, fast hand application | Better value at mid to larger quantities | Efficient application, but may have higher setup needs |
| Die-cut decals | Logo shapes, branded merch, premium promotional bottles | Works across many quantities depending on cut method | Costs more than simple shapes if the cut is complex |
| Laminated film labels | Wet handling, coolers, outdoor use, heavy abrasion | Worth it when performance matters | Higher unit cost, lower failure risk |
Rolls are better for machine application or fast hand application, especially for product packaging or retail packaging where consistency matters. Sheets are convenient for giveaways, staff events, school teams, and low-volume manual use. If 15 people are applying stickers at a table before an event, sheets may be fine. If one person is labeling 5,000 bottles, rolls are not a luxury. They are mercy.
Hidden cost traps are common. Ordering too small can keep the unit price painfully high. Choosing specialty finishes for a throwaway event is usually overkill. Skipping proof checks can create an expensive spelling mistake. Changing artwork after approval can trigger reprint fees. Picking the wrong adhesive because it saved two cents per piece is a brilliant way to buy twice.
Ask for two or three quote tiers, such as 250, 500, and 1,000 pieces. Better yet, ask for the same spec across all tiers so the comparison is clean. Custom waterbottle stickers are often inexpensive enough per unit that moving up one tier gives you extras for application errors, replacements, influencer kits, or future samples without much extra pain.
Production Steps and Timeline From Artwork to Delivery
The ordering flow is usually straightforward if the buyer does not turn it into a scavenger hunt. First, define the bottle use. Then choose material and finish, submit artwork, receive a proof, approve or revise, print, finish, inspect, pack, and ship. Each step can be quick. Each step can also stall if details are missing.
Proofing is not decoration. It is the buyer’s chance to catch spelling, scale, cut line, color expectations, white ink setup, QR code size, and placement issues before production starts. Review the proof at actual size if possible. A 2-inch logo viewed at 400 percent on a monitor will lie to your face.
Production time depends on order quantity, material availability, lamination, die-cutting, proof revisions, production schedule, shipping method, and whether physical samples are requested. A simple digital run on standard white vinyl may move quickly. A metallic, laminated, custom-shaped roll label with white ink and a rush deadline has more places to slow down.
For planning, many standard custom label runs take roughly 5 to 10 business days after proof approval, plus transit. More complex runs may take 10 to 18 business days or longer, especially if specialty stock, tooling, physical samples, or multiple proof rounds are involved. This depends on supplier capacity and seasonality, so confirm timing before promising stickers to an event team.
Production time starts after proof approval, not when someone sends a logo file named final-final-use-this-one-v7.ai. Delivery time is separate. That part belongs to the carrier, though somehow it still becomes your deadline. Build the schedule backward from the event, launch date, or retail ship date, then add buffer for proof corrections and shipping delays.
Rush orders may be possible for standard materials and clean artwork. The tradeoffs are predictable: rush fees, fewer proof cycles, fewer specialty options, and less room for indecision. If you need stickers in hand by Friday, do not spend Tuesday debating whether matte feels more “elevated.” Pick the spec and move.
A good quote request includes the deadline, ship-to ZIP code or country, quantity, size, shape, material preference, finish, adhesive need, roll or sheet format, and artwork file type. If the stickers support a larger kit with Custom Packaging Products, mention that too. Matching labels to boxes, mailers, inserts, and custom printed boxes keeps the brand system from looking assembled by three committees that never met.
Step-by-Step Guide to Ordering the Right Sticker Run
Ordering bottle stickers gets much easier when you stop starting with the artwork and start with the bottle. The surface, shape, exposure, and application method should drive the spec. Pretty files are nice. Performance keeps the sticker attached.
- Identify the bottle type and surface. A stainless gym bottle, retail water bottle, glass cold brew bottle, and one-night event giveaway do not need the same label. Note whether the surface is smooth, textured, powder-coated, curved, tapered, or ribbed.
- Choose the performance level. Decide whether the sticker must be water-resistant, waterproof, outdoor-safe, removable, dishwasher-tolerant, or simply nice enough for handout merch. Be honest about use. A corporate picnic bottle and a daily-use fitness bottle are not twins.
- Select size, shape, and placement. Measure the actual bottle. Use a paper mockup before ordering. Revolutionary technology: scissors and tape. Wrap the mockup around the bottle, check the curve, and see whether the logo is readable from a normal viewing distance.
- Prepare artwork correctly. Send vector logos when possible, usually AI, EPS, or editable PDF. Use high-resolution raster images at 300 dpi at final size. Add bleed, keep text inside safe margins, define brand colors, and give clear notes for white ink on transparent materials.
- Request a specific quote. Include quantity tiers, material, finish, adhesive, format, delivery deadline, and any performance requirement. The more specific the request, the fewer rounds of quote ping-pong. Everyone enjoys less inbox archaeology.
- Review the proof carefully. Check size, spelling, cut line, color notes, white ink, QR codes, and orientation. Approve only when the details are right. Save the final proof so reorders stay consistent.
For placement, avoid tight curves if the design includes QR codes, small type, or thin lines. Keep key branding on the flattest visible panel. If the bottle has a seam, ridge, logo emboss, or texture change, do not place the sticker over it unless you have tested adhesion. Raised features create stress points where lifting starts.
If the sticker is part of a launch kit, think beyond the bottle. Strong branded packaging uses consistent color, logo scale, finish, and message hierarchy across the bottle, sticker, box, insert, and shipping material. That does not mean everything must match perfectly. It means the customer should not feel like the bottle came from one brand and the mailer came from a discount bin.
Common Mistakes, Expert Tips, and Final Checks
The most common mistakes are painfully predictable: using paper for wet environments, making stickers too large for curved bottles, choosing removable adhesive for long-term use, skipping lamination, ignoring bottle texture, and approving proofs too quickly. None of these errors are exotic. That is what makes them annoying.
Over-designing can also hurt performance. Too many tiny details, thin borders, micro text, and low-contrast colors make stickers harder to print, cut, apply, and read. A clean 2.5-inch logo decal often beats a busy 4-inch design that tries to explain the brand’s entire personality, mission, playlist, and childhood.
Use rounded corners on rectangle labels to reduce lifting. Sharp corners catch more easily during handling. Choose gloss or laminate for heavy use, especially where water, friction, or oils are likely. Test clear stickers on dark bottles before approving a run. Avoid placing QR codes on tight curves. Keep important text large enough to read at arm’s length, usually no smaller than 6 to 7 points for simple fonts, and larger for script or reversed-out text.
Order extras. A practical overage is often 5 to 10 percent for manual application, samples, replacements, influencer kits, internal approvals, and the inevitable “we need a few more” request. Running out by 12 stickers is exactly as annoying as it sounds. If the unit price drops sharply at the next tier, the extra quantity may cost less than a reorder setup later.
For better sustainability decisions, ask what can realistically be recycled or reduced. Film labels on reusable bottles can be a reasonable choice because the bottle has a longer life, but not every sticker material is recycling-friendly. The EPA recycling resources are useful for understanding broader material recovery limits, though local rules still vary. Be careful with vague eco claims. Buyers notice, and regulators do too.
Before approving a run, reduce the decision to a few hard checks: actual bottle measurement, surface texture, exposure level, adhesive type, finish, artwork file quality, proof accuracy, quantity tier, and deadline. For custom waterbottle stickers that need to look good beyond the unboxing moment, those details matter more than another round of mood-board debate. Wild concept: complete specs get better answers.
FAQs
Are custom water bottle stickers actually waterproof?
They can be waterproof if they are made with water-resistant film such as vinyl, BOPP, or polyester and paired with the right adhesive and protective finish. Paper stickers are usually the wrong choice for bottles that face condensation, coolers, outdoor use, or repeated handling. Ask whether the sticker is water-resistant, waterproof, outdoor-rated, or dishwasher-tolerant because those claims are not identical.
What material is best for custom waterbottle labels?
Vinyl is a strong all-around option for durable decals and promotional bottles. BOPP works well for product-style labels and clean retail branding. Polyester is useful when you need stronger resistance to heat, abrasion, oils, or tougher daily handling. The best choice depends on the bottle surface, exposure level, and expected lifespan.
How much do custom drink bottle stickers cost?
Cost depends on size, material, quantity, finish, adhesive, shape, and whether the stickers are supplied on rolls or sheets. Unit cost usually drops as quantity increases because setup and production time are spread across more stickers. Request quote tiers such as 250, 500, and 1,000 pieces so you can see real price breaks before choosing a quantity.
How long does it take to make custom bottle stickers?
Standard production depends on proof approval, material availability, order size, finishing, and shipping method. Many standard runs take roughly 5 to 10 business days after final proof approval, with complex jobs taking longer. Rush options may be available for standard materials, but specialty finishes, physical samples, and complex die cuts can add time.
Can custom waterbottle stickers go in the dishwasher?
Some durable film stickers with strong adhesive and lamination can tolerate dishwasher exposure, but not every waterproof sticker is dishwasher-safe. Heat, detergent, water pressure, and abrasion all stress the sticker differently. If dishwasher performance matters, ask for a material recommendation and test samples on the actual bottle before placing a large order.