Most brands treat hang tags as a tiny afterthought. Then they wonder why the jewelry feels elevated but the tag looks like it lost a fight with a paperclip. A Custom Hang Tags for jewelry packaging material thickness guide matters because thickness affects feel, durability, print quality, and the way customers judge your brand before they read a single word.
That first hand feel does more work than many buyers expect. Jewelry shoppers often pick up the tag before they inspect the clasp, the plating, or the stone. If the tag curls, bends, or feels flimsy, the packaging story drops a level. That is why thickness belongs in the packaging decision, not in a “we’ll fix it later” folder.
Why jewelry hang tag thickness matters more than people think
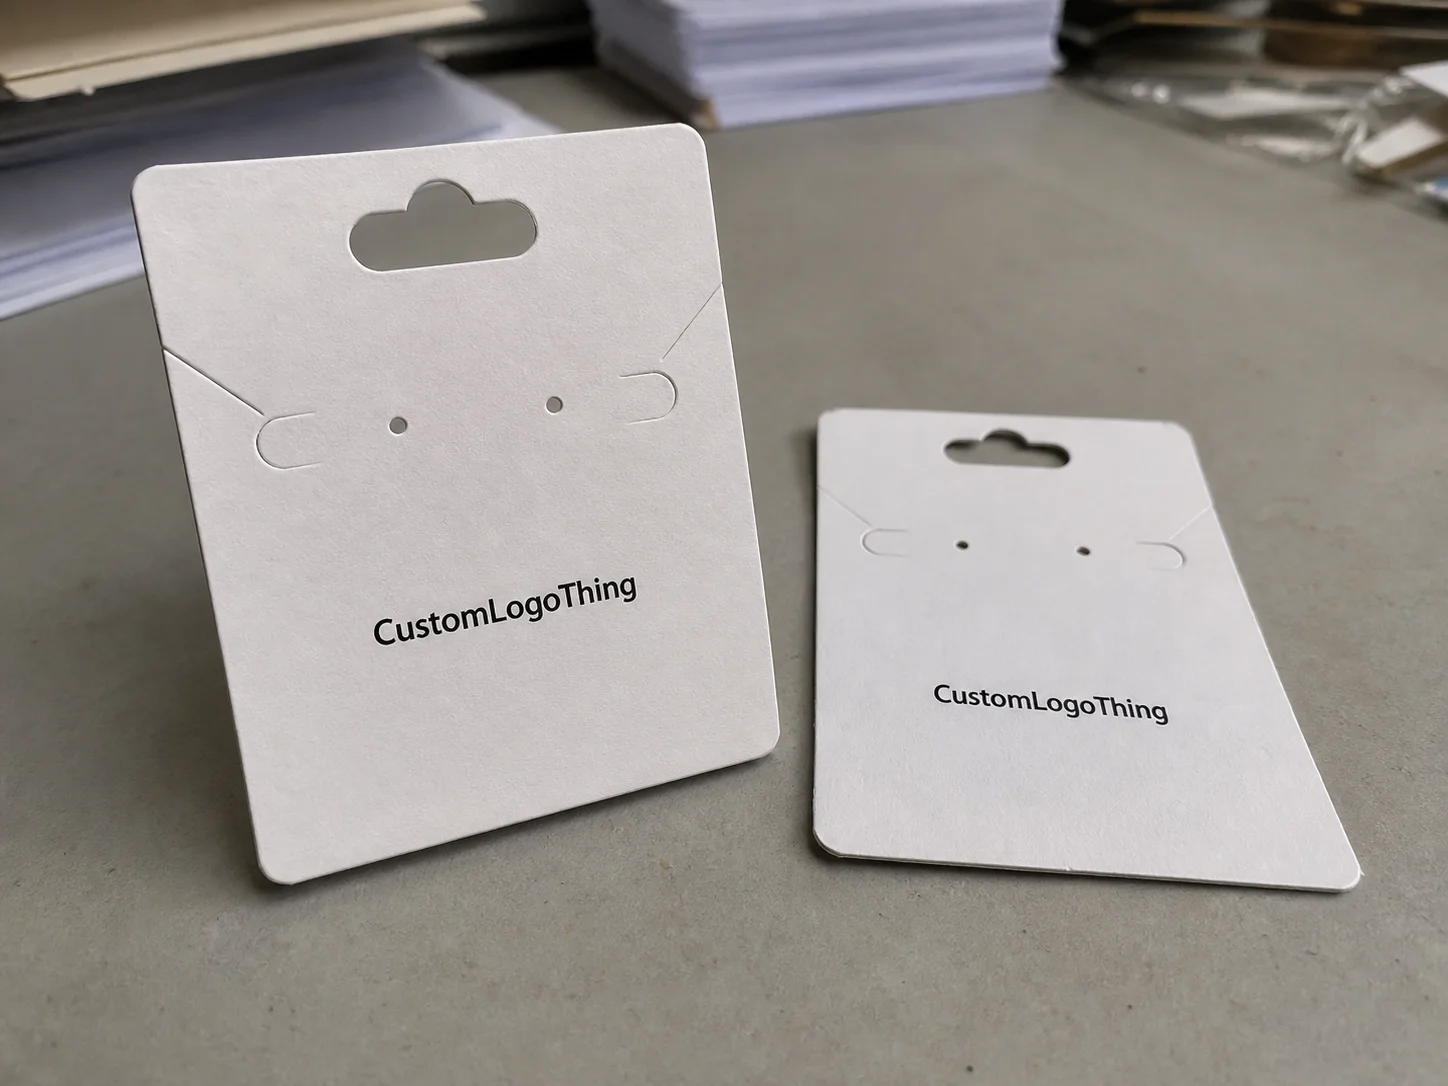
A tag can look premium on screen and still feel cheap in hand. Happens constantly. On a monitor, every stock looks clean; in real life, thin paper stock curls around the hole, creases at the fold, and makes branded packaging feel underdeveloped.
Jewelry buyers read thickness as quality almost instantly. Before they process the logo, they feel rigidity, edge smoothness, and whether the tag hangs neatly or flops around like a receipt. For small pieces such as rings, studs, and chains, the tag is not only information. It is part of the perceived value.
Here is the basic distinction that often gets blurred:
- Paper weight is usually measured in gsm or lb, depending on the market.
- Caliper is the actual thickness of the sheet, often expressed in points or millimeters.
- Board thickness is the most practical purchasing language when comparing tag stock.
They are related, but not identical. Two materials can share the same weight and still feel different because of coating, fiber density, and finish. That is why tag material choices should be judged with physical samples, not just spec sheets.
For small items, material selection matters more than it does for oversized retail packaging. A large apparel tag can get away with more heft. Jewelry cannot. Too bulky, and the tag overwhelms the product. Too thin, and it disappears into the packaging and feels disposable.
From a packaging perspective, the equation is simple: the right thickness improves perceived value, supports durability during handling, and makes retail presentation look more deliberate. If you are already investing in custom printed boxes or polished product packaging, a weak tag is an odd place to save a few cents.
A good jewelry tag should feel intentional, not accidental. If it looks like it was chosen because it was cheap, customers notice. They may not say it out loud, but they notice.
How thickness changes the look, feel, and function of jewelry tags
Thinner stock is flexible. It folds more easily, costs less, and works for simple retail packaging where the tag is mostly informational. Thicker stock brings more rigidity and a more premium hand feel. That extra stiffness is what makes a tag feel like part of the brand rather than just a label attached to it.
Print behavior changes too. Fine type stays cleaner on smoother, midweight stocks. Foil stamping, embossing, and edge painting usually perform better on thicker materials because the surface and body can support the effect. There is still a limit. Extremely thick board can resist fine detail if the die cut is not sharp or the artwork is too busy.
Function matters just as much as appearance. Hole punching, slitting, stapling, and stringing all behave differently based on stock thickness. A weak tag can tear around the hole after one shipment. A stronger tag can hold elastic, cotton string, or metal fasteners without deforming. For delicate pieces, that matters. Nobody wants the tag to fail before the customer even gets home.
Common thickness bands usually look like this:
| Tag type | Typical stock range | Feel | Best use |
|---|---|---|---|
| Basic paper tag | 250-300 gsm | Light, flexible | Entry-level jewelry, simple product info |
| Midweight cardstock | 300-400 gsm | Balanced, clean, sturdy | Most jewelry packaging programs |
| Premium rigid tag | 400-600 gsm or specialty board | Heavy, upscale, more rigid | Luxury lines, giftable pieces, premium package branding |
That table is a starting point, not gospel. Coated stocks can feel stiffer than uncoated stock at the same gsm. Kraft paper can look thicker than it is because of texture. Recycled materials can vary a lot from one mill to another.
Texture changes perception more than many first-time buyers expect. A smooth matte card can read as cleaner and more controlled, while a natural kraft surface can feel artisanal even at a lower caliper. The surface is not decoration only; it changes how the tag sits in the hand and how light hits the print.
Key material factors to compare before you request samples
Paper, cardstock, and specialty board each have a place. Paper works for lightweight, short-run tags and eco-forward branding. Cardstock is the safest middle ground for most jewelry lines. Specialty board is what you use when the tag needs to behave like a small premium card, not a hanging slip.
Coating changes both touch and readability. Matte stock reduces glare and usually makes small type easier to read. Gloss increases color pop, but it can reflect too much under store lighting. Soft-touch feels more luxurious, though it can show scuffs if handling is rough. Uncoated stock gives a natural, tactile look that pairs well with kraft themes and minimal branding.
Hole reinforcement is another detail that gets ignored until it fails. If the tag will carry string, elastic, or metal fasteners, the hole area needs enough body to resist tearing. A clean round hole is fine for lighter tags. For heavier tags, a reinforced punch or a slightly larger hole often performs better. Notch style matters too. A clean slit is fast to produce, but it is not always the best option for long-term durability.
Color coverage deserves attention. Dark stocks absorb ink differently than light stocks, and heavy coverage on black or kraft board can make fine text muddy if the printer does not manage ink density well. Light stocks are usually more forgiving for logos, SKU lines, and care info. If your brand uses a lot of white space, soft neutrals often print cleaner than pure white-on-dark effects.
Environmental requests come up often, and they are valid. Buyers frequently ask for recycled content, FSC-certified options, or lower-impact board. Recycled stock does not automatically mean poor print results, and thick recycled board can still print cleanly if the fiber quality is consistent. If sustainability is part of your brand story, ask for FSC-certified material options and check whether the finish still fits your retail presentation.
For a broader sourcing view, compare tag specs with the rest of your line, whether that includes Custom Packaging Products or matching Custom Labels & Tags. Consistency usually beats random upgrades.
Common material checks before sampling:
- Board thickness in points or mm, not just gsm
- Coating type and whether it affects readability
- Hole size and edge strength after punching
- Ink coverage on light and dark stock
- Recycled content, FSC availability, and print cleanliness
If the project is sensitive to shipping damage, ask whether the chosen stock can survive stacking, banding, and carton compression without marking. That matters more than buyers think, especially for tags packed in bulk with other insert pieces.
Step-by-step: choosing the right thickness for your jewelry line
Step 1: Match thickness to the jewelry category and price point. A lightweight earring line does not need the same stock as a premium bracelet collection. If the product retails at a higher price, the tag should usually move up a tier in feel. Not because luxury demands drama, but because inconsistency looks sloppy.
Step 2: Decide whether the tag is mostly decorative, informational, or supportive. Decorative tags can lean more premium and rigid. Informational tags need room for size, material, barcode, and care instructions. Supportive tags, especially those that help secure the item or attach to a box, need stronger hole integrity and better fold resistance.
Step 3: Choose a starting range and request real samples. For most jewelry brands, 300-400 gsm is the practical starting point. If the line is minimalist and lightweight, 250-300 gsm may be enough. If you want a high-end presentation, test 400-600 gsm or a specialty board. A screen proof is useful, but it will not tell you how the tag hangs next to an actual necklace clasp.
Step 4: Test hole strength, fold resistance, and readability after handling. Bend the sample a few times, string it, and check whether the hole feathers or stretches. Then read the smallest text under normal retail lighting. If the copy disappears, the design is too ambitious for the stock.
Step 5: Finalize the thickness based on shipping, storage, and display. Tags that travel inside corrugated cardboard mailers may need more stiffness than tags handed directly over a counter. If they will sit on a peg wall, they need to stay flat. If they will be tied to a box or pouch, they should not drag the package down visually.
There is no single correct answer. A balanced jewelry line often uses one thickness for standard pieces and a slightly upgraded stock for gift sets or limited editions. That is normal. It also keeps package branding from becoming a price war with itself.
- Start with category: fine jewelry, fashion jewelry, or giftable sets.
- Define the tag role: decorative, informational, or structural.
- Order 2-3 sample thicknesses: compare them against the actual product and box.
- Test the real-world handling: shipping, display, and customer removal.
- Lock the final spec: thickness, coating, hole size, and finish.
There is a practical detail that gets overlooked during sampling: the difference between a tag that looks good held in the hand and a tag that behaves well in volume. Fifty samples can be hand-assembled carefully. Five thousand tags need tolerance for faster finishing, stacking, and packing. That is where a moderate thickness often wins.
Cost, pricing, and MOQ realities for thicker custom tags
Thicker stock costs more. No surprise there. But the price increase does not come only from material. Heavier board can raise die wear, finishing complexity, and shipping weight. If you add foil, embossing, or edge painting, the cost climbs faster than a plain printed tag.
Minimum order quantities also shift. Standard paper stocks often allow more flexibility. Specialty rigid materials usually need a higher MOQ because setup is less efficient and waste is less forgiving. That does not mean you should avoid them. It just means the budget has to reflect reality instead of pretending premium finishes are a rounding error.
Here is a practical budget view for tag-thickness decisions:
| Tier | Typical material | Approx. unit price at 5,000 pcs | Best for |
|---|---|---|---|
| Entry | 250-300 gsm paper or light cardstock | $0.05-$0.12 | Simple product lines, lower price points |
| Midrange | 300-400 gsm cardstock, matte or soft-touch | $0.12-$0.22 | Most branded packaging programs |
| Premium | 400-600 gsm board, foil, emboss, specialty cut | $0.22-$0.45+ | Luxury jewelry, gift sets, premium retail packaging |
These numbers move with quantity, print coverage, and finishing. A small run can cost much more per unit. A large run can make thick stock surprisingly manageable. From a buyer’s point of view, the real question is not “what is cheapest?” It is “what level of feel justifies the cost for this line?”
If your jewelry already ships in polished custom printed boxes, the tag should match that investment. Mismatched materials are what make good package branding look half-finished. That is a very expensive way to save seven cents.
For packaging buyers who need the full system, compare tag costs with the broader product packaging budget. Sometimes a small upgrade in tag stock gives more perceived value than a larger spend elsewhere. A better-feeling tag can change the first impression faster than a design tweak that nobody notices from arm’s length.
Process and turnaround: what affects sample and production timing
The workflow usually follows the same path: artwork setup, material selection, proofing, sampling, production, finishing, and packing. The steps are simple. The delays come from people skipping decisions, changing the size three times, or sending artwork in a format that needs rescue.
Specialty thicknesses and custom dies can extend lead time. Round corners, unusual hole positions, and custom cut shapes all require extra setup. If you add foil, embossing, lamination, or edge paint, each effect adds a step. Not a mystery. Just manufacturing.
Sample turnaround is different from mass production turnaround. A sample can be fast if the stock is standard and the artwork is ready. But a production run with special stock and finishing may need more planning time, especially if the printer must source a specific board grade or adjust the die line.
For smoother approvals, have these ready before you request a quote:
- Final size and shape
- Hole placement and diameter
- Quantity and repeat order expectation
- Material preference and thickness range
- Finish: matte, gloss, soft-touch, or uncoated
- Artwork file in print-ready format
If your order also includes ISTA-aligned transit testing for shipping confidence, ask early. Packaging materials and shipping performance need to work together, especially if the tags travel inside mixed retail packaging or corrugated cardboard mailers.
For larger programs, the approval chain matters as much as the artwork itself. A tag that is technically correct but missing a final sign-off on thickness, coating, or hole size can stall production for days. Documenting those decisions early keeps the lead time closer to the quoted schedule.
Common thickness mistakes jewelry brands keep repeating
The first mistake is choosing a tag that is too thin for luxury positioning. Then the brand wonders why it feels cheap. Because it is thin. Physics is rude like that.
The second mistake is overbuying thickness for tiny items. A huge rigid tag on a small pair of studs can look heavy, clunky, and oddly aggressive. The tag should support the product, not fight it for attention.
The third mistake is ignoring punch-hole strength. The first shipment is not the place to discover that a hole tears when the tag is removed from a pack or when it rubs against a fastener. If the tag will move through warehouses, stores, and consumer hands, test that point deliberately.
The fourth mistake is selecting a finish that photographs beautifully but scratches fast. Soft-touch and dark matte coatings can look excellent, but they need handling discipline. If your packaging team stacks tags or bundles them tightly, you need a finish that tolerates that reality.
The fifth mistake is approving from a screen mockup alone. That is how regret gets packaged. What looks sleek on a monitor may print too dark, bend too easily, or feel too light once trimmed. Always compare the proof to the actual jewelry line and packaging format.
A sixth mistake shows up in repeat orders: teams forget to record the exact board and finish, then reorder “the same thing” from memory. That usually produces a near-match, not a match. The difference may be small on paper and obvious in hand.
If the sample does not pass the hand test, do not approve it because the artwork looks pretty. Pretty is cheap. Performance is what gets reordered.
Expert tips for ordering the right jewelry tag thickness
Use a sample set with three thickness options. Put them next to the actual jewelry, the box, and any pouch or insert. The comparison is usually obvious within thirty seconds. One will feel right. One will feel too weak. One will feel overbuilt. That middle zone is where most brands should live.
Ask for a mockup with your real logo, font size, and hole position before approving production. Tiny type that reads well on a proof can disappear on textured or darker stock. The same goes for thin lines and small care icons. If the design depends on delicate detail, keep the stock smoother and the finish controlled.
For lightweight jewelry, clean print and crisp edges often matter more than maximum rigidity. You want a tag that hangs neatly and stays readable. For luxury or giftable pieces, thicker stock makes sense only if the finishing supports it. A heavyweight tag with poor print quality still looks careless. It just costs more while doing it.
Document the final spec. Thickness, coating, hole size, shape, and finish should all be written down. Repeat orders go wrong when teams rely on memory. Memory is not a spec sheet.
There is also a practical shop-floor rule: avoid specifying a thickness that forces awkward folding or overly tight stringing. If the tag resists normal assembly, production workers compensate, and that is where neat edges and clean holes start to suffer. A spec should fit the line, not just the design board.
And if you are building a broader packaging system, keep the tag spec aligned with your other materials. Matching cards, boxes, and labels create a more coherent retail packaging experience than random upgrades spread across the line.
Practical rule: start midweight unless the jewelry category clearly demands lighter or heavier stock. It saves time, lowers sampling risk, and keeps the decision grounded in handling rather than guesswork.
For many brands, that means testing one option slightly below the ideal and one slightly above it. The difference in cost may be small, but the difference in shelf presence can be enough to justify the final choice.
FAQs
What thickness is best for jewelry hang tags?
Most jewelry brands start around midweight cardstock, roughly 300-400 gsm, because it balances feel, print quality, and cost. Premium lines often move thicker for a more rigid presentation. Tiny or delicate products usually need a lighter stock so the tag does not overpower the item.
Does thicker jewelry tag material always look more expensive?
Usually, yes in hand feel, but only if the print and finish match the stock. A thick tag with weak typography or sloppy finishing can still look cheap. Thickness helps most when paired with clean design, accurate color, and proper edge finishing.
How does material thickness affect custom hang tag pricing?
Thicker materials generally cost more to source and process. Heavier stock can also increase shipping weight and finishing complexity. Final unit cost depends on thickness, quantity, print effects, and whether custom cutting is needed.
What’s the usual lead time for jewelry hang tags?
Standard orders move faster than specialty thick-stock or heavily finished tags. Sampling adds extra time before production starts. Complex finishes, custom dies, and approval delays are the main reasons timelines slip.
Should I choose coated or uncoated stock for jewelry hang tags?
Coated stock works well when you want sharper print, smoother color, and better moisture resistance. Uncoated stock feels more natural and can suit minimalist or eco-focused branding. The best choice depends on your design, handling conditions, and desired premium effect.
How do I avoid ordering the wrong thickness?
Ask for physical samples in at least two or three thickness levels, then test them with the actual jewelry and packaging. Check readability, hole strength, and how the tag hangs once attached. A mockup alone rarely shows the whole picture.
The short version: choose the stock that matches the jewelry, the price point, and the rest of the packaging system. The right Custom Hang Tag makes the whole product feel more finished, more durable, and more intentional. That is the job, really.