If you have ever held a sample jar under bright light and thought, “That label looks great,” only to see it wrinkle after chilling or scuff during shipment, you already know why custom labels for jars deserve more attention than they usually get. A jar label has to sell the product, identify it, support compliance, and still look clean after handling, condensation, and shelf rotation. That is a lot to ask from a small piece of printed material.
The part that gets overlooked most often is that the artwork is only one piece of the job. The label still has to survive the real packaging environment, which means thinking about stock, adhesive, finish, and application method as a working system rather than separate decisions made in isolation. A beautiful proof can still become a weak label if those pieces do not match the container and the product conditions.
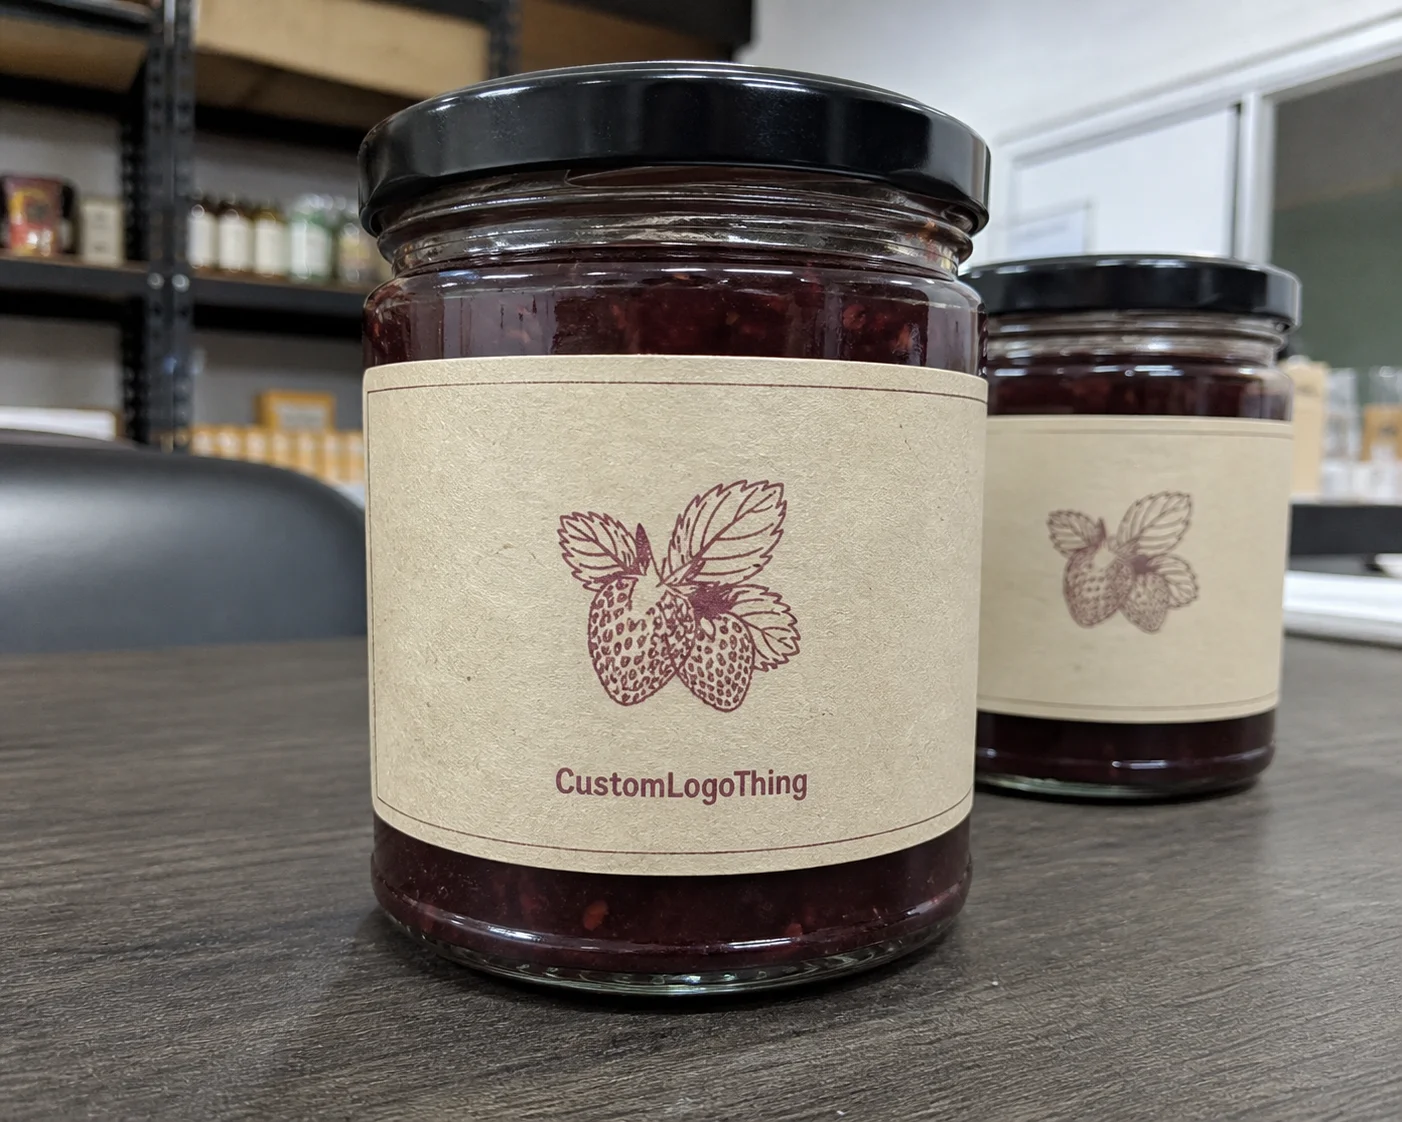
Why jar labels look simple but fail fast on the shelf
A jar seems easy to label because the shape is familiar, but a flat label on a curved container behaves differently once it leaves the design screen. Glass jars, PET jars, and polypropylene containers all carry slightly different surface energies, and those differences affect how well an adhesive grabs and holds over time. Add cold storage, oils, wet hands, or a dishwasher rinse on a reusable jar, and a label that looked perfect in the studio can start lifting at the edge or scuffing at the corner.
Custom labels for jars are not just decoration. They do branding, product identification, and compliance work at the same time. For food, bath, wellness, and candle products, the label may also need ingredients, net weight, warnings, lot codes, or barcodes that stay readable through distribution and handling. Decorative and performance labels can share the same artwork, but they do not behave the same way once production starts.
From a packaging buyer’s point of view, the question is not simply whether the label prints well. The more useful question is whether it will still look right after filling, shipping, storage, and shelf display. In practice, that depends on how the label stock, adhesive, and application method match the jar’s shape and the product’s environment.
A label that performs well on a flat proof sheet can still fail on a curved jar if the wrong adhesive or finish is chosen.
That is also why jar labels are usually considered alongside broader product packaging decisions. A label should feel like part of the whole package, alongside lid color, carton style, and any Custom Labels & Tags used elsewhere in the line. Good package branding is often quiet; everything just feels consistent and intentional.
How jar labeling works from artwork to application
The production path is straightforward, but each step matters. It usually starts with file setup and proofing, then moves into material selection, printing, finishing, die-cutting, and packing for shipment. If a file arrives without a proper dieline, missing bleed, or text too close to the trim, the first proof often exposes issues that could have been avoided with a little prepress care.
Labels for jars are usually designed in one of three ways. Some are wraparound labels that cover a portion of the body and are sized to match the jar’s circumference. Others are front-only panels, which leave more glass visible and can create a cleaner look on premium foods or candles. Then there are top labels for lids, often used for batch IDs, flavor coding, or a small branding detail that helps the jar feel finished. The right layout depends on the product story and the jar proportions.
Bleed and safe zone setup matter more on curved containers than many people expect. When artwork wraps around a cylinder, even small alignment shifts become obvious, especially with borders, fine type, or repeat patterns. A practical design leaves enough margin for trim and accounts for a slight placement variance during manual or automated application.
Print method changes the workflow too. Digital printing is often the better fit for shorter runs, multiple SKUs, or frequent artwork changes because setup is lighter and proofing is usually faster. Flexographic printing tends to make more sense for larger repeat orders, especially when the design stays stable and the goal is a lower unit cost at higher volume.
Labels can be applied by hand or by machine. Hand application is common for small batches and gives operators flexibility, but label size consistency and liner release still matter because a sticky liner or poorly wound roll slows people down. On an applicator, roll direction, core size, and unwind orientation can affect line speed more than buyers expect.
If you are ordering custom labels for jars as part of broader Custom Packaging Products, it helps to ask how the label format fits the rest of the packout. A label that applies cleanly by hand may be ideal for a startup, while a roll format with consistent gap and unwind direction may save real time on a filling line. The best option is rarely the fanciest one; it is the one that matches your operation.
Material, finish, and adhesive choices that change performance
Material selection is where many buyers either save money intelligently or create problems they will pay for later. Paper labels are still useful for dry products, short-life runs, and budget-sensitive packaging, especially if the jar stays indoors and is handled lightly. BOPP, polyester, and other film labels bring better moisture resistance, better scuff resistance, and a more durable finish for products that see condensation, refrigeration, or repeated handling.
Finish changes both appearance and performance. Matte finishes can make a brand feel quieter, more natural, or more artisanal, and they usually reduce glare on shelf. Gloss has stronger visual pop and tends to look crisp under retail lighting. Soft-touch finishes feel premium in the hand, but they can mark more easily depending on the overlaminate or coating system. Clear labels are useful when you want the jar itself to show through, although they require careful planning around white ink and contrast.
Adhesive selection matters just as much. A permanent adhesive is the normal choice for most consumer jars because it is designed to stay put through distribution, storage, and customer handling. Removable adhesive may make sense for reusable containers, promotions, or short-term campaigns. Freezer-safe and cold-temperature adhesives are used when product conditions drop below room temperature, because many standard adhesives lose grip once moisture condenses on the surface.
For food, bath, and candle jars, waterproof or oil-resistant labels are often worth the extra cost. That is especially true if the product may sit in a damp bathroom, refrigerated case, or shipping environment where carton abrasion and condensation are both part of the trip. A few cents saved on material can turn into a reprint if the label smears, lifts, or fades after a week on shelf.
| Label option | Typical use | Strengths | Tradeoffs |
|---|---|---|---|
| Paper label | Dry goods, short runs, budget SKUs | Lower material cost, easy print handling, good print sharpness | Less moisture resistance, easier to scuff |
| BOPP film | Food, bath, refrigerated, handled products | Water-resistant, durable, good for curved jars | Usually costs more than paper |
| Specialty film with soft-touch or metallic finish | Premium retail packaging, gift sets, high-end branding | Strong shelf presence, upscale feel, better resistance with the right overlaminate | Higher unit price, may need tighter print control |
| Clear label with white ink | Minimalist packaging, visible product, premium cosmetics | Lets the container show through, modern look | Requires careful contrast planning and accurate press setup |
Special effects can help, but they should never get in the way of usability. White ink, metallic accents, and transparent windows can create strong retail packaging presence, yet the design still has to leave room for barcode contrast, ingredient readability, and accurate color management. The best packaging design respects both shelf appeal and day-to-day handling.
For sourcing and sustainability references, some buyers also review material programs through organizations such as FSC when paper content matters, or packaging guidance from PMMI when they want broader industry context. Those references do not replace product testing, but they can help teams align material choices with internal procurement standards.
Cost, pricing, and MOQ factors to compare before you order
Pricing for custom labels for jars usually comes down to a few core variables: label size, material, finish, print method, quantity, and how many versions you need. A small front label on paper is not comparable to a full-wrap waterproof film label with metallic accents and multiple SKUs. If you want a usable quote, those details need to be on the table from the start.
Short runs almost always carry a higher unit cost because setup time is spread across fewer labels. Larger quantities usually lower the price per label, although the total order value goes up. That is normal print economics. A 5,000-piece order might land in the range of $0.18 to $0.35 per label depending on size, coverage, and finishing, while larger film orders can come down meaningfully when the same art repeats across multiple cartons or pallets.
MOQ, or minimum order quantity, varies by production method and material. Digital runs can be friendlier for smaller brands because the setup is lighter and the press can handle version changes well. Flexo or specialty finishes may require higher minimums to stay efficient. If a supplier is quoting very low minimums, it is fair to ask whether that applies to every material or only to a narrow set of standard options.
Special dies, variable data, and multiple versions can add cost. So can intricate shapes that require tighter die-cutting tolerances. If the label has a custom contour around a lid or a notch for a tamper feature, that should be built into the quote instead of discovered later. A surprise die charge is frustrating, but it is still better than finding out after the proof is approved.
Do not compare label pricing in isolation. Compare total landed cost, which includes freight, overage, spares for setup loss, and the labor time needed to apply the labels. A slightly more expensive label that runs cleaner on your applicator can cost less overall than a cheaper one that slows the line or leads to rework. This is one of those places where the cheapest line item is not the lowest actual cost.
Process and lead time: what happens after you approve the proof
After proof approval, production usually moves through prepress checks, printing, curing or drying, cutting, inspection, packing, and shipping. If the job is digital, the path is often shorter and fewer setup steps are needed. If it is flexographic or includes special finishing, the line may require more staging and inspection before the full run starts.
Delays tend to happen in predictable places. Late artwork changes are the obvious one. Missing dielines are another. Material availability can also slow things down, especially if the chosen stock is specialty film or a less common adhesive system. When a buyer wants a quote with a very specific face stock and finish, it helps to ask whether that material is in regular production or likely to require extra lead time.
Turnaround depends on quantity and complexity, but a simple label order often moves in about 7 to 12 business days from proof approval, while more complex jobs may take 12 to 18 business days or more. If the labels are sheeted, rolled, varnished, or laminated, that can shift the schedule. Shipping time is separate, and rush freight can change the total budget quickly.
Sampling matters too. If the jar surface is unusual, if the product is oily, or if the label must survive refrigeration, it is smart to test a sample on the actual jar before full production. That one step catches a surprising number of issues: edge lift, contrast problems, barcode scan failures, and placement problems after the fill line.
For product launches, give yourself enough room to coordinate labels with jar procurement and filling schedules. A label arriving two days late can hold up a full production week. Experienced buyers usually build a small timing buffer into the plan rather than assuming every step lands perfectly on the first try.
Common mistakes that make jar labels look cheap or wear out early
The first mistake is choosing the wrong adhesive for the environment. Cold, wet, or oily surfaces can break down a standard adhesive faster than expected. A label might stick beautifully in a dry sample room and then fail the first time it meets condensation on a chilled jar. That is a production problem, not a design problem, and it is usually avoidable with the right specification.
Another common issue is artwork that ignores the jar’s curvature. Tiny text, low contrast, and borders placed too close to the edge all become harder to read once the label wraps around the container. If the jar is curved aggressively, a design that looks clean on a flat proof can appear cramped or distorted on the actual pack.
Under-specifying materials is a quiet way to create expensive failures. A paper label might be perfectly fine for a dry pantry item, yet it can smear or wrinkle on a bath product that lives in humidity. A standard adhesive may hold well enough until the package spends a few days in transit and the carton rubs against other packs. That is why buyers should ask how the label will behave after handling, not only how it prints on day one.
Mixed jar lots can also create trouble. If one supplier sends containers with slightly different diameters or shoulder profiles, the same label placement can look inconsistent across the run. Even a 1 to 2 mm variation matters on a small jar panel. The fix is usually better container control, not redesigning the label after the fact.
Finally, proof approval without an actual product test is a frequent source of rework. A PDF proof cannot show how the adhesive behaves after chilling or how the finish reacts to fingerprints and rubbing. If the product is important and the launch matters, test it on the jar, with the real fill, before committing to full production.
Expert tips for better results, from factory floor to final fill
Start with the surface, not the art. Test the label on the exact jar material, with the actual product fill, before you scale up. If the fill level changes the way the front panel sits, or if product oils creep behind the edge, you want to learn that on a sample lot, not on a pallet.
Design for readability first. Shelf recognition comes from hierarchy, contrast, and proportion more than from decorative flourishes. A well-sized product name, a clean type system, and enough space around critical details will do more for sales than a busy layout that looks impressive in a file but hard to read in a store aisle.
Match the finish to the brand story. Matte often suits artisanal, natural, or premium small-batch products. Gloss works well when you want stronger retail pop and richer color density. If the brand is positioning itself as modern and minimal, a clear label with white ink may be the better route, but only if the contrast stays strong.
Ask for a press-ready dieline and a material sample when the jar shape or storage conditions are unusual. That extra step is worth it for freezer packs, oily foods, or curved jars that need exact placement. A small overage is also smart. Ten to fifteen percent extra can cover setup waste, mislabels, and those last-minute surprises that tend to arrive on launch week.
From a practical standpoint, labels should support the rest of the branded packaging system, not fight it. If your carton, insert, and jar all carry different visual cues, the shelf story gets muddy. Consistency across custom printed boxes, labels, and secondary packaging makes the whole line feel deliberate.
Next steps for ordering labels that fit your jar line
Before requesting a quote, gather the basics: jar diameter, label panel size, material, fill conditions, application method, quantity, and final artwork files. If you know whether the jar will be chilled, stored in humidity, or handled often, mention that too. Those details help the supplier recommend the right stock instead of guessing.
If you have multiple SKUs, prioritize one test run or sample batch for the most important product first. That is often the SKU that carries the strongest margin or the highest launch visibility, and it is where a small label issue will hurt the most. Once that version proves out, rolling the design across the rest of the line is much easier.
Compare suppliers on more than price. Look at material options, proofing support, turnaround, reprint policy, and how they handle revision rounds. A partner who asks the right questions about adhesion, application, and storage is usually worth more than a quote that simply looks lower on paper.
A simple launch checklist helps:
- Confirm jar dimensions and dieline
- Review proof and barcode placement
- Test adhesion on the actual jar
- Build in shipping and receiving time
- Keep a small overage for setup and launch-day needs
Measure the jar, choose the environment, request a sample, and then move into production. That is the cleanest path to custom labels for jars that look right on shelf and still hold up after real handling, which is exactly what buyers should expect from well-built branded packaging.
What are the best custom labels for jars in humid or cold storage?
Use a moisture-resistant film such as BOPP or another durable label stock, and choose an adhesive rated for condensation, refrigeration, or freezer conditions. Test the label on the actual jar after chilling, because surface moisture changes how the adhesive behaves.
How do I choose between paper and film custom labels for jars?
Paper works well for dry, short-life, or budget-conscious applications. Film is better when the jar may get wet, rubbed, or handled frequently. The best choice depends on the product environment and the brand look you want on shelf.
What affects the cost of custom labels for jars the most?
Quantity, label size, material, finish, and print method are the biggest drivers. Special dies, multiple versions, and premium coatings can raise setup cost, while larger runs usually lower the unit cost.
How long does it usually take to produce jar labels?
Turnaround depends on proof approval, quantity, finishing, and current material availability. Simple digital orders often move faster than highly finished or large repeat runs, so it helps to build time for testing, revisions, and shipping into the launch schedule.
Can custom labels for jars be applied by hand?
Yes, many small and medium runs are applied manually. Clean release liners and consistent label sizing make hand application easier, and if you scale up, it is smart to check whether the labels will run smoothly through your applicator or labeling line.


