What Custom Made Stickers Online Really Means for Buyers
A sticker can cost less than a paperclip and still decide whether a package looks premium, handmade, compliant, or forgettable. That is the odd economics of package branding: tiny surface, visible consequence. Ordering Custom Made Stickers online is not just buying decoration. It is specifying printed, cut, and finished pieces that must match a brand system, a surface, a handling environment, and a quantity target.
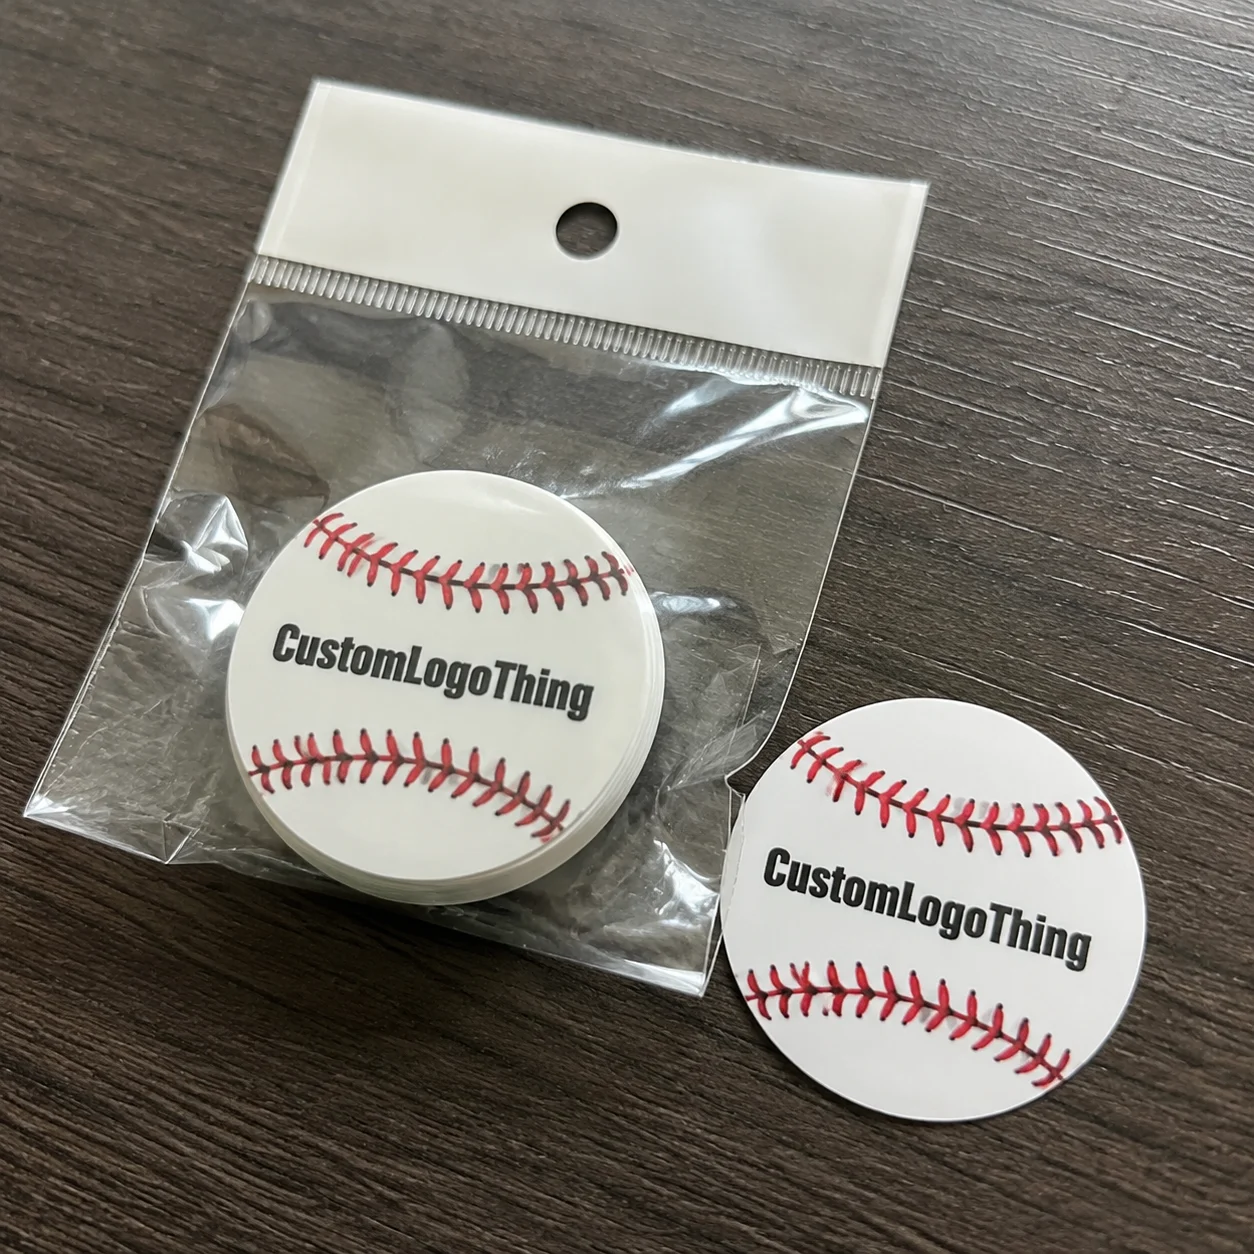
The category is broader than most first-time buyers expect. It includes logo stickers, product labels, packaging seals, QR code stickers, warning labels, event giveaways, tamper-evident seals, short-run retail labels, inventory markers, and promotional decals. Some carry only a mark or illustration. Others carry batch codes, ingredients, barcodes, safety warnings, allergen statements, or shipping instructions.
A 1.5-inch circle on a bakery box has a different job than a 4-inch waterproof label on a refrigerated bottle. Same buying portal. Different engineering problem.
The online buying advantage is real: faster quoting, easier artwork upload, material comparisons, digital proofing, and cleaner reorders. For smaller brands, that can remove three or four email loops from the process. For larger packaging teams, it lowers the risk of someone reordering from memory and forgetting the adhesive, roll direction, or laminate.
Custom stickers differ from stock stickers because the buyer controls the size, shape, adhesive, finish, color, artwork, and sometimes durability. Stock “thank you” seals can be fine for a hobby batch. If the sticker must match Custom Printed Boxes, survive condensation, scan under warehouse lighting, or fit a curved jar panel without wrinkling, the specification matters.
Packaging rule of thumb: start with the job the sticker must perform, not the artwork. Seal a box, survive refrigeration, brand a mailer, resist oil, scan reliably, or look clean on a retail shelf. The best material choice follows the job.
How Online Sticker Ordering Works From File to Finished Roll
The ordering path is usually simple on the screen: choose the sticker type, enter size and quantity, upload artwork, select material and finish, review the digital proof, approve production, and receive the shipment. The interface makes it feel frictionless. Production is not frictionless. The printer still needs clean data.
Digital proofing is the checkpoint buyers often rush, and it is the one that prevents the most expensive mistakes. A proof checks layout, cut lines, bleed, safe margins, color placement, spelling, and whether small text will remain readable after printing. It may also show roll direction, corner radius, white ink placement, or the position of a barcode relative to the cut.
QR codes deserve special attention. A code that looks crisp on a high-resolution display may fail after shrinking, printing on a textured stock, or being placed on a curved pouch. As a practical floor, many packaging teams avoid making QR codes smaller than about 0.8 inches square unless they have tested the exact print method and scan distance. More quiet zone around the code is usually safer than a decorative border that crowds it.
Format changes the way stickers behave in the packing process. Sheets are useful for hand application, office use, and low-volume packaging runs. Rolls are better for packing stations, label dispensers, and repeated application because the operator can peel faster and keep orientation consistent. Individual die-cut pieces work well for giveaways, inserts, events, and customer merch.
Printing method matters, but buyers do not need a pressroom lecture. Digital printing is flexible for short runs, multiple designs, and fast artwork changes. Larger runs may benefit from more production-efficient methods depending on ink coverage, material, and finishing. Cut style is just as practical: kiss-cut stickers stay on a backing sheet, die-cut stickers follow the artwork shape, and standard circles, rectangles, squares, and ovals usually reduce setup complexity.
Online ordering saves time. It does not remove buyer responsibility. A printer cannot guess whether the sticker will be applied to glass, corrugated board, a coated pouch, a candle jar, or a cold bottle pulled from a refrigerator. Good specs prevent expensive assumptions.
Sticker Materials, Adhesives, and Finishes That Change Performance
Material choice matters more than many first-time buyers expect. The same design can behave very differently on paper, white vinyl, clear film, kraft stock, metallic stock, or BOPP-style film. It may print the same logo. It will not age, flex, or stick the same way.
Paper is usually the economical choice for dry indoor packaging: boxes, mailers, hang tags, retail cartons, and short-term promotional stickers. It can look warm and tactile, especially on kraft or uncoated packaging, but it is not built for moisture or heavy abrasion unless coated or laminated.
White vinyl adds durability and is common for decals, handled products, outdoor applications, and branded stickers that customers may keep. Clear film works on transparent containers when the brand wants a “printed-on” look. Light artwork on clear material may need a white ink layer underneath; otherwise, pale colors can disappear against glass, liquid, or dark contents.
Kraft stock supports natural packaging design, especially for handmade, organic, or artisan positioning. It also changes color perception because inks sit over a brown base rather than a white one. BOPP-style films are common for moisture resistance and are often used on food, cosmetic, and beverage labels. They are thin, flexible, and practical when packaging may face condensation or handling.
Adhesive is the quiet failure point. Permanent adhesive is built for long-term hold. Removable adhesive suits temporary promotions, reusable containers, and surfaces where residue would be a problem. Freezer-grade adhesive is made for cold environments where standard adhesive can become brittle or weak. High-tack adhesive helps on difficult surfaces such as textured paperboard, low-energy plastics, slightly rough mailers, or recycled board with an uneven surface.
Finish changes both performance and perception. Matte feels soft, modern, and restrained. Gloss boosts color and shine, which can help product packaging stand out under retail lighting. Soft-touch finishes feel premium but may show oils from handling. Lamination can add scuff resistance, water resistance, and a longer shelf life, though it increases cost and may alter recyclability assumptions.
Surface compatibility should be treated as a real specification. Cardboard absorbs differently than glass. Plastic may resist adhesive because of its surface energy. Metal can be slick. Coated pouches flex. Textured mailers reduce contact area. For standards-minded buyers, it helps to think the way package testing organizations do: conditions matter. Groups such as ISTA focus on distribution performance because packaging rarely fails in perfect laboratory comfort.
A candle label needs awareness of heat, oil migration, and shelf appeal. A bakery box seal needs quick hand application and reliable adhesion to paperboard, often at a unit cost that still makes sense for daily volume. Same category. Very different sticker.
Pricing, MOQ, and Unit Cost: What Actually Drives the Quote
Sticker pricing is not just square inches. Quotes are shaped by material, quantity, shape complexity, finish, adhesive, roll or sheet format, proofing needs, and shipping. A simple 2-inch paper circle on sheets can price very differently from a laminated waterproof die-cut sticker with metallic stock and a custom contour.
MOQ means minimum order quantity: the lowest production run a supplier can print economically without setup costs dominating the job. This is why 100 stickers can look expensive per piece while 1,000 stickers often drop sharply. Artwork checks, press setup, cutting setup, and packing are spread across more units.
| Sticker Option | Typical Use | Common Cost Driver | Buyer Watchout |
|---|---|---|---|
| Paper label on sheets | Dry boxes, mailers, short-term retail packaging | Quantity and size | Not ideal for moisture or heavy handling |
| White vinyl sticker | Durable branding, decals, handled products | Material and lamination | May be more durability than a temporary seal needs |
| Clear film label | Glass jars, bottles, transparent containers | White ink and artwork opacity | Light colors can disappear without a white ink layer |
| Roll labels | Packing stations and repeated application | Roll direction, core size, setup | Wrong unwind direction can slow operators or jam dispensers |
| Metallic or specialty finish | Luxury launches, limited editions, gift packaging | Special stock, foil-like effects, finish | Premium look can become wasteful for one-day promotions |
As a broad planning range, small custom sticker runs may land anywhere from about $0.20 to $1.50 per piece depending on size, finish, and quantity. Larger simple paper or film label runs can drop below $0.10 per unit. Not always. A waterproof laminated label with a custom shape will not price like a basic paper seal.
Cost adders include Custom Die Cuts, specialty films, metallic effects, lamination, waterproof materials, rush production, multiple designs, and variable data such as unique QR codes. Variable QR codes are easy to underestimate because they add data handling, proofing discipline, and scan verification risk. One bad spreadsheet column can turn a neat campaign into a reprint.
Buyers often overpay in predictable ways: ordering too small too often, choosing premium materials for temporary use, requesting a complex shape when a standard rectangle would work, or paying rush fees because proof review stalled. Before requesting custom made stickers online, prepare a quote checklist: final size, quantity, material, finish, indoor or outdoor use, application surface, roll or sheet preference, delivery deadline, and artwork status.
If the sticker supports a broader product launch, compare it with your Custom Packaging Products so the finish, color system, and durability level feel intentional rather than patched on at the end.
Process and Timeline: From Artwork Upload to Delivery
The usual process runs through specification review, artwork check, proof creation, customer approval, print setup, production, quality control, packing, and shipping. The clock often starts after proof approval, not when the buyer first submits a request. That distinction causes real delays.
If artwork has missing bleed, unclear cut paths, low-resolution logos, or copy that changes after proofing, the order pauses. A straightforward sticker job may need a few business days for proofing and production, plus transit time. More complex orders, large quantities, specialty materials, or rush-season queues can stretch longer. Treat any timeline as a planning estimate because supplier capacity and material availability change.
Common timeline variables include order size, material availability, cut complexity, finishing requirements, proof revisions, production queue, shipping method, and destination. A rectangular roll label on standard white film is usually easier to schedule than a metallic die-cut sticker with soft-touch laminate and multiple artwork versions.
What speeds things up? Print-ready vector files. Clear size requirements. Approved dielines. No last-minute copy changes. Fast response to proof emails.
What slows things down? Low-resolution artwork, missing bleed, unclear cut paths, color disputes, specialty material sourcing, and rush requests placed near weekends or holidays.
From a packaging operations point of view, plan backward from the packing date, not the retail launch date. If finished goods must be packed on Monday, stickers arriving Monday afternoon are already late. For regulated categories or barcode-heavy labels, add time for internal review and scan testing. The U.S. Environmental Protection Agency offers useful context on packaging and material decisions through its Sustainable Materials Management resources, especially for teams balancing performance and waste reduction.
A Step-by-Step Buying Checklist Before You Place the Order
The smartest online sticker orders start with a short checklist. Not a committee meeting. Just enough discipline to stop small decisions from becoming expensive reprints.
- Define the job. Decide whether the sticker is for branding, sealing, compliance, promotion, inventory marking, tamper indication, or product identification.
- Measure the application area. Check whether it must fit a flat panel, curved jar, box flap, pouch front, bottle neck, or mailer corner. Measure in inches or millimeters, then confirm actual size on the package.
- Choose the shape and format. Rolls are best for packing lines. Sheets suit low-volume hand application. Individual die cuts work well for customer-facing inserts and giveaways.
- Select material and adhesive. Consider moisture, cold, heat, sunlight, oils, friction, and how long the sticker must stay attached.
- Prepare artwork correctly. Use correct dimensions, bleed, safe area, outlined fonts, high-resolution images, and a clear dieline for nonstandard shapes.
- Review the proof like a contract. Check spelling, barcode scanability, QR code destination, color expectations, cut line, roll direction, and quantity before approval.
Proof review is the least glamorous and most valuable step in the whole process. A one-character typo on a promotional sticker is annoying. A wrong allergen statement, broken QR code, or unreadable barcode can be much worse.
If you already buy Custom Labels & Tags, keep a shared spec sheet for sticker reorders. Include size, material, adhesive, finish, roll direction, artwork version, supplier, quantity, and proof approval date. Even a simple spreadsheet reduces reordering errors.
Common Mistakes That Make Custom Stickers Look Cheap
The most common error is designing for a screen instead of a physical surface. Screens glow. Packages sit under warehouse lights, kitchen lights, sunlight, and retail LEDs. Text that looks clean at 300% zoom may be unreadable at 1.25 inches wide.
Low-resolution logos are another red flag. Pixelated artwork signals amateur packaging even when the product inside is excellent. For logos and text, vector files such as AI, EPS, or PDF are usually the safest route. If raster images are used, they should be high resolution at final print size, not stretched from a small social media graphic.
Bleed and safe zones are not production trivia. They are insurance. A tiny cutting shift can create uneven borders or clip design elements if the artwork is built too tightly. For many sticker jobs, a bleed of about 0.0625 to 0.125 inches is a practical planning range, though the supplier’s template should always win.
Adhesive mismatch may be the most frustrating failure because the sticker can look perfect on arrival and fail later. A beautiful label that lifts from a textured box or peels from a cold bottle has not done its job. The print was successful. The specification was not.
Overdesign creates a different kind of damage. Too many fonts, excessive claims, cramped QR codes, and tiny social handles turn a useful label into visual noise. For package branding, white space is not wasted space; it helps the buyer understand the message quickly.
Operational mistakes show up fast. Ordering the wrong roll direction can slow a packing station. Choosing sheets when rolls are needed for speed can add labor cost. Approving a proof without checking actual application size can make a 3-inch design feel enormous on a small jar or too weak on a large shipper.
Then there is color. Online proofs are usually viewed on backlit screens, often with different brightness settings and no color calibration. Printed color depends on ink, substrate, finish, and whether the artwork is built in the right color mode. If exact brand color is critical, ask about available color matching options and understand that specialty stocks, kraft paper, and clear film can shift the result.
Expert Next Steps Before You Approve Production
Before approving production, print the design at actual size on office paper. Cut it out. Place it on the real package. Judge readability from arm’s length. That simple test catches more problems than another round of zooming in on a monitor.
Test the sticker on the real surface, not a similar one. Coatings, dust, curvature, condensation, and texture can change adhesion dramatically. A label that bonds to smooth glass may behave differently on a slightly frosted jar. A seal that sticks to uncoated paperboard may lift from a glossy mailer.
Application conditions matter too. Many adhesives perform best when applied to clean, dry surfaces at moderate temperatures, then given time to build bond strength. Applying labels to cold, wet, dusty, or oily packaging can reduce adhesion even if the material choice was technically correct.
Request or review samples when material choice is uncertain, especially for clear, metallic, waterproof, freezer, or luxury finishes. If sustainability claims are part of your retail packaging story, ask careful questions about paper sourcing, coating, liner waste, and recyclability. The Forest Stewardship Council is a useful reference point for paper-based sourcing claims, although certification details depend on the exact material and supplier chain.
Document approved specs for reorders: size, material, adhesive, finish, roll direction, quantity, artwork version, and supplier proof number. Good documentation is not bureaucracy. It protects margin. It also helps if the same sticker needs to coordinate with cartons, inserts, sleeves, or other branded packaging components.
Brief the supplier clearly. Describe the product, packaging surface, storage conditions, application method, deadline, and whether the sticker is decorative or functional. If it must survive refrigeration, say that. If it needs to seal a box flap during shipping, say that too.
Buying custom made stickers online becomes a smarter purchasing process when buyers confirm specs, proof carefully, and match the sticker to the packaging job. The sticker may be small. The decision is not.
Frequently Asked Questions
What files do I need to order custom stickers online?
Vector files such as AI, EPS, or PDF are best for logos, sharp text, and clean cut lines. High-resolution PNG or JPG files can work for simple designs if they are sized correctly and not pixelated. Include bleed, safe margins, outlined fonts, and a separate dieline for custom shapes.
How much do custom made stickers usually cost online?
Cost depends on size, quantity, material, finish, cut shape, adhesive, format, and shipping speed. Higher quantities usually reduce unit cost because setup is spread across more stickers. Specialty finishes, waterproof materials, metallic stocks, and rush turnaround increase the quote.
How long does it take to receive custom stickers after ordering?
The timeline usually includes proofing, approval, production, quality checks, and shipping. Production timing often begins after proof approval, so fast proof review helps prevent delays. Complex cuts, specialty materials, large quantities, or rush seasons can extend lead time.
Are waterproof custom stickers worth it for packaging?
They are worth it when stickers face refrigeration, condensation, oils, outdoor exposure, or frequent handling. Paper stickers are often enough for dry indoor boxes, mailers, and short-term promotional use. Match the material to the actual environment instead of paying for durability the sticker does not need.
Should I order custom stickers on rolls, sheets, or individual pieces?
Rolls are best for faster application, packing stations, and label dispensers. Sheets are practical for smaller batches, office use, and hand-applied packaging stickers. Individual die-cut stickers work well for giveaways, inserts, events, and customer merch.