Buyer Fit Snapshot
| Best fit | Custom Mailer Boxes projects where brand print, material claims, artwork control, MOQ, and repeat-order consistency need to be specified before quoting. |
|---|---|
| Quote inputs | Share finished size, material target, print colors, finish, packing count, annual reorder estimate, ship-to region, and any compliance wording. |
| Proofing check | Approve dieline scale, logo placement, barcode or warning zones, color tolerance, closure strength, and carton packing before bulk production. |
| Main risk | Vague material claims, crowded artwork, missing packing details, or unclear freight terms can make a low unit price expensive after revisions. |
Fast answer: Custom Mailer Boxes: Film, Print, MOQ, and Carton Packing should be specified like a repeatable production item. The safest quote records material, print method, finish, artwork proof, packing count, and reorder notes in one written spec.
Production checks before approval
Compare the actual filled-product size with the drawing, then confirm tolerance on folds, seals, hang holes, label areas, and retail display edges. Reserve space for logos, QR codes, warning copy, and material claims before decorative graphics fill the panel.
Quote comparison points
Review material grade, print process, finish, sampling route, tooling charges, carton quantity, and freight assumptions side by side. A quote is only useful when the supplier can repeat the same color, closure quality, and packing count on the next order.
On a packing line, the wrong mailer box can cost more in crushed corners, replacement shipments, and extra void fill than the box itself, and I’ve watched that play out in facilities from New Jersey to Southern California. That is why custom mailer Boxes How to Choose is never just a design question; it is a practical decision about protection, speed, and brand presentation all working together. When I help brands think through Custom Mailer Boxes how to choose, I always start with what happens on the bench, in transit, and at the customer’s front door, because that is where the box proves itself.
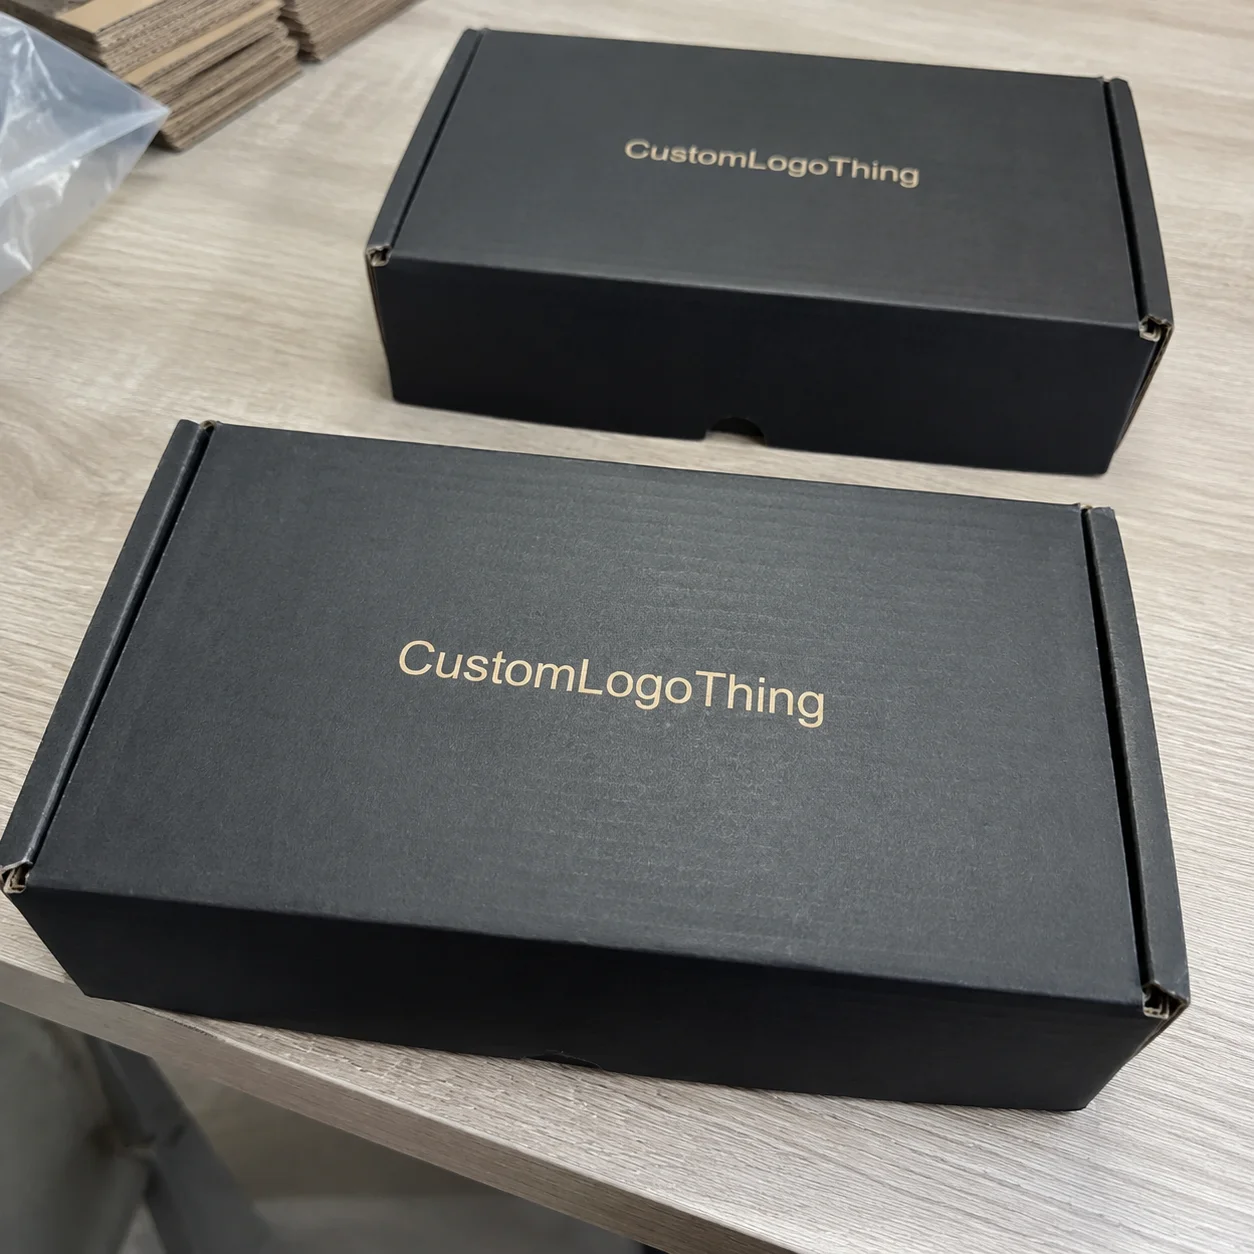
Custom Mailer Boxes are self-locking Corrugated Shipping Boxes commonly used for ecommerce, subscriptions, and Branded Unboxing Experiences. They usually feature a tuck-in lid, front flap, and folded structure that gives them a cleaner presentation than a regular shipping carton, which is why they show up so often in branded packaging and direct-to-consumer product packaging. If you are comparing Custom Packaging Products or trying to understand how these boxes fit into a broader packaging design system, the real job is balancing protection, brand look, packing speed, and postal efficiency rather than simply choosing a pretty face.
I still remember a client meeting where a cosmetics brand insisted on a larger mailer because the mockup “felt premium.” Their fulfillment team ran 1,200 test packs, and the oversized version added nearly 18 seconds per order because the inserter kept shifting, while the tighter box cut that time down and reduced dunnage by 30%. That is the kind of detail that makes custom mailer Boxes How to Choose such a consequential decision.
What Custom Mailer Boxes Are and Why Choice Matters
At the plant level, a mailer box is usually a die-cut corrugated blank that gets scored, folded, and locked into shape without tape in many applications. The structure is simple on paper, but in real life the choice of board grade, flute profile, liner color, and print method changes how the box behaves under load, how it stacks in a warehouse, and how it looks when the customer opens it. That is why Custom Mailer Boxes how to choose should always start with use case, not artwork.
The biggest factory-floor truth I can share is this: a bad mailer rarely fails in a dramatic way on day one. More often, it fails quietly by adding extra void fill, creating slow assembly, or arriving with a scuffed corner that triggers a return. I once visited a fulfillment center outside Chicago where the team was shipping a candle kit in an E-flute mailer that was two inches too wide. They were using crumpled kraft paper by the handful, and their shrink rate dropped almost 4% after we tightened the dieline and switched to a better insert. That small shift saved more than the cost of the box.
Choice matters because the box is doing several jobs at once. It protects the product, supports the brand, fits the ship method, and keeps the packing line moving. If your box looks beautiful but takes too long to assemble, it will slow labor. If it is strong but oversized, dimensional weight charges can creep up. If it is visually striking but printed on the wrong linerboard, the graphics may look dull or muddy. In other words, custom Mailer Boxes How to Choose is really about tradeoffs, and anyone promising a one-size-fits-all answer is glossing over the way real production works.
For brands that want a cleaner retail presentation or subscription feel, mailers often outperform plain cartons because the closure style and printed surfaces create a more intentional unboxing sequence. That is why you see them used for retail packaging, influencer kits, and higher-touch ecommerce shipments. If your line also includes flexible formats, Custom Poly Mailers can make sense for lighter, non-fragile orders, but corrugated mailers are usually the better fit when protection and presentation both matter.
Custom Mailer Boxes How to Choose in Real Fulfillment
If you are sorting through Custom Mailer Boxes how to choose, the most useful place to begin is the actual workflow on the packing bench. In real fulfillment, the box does not live as a concept; it lives as a flat die-cut sheet, a set of folds, a closure sequence, and a finished package that has to move quickly through human hands, conveyors, and carrier networks without causing friction. The right choice should feel almost invisible to the team shipping it, because the best packaging supports the operation rather than interrupting it.
That is why I always ask clients to walk through the process from stockroom pull to final label placement. A box that looks elegant in a render but slows a packer by even a few seconds can create a real labor issue across thousands of orders. The more your team ships, the more that small difference compounds, which is exactly why custom mailer boxes how to choose needs to include production flow, not just appearance. You are not selecting a decorative container; you are selecting a working tool.
In the plants I’ve visited, the strongest packaging programs are the ones that fit the rhythm of the line. The board opens cleanly, the flaps fold predictably, the insert seats without fighting the walls, and the finished box stacks without collapsing. Those are the details that keep a shift moving in a facility in New Jersey, a third-party logistics center in Texas, or a cosmetics co-packer in California. Once those details are right, the rest of the brand experience has a chance to shine.
How Custom Mailer Boxes Work in Real Fulfillment
In real fulfillment, a mailer box starts as a flat die-cut sheet. The sheet is scored at the fold lines, then converted into a finished shape by folding side walls and locking front panels into place. Many operations on a packing table or conveyor line use this style because the box can be assembled quickly, often with no tape, and the closure is intuitive after a short training cycle. That simplicity is one reason custom mailer boxes how to choose should include assembly time as a formal criterion.
The most common board constructions are E-flute and B-flute corrugated. E-flute is thinner and gives a cleaner print surface, which is why it shows up so often in custom printed boxes for beauty, apparel, and subscription programs. B-flute is thicker and typically offers better crush resistance, which can be valuable for heavier contents or longer parcel routes. Kraft linerboard gives a natural, earthy appearance, while white linerboard supports brighter graphics and more premium package branding. If you ask me honestly, I think too many buyers choose liner color purely on mockups and not on print behavior, which is a mistake I have seen dozens of times.
Printing method matters too. Flexographic printing tends to make sense for larger runs with simpler graphics and solid colors. Lithographic lamination gives sharper image quality and can be excellent for premium retail looks, though it adds complexity and cost. Digital printing is often the practical path for smaller quantities or fast-turn projects because it avoids plate costs and supports variable artwork. Direct-to-corrugated methods can shorten production in some cases, but the final choice depends on board surface, color expectations, and quantity. If you are comparing options, ask the supplier about minimum order quantities, setup time, and whether the chosen process will hold on kraft or white linerboard.
Shipping behavior is another piece people underestimate. A snug mailer reduces movement, lowers the amount of paper or air pillows needed, and can improve stability under vibration. The right size also helps with dimensional weight control, which matters when your carrier pricing depends on package volume as much as actual weight. I have seen teams save money simply by trimming 0.5 inch from the internal width and redesigning the insert, because the total cube dropped enough to change the parcel class on larger monthly volumes.
If you want a benchmark for shipping performance, it helps to review basic standards and sustainability guidance from organizations like the International Safe Transit Association and the U.S. EPA recycling resources. Those references will not choose the box for you, but they do reinforce why transit testing and material choices matter beyond appearance.
Key Factors to Consider Before You Choose
If you are working through custom mailer boxes how to choose, start with size and product fit. Measure the product’s length, width, and height, then add only the clearance needed for tissue, inserts, or protective padding. A box that is too tight creates packing frustration and can scuff the contents, while one that is too loose wastes filler and weakens the presentation. I usually like to see at least one physical sample on the bench before anyone approves final dimensions, because a digital mockup can hide a surprising amount of reality.
Material strength comes next. Match board grade and flute type to the product weight, fragility, and distance traveled. A light apparel kit going regionally might do fine in E-flute, while a ceramic candle set or gift bundle may need B-flute or a stronger insert strategy. In my experience, the right insert often matters more than adding thickness everywhere. A well-designed paperboard insert can lock a product in place better than another layer of corrugation, and it usually prints and packs more cleanly.
Branding and print quality are where many buyers get emotionally attached, and I understand why. The box is often the first physical touchpoint a customer has with the brand. You may want full-color exterior print, interior messaging, or a simple one-color logo with a restrained kraft look. The decision should align with the product’s price point and audience. For example, a luxury skincare line might benefit from a white exterior, soft-touch lamination, and interior print, while a farmer’s market snack brand may look better with kraft, black ink, and a simple stamp-style logo. That is the practical side of custom mailer boxes how to choose.
Cost is more than the quote per unit. You need to compare unit price, tooling or die costs, print setup, freight, and any secondary finishing. A box that costs $0.18 less per unit can still be more expensive if it requires slower assembly or more protective filler. I like to talk about total landed cost with clients, because that is the number that actually reaches the shipping table. Small runs often cost more per unit, while larger programs spread setup costs across more boxes, which is why volume planning matters so much.
Order volume and inventory planning also shape the decision. Digital print often suits lower quantities or frequent artwork updates, while offset or flexo can make more sense at higher volumes. If you are not sure whether your run will stabilize, build a forecast with a base quantity plus safety stock. I have seen brands launch with 2,000 boxes and run out in six weeks because a retailer picked up the product unexpectedly. That kind of scramble can delay fulfillment and create avoidable rush freight.
How do you choose custom mailer boxes for your product?
The simplest answer is to start with the product itself, then work outward to shipping method, branding goals, and fulfillment speed. Measure the item carefully, identify the protection it needs, and decide whether the box should feel natural, premium, or retail-ready. Once those choices are clear, custom mailer boxes how to choose becomes a matter of matching structure, board, print, and size to the job the box has to perform.
Step-by-Step Guide to Choosing the Right Mailer Box
- Define the product and shipping method. Note the weight, fragility, and whether the box will go by parcel, mail, or retail packaging use. A 9 oz apparel kit has very different needs than a 3 lb candle set, even if both use mailers.
- Measure the product carefully. Add the exact clearance for inserts, tissue, or protective padding. If the product shifts when you shake the sample, the box is probably too generous.
- Choose the corrugated style and finish. Kraft can signal natural and practical, while white exterior stock usually supports cleaner graphics. If the art is bold or photo-heavy, white liner often gives better visual control.
- Select print details. Decide whether you need one-color branding, full exterior coverage, or inside print. Confirm proofing requirements, because color expectations can differ from screen to board.
- Request samples or prototypes. Test assembly speed, stackability, and transit protection before production. A 15-minute bench test can reveal more than three email threads.
That five-step sequence is the backbone of custom mailer boxes how to choose in a real business setting. I once worked with a subscription snack company that skipped sample testing and approved a beautiful blue box with a very tight tuck. On the packing line, the lid had to be pressed hard enough that two out of every hundred boxes creased at the flap. They thought they had a print issue; it was actually a structural issue. The corrected dieline fixed the problem in one revision.
When you are comparing custom printed boxes, do not forget to test the opening experience. The best mailer boxes feel deliberate from the first fold to the final reveal. If the closure catches awkwardly or the flaps fight each other, customers notice. Good packaging design is not just visual; it is mechanical, tactile, and operational.
Pricing, Lead Times, and Production Planning
Pricing is driven by board grade, box size, print coverage, color count, and the complexity of the die line. A simple one-color kraft mailer with a standard size can be relatively economical, while a fully printed white mailer with interior artwork, special coatings, and multiple SKUs will climb quickly. If you want to compare quotes properly, ask each supplier for the same assumptions on board, print side, finish, and freight, otherwise the numbers will not mean much.
Lead time usually includes sampling, proof approval, die creation, production, finishing, and freight. For a straightforward mailer box, I often see 12 to 15 business days from proof approval to ship date, though larger runs or specialty finishes can push that longer. Sampling may take 3 to 7 business days depending on workload and whether the structural sample is plain or printed. If your artwork has fine gradients or a dark background, add time for proof review, because color on board never behaves exactly like color on a monitor.
There are simple ways to speed things up. Approve dielines quickly. Keep print simple if you can. Choose standard board options rather than rare materials. Send exact artwork dimensions the first time. In one supplier negotiation I sat through, the buyer saved a full week just by approving the dieline on the same day instead of waiting for a second internal meeting. That kind of discipline matters when a launch date is locked.
Plan inventory around launch dates, seasonal demand, and safety stock so packaging never becomes the bottleneck. I have seen brands have inventory ready and then sit idle because the boxes were still in transit. If you are launching a new line of branded packaging, build a buffer of at least one reorder cycle if possible, especially if your supplier is overseas or your print spec is complex. If the box supports retail placement too, confirm how it will store in back rooms and on shelves, because retail packaging often needs to survive more handling than ecommerce alone.
Common Mistakes When Choosing Mailer Boxes
The most common mistake is choosing a box that is too large and then stuffing it with filler. That raises costs, slows packing, and weakens the unboxing experience. The second mistake is selecting a style based only on appearance without testing crush resistance or closure strength. A box can look beautiful on a render and still fail under vibration or compression.
Another issue is ignoring print tolerances. Logos, gradients, and dark backgrounds can look muddy on the wrong surface, especially if the linerboard and ink system were not matched properly. I have seen brands approve a rich black design on kraft and then wonder why it looked more brown than black after production. That is not a mystery; it is board behavior.
Assembly speed gets overlooked constantly. A design that folds with three extra motions per box may not sound like much, but on a line shipping 4,000 units a day, those seconds add up fast. A beautiful structure that fights the packer is still a bad operational choice. That is one of the most practical lessons I have learned from years on factory floors.
Skipping sample tests is another expensive mistake. Drop, vibration, and compression checks matter, especially for fragile, premium, or multi-item kits. If you need a benchmark, ask whether the sample has been considered against common transit tests used in packaging engineering and logistics, including the types of methods discussed by PMMI and packaging industry resources. It is not always necessary to run formal lab testing for every project, but it is wise to test like a skeptical customer would handle the package.
Expert Tips for a Better Box Decision
Use inserts when product movement matters more than adding thicker board. A stable internal fit often protects better than more material alone, and it can also create a tidier reveal. I have watched brands spend heavily on thicker corrugation when a $0.06 insert change would have solved the problem more elegantly.
Match the finish to the brand story. Kraft tends to feel earthy, practical, and honest, while white or coated surfaces feel cleaner and more upscale. Neither is inherently better. The right choice depends on the product, the price point, and the customer expectation. That is where package branding becomes strategic rather than decorative.
“The best mailer is the one the packing team stops thinking about,” a fulfillment manager told me during a warehouse walk-through in Dallas, and that line has stuck with me ever since. If the box opens predictably, stacks well, and protects the product without drama, the operation runs better all day.
Think through the unboxing sequence on a real packing bench. Where does the insert go first? Does the logo face up or out? Is the label placed before or after closure? Those little choices shape the customer’s perception and can even reduce mistakes on the line. When I visited a skincare co-packer in Pennsylvania, we shaved several seconds off each pack-out by changing label placement and fold order, and the operator feedback was immediate.
Ask for structural and print samples from the actual converting process, not just digital mockups. Board fibers, scoring pressure, glue lines, and ink laydown all affect the final result in ways a screen cannot show. If a supplier can walk you through the dieline, flute choice, and finish with specifics, that is a very good sign. Experienced guidance is especially valuable in custom mailer boxes how to choose, because small changes to size or material can ripple through freight, labor, and customer experience.
What to Do Next Before You Place an Order
Before you place an order, build a simple specification sheet with product dimensions, weight, quantity, branding needs, and target shipping method. Include whether you want kraft or white liner, one-color or full-color print, and whether the box needs an insert. If you already know your supplier’s requirements, add bleed, safe area, and proofing notes so the process stays clean from the first round.
Gather two or three reference boxes you like and note what works about each one. Maybe you like the closure on one, the finish on another, and the size on a third. That side-by-side comparison is often more useful than trying to describe a perfect box from memory. A physical sample pile tells the truth quickly.
Request a structural sample and a printed proof, then test fit, stacking, and opening experience with your actual product. If possible, hand the sample to someone who has never seen the brand and ask them what they notice first. Their reaction usually reveals whether the box communicates the right level of quality. If you are also comparing other packaging formats, keep the broader lineup in mind by reviewing Custom Packaging Products alongside your mailer options so your program stays consistent across SKUs.
Confirm budget, timeline, and reorder expectations so you can choose a box that supports both launch and long-term fulfillment. The box should fit the business model, not just the marketing mood board. That is the real answer to custom mailer boxes how to choose: use the right structure, the right size, the right print approach, and the right production plan for the way your team actually ships.
Honestly, the best packaging decisions are rarely the flashiest ones. They are the ones that protect the product, keep labor steady, and make the customer feel the brand cared enough to get the details right. If you keep that standard in mind, custom mailer boxes how to choose becomes much clearer, and your final box is far more likely to work in the real world, not just on a rendering. Pick the smallest structure that safely fits the product, verify it with a physical sample, and let the packing line—not the mockup—have the final say.
Frequently Asked Questions
How do I choose the right size for custom mailer boxes?
Measure the product’s length, width, and height, then add only the clearance needed for inserts or protective packaging. A snug fit usually ships better and looks more polished than an oversized box filled with extra void fill.
What material is best when deciding on custom mailer boxes?
Most ecommerce mailers use corrugated board because it balances strength, printability, and cost. Kraft liners work well for a natural look, while white liners are often preferred for brighter branding.
How much do custom mailer boxes usually cost?
Cost depends on size, board grade, print coverage, order quantity, and tooling setup. The best way to compare pricing is to look at total landed cost, not just the per-box quote.
How long does production take for custom mailer boxes?
Timeline usually includes sampling, proof approval, die creation, production, and freight. Simple designs and faster approvals move quicker, while full-color custom work and special finishes take longer.
What are the most common mistakes when choosing mailer boxes?
Picking the wrong size, underestimating shipping stress, and ignoring assembly speed are the biggest issues. Testing samples before production helps prevent costly packaging problems later.