Custom Miniature Stickers Are Tiny, Not Simple
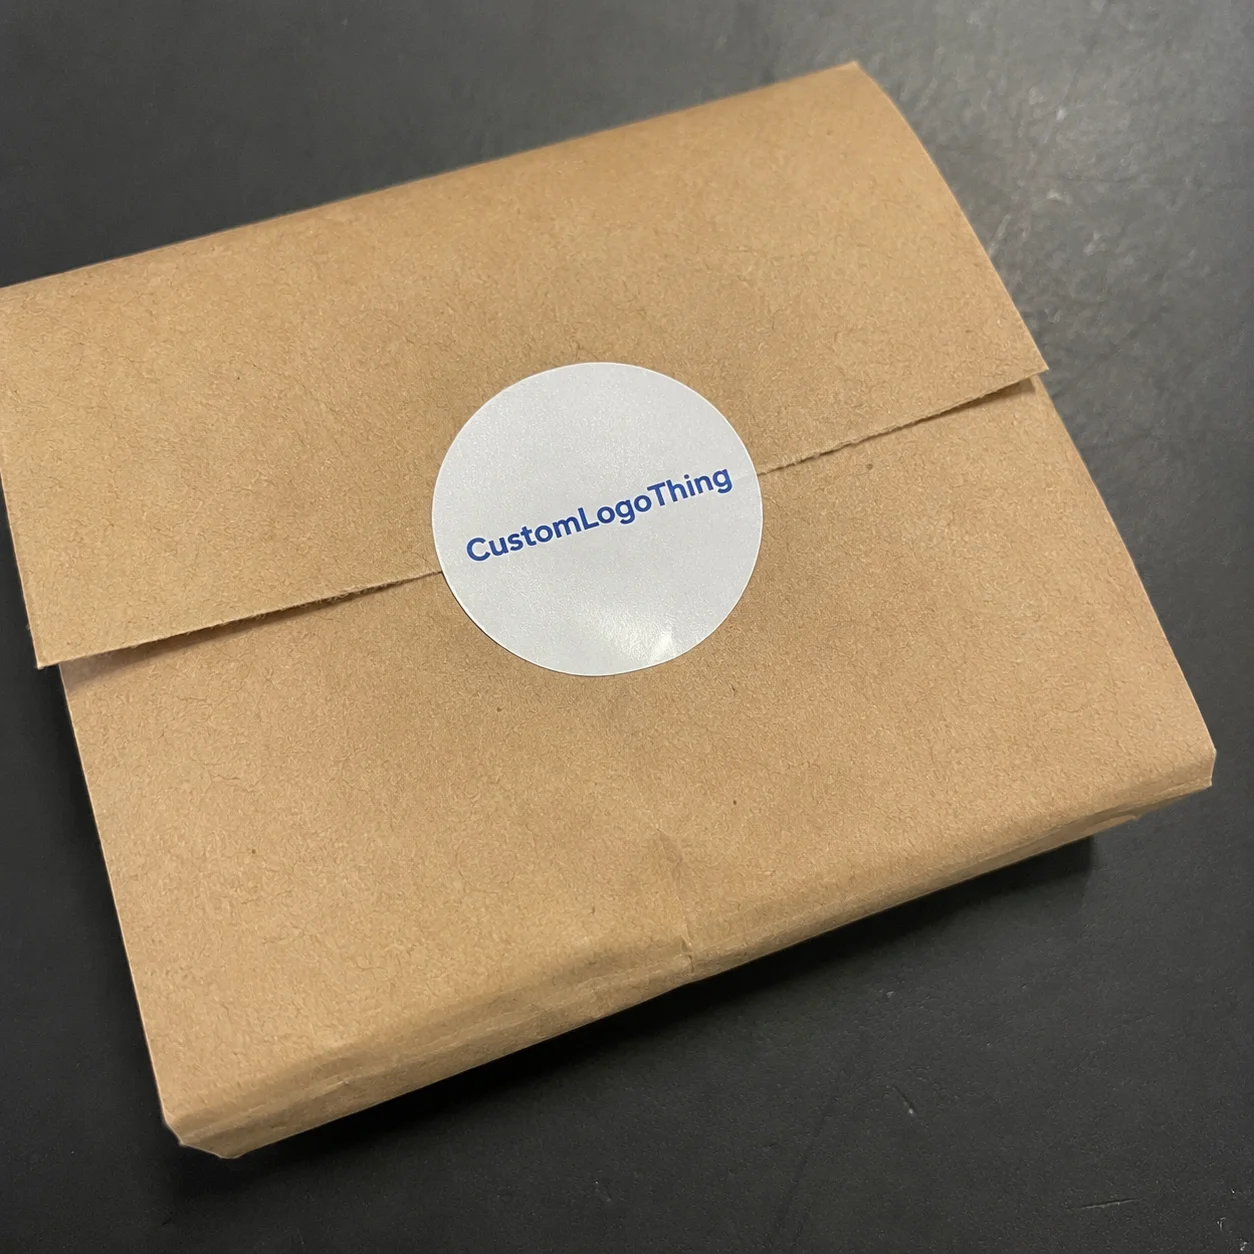
A cosmetics brand adds a 0.75-inch seal sticker to a lip balm box, and suddenly the package looks finished instead of improvised. That is the irritating little trick behind custom miniature stickers: small part, large visual responsibility. Funny how a piece smaller than a coin can expose the whole packaging system.
Miniature stickers are small-format printed labels or decals, usually under 1.5 inches wide or tall, made with a logo, icon, warning mark, QR code, batch marker, closure seal, or decorative graphic. They show up on sample jars, candle lids, cannabis packaging, electronics accessories, stationery sets, food samplers, bottle caps, retail inserts, event giveaways, and packaging that needs one final detail to look intentional.
The job sounds simple. Shrink the logo. Print the sticker. Apply it. Done.
Except small stickers punish weak files faster than larger labels. Thin fonts vanish. Tight borders look crooked after normal cut movement. Low-contrast colors turn gray and muddy. Cheap adhesive lifts from curved tubes, oily jars, chilled bottles, textured mailers, and low-energy plastics. A full-size label has room to absorb small flaws; a 0.6-inch sticker does not.
For buyers, the important decisions are practical rather than glamorous: size, shape, adhesive, finish, quantity, sheet or roll format, application method, and the environment the sticker must survive. A dry paper carton and a refrigerated glass bottle are not the same assignment. Neither are a hand-applied batch of 500 and a roll-fed run of 50,000.
The production problems are not miniature. The sticker is.
How Small Sticker Printing Actually Works
The production path is predictable. Artwork is prepared, colors are checked, material is selected, stickers are printed, coating or lamination is added if needed, and the pieces are kiss-cut, die-cut, sheeted, or rolled. A decent quality check should confirm cut accuracy, print clarity, adhesion, quantity, and final packing format before the order ships.
Digital printing is common for short runs, product launches, test batches, and detailed miniature designs. Setup is faster, minimums are usually more flexible, and multiple versions can sometimes be grouped on the same sheet. For 250 to 2,000 pieces, digital often makes more sense than pushing a small order through heavier setup just to save a little on each unit.
Flexographic printing or offset-style production can work better once volume climbs. If the order is 25,000 round closure seals for a packaging line, the quote may shift toward roll production, plate setup, tighter repeat control, and machine-compatible specs. Setup costs rise, but unit cost usually improves when enough pieces absorb that setup.
Kiss-cut and die-cut are not interchangeable terms. Kiss-cut stickers are cut through the face material while the backing liner stays intact, which makes tiny pieces easier to peel from sheets or rolls. Die-cut stickers are cut through the full shape, including the backing. They look tidy as individual pieces, but very small die-cut stickers can be slow to handle. Tiny loose decals are excellent if the goal is losing inventory under a packing table.
Shape affects both appearance and production yield. Circles, squares, ovals, rounded rectangles, and simple custom silhouettes usually behave well. Spiky edges, hairline extensions, tiny notches, and intricate outlines can tear, lift, or show edge variation. A 0.6-inch starburst may look sharp on screen and miserable after cutting.
Print tolerance needs plain language: every print-and-cut process has slight movement. On a 4-inch label, a 0.5 mm shift may barely register. On a 0.5-inch sticker, the same shift can make a border look visibly off-center. Bleed, safe margins, and simplified artwork are not decorative file-prep rituals; they are what keep tiny stickers from looking defective.
Practical rule: if the sticker is smaller than 1 inch, design it like a symbol, not a brochure. One mark. Strong contrast. Thick lines. Breathing room around the cut.
Use at least 0.0625 inch bleed when possible, keep critical art at least 0.0625 inch inside the cut line, and avoid skinny borders unless the supplier confirms the tolerance and the brand can accept normal movement. A bold border can work. A hairline ring around a 0.5-inch circle usually cannot.
Proofing catches many problems, not all of them. A digital proof confirms size, layout, cut line, bleed, roll direction, and general color direction. A physical sample is safer when the adhesive, finish, or brand color is critical. Color shifts by material, coating, and print method, so Pantone references or approved color targets matter when the sticker must match an existing carton, sleeve, or label system.
Size, Shape, Material, and Finish Specs That Matter
Mini sticker sizing should start with the job. For icons, closure dots, and simple decorative seals, 0.25 to 0.5 inches can work. For logos and short marks, 0.5 to 1 inch is usually safer. For QR codes, compliance marks, short text, or ingredient callouts, 1 to 1.5 inches gives the design enough space to function.
Readability has limits. Text under 5 to 6 points is risky unless the typeface is clean, bold, and printed at high resolution. Reversed-out text, fine scripts, low-contrast gray, and thin serif fonts are especially fragile at miniature scale. Legal copy may want to be tiny. Physics is less cooperative.
Material choice should follow the surface and environment, not just the lowest quote. Paper works for dry indoor packaging, hang tags, stationery, and decorative seals on boxes. White BOPP or vinyl performs better around moisture, oils, frequent handling, refrigerated products, and curved containers. Clear film creates a premium no-label effect, but transparent stock weakens contrast unless white ink or high-opacity color is planned correctly.
Adhesive is the spec buyers often underestimate. Standard permanent adhesive works for most cartons, paperboard boxes, inserts, and dry retail packaging. Removable adhesive is useful for promotions, temporary seals, and surfaces where residue would be a problem. Freezer-grade adhesive belongs in cold supply chains. High-tack adhesive helps with rough paper, textured mailers, curved tubes, low-energy plastics, and surfaces that do not want to bond cleanly.
| Spec Choice | Best Use | Watchout | Typical Cost Impact |
|---|---|---|---|
| Paper | Dry boxes, inserts, stationery, simple seals | Scuffs and moisture damage | Lowest |
| White BOPP | Cosmetics, food samples, bottles, jars | Needs the right adhesive for curves | Medium |
| Vinyl | Durable decals, handling-heavy products | Often excessive for basic indoor use | Medium to high |
| Clear Film | Premium branding and no-label effects | Low contrast if ink is not planned well | Medium to high |
| Specialty Adhesive | Freezer, rough, oily, curved, or low-energy surfaces | Requires testing on the actual surface | Higher |
Finishes change appearance and durability. Matte feels softer and more restrained, especially for cosmetics, candles, wellness products, and premium packaging. Gloss makes color pop and can make small graphics look sharper. Soft-touch lamination feels expensive because it usually is. Lamination can protect against scuffs, oils, moisture, and abrasion during packing and shipping.
Each finish has a tradeoff. Gloss can show scratches and glare. Matte can dull bright colors. Unlaminated paper can scuff in transit. Soft-touch can show oils from fingers. Foil looks impressive on a small seal, but tiny foil details may fill in or break up if the art is too delicate. The finish should match the handling environment, not only the brand mood board.
Color and contrast matter more as the sticker shrinks. Miniature graphics benefit from bold icons, thick strokes, strong contrast, and fewer elements. If the design needs a magnifying glass, it is not a design. It is a warning sign.
Backing format is another operational choice. Sheets work well for hand application, sample kits, multi-design orders, and small assembly teams. Rolls are better for dispensers, label applicators, and larger production runs where speed and placement consistency matter. If a product line already uses Custom Labels & Tags, miniature versions should match the same finish, adhesive family, and color target where possible. Small inconsistencies are surprisingly visible when packages sit side by side.
Cost, Pricing, MOQ, and Unit Cost Tradeoffs
Pricing depends on size, material, finish, cut complexity, quantity, print method, number of designs, packing format, sampling, and rush needs. A 0.5-inch matte paper circle on sheets is not the same job as a 1-inch clear BOPP QR label on rolls with freezer adhesive.
Small digital runs may start around a few hundred to 1,000 pieces. Larger custom runs often make more sense around 2,500 to 10,000+ pieces because setup, proofing, and cutting costs spread across more units. For basic small paper stickers at moderate quantities, buyers may see rough unit pricing around $0.03 to $0.12. Specialty films, lamination, foil, multiple versions, or tiny complex cuts can push that higher, especially below 1,000 pieces.
Tiny does not mean nearly free. Setup still exists. Proofing still exists. Cutting still exists. Material handling still exists. A miniature sticker does not create a miniature production cost.
Sheets can be cost-effective for hand application, mixed designs, and low to mid-volume packing. Rolls may have better unit economics for high-volume packaging lines, especially when the same sticker repeats thousands of times. Rolls also reduce handling time if the team uses a dispenser or label applicator. Labor can quietly erase savings from the cheapest quote when each sticker takes 5 to 10 seconds longer to peel.
Material differences are real. Basic paper is usually the lowest-cost option. BOPP, vinyl, clear film, specialty adhesives, foil stamping, spot UV, textured finishes, and soft-touch lamination raise the quote. If sustainability claims matter, ask about FSC-certified paper options through the Forest Stewardship Council and confirm whether the adhesive and liner fit the package’s disposal path. Recyclability claims around labels can get messy fast, especially when film labels, coated paper, mixed materials, and liners enter the discussion.
Multiple designs also affect price. Ganging versions on one sheet can reduce waste and make a promo pack easier to manage. Separate rolls, separate proofs, different materials, or different adhesives increase setup and handling. Ten versions of a 0.75-inch warning mark may be efficient if they share a sheet. Ten separate rolls with different colors and unwind directions are a different order entirely.
| Quantity Range | Common Format | Best Fit | Buying Note |
|---|---|---|---|
| 250-1,000 | Digital sheets | Samples, launches, small-batch product packaging | Higher unit cost, lower commitment |
| 1,000-5,000 | Sheets or short rolls | Seasonal runs, promo seals, boutique retail packaging | Useful range for testing material and size |
| 5,000-25,000 | Rolls or ganged sheets | Repeat packing, dispensers, growing product lines | Unit cost usually improves noticeably |
| 25,000+ | Production rolls | Automated or semi-automated packaging lines | Confirm machine specs before proof approval |
A useful quote request includes final size, quantity, shape, material, finish, adhesive, sheet or roll format, application surface, intended environment, artwork file, and target delivery date. Compare total landed cost, not only unit price. Shipping, sampling, overage, storage, and labor to peel and apply very small pieces all belong in the calculation.
Process, Timeline, and Production Steps From File to Delivery
A normal order follows a clear path: Request a Quote, confirm specs, submit artwork, receive a proof, approve the proof, start production, run quality checks, and ship the finished stickers. The calendar starts after usable artwork and approval. Not when someone sends a blurry screenshot at 11:47 p.m. and calls it a logo file.
Simple digital sticker orders often take about 5 to 10 business days after proof approval. Larger, specialty, or highly customized orders may need 10 to 20 business days or more. Rush production may be possible, but rush fees, limited material options, and compressed proofing windows create risk. A rushed tiny sticker can still ruin a very not-tiny packaging schedule.
The proof should show exact dimensions, cut line, bleed, safe area, color references, sheet layout or roll direction, and delivery format. For rolls, confirm unwind direction, core size, outside diameter, and whether labels are wound in or out. For sheets, confirm sheet size, number of stickers per sheet, spacing, and whether the backing is easy to peel.
Sampling adds time but reduces risk. Digital samples help check size, layout, and general appearance. Pre-production samples are better when the sticker is going on expensive custom printed boxes, rigid packaging, glass jars, cosmetic tubes, or packaging that already has an approved brand system. If the sticker has to match a carton, insert, sleeve, or existing label, screen color alone is too thin a basis for approval.
Quality control should be specific. Check that the count is correct, the cut is centered, the liner releases cleanly, the adhesive bonds to the intended surface, the finish is not scuffed, and the smallest text or icon remains legible at normal viewing distance. For QR codes, scan several samples with multiple phones. For closure seals, open and close test packages to see whether the sticker tears, lifts, or wrinkles in an unacceptable way.
Production bottlenecks are predictable: missing vector files, unclear sizes, complex cut lines, specialty materials, custom adhesive requests, last-minute quantity changes, and approvals stuck in someone’s inbox. International shipping can add customs time, and protective packing for rolls can increase freight cost more than buyers expect. Miniature stickers are compact. Logistics still finds a way.
Plan the sticker order before packaging assembly begins. Not after the boxes arrive and the team remembers the tamper seal. If the stickers are part of a larger launch, coordinate them with cartons, inserts, mailers, and Custom Packaging Products so color, finish, and delivery timing line up.
Common Mini Sticker Mistakes That Make Orders Go Sideways
The first mistake is shrinking artwork built for a full-size label. Fine lines, gradients, thin fonts, dense text, shadows, and delicate patterns often fail at miniature scale. A design that works beautifully on a 3-inch label can become a decorative smudge at 0.75 inches.
The second mistake is choosing the smallest possible size because it feels cheaper. Smaller can reduce material use, but readability, peelability, and application speed often matter more than saving a fraction of a cent. If workers struggle to peel the sticker or place it straight, the cheap spec is not cheap anymore.
The third mistake is ignoring the application surface. A sticker that works on a flat paper box may fail on a curved lip balm tube, textured mailer, oily jar, chilled bottle, or low-energy plastic cap. Adhesive testing on the real surface is boring. Failed adhesion after packing 4,000 units is worse.
The fourth mistake is skipping bleed and safe margins. Tiny stickers need clean files because minor cut variation can make borders look uneven. Avoid ultra-thin borders around circles and squares unless the supplier confirms the tolerance and the brand accepts normal movement.
The fifth mistake is picking a finish based only on appearance. Gloss can show scratches. Matte can mute bright colors. Unlaminated paper can scuff during shipping. Soft-touch feels premium but may show fingerprints and oils. Finishes should match both the product and the handling environment.
The sixth mistake is ordering rolls without confirming unwind direction, core size, or dispenser compatibility. Packaging machines are not mind readers. They are expensive ways to discover bad specs. If a machine needs a 3-inch core, outside-wound labels, and a specific leading edge, put that in writing before production.
The seventh mistake is underestimating hand-application labor. Very small stickers can be slow to peel and place, especially on curved packaging or when alignment matters. A worker placing a 0.5-inch seal across a box flap may move quickly. A worker centering a 0.75-inch logo on a jar lid may not. Multiply that by 5,000 pieces and the labor cost becomes visible.
Most mistakes are preventable when buyers define the size, use case, surface, quantity, and application method before chasing the cheapest quote. Cheap is fine. Cheap and wrong is tuition.
Next Steps Before You Request a Quote
Start with the available space. Measure the box flap, jar lid, pouch corner, bottle cap, insert, or mailer area where the sticker will sit. Then decide the exact job: decorative branding, closure seal, compliance mark, batch identifier, promotional callout, QR code, or machine-applied label. One sticker can do two jobs if designed well. Five jobs on a 0.75-inch circle is comedy.
Print a paper mockup at actual size before ordering. If the team cannot read it on office paper, the final sticker will not magically become readable because the printer has better equipment. Test the scale from normal viewing distance, not with your face six inches from the page under perfect lighting.
Test the surface. Apply a sample sticker, blank label, or even tape to the actual box, jar, pouch, bottle, mailer, or insert. Check lifting, wrinkles, edge curl, placement difficulty, and whether the adhesive marks the surface. For cold, oily, or damp products, test under those conditions. Room-temperature desk tests lie.
Simplify the artwork before sending it out. Use one logo mark, one short phrase, or one clear icon. Keep borders thick. Avoid tiny reversed-out text. Send vector files such as AI, EPS, or editable PDF when possible. High-resolution PNG or TIFF can work for simple designs, but screenshots and blurry JPEGs should be treated as reference material, not production artwork.
Send the manufacturer the actual spec list: size, shape, quantity, artwork, material preference, finish preference, adhesive needs, application surface, indoor or outdoor use, sheet or roll format, and delivery deadline. If the material is undecided, describe what the sticker must survive. A quote team can recommend options faster when the use case is clear.
Order extra. A 5% to 10% overage is practical for hand application, replacements, samples, damaged pieces, and the occasional packing-table disaster. Running out of tiny stickers during packing is a dumb problem. Still common.
Buyers who define the application first usually get cleaner proofs, fewer production delays, and custom miniature Stickers That Actually work on the package. The strongest spec is rarely the fanciest one. It is the one that fits the surface, survives the environment, and can be applied without turning the packing line into a patience test.
FAQ
What size should custom mini stickers be for packaging?
Most packaging mini stickers work best between 0.5 and 1.5 inches, depending on whether they show a logo, seal, QR code, or short text. Use 0.5 to 0.75 inches for simple icons or seals, and move closer to 1 inch or larger if the design includes readable text. Print the design at actual size before ordering; if it looks cramped on paper, it will look worse on the final sticker.
Are custom miniature labels better on sheets or rolls?
Sheets are usually better for hand application, small batches, sample kits, and multiple designs in one order. Rolls are better for high-volume packaging, dispensers, label applicators, and consistent placement on a production line. If using rolls, confirm roll direction, core size, outside diameter, and dispenser compatibility before production.
How much do tiny custom stickers usually cost?
Cost depends on size, quantity, material, finish, adhesive, cut shape, and whether the stickers are supplied on sheets or rolls. Unit cost usually drops as quantity increases because setup and proofing costs are spread across more pieces. Paper stickers are generally cheaper, while vinyl, BOPP, clear film, lamination, foil, and specialty adhesives increase pricing.
Can custom small stickers include QR codes?
Yes, but the sticker must be large enough for the QR code to scan reliably, usually around 0.75 to 1 inch minimum depending on code density. Keep the QR code high contrast, avoid glossy glare when possible, and leave enough quiet space around the code. Always test-scan the proof or sample using multiple phones before approving production.
What artwork file is best for miniature custom stickers?
Vector files such as AI, EPS, or editable PDF are best because they keep lines, logos, and cut paths clean at small sizes. High-resolution PNG or TIFF files can work for simple designs, but low-resolution screenshots, social media images, and blurry JPEGs are poor choices. Include bleed, safe margins, outlined fonts, and a clear cut line to avoid proof delays.
For broader transit testing guidance on packaged products, the International Safe Transit Association publishes standards that help brands think through shipping stress, vibration, compression, and handling. A sticker is only one small part of product packaging, but if it scuffs, lifts, or fails in transit, customers still notice.

