Custom PVC Patches: Order Smarter With Specs, Pricing
Custom PVC Patches are a good fit when a logo needs crisp edges, readable text, or color separation that embroidery would blur. They preserve detail better than thread in many cases and hold up well on bags, outerwear, and field gear.
The value is practical, not decorative. A molded patch has to stay legible at the final size, survive handling, and match the product it is attached to. That is why Custom PVC Patches are often chosen for tactical gear, travel goods, uniforms, and retail kits where a cleaner, more technical look makes sense.
They also matter as part of a larger branding system. A patch that works on screen but fails in production is not useful, and a patch that looks out of place next to packaging or inserts weakens the overall presentation. The goal is a format that fits the job and the product.
What Custom PVC Patches Are Best For
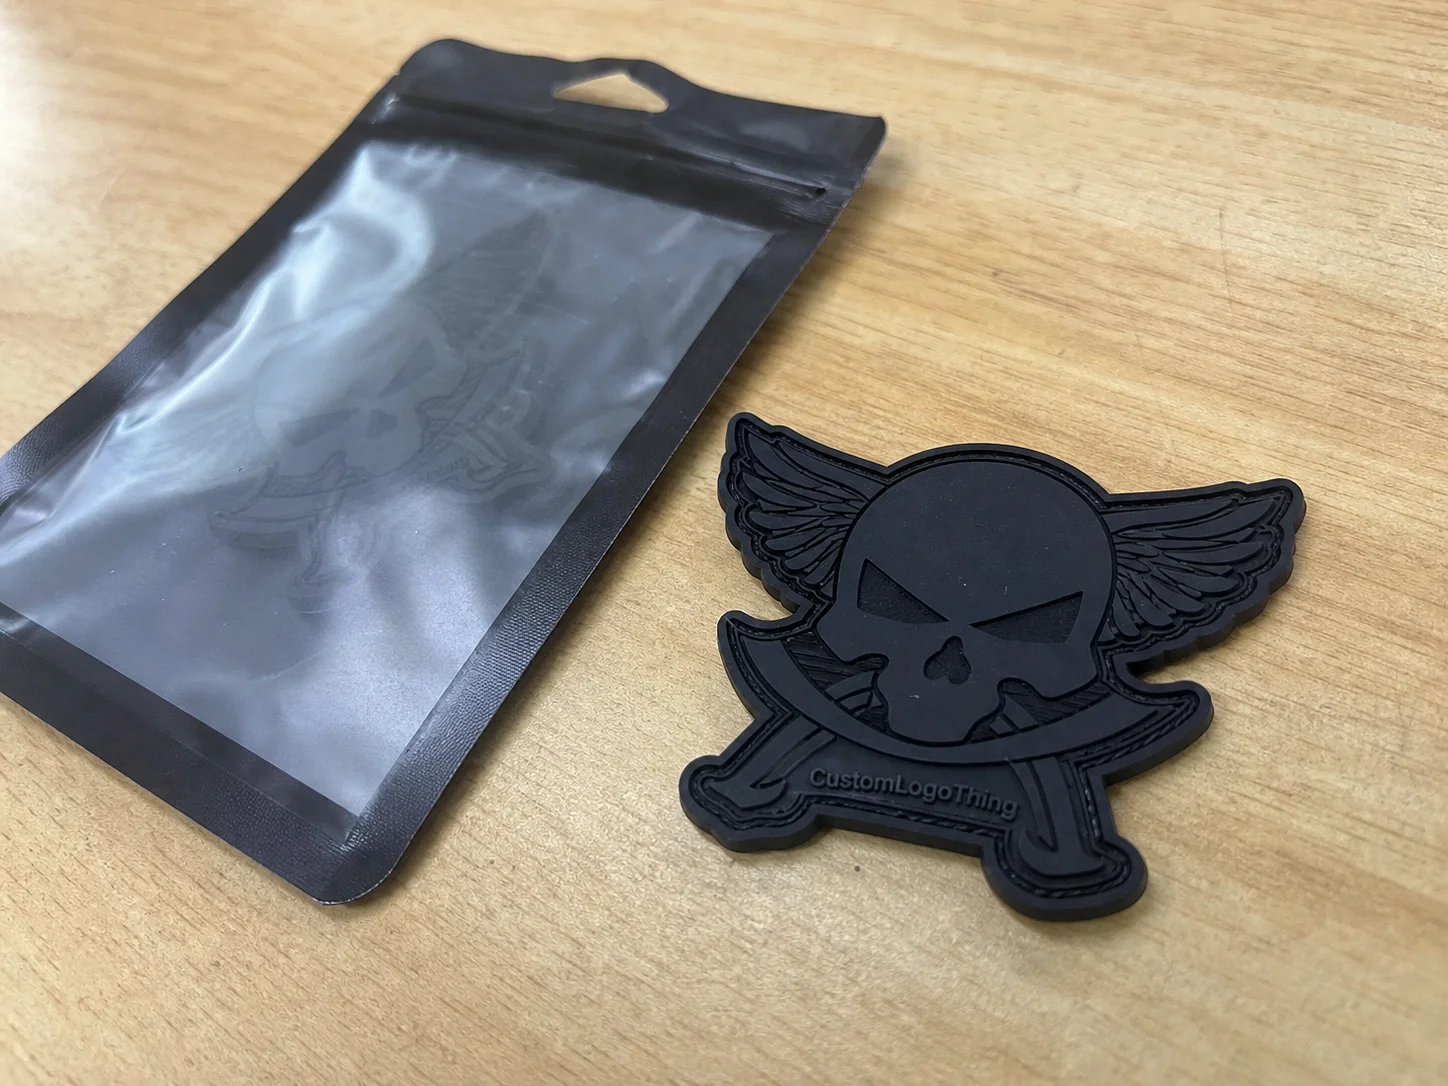
Custom PVC patches work best when the artwork depends on clean geometry, layered shapes, or hard color breaks. Thin lines, stacked lettering, and icon-style logos usually translate better into a molded format than they do in thread. If the design depends on clarity more than texture, PVC is often the better choice.
They also fit products with a technical or utility-driven look. That is why they show up on backpacks, jackets, duffels, and work gear. The finish reads as intentional and durable, which helps on products that will be handled often or exposed to weather.
The real test is the use case. A patch on a backpack faces friction and repeated handling. A patch on outerwear has to flex with the garment. A patch in a retail kit needs to stay consistent with the rest of the presentation. The patch should serve the product, not fight it.
If the logo loses readability when it shrinks, the problem is usually the size, not the patch.
That is the point many buyers miss. Some logos need simplification, and others need more surface area. PVC is useful because it holds shape without relying on thread density or print tricks to preserve contrast.
How the Molded Patch Process Works
The process starts with artwork cleanup. The supplier separates color zones, checks line thickness, and identifies where raised and recessed areas will sit. That step prevents problems later, because strokes that are too thin or details that are too close together can merge in production.
Next comes the proof. This is where dimensions, border treatment, color count, and backing choice are confirmed. A small change in size can affect readability, especially with text, so the proof is the point where the final shape of the job gets locked in.
After approval, the patch is formed with colored PVC in a mold or mold-like production setup and then cured so it keeps its shape. It is trimmed, finished, and attached to the selected backing. That order matters: the attachment method should be decided before production starts, not after the patch is made.
Clear artwork, clear dimensions, and a clear use case usually produce the best results. That is true for a sleeve patch, a bag emblem, or a branded kit that includes packaging and other components.
For projects that move with other goods, transit protection matters too. General packaging guidance from the Institute of Packaging Professionals and the International Safe Transit Association can help when patches are shipped with inserts, labels, or retail components and need to arrive flat and clean.
Material, Size, and Backing Choices That Change the Look
Material choice changes the feel of the finished patch. Softer PVC flexes better on garments and soft goods, while a firmer build holds a more structured profile. The right option depends on where the patch will live and how often it will move.
Size matters just as much. A larger patch gives text and layered artwork room to breathe. A smaller patch can still work, but only if the design is simple enough to remain readable at a glance. The better question is not whether it fits on the product, but whether it can be read from the distance it will actually be seen at.
Backing choice determines how the patch behaves in use. Hook-and-loop works well for removable patches on tactical gear, bags, and modular uniforms. Sew-on is usually the strongest permanent option. Adhesive and heat-applied options can work, but only when the surface, fabric, and wear conditions match the backing.
| Backing Type | Best Use | Typical Price Impact | Practical Notes |
|---|---|---|---|
| Hook-and-loop | Removable patches for tactical gear, bags, and modular uniforms | Usually adds about $0.10-$0.30 per unit | Fast to use, easy to swap, slightly bulkier than sew-on |
| Sew-on | Permanent attachment on outerwear, backpacks, and work gear | Often the lowest-cost option | Strong and simple, but not removable without tools |
| Adhesive | Short-run display use or smooth surfaces in controlled conditions | Can vary widely by adhesive type | Surface prep is critical, and long-term wear should be tested |
| Heat-applied | Garments and textile goods that can tolerate pressing | Often adds modest setup cost | Requires the right temperature, pressure, and fabric compatibility |
Color strategy affects the final result more than many buyers expect. High contrast, clean separations, and limited clutter usually produce a sharper patch than dense artwork with tiny islands of color. A slightly simplified logo often performs better than one packed with details that collapse at production scale.
Texture is another variable. Some buyers want a smoother face, while others want stronger relief. That choice changes how light hits the patch and how much depth the design appears to have. Small change, large effect.
Cost, MOQ, and Quote Drivers
Price is shaped by a small set of variables: patch size, number of colors, design complexity, backing type, border style, and whether the artwork needs cleanup before approval. More detail means more setup time and more production risk, which is why quotes rise as designs get more complex.
MOQ exists for the same reason. Setup labor does not disappear on small orders, so the quantity is what spreads those fixed costs across each piece. Many suppliers start around 100 to 300 pieces, though more complex builds can push higher. Smaller pilot runs are possible, but unit price usually rises quickly when the order is too short to absorb setup.
For rough planning, a 2 to 3 inch patch might land around $0.85 to $1.75 each at 500 pieces, then move closer to $0.45 to $1.00 each at higher quantities, depending on backing and color count. More detail, specialty borders, or less common attachment methods can push the price up. If a quote seems unusually low, check the fine print for missing steps or later change orders.
Use this checklist before asking for pricing:
- Exact dimensions in inches or millimeters
- Quantity needed, including a small overage if spares matter
- Backing type and attachment method
- Artwork file quality, preferably vector
- Intended product use, such as bags, jackets, or promo gear
- Target ship date and any hard deadline
Clean inputs produce cleaner quotes. The supplier can only price what has been defined.
Production Steps and Timeline From Proof to Ship Date
The production path is straightforward but sequence-sensitive. Inquiry first, artwork review next, proof approval after that. Once the final proof is signed off, the patch is formed, cured, finished, and packed for shipment. A delay early in the process usually carries through the rest of the schedule.
Simple orders move faster. Clean artwork, standard sizing, and a common backing reduce back-and-forth. More complex orders take longer, especially when the design includes tiny text, thin outlines, or sharp internal angles that need to be adjusted before production.
In practice, a straightforward run often takes about 12 to 15 business days after proof approval. A more complex order may take 15 to 20 business days or more, depending on quantity and workload. The biggest delay is usually approval time, not machine time.
Shipping adds another layer when custom PVC patches are part of a larger branded program. Some buyers want individual bagging, some want bulk packing, and some want the patches staged with other components for a retail launch. That affects handling and the final ship date.
A good supplier should call out tradeoffs early. If the deadline is aggressive, the artwork may need simplification. If the design is dense, the quantity may need to increase to justify setup. If the backing is unusual, the lead time may move. Those are normal production constraints, not surprises.
Common Mistakes Buyers Make With Molded Patches
The most common mistake is sending artwork that is too detailed for the intended size. Thin strokes, tiny words, and overlapping shapes can look fine on a monitor and fail once translated into a molded format. A supplier can sometimes rescue the design, but that usually means simplifying details the buyer wanted to keep.
Size confusion follows closely behind. Buyers often know the patch needs to fit a bag flap, sleeve, or chest area, but they do not always think through how much visual space the logo needs to stay readable. A patch that fits physically is not always a patch that works visually.
Backing mistakes are equally common. Hook-and-loop, sew-on, adhesive, and heat-applied are not interchangeable. Each one behaves differently on different materials, so the wrong choice can lead to poor adhesion, awkward feel, or a patch that does not suit the item.
The proofing mistake costs the most. People rush the final proof because it looks close enough. Then a misspelling, a border that is too thin, or a size that is off by a small amount gets approved and sent into production. After that point, fixes are expensive.
Before approval, check these points:
- Spelling and punctuation
- Final dimensions
- Color count and color order
- Border thickness and edge shape
- Backing type
- Any simplification made to small text or detail clusters
That list is basic on purpose. Most avoidable production errors are basic.
Next Steps for a Cleaner Quote and Faster Approval
Before asking for pricing, gather the essentials: the logo file, exact size, quantity, backing choice, product surface, and delivery deadline. That single step improves the quote more than almost any other because it tells the supplier whether the order is removable, permanent, or part of a larger branded kit.
If you have a reference photo, send it. A mockup on a bag, jacket, or accessory gives the supplier context that a flat file cannot. It reduces dimension mistakes and helps the proof team understand how the patch should sit in the real world.
Three questions should be answered before production begins. Where will the patch be used? Does it need to be removable or permanent? Does the logo need simplification so the molded form stays clean? If those answers are settled early, the rest of the order moves with less friction.
If the project also includes packaging or accessory components, keep the system aligned. Match the patch with custom printed boxes, inserts, labels, and any other presentation pieces carrying the same brand mark. Consistency matters because the buyer experiences the whole set as one object, not as separate line items.
Custom PVC patches work best when they are treated as production items, not casual add-ons. Get the artwork clear, choose the backing based on use, size the design honestly, and review the proof with care. That sequence is what keeps quotes accurate, timelines realistic, and the final patch close to the original intent.
What should I know before ordering custom PVC patches?
Start with a clean vector file if possible. That makes sizing, separation, and proofing more accurate. Decide how the patch will attach before requesting a quote, since sew-on, hook-and-loop, and adhesive options affect both price and performance. Check whether the design includes tiny text or very thin lines, because those details may need simplification to work well in molded PVC.
Are PVC patches durable enough for bags and outerwear?
Yes. They are widely used on bags and jackets because the molded surface tolerates handling, outdoor use, and repeated wear better than many buyers expect. Durability still depends on the backing and attachment method, so the patch should be matched to the product instead of chosen by appearance alone. If the item sees heavy flexing or abrasion, ask for a spec that balances thickness, flexibility, and edge finish.
What size works best for a custom PVC patch?
The best size is the smallest size that still lets the logo read cleanly at arm's length. Bigger patches are usually better for detailed logos, while smaller patches work best for simple marks and short wordmarks. If the design includes small lettering, ask the supplier to review it against the proposed dimensions before production starts.
How do I get an accurate quote for PVC patches?
Send exact dimensions, quantity, backing choice, and a vector file or high-resolution artwork so the supplier can estimate the real production effort. Include the intended application, because a removable patch for bags is not priced or built the same way as a permanent garment patch. If you have a deadline, share it early; rush schedules can change the quote and may limit available production options.
Which backing is best for custom PVC patches?
Hook-and-loop is best when the patch needs to be removed or swapped between items. Sew-on is usually the strongest choice for permanent attachment on garments, bags, and gear that will be washed or handled often. Adhesive or heat-applied backing can work in specific cases, but the surface material and long-term wear conditions need to be confirmed first.