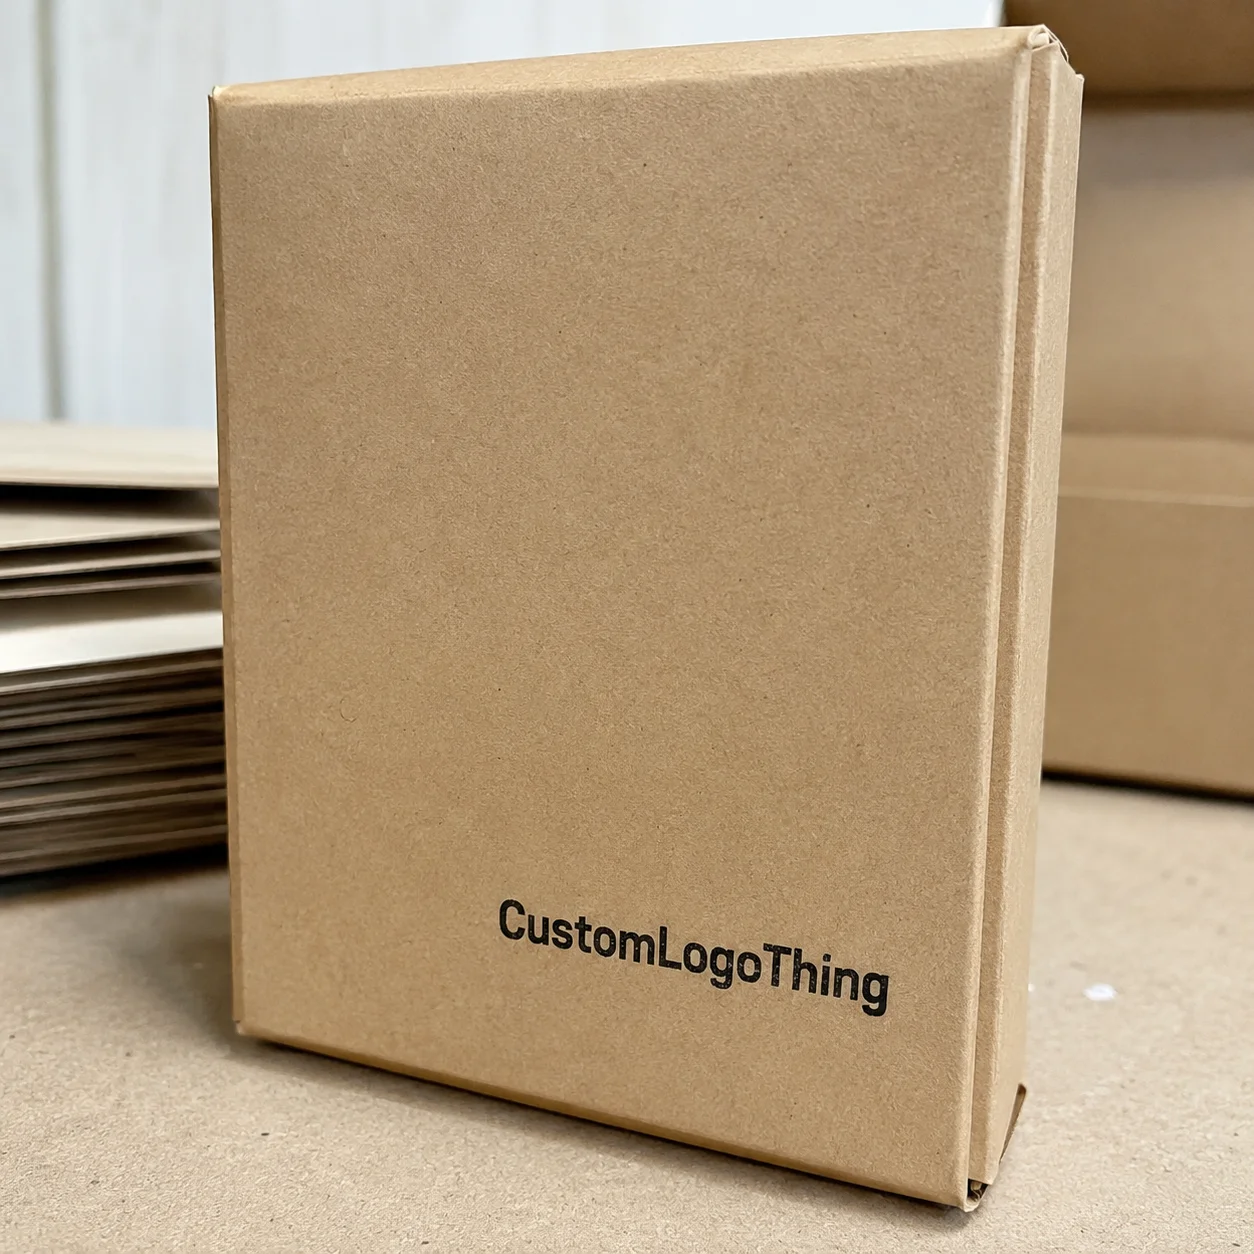
A founder has 500 candle jars, a matte black rigid box for a sample kit, and one sharp problem: the logo needs to look printed, not stuck on. That is why buyers search for custom rub on transfer stickers. They want the brand mark without label edges, clear-film glare, or the setup cost of direct printing.
Standard labels are fast, dependable, and often cheap at volume. They also change the feel of premium product packaging the moment a film edge catches the light. Direct screen printing or pad printing looks excellent, but short runs can hit tooling charges, fixture requirements, longer setup windows, and higher minimums. Rub on transfers sit between those options. Not a cure-all. A useful lane.
What Custom Rub On Transfer Stickers Are and When They Beat Labels
Custom rub on transfer stickers are dry-transfer graphics that move from a carrier sheet onto a package, product, or display surface through pressure. After application, the carrier is removed and only the printed artwork remains. No traditional label face stock. No obvious vinyl border. No clear rectangle around a logo on glass.
The visual difference is easy to spot under retail lighting. A pressure-sensitive label sits on top of the package. Even a clear label has thickness, adhesive, and a perimeter. A well-applied transfer can look closer to screen printing, pad printing, or a direct brand mark. That is why dry transfers appear on cosmetics, candles, boutique food packaging, event merchandise, prototype packaging, promotional kits, and limited-run launches where the first impression has to do more work than the order quantity suggests.
The price question gets misunderstood. Buyers often ask whether dry transfers are cheaper than labels. Sometimes they are not. A roll label at 10,000 units can be extremely economical. The better question is whether transfers avoid other costs: print plates, decorated-component minimums, line setup, custom fixtures, or inventory that becomes obsolete after a test run. For 100 to 1,000 pieces, that math can flip quickly.
Packaging reality check: rub on transfers are not magic ink tattoos. Surface texture, coating, artwork detail, rubbing pressure, storage, and handling all decide whether the result looks premium or patched together.
They are especially attractive for branded packaging that needs a printed-on look without committing to a large order of custom decorated components. A startup can test three logo placements on jars. A subscription brand can dress a limited sample kit. A retailer can mark a seasonal gift box without buying thousands of fully printed units. That flexibility is the commercial appeal.
How Dry Transfer Stickers Work on Packaging and Products
A typical dry transfer has four functional parts: printed artwork, adhesive, release carrier, and protective backing or application sheet. Suppliers may configure that stack differently depending on print method, ink system, finish, and whether the transfer is supplied as single pieces or grouped on sheets. The working principle stays the same: pressure moves the design from the carrier to the final surface.
The application process is simple, but it is not casual. Position the transfer. Tape one edge if alignment matters. Rub with firm, even pressure using a squeegee, burnishing tool, or similar applicator. Peel the carrier slowly. If part of the artwork stays behind on the carrier, lay it back down and rub again before removing the sheet.
Think of it as a cousin to decal application, not a normal sticker. Most dry transfer stickers do not need water, heat, or a separate laminate. That makes them useful on paperboard boxes, glass jars, metal tins, plastic compacts, coated cartons, painted wood, and some rigid packaging materials. It also means the operator matters. One hurried peel can ruin a clean logo.
Pressure is not a small variable. Incomplete rubbing leaves broken letters, missing corners, weak opacity, or gaps in fine typography. Small serif type, thin line art, and registration marks below about 0.5 mm are the usual trouble spots. If ten people will apply transfers during a launch week, train them on the same tool, pressure, peel angle, and inspection standard.
The surfaces that deserve testing are predictable: heavily textured kraft, oily plastics such as some polyethylene or polypropylene grades, silicone-coated papers, powder-coated metal, curved jars, flexible pouches, and packages with anti-scuff varnishes. Many failures blamed on the sticker are surface-energy, contamination, or handling problems. Dust, hand oil, mold release residue, and low-energy plastics can all interfere with adhesion.
For packaging teams already comparing Custom Labels & Tags, rub on transfers are worth considering when the goal is visual integration rather than label performance. Labels still win for regulatory panels, barcodes, nutrition facts, variable data, and high-speed application. Transfers win when the mark itself should disappear into the surface.
Artwork, Materials, and Finish Factors That Decide the Final Look
Artwork quality drives the result more than many buyers expect. Vector files such as AI, EPS, or editable PDF are usually preferred because they preserve sharp logo edges, clean curves, and small typography. Raster files can work if they are high resolution, but a 600 px logo pulled from a website is not a production file. For marks under 2 inches wide, weak source art becomes obvious fast.
Minimum line weights vary by supplier and print system, but as a practical packaging rule, hairline details below 0.25 mm should be questioned. Tiny reversed-out text can close up. Fine rules can break during transfer. Micro-details that look elegant on a monitor may disappear on kraft board or textured stock. If the design depends on delicate strokes, request a sample or production proof before approving the full batch.
Color deserves similar scrutiny. Solid spot colors behave differently from process builds. White ink may need extra opacity on clear glass, amber jars, black boxes, or kraft substrates. Metallic effects add shelf flash, but they can raise cost and may require more careful application. Opaque black usually performs well, yet it still needs enough contrast. A black transfer on a deep navy rigid box can look beautiful in a studio mockup and nearly invisible in dim retail lighting.
| Finish Option | Best Use | Buyer Watchout | Typical Cost Impact |
|---|---|---|---|
| Matte | Luxury candles, cosmetics, rigid boxes | Can look soft on low-contrast substrates | Low to moderate |
| Gloss | Sharp logos, glass jars, promotional products | May show glare under bright lighting | Low to moderate |
| Metallic | Retail packaging, gift sets, event merchandise | Registration and handling need tighter control | Moderate to high |
| White Ink | Clear, amber, black, or kraft surfaces | Opacity depends on ink deposit and background color | Moderate |
Durability depends on the whole system. A transfer used on presentation packaging may only need to survive packing, shipping, and unboxing. A logo on a cosmetic jar handled twice a day faces skin oils, moisture, abrasion, and product residue. Rub resistance, humidity, and cleaning exposure should be discussed before ordering. ASTM methods are often referenced for abrasion and adhesion evaluations, while shipping validation may be informed by organizations such as ISTA if the decorated package will be transit-tested.
Contrast is the quiet design variable. A white logo on amber glass reads differently when the jar is empty, filled with wax, or photographed against a cream background. A metallic gold mark on kraft may feel artisanal; the same gold on gloss black may feel premium retail. Packaging design is not only file preparation. It is light, surface, ink, and use case colliding.
Process, Timeline, and Lead Time From File to Finished Transfer
A normal order moves through a predictable sequence: inquiry, artwork review, material recommendation, quote, proof, production, quality check, packing, and shipping. The faster the buyer supplies complete information, the fewer loops happen before production. Missing dimensions and vague surface descriptions are among the most common causes of delay.
For a simple one-color transfer with clean vector art, many suppliers can often move from proof approval to production completion in roughly 7 to 12 business days. Multi-color designs, metallic finishes, custom color matching, sampling, or unusual substrates may push that into 12 to 20 business days or more. Those are planning ranges, not guarantees. Workload, quantity, approval speed, and shipping distance still matter.
The proofing stage is risk control, not paperwork. A proof should confirm final size, orientation, color notes, quantity, sheet layout, and application assumptions. If a logo is 1.75 inches wide and centered 30 mm below a jar shoulder, say so. If the transfer will be applied to a soft-touch laminated box, disclose that. Soft-touch coatings can feel premium, but some finishes resist adhesion or scuff differently than standard coated paperboard.
High-stakes launches deserve pre-production testing. That is especially true for glass bottles, cosmetic jars, rigid setup boxes, curved packaging, or any item with a coated, oily, flexible, or textured surface. Ten tested pieces can save 500 rejected pieces. The sample cost may feel irritating; the rejected-package cost is usually worse.
Shipping is another overlooked detail. Small transfer sheets are easy to pack and ship compared with assembled packaging, but rushed freight can erase the cost advantage of short-run decoration. If your launch date is fixed, share the required in-hands date early. “Ship by Friday” and “arrive by Friday” are not the same instruction.
For a clean quote, send seven pieces of information: artwork file, final transfer size, quantity, surface material, finish preference, deadline, and whether the transfers will be self-applied or factory-applied. If you are also ordering Custom Packaging Products, coordinate dimensions before approving artwork. A 2-inch logo can feel balanced on a 4 oz jar and oversized on a slim sample tube.
Cost, Pricing, MOQ, and What Changes Unit Cost
Pricing for custom rub on transfer stickers is driven by setup, artwork complexity, sheet size, quantity, number of colors, finish, durability requirements, trimming, packing format, and testing needs. The unit price is rarely a single flat answer. A 1-color black logo at 1.5 inches wide is a different project from a 4-color metallic transfer with tight registration and individual trimming.
As a broad planning range, small runs may land around $0.35 to $1.50 per transfer for simple designs, depending heavily on size and setup. Larger runs can drop below that when artwork is ganged efficiently on production sheets. Specialty finishes, white layers, metallic effects, additional sampling, or rush production can push costs higher. The most accurate quote comes from the real file, the real surface, and the intended use case.
Compared with regular stickers, dry transfers behave differently on the cost curve. Pressure-sensitive labels may be cheaper at scale, especially on rolls used with automatic applicators. Transfers can be more economical for premium short runs because they avoid direct-print tooling, larger component MOQs, or decorated packaging inventory that may become obsolete after a product test.
MOQ depends on the supplier and production method. Some suppliers support small batches for prototypes, influencer kits, or market tests. Still, the unit cost drops as more transfers share the same setup and sheet layout. Buyers Should Ask for two or three quantity breaks: 250, 500, and 1,000 pieces, for example. The price curve may shift sharply once setup is spread across more units.
| Decoration Method | Short-Run Strength | Typical Limitation | Best Fit |
|---|---|---|---|
| Rub On Transfers | Printed-on look without direct-print setup | Requires careful surface testing and application | Premium short runs, prototypes, gift kits |
| Clear Labels | Fast, flexible, good for information panels | Film edge and glare may be visible | Ingredients, barcodes, general branding |
| Direct Screen Printing | Durable, integrated appearance | Setup, fixtures, and minimums can be higher | Repeat programs and larger production runs |
| Custom Printed Boxes | Strong all-over package branding | Less flexible for small design changes | Retail packaging with stable artwork |
Hidden cost drivers deserve attention. Custom Pantone matching, metallic foil-like effects, extra white ink, tight multi-color registration, individual trimming, protective interleaving, and rush scheduling all add labor or production complexity. So does supplier application. Self-application saves labor cost, but it shifts responsibility to your team. If the product value is $18 per jar and 8% are rejected because the logo cracked or skewed, the low sticker price was not low.
Compare total project cost, not transfer price alone. Include rejected pieces, staff time, packaging value, repacking labor, and deadline risk. If the transfer is going on premium retail packaging, a slightly higher unit cost may be rational if it reduces visual defects and protects the launch schedule.
Step-by-Step Application Guide for Cleaner Transfers
Application quality starts before the transfer touches the package. Clean the surface first. Wipe dust, oils, and residue with a material-safe cloth or cleaner, then let the surface dry completely. On glass, even a fingerprint can create an adhesion gap. On paperboard, aggressive liquid cleaning can damage the coating, so choose the prep method according to the substrate.
- Confirm placement. Measure the imprint area and mark a light guide where possible. For repeated work, use painter’s tape as a hinge or build a simple jig.
- Position the transfer. Keep the carrier flat and avoid touching the adhesive or printed side. Tape one edge if alignment is critical.
- Burnish from the center outward. Use steady pressure with a squeegee, craft stick, or burnishing tool. Cover every letter, corner, and fine detail.
- Peel slowly. Lift one corner at a low angle. If artwork stays on the carrier, lay it back down and rub again.
- Inspect immediately. Look for broken strokes, missing dots, bubbles, skew, or weak opacity before moving to the next piece.
- Let it rest. Avoid heavy rubbing, stacking pressure, or aggressive packing until the graphic has settled.
Curved and cylindrical surfaces need patience. Apply in small sections rather than forcing the whole mark down at once. A candle jar, tube, or bottle introduces distortion because the flat carrier wants to bridge over a curved surface. If the artwork is wide, the risk increases. Narrow logos and short wordmarks usually behave better than large wraps.
For batch work, inspect the first five to ten pieces before running the full quantity. Early mistakes repeat fast. If the first few transfers show broken corners, the issue may be pressure, surface contamination, artwork detail, or carrier peel speed. Stop and adjust. Do not burn through 200 units hoping the process will improve on its own.
A simple production log helps more than people expect. Record the surface, cleaning method, tool, approximate pressure, peel direction, room conditions, and defect rate. That may sound excessive for a small launch, but it gives the team a repeatable process if the first batch sells out and a reorder follows.
Common Mistakes, Expert Fixes, and Next Steps Before You Order
The biggest mistakes are familiar: ordering without surface testing, using artwork that is too fine, skipping proofs, applying to dusty packaging, peeling too fast, assuming every plastic accepts transfers equally, and storing sheets under pressure or heat. None of these are exotic failures. They are normal production problems dressed up as sticker problems.
The fixes are practical. Test first. Simplify micro-detail. Approve proofs carefully. Clean surfaces consistently. Peel slowly. Confirm material compatibility before ordering the full quantity. Keep transfer sheets flat, dry, and away from heat, dust, pressure, and humidity. If a team will apply them, document the method: tool type, rubbing pressure, alignment guide, peel angle, inspection standard, and what counts as a reject.
Surface compatibility is the one area where buyers should be slightly skeptical. Smooth coated paperboard, glass, metal, and many rigid plastics are good candidates, but plastics vary widely. Polypropylene and polyethylene can be low-energy surfaces. Silicone coatings are notoriously difficult. Powder-coated materials may look smooth while resisting adhesion. If sustainability claims matter for the surrounding package, confirm board sourcing and certifications separately; groups such as the Forest Stewardship Council provide useful context for paper-based packaging claims, though they do not certify transfer performance.
Before requesting a quote, measure the exact imprint area. Choose the application surface. Prepare vector artwork. Decide whether you want matte, gloss, metallic, white, or another finish. Pick two or three quantity ranges. Share the deadline and the final use case. Presentation kits, e-commerce shipments, retail shelves, refrigerated bottles, and daily-use containers all carry different risk.
If the project includes broader package branding, think beyond the mark itself. A rub on logo on a jar may need to match a carton, belly band, insert card, or shipper. Consistency across materials is never automatic because ink, substrate color, gloss level, and lighting all shift perception. For premium kits, ask for a physical proof whenever the budget allows.
Custom rub on transfer stickers work best when buyers treat them as a decoration system, not just a sticker order. The artwork, surface, finish, application method, handling, and inspection standard all matter. Get those pieces aligned, and a small run can look far more polished than its quantity suggests.
FAQ
Are rub on transfer decals the same as regular vinyl stickers?
No. Vinyl stickers usually keep a visible film, adhesive layer, or cut edge, while rub on transfers leave only the printed artwork on the surface. Buyers choose them when they want packaging, glass, or promotional products to look closer to direct printing. Regular stickers may still be better for outdoor use, heavy abrasion, compliance labels, or very flexible surfaces.
Can custom dry transfer stickers be used on glass jars or bottles?
Yes. Smooth glass is one of the most common surfaces for dry transfer stickers, but it must be clean, dry, and free of oils, wax, or residue. Curved jars and bottles need gradual application to avoid broken edges or skewed artwork. Testing is smart if the item will face moisture, refrigeration, frequent handling, or oily product contents.
What artwork file is best for custom rub down transfers?
Vector files such as AI, EPS, or editable PDF are usually best because they preserve sharp edges, curves, and typography. High-resolution PNG or TIFF files may work for simple artwork, but fine lines and small text are safer in vector format. Include final size, color notes, white ink requirements, and any metallic finish request with the file.
How much do custom rub on transfer stickers cost?
Cost depends on quantity, size, color count, finish, artwork complexity, sheet layout, trimming, testing, and rush needs. Small simple runs may fall around $0.35 to $1.50 per transfer, while specialty finishes or complex registration can cost more. For accurate pricing, request multiple quantity breaks and provide the surface material, dimensions, deadline, and artwork file.
How long does it take to make custom transfer stickers?
Timeline depends on proof approval, artwork readiness, quantity, finish complexity, surface testing, and production workload. Simple designs may be produced after proof approval in roughly 7 to 12 business days, while metallic effects, multi-color registration, samples, or unusual surfaces can require 12 to 20 business days or more. The fastest way to prevent delays is to send production-ready artwork, exact dimensions, surface details, and a firm in-hands date.

