The shape is what people notice first. A well-cut sticker can make a logo feel intentional and finished; the same artwork forced into a generic circle can look like packaging done in a hurry. That difference matters because stickers are rarely just decoration. They sit on bottles, boxes, tins, inserts, mailers, and event giveaways, where the cut, adhesive, and finish all affect how the brand is read.
Custom shape die cut stickers are especially useful when the artwork itself carries personality. A cup icon, mascot, badge, fruit, cloud, or simple logo silhouette often looks stronger when the sticker follows the outline instead of sitting inside a stock shape. The catch is that the shape has to survive production and use. Fancy contours that look great on screen can become fragile, expensive, or awkward to apply if they are not designed with the real substrate in mind.
For buyers, the real question is not whether a shape can be cut. It is whether the sticker will peel cleanly, hold up under handling, and still look crisp at the size you need. That is where material choice, border width, cut tolerance, and application surface start to matter more than most people expect.
What Custom Shape Die Cut Stickers Actually Are
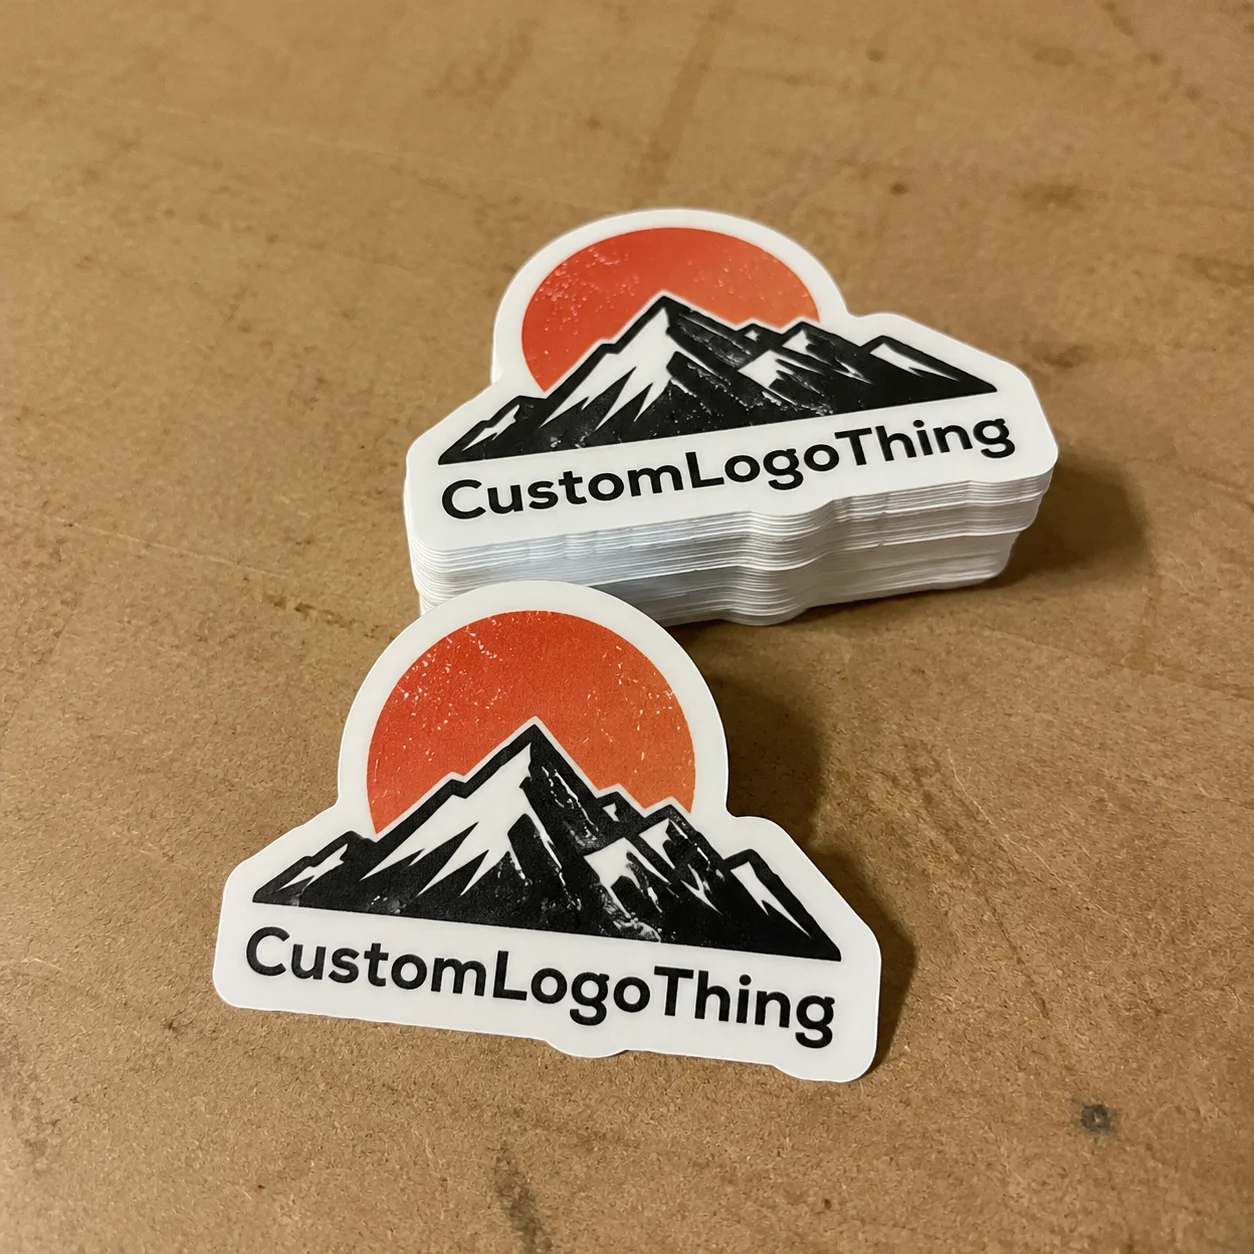
Custom shape die cut stickers are trimmed around the outer contour of the printed artwork instead of being cut into a stock circle, square, rectangle, or oval. The cut line follows the design edge, so the finished piece mirrors the artwork rather than sitting inside a preset frame. If the logo has an unusual silhouette, the sticker can echo that silhouette directly.
That term gets mixed up with a few others, and the distinction is useful:
- Die cut stickers: cut through both the printed face and the backing liner so each piece becomes a standalone shape.
- Kiss cut stickers: cut only through the sticker layer, leaving a larger liner sheet for easier peeling and hand distribution.
- Standard cut stickers: cut to a simple preset shape such as a circle, square, rectangle, or oval.
Die cut formats are common for retail packaging, product labels, merch, subscription box inserts, influencer kits, laptops, water bottles, and giveaways. They also fit naturally alongside Custom Labels & Tags when a brand wants packaging elements to feel coordinated instead of pieced together.
Shape affects more than appearance. A small logo seal may need a different border than a large laptop sticker. Curves that look elegant at four inches can become hard to peel at one and a half. Very narrow points can lift during application. A die line that looks clever in a presentation can become a production headache if it ignores those limits.
Practical rule: design the sticker for the product surface first, then refine the shape. The reverse order usually creates expensive revisions.
How the Die Cutting Process Works From Artwork to Finished Sticker
The production flow is usually straightforward: artwork upload, prepress review, cutline creation, proofing, printing, coating or lamination, cutting, inspection, and packing. Simple on paper. Less simple when the source file is a low-resolution export named final-final-v7. Printers see a lot of those.
The most important technical element is the cutline. It is the vector path that shows exactly where the cutter will trim around the printed design. A clean cutline is smooth, closed, and offset correctly from the artwork. A messy one follows tiny irregularities in the image and can create rough edges, awkward points, or weak bridges that tear when the sticker is removed from the liner.
Most buyers should expect a small safety border around the artwork. That border helps absorb normal cutting variation, which is often in the range of 1/32 inch to 1/16 inch depending on the material and equipment. If the design goes right to the edge, even a minor shift can make the finished piece look off. The machine may still be within spec, but the sticker will not feel aligned.
There are two broad production methods. Traditional steel dies can be efficient for repeat runs because the tool is made once and reused. Digital cutting is better for short runs, multiple designs, and irregular shapes because it avoids die fabrication. The tradeoff is that complex contours, sharp points, and tiny cutouts can slow the run and make handling more delicate.
Prepress is where many problems are caught. This stage is supposed to clean up file issues, confirm the cutline, and flag anything that could affect print quality or trimming. It cannot rescue a poorly built file completely. Vector logos, clean outlines, and properly sized artwork save time and prevent rework. A blurry image enlarged past its useful resolution will still look blurry. There is no clever workaround for that.
Proof approval deserves more attention than it usually gets. Confirm size, shape, cutline placement, border thickness, quantity, material, finish, and shipping details before production starts. Once the job is approved, revisions often mean a restart. Not always, but often enough that careful proofing is the cheapest risk control in the process.
Material, Adhesive, Finish, and Size Choices That Matter
Material should match the use case, not the mood board. White vinyl remains the most versatile option because it handles color well, resists moisture, and works for indoor or outdoor branding. Clear film is useful when the background needs to show through, but it needs careful planning because transparency changes how color and white ink behave. Paper is still a sensible option for dry indoor packaging, short campaigns, and lower-cost runs. Specialty materials such as holographic, metallic, and textured stocks add visual impact, but they also raise cost and can complicate proofing.
Adhesive selection matters more than many first-time buyers expect. Permanent adhesive is the default for product packaging and merch because the sticker is meant to stay in place. Removable adhesive is better for temporary promotions, events, and applications that should come off cleanly. High-tack or freezer-grade adhesive may be required for cold, curved, textured, or low-energy surfaces such as some pouches, tins, or polypropylene containers.
Finish affects both look and wear:
- Gloss laminate: brighter color, more shine, and solid scuff resistance.
- Matte laminate: lower glare, softer appearance, and a more subdued retail look.
- Soft-touch finish: smooth feel and premium presentation, though fingerprints can show more readily.
- UV-resistant laminate: better for sun exposure, window displays, and outdoor use.
- Metallic or holographic stock: high visual impact, but less forgiving if color accuracy is tight.
Size should be tied to surface and viewing distance. Small seal stickers often sit around 1.5 to 2 inches. Product labels commonly fall between 2 and 4 inches. Merch stickers usually work best around 3 to 5 inches. Larger decals can work well, but application, shipping, and storage become more important as the format grows.
| Use Case | Typical Size Range | Common Material | Practical Note |
|---|---|---|---|
| Jar or bottle label | 2 to 4 inches | Laminated white vinyl or clear film | Test on the actual curve before placing a large order. |
| Package seal | 1.5 to 2 inches | Paper or vinyl | Keep text away from the edge. |
| Merch giveaway | 3 to 5 inches | Durable white vinyl | Matte or gloss laminate improves handling. |
| Retail display decal | 4 inches and up | Vinyl with UV-resistant laminate | Ask about indoor versus outdoor exposure. |
Surface type can change the whole outcome. Glass, kraft paper, coated cartons, flexible pouches, textured tins, chilled bottles, and oily cosmetic jars all behave differently. A sticker that grips a flat box well may fail on a curved or refrigerated container. If the job involves moisture, abrasion, refrigeration, or outdoor exposure, say so early. That gives the supplier a chance to recommend the right construction instead of guessing.
For sustainability claims, be precise. Paper, film, liners, adhesives, and coatings all affect recyclability. FSC-certified paper may matter for some projects through FSC, and the EPA recycling guidance is a useful starting point for disposal questions. Avoid vague green language unless the material stack really supports it.
Cost, Pricing, MOQ, and Quote Factors Buyers Should Know
Sticker pricing is shaped by quantity, finished size, material, finish, cut complexity, number of designs, packing format, proofing, and shipping speed. Square inches matter, but they are only one part of the bill. Two stickers with the same printed area can price very differently if one has a simple edge and the other has a cut line full of small points and tight curves.
Small test runs often begin around 100 to 250 pieces. Better unit pricing usually appears at 500 to 1,000 pieces, and the price per unit can continue to fall at higher volumes because setup and prepress costs are spread across more stickers. The downside is inventory risk. A lower unit price is not a good deal if the design changes or the product never reaches steady sales.
For a basic 3-inch laminated vinyl sticker, rough pricing can land around $0.35 to $0.90 each at 250 pieces and $0.18 to $0.45 each at 1,000 pieces, with lower pricing possible on larger runs. Specialty stocks, rush jobs, individually cut pieces, custom backing cards, and waterproof constructions can move the number up quickly. Holographic and metallic options also tend to sit higher because the material itself costs more and the process can require additional handling.
Request multiple quantities in the same quote. A 500-piece order and a 1,000-piece order may be close enough that the larger run becomes the smarter buy. In other cases, the smaller run protects cash flow and reduces storage. It depends on sales velocity, shelf life, and how certain you are about the artwork.
| Quote Factor | Why It Changes Price | Buyer Advice |
|---|---|---|
| Quantity | Setup cost is spread across more units at higher volume. | Ask for 250, 500, 1,000, and 2,500 pieces. |
| Shape complexity | Detailed contours cut more slowly and need more handling. | Reduce tiny points and narrow bridges where possible. |
| Material | Vinyl, clear film, paper, and specialty stocks price differently. | Choose based on use, not just appearance. |
| Finish | Matte, gloss, soft-touch, UV, metallic, and holographic options add cost. | Use premium finishes where they do real work. |
| Packing format | Singles, sheets, rolls, and backing cards take different labor. | Match the format to application and fulfillment. |
To get an accurate quote, send the final size, quantity, material preference, finish, artwork file, application surface, indoor or outdoor use, and delivery deadline. If the sticker is part of a box, bottle, pouch, or retail display system, mention that too. Adhesion decisions are much easier when the supplier knows the substrate and the environment.
Timeline, Lead Time, and Proofing Expectations
A typical order includes one to two business days for artwork review and proofing, a few business days for production after approval, and transit time based on shipping method. Straightforward jobs move quickly. Specialty films, multiple designs, large volumes, and unusually detailed cuts add time.
Lead time starts after proof approval, not when the initial email lands. That distinction matters when a launch date is fixed. If the file is incomplete or the proof needs several revisions, the clock shifts immediately.
Several variables affect timing: quantity, stock availability, cut complexity, finishing method, number of designs, revision count, rush queue availability, and delivery distance. A 250-piece order on standard vinyl is a very different job from 10,000 holographic stickers with six variations and individual packaging.
Proofing should be treated like a quality-control step, not a formality. Check spelling, size, border thickness, cutline placement, color expectations, finish, quantity, and shipping details. If the sticker is supposed to stand out from several feet away, print it at actual size and mock it up on the package. That catches problems that are easy to miss on a screen.
Color control is another place where expectations need to stay grounded. Screen color is not reliable for exact matching. Brands with strict standards should provide Pantone references, CMYK values, or an approved physical sample. If exact color matters, ask about a press proof or sample when timing allows.
Rush production is possible in some cases, but it can reduce flexibility on material choices, proof revisions, and shipping options. It is better to build in buffer time before seasonal launches, trade shows, retail rollouts, and influencer mailers. Sticker deadlines are usually less forgiving than they look on a calendar.
Step-by-Step Guide to Ordering a Clean Custom Sticker Shape
Strong orders begin with use case. A packaging seal, product label, merch sticker, and window decal do not need the same adhesive or finish. A sticker for a refrigerated bottle needs different thinking than one going on a laptop or a craft box.
- Define the application. Decide whether the sticker is for packaging, retail display, promotion, shipping, or merch.
- Measure the surface. Confirm width, height, curvature, texture, temperature, and viewing distance.
- Prepare the artwork. Vector files such as AI, EPS, or PDF are best. High-resolution PNG or TIFF files can work for simple designs.
- Build the cutline. Keep it smooth and offset enough to protect the artwork edge.
- Select material and finish. Choose paper, vinyl, clear film, or specialty stock based on exposure and handling.
- Review the proof carefully. Check size, spelling, border, orientation, finish, quantity, and shipping details.
- Save the approved version. That makes future reorders faster and reduces the chance of mismatch.
If the sticker is part of a full packaging system, align it with the rest of the print specs. A soft-touch box paired with a low-grade glossy label can feel disjointed. The opposite can also look off. Consistency is not decorative; it is part of how buyers judge quality.
For brands coordinating boxes, inserts, bags, or retail materials, Custom Packaging Products can help keep the sticker spec aligned with the larger package. That matters more than most launch checklists admit.
Common Artwork and Ordering Mistakes That Ruin the Result
Overly intricate shapes are the first problem. Hairline points, tiny holes, narrow bridges, and delicate scallops may be attractive in a mockup, but they are difficult to cut cleanly and even harder to peel without damage. Thin extensions can lift. Small interior cutouts can tear. Fragile shapes also raise the chance of bent edges during packing.
Placing important elements too close to the edge is another frequent mistake. Text, icons, and borders need a safe zone because cut variation is real. For many jobs, leaving at least 1/16 inch of breathing room is a sensible starting point, though the exact margin depends on size, material, and finish. If the border is supposed to look even, it needs to be thick enough to survive normal tolerance.
Low-resolution files are a predictable source of trouble. Screenshots, social media exports, and compressed web images often print soft or jagged. Vector is best for logos and type. If a raster file is the only option, it should be high resolution at final size, not enlarged from a small source.
Clear stickers need special planning. Transparent material is useful only when the design supports it. If the artwork depends on white areas or light colors on a dark bottle, white ink may be needed. Without that layer, the design can disappear into the substrate. Clear film is not inherently premium; it is only as effective as the contrast behind it.
Another mistake is ordering too many pieces before testing adhesion on the actual surface. Curved jars, coated cartons, flexible pouches, chilled bottles, textured tins, and oily containers behave differently. A sample applied to the real product reveals more than a proof ever will. If the surface is hard to stick to, test first and scale later.
Application format matters too. Hand-applied singles, sheets, rolls, and machine-applied labels may each need different formatting. Roll labels can need a specific unwind direction for applicators. If a co-packer or fulfillment team will handle the stickers, ask for their requirements before placing the order.
Finally, there is the speed mistake: approving a proof too quickly and discovering the sticker is technically the correct size but visually too small once it is on the package. That problem shows up constantly. A paper mockup at actual size prevents most of it.
Next Steps Before You Send Artwork for Production
Before sending files, confirm the use case, surface, size, quantity, material, finish, shape complexity, and delivery deadline. That list is basic, but it prevents most expensive surprises. The more exact the brief, the fewer revisions are needed.
Print a paper mockup at actual size and place it on the package or product. It costs almost nothing and immediately reveals proportion issues, awkward placement, weak contrast, and shapes that look better on screen than in the hand. Low-tech tests still catch high-cost mistakes.
Send the original artwork file, not a screenshot or compressed preview. If brand colors matter, include Pantone references, CMYK values, or a previously approved sample. If you have a prior production file that worked well, include that too. Reusing a proven spec is easier than rebuilding one from scratch.
Ask for quote tiers at several quantities so you can balance unit cost against inventory risk. A larger run can make sense for a stable product line. It can be a poor decision for a seasonal item or an untested design. The cheapest per-piece price is not always the smartest buy.
For stickers that will face moisture, refrigeration, outdoor exposure, curved containers, or heavy handling, a short test run is usually worth it. The most reliable orders start with clear specs, clean artwork, and a realistic view of where the sticker is going to live.
FAQ
Are custom shaped die cut stickers waterproof?
They can be, but only if the construction supports it. Vinyl or film with a suitable laminate will handle water much better than paper. For bottles, coolers, outdoor gear, and bathroom products, ask for water resistance, strong adhesive, and a protective finish. Dishwasher-safe and water-resistant are not the same thing.
What file format is best for custom die cut sticker artwork?
Vector files such as AI, EPS, or PDF are the best starting point because the cutline stays clean and the artwork scales without soft edges. High-resolution PNG or TIFF files can work for simple designs, but screenshots and low-resolution web images usually produce poor results. If no cutline is supplied, the printer can often create one during prepress, though it should still be reviewed in the proof.
How small can custom contour cut stickers be?
Small stickers are possible, but readability and cutting accuracy become the limiting factors. For logo stickers, 1.5 to 2 inches is often the practical minimum unless the design is very simple. Fine text, thin outlines, and tight interior spaces should usually be enlarged or simplified.
Do custom shape stickers cost more than standard stickers?
Usually yes, especially when the shape is detailed, the quantity is low, or the stickers are individually cut. Simple circles, squares, and rectangles are faster to produce. Contour cutting adds setup and handling time, although the gap often narrows at higher quantities.
How long does it take to make die cut logo stickers?
A typical order includes proofing, production after approval, and shipping. Simple jobs can move quickly, while specialty materials, complex cuts, large quantities, and multiple revisions add time. Lead time usually starts after proof approval, so fast review helps when the order is tied to a launch or event.