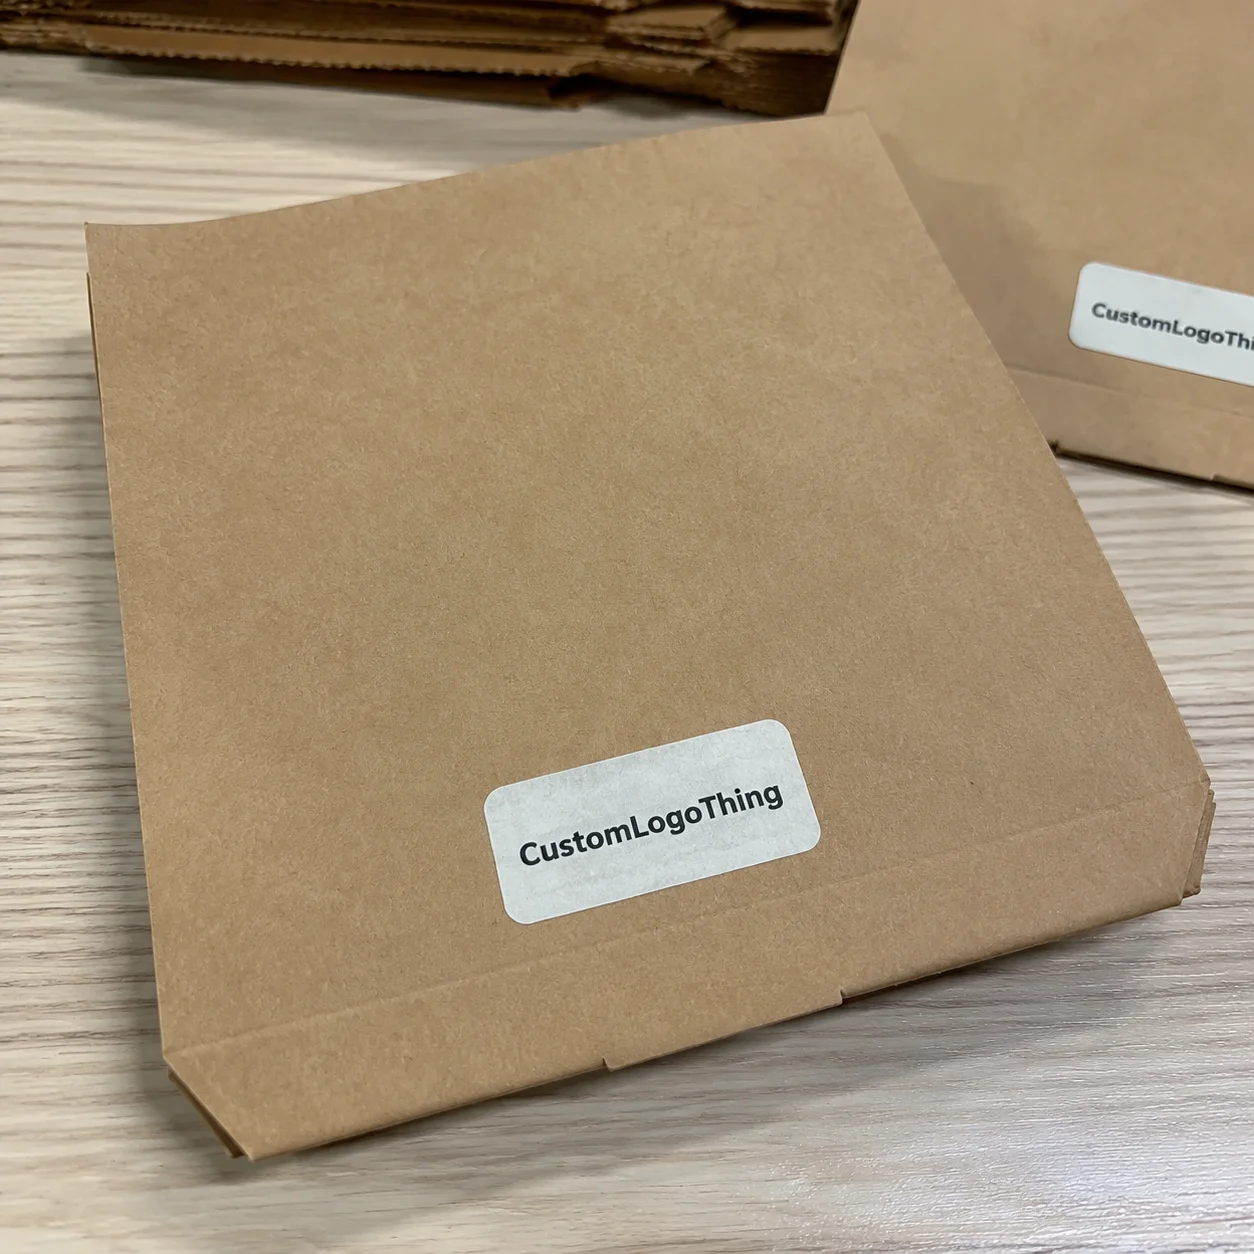
A beautiful jar, pouch, mailer, or box can look strangely unfinished when the sticker is only a quarter inch too wide, too short, or sitting awkwardly near a seam. That is why Custom Size Stickers matter: they let the label fit the real package, the artwork, and the way people handle the product instead of forcing a good design into a standard rectangle that almost works.
Sticker sizing is not only a design choice. It affects material waste, print clarity, application speed, shelf presentation, and sometimes whether a barcode scans or a seal stays down. A sticker that looks fine on a monitor may fail on a curved bottle, wrinkle on a flexible pouch, or cover too much of a small retail box.
The better sequence is unglamorous but effective: measure the package first, define the usable area, build the artwork around that space, then quote the job with the right material and finish. Skip that order and the sticker starts making decisions for the package instead of supporting it.
Custom Size Stickers Solve Fit Problems Standard Labels Miss
Standard sticker sizes work for basic giveaways, address labels, and general promotions. Product packaging is rarely that tidy. A candle jar may have a curved wall and a raised base. A stand-up pouch may bow after filling. A small mailer box may need a front logo sticker that avoids the opening flap. Even a clean paperboard carton can have score lines, corners, or tuck panels that reduce the safe placement area.
Custom size stickers are printed or cut to match the surface and use case. That may mean a 1.75-inch circle for a lid seal, a 2.25-by-3-inch rectangle for a jar face, or a narrow 0.75-by-5-inch strip for a tamper band. The size should support the job: brand recognition, compliance text, sealing, QR-code scanning, batch identification, decoration, or promotion.
Three terms get mixed together. Custom size means the finished dimensions are made to order. Custom shape means the cut follows a non-standard outline, such as a logo silhouette or arched top. Custom artwork means the printed design is unique, even if the size is a common 2-by-2-inch square. One order can include one, two, or all three.
The biggest sizing mistake is making the sticker as large as the package will physically allow. Bigger can create more problems: slower application, higher cost, edge lift, crowded artwork, and a label that looks forced. The right size balances visual impact, readability, application speed, and production efficiency. That balance is what makes a sticker feel intentional instead of pasted on late in the process.
How Sticker Sizing Works From Artwork to Finished Cut
The finished sticker size is usually listed as width by height, such as 3 inches by 2 inches. The artwork file needs more than the finished size. Most print files require bleed, often 0.0625 to 0.125 inch beyond the trim edge, so background color can run cleanly off the sticker without leaving a white hairline. They also need a safe area, usually at least 0.0625 to 0.125 inch inside the cut line, where logos, type, barcodes, and important graphics stay protected from normal cutting tolerance.
Round, square, rectangle, and oval stickers are straightforward because the finished dimensions are easy to define. Kiss-cut stickers are cut through the face material but not through the liner, so they peel away from a backing sheet or roll. Die-cut stickers are cut to the outside contour of the design. Sheeted stickers may be supplied several per sheet, while roll labels are wound on a core for faster hand or machine application.
Those formats change how a job behaves on press, during cutting, and during packing. A sticker supplied on rolls may need a specific unwind direction if it is going into a label applicator. A sheeted promotional sticker may need extra liner space around each piece so people can peel it without picking at the edge. A tiny kiss-cut logo may look efficient on a layout but frustrate staff during application.
Small stickers need restraint. Fine type under about 5 or 6 points can fill in. Thin borders can look uneven after normal cutting movement. Tiny QR codes may scan poorly once printed on textured paper or clear film. If a QR code is critical, test it at final size with the same approximate contrast and background planned for production.
Digital printing is common for short runs and flexible sizing because it avoids some tooling and setup tied to larger conventional methods. Higher quantities, specialty effects, or complex cut shapes may still involve dies, finishing setup, or extra press planning. Material thickness matters too. A thicker vinyl or laminated BOPP can peel and sit differently than a thin paper stock, especially on tight curves or small-diameter containers.
Key Factors That Decide the Right Sticker Dimensions
Start with the surface. Flat boxes are forgiving, which is one reason stickers pair well with Custom Printed Boxes and short-run package branding. Curved bottles, tubes, jars, and flexible pouches require more careful measuring because the sticker may bridge a curve, cross a seam, or land on an area that flexes during filling and shipping.
Measure the usable label panel, not the full face of the package. Leave clearance from edges, corners, folds, seams, lids, zippers, heat seals, and opening features. On a pouch, a 4-inch-wide front panel may only have 3.25 inches of comfortable sticker width after accounting for side seals and the rounded shape of the filled product. On a jar, a label that wraps too far around the curve can make the front artwork harder to read from straight ahead.
Readability has practical limits. Logos need breathing room. Ingredients, warnings, and batch codes need enough type size to remain legible. Barcodes need quiet zones on both sides. QR codes generally need strong contrast, a clean print surface, and enough physical size for the expected scanning distance. A promotional QR code on retail packaging can often be larger and cleaner than a small internal inventory code tucked on the bottom of a carton.
Visual hierarchy matters as much as measurement. A front-facing brand sticker may need room for a logo, product name, flavor, scent, or key claim. A tamper seal may only need a logo mark and security message. A bottom information label may prioritize barcode accuracy and compliance copy over shelf appeal.
Application method should also influence size. Hand-applied stickers need enough liner edge and visual reference points for consistent placement. Machine-applied labels may require roll direction, gap size, core diameter, outside roll diameter, and label repeat to match equipment. A dimension that looks harmless in artwork can slow a production line if it is difficult to peel, register, or align.
Practical rule: print a paper mockup at actual size, trim it with scissors, and place it on the real package before approving the quote. Five minutes with paper can prevent a full run of Labels That Looks crowded, crooked, or undersized.
Cost and Pricing Factors Before You Request a Quote
Sticker pricing is shaped by size, quantity, material, adhesive, finish, cut style, print coverage, and packing format. A larger sticker usually costs more because it consumes more face stock, adhesive, liner, ink or toner, and cutting time. Smaller is not automatically better. If shrinking the sticker makes the logo weak or the QR code unreliable, the savings are not doing useful work.
Quantity changes the unit cost because setup, file handling, proofing, and press preparation are spread across more pieces. As a rough planning range, a simple 2-by-3-inch digitally printed paper sticker might land around $0.12 to $0.28 each at 1,000 pieces, then drop at 5,000 or 10,000 pieces depending on coverage, finish, and supplier setup. A laminated vinyl or clear film sticker may cost more, especially with white ink, heavy coverage, or contour cutting.
Material choice is a major driver. Paper is economical and suitable for dry indoor use. BOPP is a popular film for product packaging because it resists moisture better than paper and has a clean retail look. Vinyl is durable for outdoor, equipment, and promotional uses. Clear film can look premium, but it may need white ink behind artwork so colors do not disappear on dark packaging. Metallic and textured stocks add shelf appeal, yet they also add cost and require more careful artwork planning.
Adhesive choice can be just as important as the face stock. Permanent adhesive is common, but not universal. Removable adhesive may be better for temporary promotions or reusable containers. Freezer-grade adhesive may be needed for cold storage. Rough corrugated, low-surface-energy plastics, oily products, refrigerated glass, and flexible films can all challenge adhesion. If the sticker must survive moisture, abrasion, refrigeration, or shipping vibration, specify that before quoting.
Finishes add appearance and function. Gloss coating boosts color and shine. Matte finish reduces glare. Soft-touch lamination feels upscale but can scuff depending on handling. UV coating and lamination improve abrasion and moisture resistance. Foil, spot gloss, and raised effects can look excellent on retail packaging, though they bring added setup and production time.
| Sticker Option | Typical Use | Cost Level | Production Notes |
|---|---|---|---|
| Paper sticker | Dry boxes, bags, inserts, event labels | Low | Best for indoor use; avoid moisture-heavy applications |
| BOPP film | Jars, bottles, pouches, food and beauty packaging | Medium | Good moisture resistance; available in white, clear, and metallic looks |
| Vinyl sticker | Outdoor decals, equipment labels, promotional giveaways | Medium to high | Durable and flexible; often paired with lamination |
| Clear film | Premium package branding, glass, clear containers | Medium to high | May need white ink support for strong color opacity |
| Foil or specialty finish | Gift, cosmetic, limited-run, and luxury product packaging | High | Adds setup, proofing attention, and lead time |
Ask for pricing at two or three nearby sizes and quantities. A 2.75-by-3.5-inch sticker may nest more efficiently than a 3-by-3.75-inch sticker on a sheet or roll layout, and that small adjustment can reduce waste. For broader packaging planning, compare stickers alongside Custom Labels & Tags so the format matches the product, application method, and budget.
Process and Timeline From File Check to Delivery
A clean sticker order follows a predictable path: define the size and use case, prepare artwork, receive a quote, approve the proof, print, finish, cut, inspect, pack, and ship. The proof stage is the key checkpoint. Production normally should not begin until the size, color expectations, copy, barcode position, and cut line are confirmed.
Simple digitally printed stickers can often move quickly, especially when the material is in stock and the artwork is press-ready. A common production window might be 4 to 8 business days after proof approval for straightforward short runs. Specialty materials, lamination, foil, custom shapes, large quantities, or roll-format requirements may push that to 8 to 15 business days or more. These ranges vary by supplier, order queue, and material availability, so confirm before tying stickers to a launch date.
Production time and shipping time are separate. If a shop quotes 7 business days for production, that usually does not mean the order arrives at your door in 7 business days. Freight transit, pickup timing, weekends, holidays, and weather can all affect arrival. For trade shows, retail resets, influencer mailers, or seasonal product packaging, build in extra time. Missed dates are expensive, and rush production often limits material and finish choices.
Accurate files reduce delays. A vector logo, outlined fonts, proper bleed, and a clearly named dieline limit back-and-forth. Clear quantity targets help too. If you might need 2,500 stickers but request only 1,000 for pricing, you may miss a better unit cost or reorder sooner than planned.
Quality-control checks should be specific, not vague. Confirm the finished dimensions against the proof, check that the cut is centered within normal tolerance, inspect color against approved expectations, test peel behavior, and scan any barcode or QR code from a printed sample if available. For roll labels, check unwind direction and roll count. For clear or metallic materials, review opacity and contrast before assuming the screen preview tells the full story.
For sustainability claims or fiber-based packaging, avoid loose language. If paper stocks or cartons are part of the larger packaging system, certification and sourcing can matter. The Forest Stewardship Council provides information on responsible forest certification, while performance testing for packed goods may involve protocols from groups such as ISTA. Stickers are small, but they still sit inside a larger packaging decision.
Step-by-Step Guide to Measuring and Ordering Stickers
Good ordering starts before the quote form. Measure first, then design. That order prevents most fit problems.
- Measure the available area. Use a ruler or caliper and record the usable width and height. Include clearance from edges, curves, seams, lids, folds, zippers, openings, and corners. For curved containers, mark the front-facing view and avoid wrapping critical artwork too far around the side.
- Decide the sticker’s job. A branding sticker, seal, instruction label, barcode label, promotion, warning, compliance label, or decorative sticker each needs different space. Multi-purpose stickers are possible, but they get crowded fast.
- Make a paper sample at actual size. Print the artwork or a blank box at full scale, trim it, and place it on the item under normal viewing conditions. Check how it looks on a shelf, in hand, and in a shipping pack.
- Confirm legibility. Review small type, contrast, QR-code size, barcode quiet zones, and logo details. Scan printed codes from a realistic distance. If the sticker is viewed at arm’s length, do not size the type as if it will be read from six inches away.
- Choose material and adhesive. Indoor paper, freezer-grade adhesive, removable adhesive, permanent film, textured stock, clear BOPP, and laminated vinyl all behave differently. Moisture, refrigeration, oils, rough cartons, flexible pouches, and outdoor exposure should guide the choice.
- Request a complete quote. Include size, quantity, shape, material, finish, roll or sheet format, delivery deadline, and application method. If staff will hand-apply hundreds per hour, liner format and peel behavior matter almost as much as artwork.
For brands building a full packaging program, stickers can work as part of a wider mix that includes sleeves, cartons, inserts, hang tags, and Custom Packaging Products. That can be useful for seasonal launches or small-batch retail packaging, where printed stickers add flexibility without committing every component to a long production run.
Common Mistakes That Make Stickers Look Cheap or Fail
The first mistake is choosing size from a screen mockup only. Digital previews hide scale. A 2-inch logo can look bold on a laptop and tiny on a 12-ounce pouch. The reverse happens too: a sticker that looked elegant on screen may overpower a small jar once it is printed and placed near the lid.
Placement errors are just as common. Stickers placed too close to edges, corners, seams, or curves can lift, wrinkle, or look crooked even if the print quality is good. On flexible packaging, the filled shape matters more than the flat empty pouch. On bottles, a label that crosses a tight radius may fight the adhesive memory and slowly lift at the edge.
Artwork mistakes usually show up late and cost money. Missing bleed can leave white slivers. Thin borders can look uneven because cutting has normal tolerance. Low-resolution logos may print soft. Weak contrast can make type hard to read. Untested QR codes can fail after lamination, texture, glare, or reduced size changes the printed result.
Material mismatch is another quiet problem. Paper stickers on wet bottles can wrinkle or stain. Removable adhesive may not hold well on rough corrugated cartons. Clear labels on dark product packaging may lose color strength if the artwork does not include white ink planning. A textured stock can look beautiful, but tiny type may not print as sharply as it would on a smooth film.
Ordering the absolute minimum quantity can also backfire. You need extras for setup checks, damaged pieces, staff training, samples, returns, and small future batches. If 1,000 finished units are required, ordering exactly 1,000 stickers leaves no room for normal handling loss. Depending on the application process, 3% to 10% extra can be a sensible cushion.
Proofs deserve slow attention. Check spelling, size, quantity, finish, color notes, cut line, and orientation. Once custom size stickers are printed and cut, fixing a simple typo usually means starting over.
Expert Checks Before You Approve Production
Before approval, create a short pre-production checklist. Confirm the final size, shape, material, adhesive, finish, quantity, roll or sheet format, application method, and delivery deadline. If the order is part of a larger packaging design project, confirm that the sticker color and finish still make sense against the actual box, pouch, jar, or mailer material.
Ask whether the selected size nests efficiently on the print sheet or roll. A slight change, even 0.125 inch in one direction, may reduce waste or improve the price. Not every job has a hidden cheaper size, but it is a fair question and a good supplier should be able to explain the tradeoff.
Request a digital proof that clearly shows the trim line, bleed, safe area, and finished dimensions. For custom shapes, the cut path should be easy to identify and separate from the printed artwork. If the sticker goes on a curved, chilled, oily, textured, or flexible surface, ask about material and adhesive compatibility before approving production. Surface energy, application temperature, and the environment after application all affect performance.
For hand-applied stickers, confirm that the liner is easy to peel and that the size can be placed consistently. A tiny seal may save material but slow down workers. A large label may look good but be harder to align by hand. Application speed becomes real money once staff are labeling hundreds or thousands of units.
Use the real package, not just the artwork file, as the final judge. The strongest sticker size is the one that fits the surface, supports the message, prices efficiently, and moves through production without surprises.
FAQ
What is the best size for custom sized stickers on packaging?
The best size depends on the usable flat area, viewing distance, required text, and application method. Leave clearance from edges, folds, seams, and curves so the sticker does not lift or wrinkle. A paper mockup at actual size is the fastest way to confirm proportion before ordering.
Do custom size labels and stickers cost more than standard sizes?
They can cost more if the size creates extra material waste, needs specialty cutting, or uses premium materials and finishes. They can also be cost-efficient when sized properly because they fit the product better and avoid reprints. Ask for a quote at nearby sizes and quantities to compare unit cost before final approval.
How small can custom size stickers be and still look professional?
Very small stickers can look sharp if the design is simple, high contrast, and not overloaded with text. Fine print, thin borders, tiny QR codes, and detailed logos may lose clarity at small sizes. For functional codes or compliance text, test scanability and readability at the final printed size.
What file setup is needed for custom sticker sizes?
Artwork should include the finished size, bleed, safe area, and a clear cut line when a custom shape is involved. Vector files are preferred for logos, type, and cut paths, while images should be high resolution. All critical text and graphics should stay inside the safe area to avoid trimming issues.
How long does it take to produce custom size stickers?
Timeline depends on quantity, material, finish, proof approval speed, and whether the order needs specialty cutting or effects. Simple digitally printed stickers usually move faster than complex laminated, foil, clear, or die-cut orders. Production time and shipping time are separate, so confirm both when planning a launch, event, or packaging deadline.


