Buyer Fit Snapshot
| Best fit | Embossed Logo Paper Bag Production projects where brand print, material claims, artwork control, MOQ, and repeat-order consistency need to be specified before quoting. |
|---|---|
| Quote inputs | Share finished size, material target, print colors, finish, packing count, annual reorder estimate, ship-to region, and any compliance wording. |
| Proofing check | Approve dieline scale, logo placement, barcode or warning zones, color tolerance, closure strength, and carton packing before bulk production. |
| Main risk | Vague material claims, crowded artwork, missing packing details, or unclear freight terms can make a low unit price expensive after revisions. |
Fast answer: Embossed Logo Paper Bag Production: Film, Print, MOQ, and Carton Packing should be specified like a repeatable production item. The safest quote records material, print method, finish, artwork proof, packing count, and reorder notes in one written spec.
Production checks before approval
Compare the actual filled-product size with the drawing, then confirm tolerance on folds, seals, hang holes, label areas, and retail display edges. Reserve space for logos, QR codes, warning copy, and material claims before decorative graphics fill the panel.
Quote comparison points
Review material grade, print process, finish, sampling route, tooling charges, carton quantity, and freight assumptions side by side. A quote is only useful when the supplier can repeat the same color, closure quality, and packing count on the next order.
Embossed logo paper bag production looks simple until your first approved sample is wrong. Then, suddenly, paper, pressure, and tooling become the real protagonists. A plain bag can feel expensive in two seconds, or look tired before it even hits the shelf. There is no mystery, just manufacturing truth.
Brands choose embossing because it makes a logo feel intentional. Texture does part of the selling. In grocery retail, gifts, cosmetics, tea, cosmetics accessories, and events, the bag itself is a contact point before anyone opens the product. I have seen buyers get a much higher perceived value jump from a clean raised mark than from a louder print pattern. That is what embossed logo paper bag production does when it works.
What follows is the practical version, not the brochure version: how it works, why stock matters, what drives cost, where delays hide, and why mistakes repeat in the same places every cycle. My goal is the boring but useful one: fewer bad revisions, fewer rushed callouts, fewer misunderstandings that turn into late-stage cost spikes.
What Is Embossed Logo Paper Bag Production?
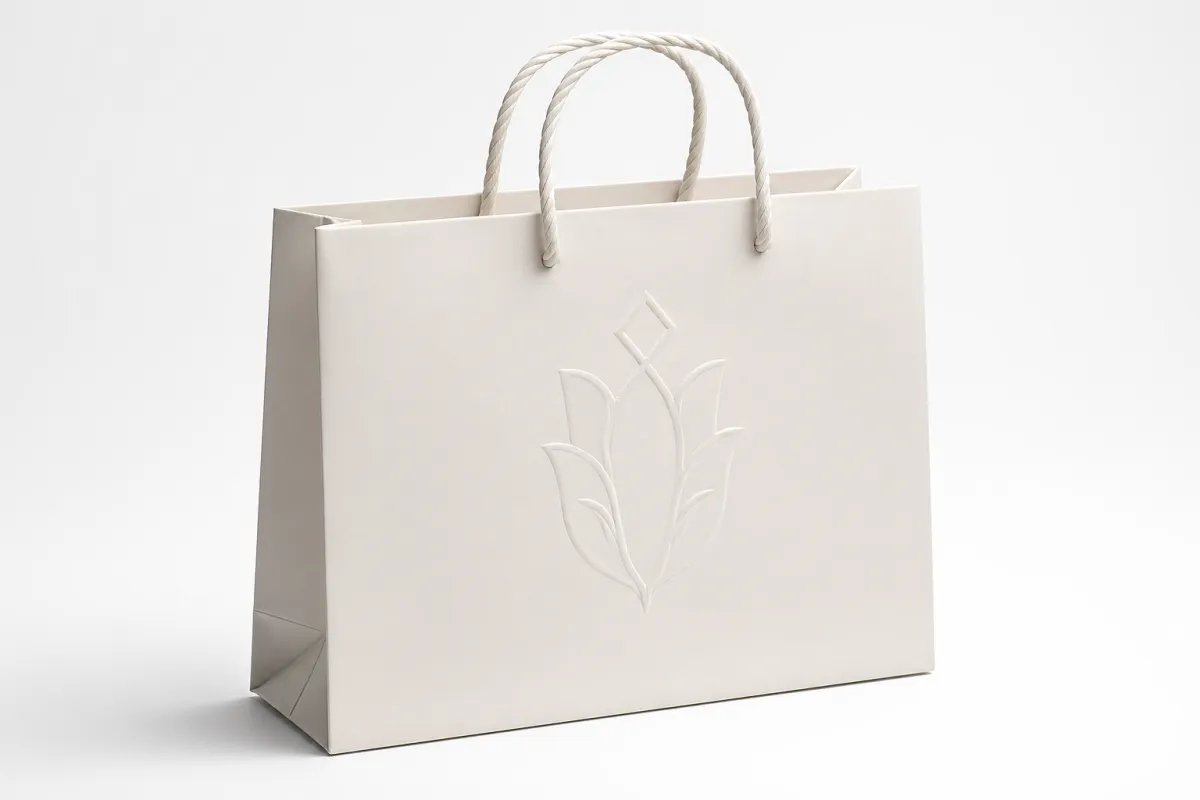
Embossed logo paper bag production is a process where a custom die presses a logo or pattern into the paper surface while a matching counter surface supports the shape from the back. One side rises, the opposite side receives pressure. Done correctly, the edge stays crisp and controlled. Done badly, it looks like somebody sat on the logo with muddy shoes.
Three finish families show up most often. Blind embossing uses no ink or foil; the logo lives in shadow, gloss change, and touch. Printed embossing adds color registration around or inside the raised area. Foil embossing overlays foil for reflective contrast, and that makes precision non-negotiable. In embossed logo paper bag production, this one decision should be made in the brief before samples, not after.
Blind embossing is often better than people expect. Brands in fashion, beauty, wine gifting, and stationery use it when they want a premium tone without loud graphics. A blind emboss on matte white, natural, or soft-touch paper can be more memorable than a heavy one-color print that has no hierarchy. Tactile cues beat visual noise when shoppers are deciding fast.
From the buyer side, embossed logo paper bag production is appealing because it compresses attention into one physical action: touch and recognize. A logo can stay subtle but still carry authority. For many product categories, subtlety reads as quality. Yes, that sounds obvious. But print buyers over-design because they think visual equals premium, while feel is often the deciding factor in handoffs.
There is a practical upside too. You can cut back on ink-heavy graphics, which helps minimalist brands and reduces some registration risk. If your paper already has strong hand feel, embossing can lift the whole package. Still, embossing is not a rescue tool. Tiny logos, weak file prep, thin stock, and over-ambitious detail will fail no matter how hard you wish otherwise.
If the logo is tiny, overcomplicated, or too dense, embossing will not rescue it. Paper has limits. Tooling has limits. Manufacturing physics has less patience than a marketing team.
Match style before you match machinery. A jewelry or premium watch bag usually does well with soft-quiet blind emboss plus a protective coating that keeps fingerprints soft. A bakery bag often performs better with a simplified raised symbol on uncoated kraft. A high-traffic retail campaign bag might need foil or print-assisted embossing for shelf attention. Same technique, very different goalposts.
For suppliers evaluating scope, reliable references like packaging.org and sourcing guidance from fsc.org are useful for framing performance and sourcing choices, not just decoration. In practice, embossed logo paper bag production should support function first, visuals second, and branding always in control.
How Embossed Logo Paper Bag Production Works
In theory, embossed logo paper bag production is a straight line: technical art review, die fabrication, sampling, approval, production, inspection, packing. In the real world, the line gets kinked by missing dimensions, late changes, and unclear files. Nobody wins there.
Artwork prep is the first gate. Most print teams want vector files, not raster guesses. Fill areas need predictable edges, and clear spacing matters more than elegance on a desktop preview. Crowded crests, tiny serif fonts, and border details that look fine at 4K screens can turn into an unreadable block once compressed under pressure.
Then comes die making. For most bag runs, the die manufacturer produces a metal die and a matching counter die. They are not interchangeable, and they are not cheap to alter once production starts. If your logo has hairline elements, the die builder will often suggest simplification, which is usually the right move in retrospect. Ask them early.
Pressure and heat are the heavy hitters in this process. Most lines of this conversation should start with "test pull" because paper responds unpredictably depending on thickness, coating, and grain. Pressure shapes the fibers. Heat can stabilize the impression and improve edge definition in some stacks. Too much of either, and paper may crack, warp, or print weirdly after conversion. Too little, and the logo disappears under handling.
Depth is where many teams get overconfident. Deeper is not better by default. If your logo has thin strokes, a moderate depth often reads better. If your stock is stiffer and your handle geometry strong, you can go slightly heavier without losing definition. I have seen deep impressions look great in an isolated sample and go ugly in mixed inventory because cartons and flexing changed the panel angle.
Workflow position matters too. Some factories emboss flat sheets before bag conversion. Others emboss components after conversion for certain formats. Flat-sheet embossing is often more repeatable for consistent logo placement, especially on high-volume runs. Post-conversion embossing can be practical for specific shapes but can add risk at fold lines and glue lines.
In most shops, a good embossed logo paper bag production run does not reward improvisation. If your file, stock, and finish are locked, your sample cycle drops. If you keep changing details while the press is live, you pay for that uncertainty in downtime and rework. That is why good briefs are boring: they save time.
Materials, Artwork, and Quality Factors That Change the Result
Paper is the headline decision in embossed logo paper bag production. Fiber quality, caliper, coating, and direction all determine whether a mark is crisp or dull. High GSM paper usually holds detail better for raised marks because it has more body. You still need to avoid overbuilding depth on weakly processed stock; "heavier" is not the same as "indestructible."
Coated stock has pros and cons. It often gives a cleaner edge if the emboss depth is right. Push too hard and coating stress can crack. Uncoated stock can feel more natural and forgiving, especially for natural brand stories, but it can also soften micro-details. Kraft paper is lovely for earthy brands, yet its surface texture can merge fine elements. The practical rule is simple: pick paper that can defend the shape you asked for.
Artwork complexity is the second major quality variable. Bold geometry, generous counters, and fewer strokes generally emboss better. If your mark has interior counters thinner than about a matchstick line width, expect losses. You can usually simplify while keeping brand recognition. That is a win, not a compromise.
Grain direction is still the most underrated variable. Along-grain and cross-grain behavior are different. Ask your supplier for grain orientation on their chosen sheet. If the logo is rotated against grain, edges can open and close as the bag flexes. I have watched teams insist "the proof was fine" and then fight this exact issue in final packing.
Handles are not cosmetic afterthoughts. Rope, ribbon, twisted paper, and die-cut styles all shift panel behavior and stress points. If a handle sits too close to embossed artwork, the line may blur after folding and use. Good bag architecture includes handle position and emboss zone, especially for reusable or event-claimed bags.
Lamination changes both visual and tactile outcomes. A soft-touch laminate can create that premium hand-feel but may soften edge contrast. Gloss improves contrast and edge visibility, though it can reduce the matte tactility that some brands want. If the goal is restrained premium, matte and blind embossing often pair best. But one brand might want "book cover" contrast and choose gloss; both can work when intentional.
Depth, again, is not a vanity number. In embossed logo paper bag production, shallow-to-medium depth often ages better because it resists accidental edge collapse and shelf wear. A deep impression may look dramatic in a launch photo and then flatten during normal shipping abuse. Real handling, not social content, is the final judge.
Demand a sample on final stock. I keep saying this because it matters. Exact paper, exact handle style, exact lamination, exact size. No approximations. If you change any of those before the real sample, you are guessing twice.
For teams balancing environmental positioning and material responsibility, references like epa.gov help anchor decisions in paper-management reality. That said, supplier technical sheets and factory quality records still decide execution reality.
Embossed Logo Paper Bag Production Cost and Pricing Breakdown
Embossed logo paper bag production always has two cost lanes: one-time setup and recurring per-unit. The confusion starts when quotes blur those categories. Setup usually includes die engraving, sampling, machine setup, and technical review. Recurring includes raw material, printing, embossing operation cost, finishing, and logistics. If no split is shown, ask for one, then read the fine print anyway.
Tooling is usually fixed per job, which is why low volumes look expensive per bag. You still pay die prep whether you run 300 or 30,000 units. That does not mean high volume is always cheaper in every line item, but it does usually smooth cost per unit. People who skip this math always feel surprised at the first order confirmation.
In my audits, the cost curve is mostly controlled by six levers: stock grade, paper weight, emboss area, logo complexity, finish stack, and handling/pack method. Add foil and print and you are usually adding both labor and control time. Add a deep relief mark plus premium handles and your total may jump faster than expected. Bigger bags also increase waste and fold complexity, which is why area-to-unit cost is not linear.
Here is a practical comparison of common options in embossed logo paper bag production:
| Option | Typical Use | Relative Cost | Detail Level | Notes |
|---|---|---|---|---|
| Blind emboss | Minimal luxury retail, gifting, premium packaging | Low to medium | Best for bold shapes and clean logos | Good when texture is expected to carry brand positioning |
| Emboss + print | Branded shopping bags, cosmetics, promotional packaging | Medium | Good if print and raised area are spaced well | More visual information, but registration discipline is required |
| Emboss + foil | Luxury retail, events, high-impact gifting | Medium to high | Strong visual contrast with tactile depth | Alignment errors show quickly on small, dense marks |
| Emboss + print + foil | Premium campaigns with strict brand guidelines | High | High when artwork is simplified | Strong finish, but quality control becomes critical |
That is the straightforward table. The glossy sales version usually calls everything "premium." Useful for slides, not procurement. In embossed logo paper bag production, the practical question is always: does this extra finish improve performance, or just consume time and budget?
Always compare quotes against identical specs. If one quote uses 157gsm and another 210gsm, one uses a 35 mm emboss window and another uses 20 mm, you are not comparing two real options. You are comparing two different jobs under a polite price cover. Same for depth, paper direction, and handle style. Keep everything fixed except cost, then compare.
Hidden cost traps usually arrive late: extra sample cycles, rush conversion, special carton labeling, shipping insurance, and re-shipping if the first lot fails inspection. I have seen one "small change" request trigger three extra freight charges and 40% more hours in QC comments. Ask for revision policy before signoff. Not a legal detail, just project survival.
Typical ranges vary by region and supplier network. A simple blind-emboss bag at moderate volume may be straightforward, while a complex high-finish bag can escalate quickly. If an offer skips tooling and still gives a low piece price, it can be a red flag. Maybe tooling is bundled deep inside; maybe setup fees appear after approval. Either way, clarification helps before commitment.
Step-by-Step Embossed Logo Paper Bag Production Timeline
Embossed logo paper bag production usually runs longer than simple print-only bag runs because tooling and approvals are part of production, not extras. The core path is usually: technical review, die build, sample approval, mass production, quality audit, and logistics. Delivery windows vary, but sequence consistency is common.
Artwork prep is often the first bottleneck. If your file is not vector, if type is too thin, or if the size exceeds what the stock can support, engineering pauses. That pause is expensive in elapsed time but cheaper than fixing a run of wrong parts. Send a complete file package and you will save days.
After die build, a sample is typically produced on real material. That sample stage is where many teams learn what no render can show: edge rounding, shadow behavior, handle interference, and whether the mark can survive a light hand squeeze. If you are lucky, only one sample cycle is needed.
What kills lead time most? Ambiguous specs, post-proof design tweaks, and stock substitutions. Also slow approvals. If a team waits to review at the last minute, your schedule shifts even if the press has no technical issue. A quick, decisive review process is often the biggest time accelerator you control.
Here is the practical way to compress lead time. Send a clean, decision-ready brief before the RFQ goes out. Include final dimensions, target quantity, stock type, color plan, emboss style, handle type, finish expectations, and hard deadline. If you know the bag needs blind emboss only, state that clearly. If foil is required, state it there too. No room for mystery in embossed logo paper bag production.
Reasonable timing for a simple job is often: die build in a few days, sample review within roughly 3-7 days depending on complexity, then one to two weeks for production on moderate volume. Complex jobs, unusual stock, or late changes move this out. Faster asks are possible, but only when risk is low and approvals are locked.
If your bags travel far, distribution durability matters as much as beauty. The ISTA framework is a useful benchmark for handling impact and transit damage, even though it is not emboss-only specific. Bags can look great out of press and look rough after the second transfer. Packaging is still packaging at that point.
Common Mistakes That Ruin an Embossed Finish
Most failures in embossed logo paper bag production are not weird. They are predictable, repeated, and avoidable. Most start with assumptions that should have been tested.
The first and most common mistake: too-thin stock for the requested depth or logo detail. If the paper collapses, the edge softens and the design loses hierarchy. If coating fractures, quality collapses faster than a budget deck under a Friday night review.
The second: over-detailed artwork. Tiny symbols, tiny scripts, thin hairlines, and micro-borders look sharp on a monitor and fail in a press. Press tools are not anti-aliasing engines. They need printable geometry that survives pressure and fiber movement.
The third: skipping sample validation. I keep hearing the same phrase in projects: "Let's save time and go straight to production." That is not saving time. It is buying risk. A proof may take days and a fraction of the cost. A rejected full run takes weeks and serious stress.
The fourth: adding emboss late. It is common to design the whole bag first and then ask, "Can we add embossing here?" Then everyone blames alignment when the issue is structure. Embossing works better when planned with the bag format, fold geometry, and handle placement from the start.
The fifth: comparing a stock bag quote with a custom embossed quote and deciding the premium finish is "ridiculously expensive." Of course it is, if scope differs. If one option has die work and a higher-grade paper and the other does not, they are different products. That is not a pricing injustice. It is apples and furniture-level mismatch.
Here are failure patterns that seem minor but cost big:
- Embossing too close to edges, folds, or stitch lines.
- Foil colors that outcompete the raised structure and flatten the design.
- Logo sizing that works in CAD but crowds once the panel is cut and folded.
- Ignoring transport and handling, especially for gifts and event fulfilment.
- Using a single "works in render" sample and declaring the job approved.
The safe path in embossed logo paper bag production is boring: simpler geometry, right paper, and hard proofing. Fancy does not mean better if your execution risk goes up threefold. Simplicity is not lazy. It is production truth with fewer back-and-forth calls.
Next Steps: Turning Embossed Logo Paper Bag Production Into a Clean Order
If this process feels like it will still bite you, that is fair. It does, if you are vague. Start with a strict intake pack: vector logo, final dimensions, paper weight target, grain preference if known, handle type, emboss area, finish stack, expected quantity, and delivery deadline. The clearer your package, the cleaner the quote set and the lower your revision cost. That is already a competitive advantage.
Ask for a physical sample on your final material before production authorization. Evaluate edge clarity, depth uniformity, foil registration (if used), placement, and how the emboss survives normal touch. Tilt under angled light. Check at arm's length. Put it beside your product and against an unembossed bag. This feels old school, but it works.
Request at least three quotes with the same specification sheet. Keep variables locked: same stock, same die area, same quantity, same handle architecture, same laminate, same finishing steps. If one bidder says "same bag, lower cost" while another includes extra process steps, you need to ask for a detailed breakdown. Ambiguity is where hidden differences hide.
Approve die and sample before full release every time. If you miss this, you are basically approving in reverse. I have seen teams burn days because they thought they would correct issues mid-run. In embossed logo paper bag production, mid-run correction often becomes a restart, and nobody loves that.
Use one checklist across all projects. Keep it in your PM system. Update it from mistakes. Once this becomes routine, your team approves faster, suppliers respond with better consistency, and the whole process stops feeling like roulette. That is how you protect schedule and budget without turning down quality.
Actionable takeaway: commit to locked specs, paper-accurate sampling, and strict sample approval before mass runs. If you do those three things consistently, embossed logo paper bag production does exactly what it should do: make your brand feel intentional every time, not just on launch day.
FAQ
What paper weight works best for embossed logo paper bag production?
In practice, a mid to higher GSM paper usually performs better for clean, stable impressions. Very thin sheets can look fine on mockups and then fail under pressure. If your budget is strict, use the lightest sheet that still holds detail on a real sample. Request the sample on final stock because emboss depth and material hand are linked in embossed logo paper bag production.
How much does embossed logo paper bag production cost per bag?
Per-unit cost depends on quantity, paper grade, size, printing or foil combinations, and tooling complexity. Small runs show higher unit prices because setup is still required. Fair quotes should separate tooling/setup from recurring unit costs and call out revision policy clearly. If that split is missing, ask for a revised quote before final commitment.
How long does embossed logo paper bag production usually take?
Timeline depends on artwork readiness, die build time, sample rounds, factory capacity, and approvals. Simple jobs usually move faster than complex ones, especially if artwork and stock are locked before quoting. If changes occur after sample approval, expect delay. For this type of work, lock the scope early and keep approvals tight.
Can embossed logo paper bag production include foil or printed color?
Yes. It can combine embossing with printing and/or foil, but only if the artwork is simplified enough for physical output. Multiple effects increase setup, registration needs, and QC time. If the target is premium, a clean emboss with one supporting finish often outperforms stacked effects that dilute clarity.
What should I send a supplier before starting embossed logo paper bag production?
Send vector artwork, final dimensions, target quantity, stock preference, handle type, finish direction, and deadline. Add references for expected depth and edge character, and specify inspection conditions before release. The better your input package, the fewer expensive revisions happen later. Great suppliers can advise, but good ones can save you when the brief is already clear.
Related packaging resources
Use these related guides to compare specs, costs, quality checks, and buyer decisions before making the final call.


