Most bad event staff caps are not ruined in production. They are approved that way in the proof. Lovely, right? An event staff caps logo proof checklist is the buyer's last real chance to catch embroidery, color, sizing, placement, quantity, and fabric problems before decoration starts and the clock gets expensive.
For an event team, caps are not just merch. They are moving identification. They help guests find staff, help security spot the right people, and make photos look organized instead of like someone panic-ordered hats from three different tabs at midnight. In practice, that means the cap has to work in fluorescent lobby light, outdoor sun, and dim ballroom lighting without losing the logo or looking inconsistent across sizes and shifts.
The proof is where all of that either becomes clear or starts drifting. A logo 0.5 inches too small can disappear at a registration desk. A dark thread on a dark cap can look tasteful in a PDF and useless under venue lighting. A sponsor mark can become a fuzzy rectangle if nobody checks line weight, digitizing path, and stitch density before embroidery. A clean proof should also indicate the cap substrate, such as 100% cotton twill, brushed chino twill, recycled polyester, acrylic-wool blends, or mesh-backed foam, because each one holds ink and thread differently.
Why Event Caps Fail Before Anyone Even Wears Them
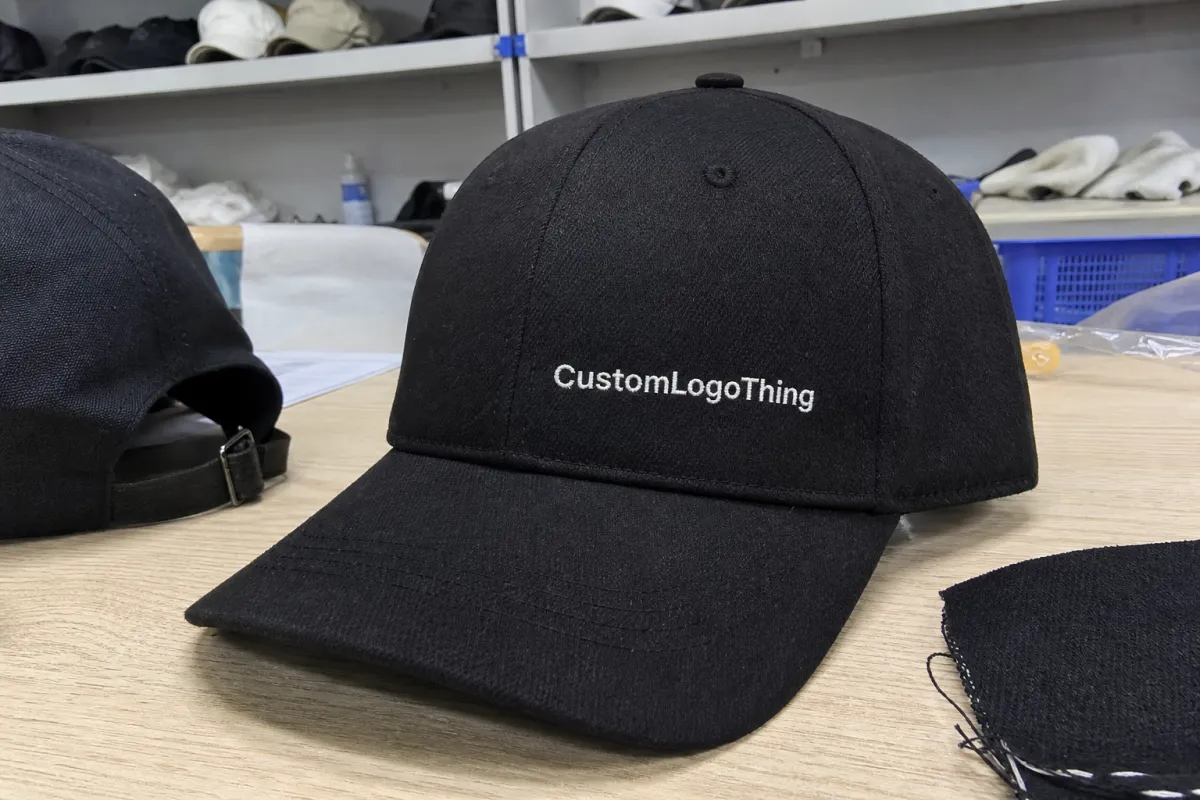
A logo proof is the visual approval document that shows what will be decorated on the cap. It usually lists the cap style, cap color, logo size, placement, decoration method, thread or ink colors, and sometimes stitch count or print notes. If the proof says the logo is 3.5 inches wide on the front panel in white embroidery, that is what the production team is preparing to make. For decorated caps, that instruction usually flows into digitizing, machine setup, needle selection, thread matching, and first-piece inspection.
Buyers often treat a mockup, digital proof, sew-out, pre-production sample, and final production approval like they are interchangeable. They are not. A mockup is usually a sales visual. A digital proof is the approval document. A sew-out is an embroidered test, often on backing fabric, cap fabric offcuts, or a similar crown panel. A pre-production sample is closer to the finished cap and should reflect the actual blank, stitch density, panel structure, and closure hardware. Final approval is the point where you are saying, yes, make the order like this.
That distinction matters because a clean logo on a flat screen can behave badly on a curved crown. A structured cap has buckram behind the front panel. A 6-panel cap has a center seam. A trucker cap may have a tall crown and mesh sides. A low-profile dad cap gives you less vertical room. The same artwork can look sharp on one cap and cramped on another. If the cap is going to be embroidered, the proof should also account for underlay, pull compensation, and the way the front panel tensions when it is hooped.
From a packaging buyer's point of view, caps behave a lot like printed boxes: the proof is not decoration. It is a production instruction. If the instruction is vague, wrong, or approved by someone who never checked scale, the factory is not magically reading minds. Tragic, but true. The best proofs spell out the decoration method, blank composition, closure type, and any compliance needs such as OEKO-TEX Standard 100 for fabric safety, GRS for recycled content, or WRAP and BSCI when the buyer needs social compliance documentation.
Proof rule: Review the cap proof as if the finished order already exists and you are trying to explain every visible detail to your boss, operations lead, and event photographer.
The goal is blunt. Staff should be easy to identify at 10 to 30 feet. The logo should sit where people expect it. The cap color should work with the uniform. Sponsor marks should not turn into fuzz. Nothing should float too high, sit too low, or look weirdly off-center in group photos. If the event has multiple teams, create separate approvals for front-of-house, security, VIP support, and setup crews so each cap version is controlled instead of improvised.
How the Cap Logo Proof Process Works From Artwork to Approval
A normal cap order follows a predictable path. You submit logo files, choose a cap style, confirm the decoration method, receive a digital proof, review the details, request changes if needed, then approve in writing. Production should not start before written approval. Verbal approval is how teams end up arguing over who said what. Very glamorous. A clean process usually includes art submission, digitizing or print prep, a proof revision if needed, sample confirmation, and a final production sign-off.
Before proofing, the manufacturer or decorator should check file quality, stitchability for embroidery, print limits, cap panel shape, seam interference, and minimum line thickness. Vector files such as AI, EPS, SVG, or print-ready PDF are usually safer than a low-resolution PNG pulled from a website. For embroidery, the logo may need digitizing, which converts artwork into stitch paths. That is not the same as dropping a file onto a cap image. A good digitizing file should define stitch direction, underlay, density, and travel sequence so the machine does not create bulky overlaps or loose trims.
An embroidery proof should usually call out logo size, thread colors, stitch direction notes, and sometimes estimated stitch count. A printed cap proof should show ink colors, print area, transfer size, curing or heat limits, and any restrictions tied to fabric texture. Foam trucker caps, cotton twill, polyester performance caps, and washed dad caps all behave differently under decoration. If the decoration is heat transfer or DTF, the proof should also note press temperature, dwell time, and whether the blank can tolerate the heat without scorching or warping.
The curved front panel is the part buyers underestimate. A flat logo proof can look balanced while the finished cap stretches the design over a crown with seams, buckram, and depth. Wide horizontal logos may need to shrink. Tall badges may need to lose a line of text. Fine outlines may need to be thickened to at least 0.5 mm for print or simplified for embroidery, depending on the supplier's equipment. On structured caps, the center front panel often handles dense logos best, while side-panel or back-strap decoration should stay much simpler and smaller.
For clean artwork and one standard cap style, an initial proof often takes 1 to 3 business days. If a sew-out is requested, add another 2 to 4 business days for sampling and photos. If the order needs a full pre-production sample, plan on 7 to 10 business days depending on blank availability and decoration complexity. Add time if the logo needs cleanup, multiple cap colors are involved, or there are separate versions for staff, security, VIP, and sponsor teams. A smart event staff caps logo proof checklist keeps every version from turning into a scavenger hunt.
Approvals should include the proof PDF or image, cap SKU, cap color, logo file name, decoration location, quantity, ship date, and delivery address. If the event has strict brand controls, include Pantone references, thread codes, or ink formulas in the approval record. If the supplier changes any of those details after revision, ask for a new proof rather than approving by email description alone. For recycled-content caps, confirm whether the blank is certified to GRS, and for organic cotton caps, confirm whether the material chain is documented under GOTS before the order is released.
Logo Placement, Size, Color, and Readability Checks
Start with placement. Common cap locations include centered front, left front panel, right front panel, side panel, and back strap area. Not every cap supports every location well. A 5-panel cap gives you a cleaner uninterrupted front for large logos. A 6-panel cap has a center seam that can interrupt small text or vertical artwork. Back strap embroidery is small by nature, often around 2 to 3 inches wide, and usually not the place for a full event name plus sponsor line.
Most front embroidery logos work best around 2.25 to 4 inches wide. A simple wordmark may sit nicely at 3.5 inches wide. A stacked logo may need to be closer to 2.5 or 3 inches wide so the height does not crowd the crown. Low-profile caps can make tall logos look squeezed. High-crown trucker caps can swallow tiny marks and make them look timid. For printed transfers, the image may go slightly larger than embroidery, but the proof should still respect the curvature of the crown and the printable area on each panel.
Check logo height, not only width. A 4-inch-wide logo that is only 0.8 inches tall can look clean. A 4-inch-wide round badge that is also 3.5 inches tall can look like a forehead billboard. Sometimes the right fix is not shrinking everything. It may be rearranging the logo, removing a tagline, or creating a cap-specific version. If the logo includes tiny type, keep it readable by eliminating subtext below roughly 6 to 7 pt equivalent for embroidery and confirming the smallest letter width will not collapse when stitched.
Color is another trap. Pantone references help, but thread has texture and reflects light. A thread color will rarely look identical to a flat brand color on a screen. Ink can shift based on fabric color, underbase, curing, and transfer type. If color is critical, ask for a thread chart, ink reference, or previous production photo under similar lighting. For apparel programs that include organic or recycled fabrics, look for supporting certifications such as OEKO-TEX Standard 100 for harmful-substance testing and GRS for recycled fiber claims, especially when the cap includes recycled polyester panels or mesh.
Contrast beats theory. Navy thread on black caps is technically on brand and practically invisible. Congratulations, you made stealth merch. For staff identification, the best cap is not always the most subtle cap. White, light gray, safety yellow, or high-contrast brand colors may perform better in a crowded lobby, outdoor queue, or dim ballroom. A good proof should show the cap on a color-matched background or include a note on the likely visibility at distance.
Use the proof at actual viewing distance. Staff role text, event names, sponsor marks, and small taglines should be readable at roughly 6 to 10 feet for close guest interaction and recognizable at 20 to 30 feet for general wayfinding. Do not judge a 0.2-inch letter while zoomed to 300 percent. The cap will not come with a magnifying glass. Shame. For multi-team events, assign one hierarchy: primary logo on the front, role marker on the side, and only a short identifier on the back if needed.
Gradients, hairline text, tiny icons, detailed crests, and multi-ring badges often need simplification for embroidery. A cleaner cap logo is not a brand failure. It is production reality. If the event also uses badges, shirts, lanyards, and printed signage, the cap can carry the main mark while other items carry the fine print. On embroidery orders, ask whether the shop is using 9-needle or 12-needle multi-head machines, because needle count affects thread-change efficiency and the complexity of the sewout approval.
Pricing, MOQ, and Unit Cost Details Hidden in the Proof
The proof can expose cost drivers before production. Logo size, stitch count, number of decoration locations, thread changes, specialty effects, cap style, and rushed handling can all move the price. A 2.5-inch embroidered logo is not priced the same as a 4-inch dense badge with six thread colors and a side hit. Likewise, a flat print on a brushed twill cap will usually cost less than a multi-color embroidery with a woven label and custom inner taping.
Basic embroidered stock event caps may land around $2.50 to $4.00 per unit at 500 MOQ before freight, duty, and rush charges when the decoration is a simple single-location logo on a standard blank. More commonly, decorated retail-ready event caps run about $7 to $18 per unit depending on quantity, cap blank, stitch count, decoration method, and packaging. If the order includes a woven patch, reflective thread, puff embroidery, or a second-location mark, the price can move upward quickly.
MOQ usually changes with customization. Off-the-shelf cap blanks with one-color embroidery can sometimes start at 24 to 50 pieces. Fully custom crown shapes, custom labels, or specialty fabric builds often start closer to 100 to 300 pieces. If the order uses recycled polyester, organic cotton, or a branded private-label inner label, the supplier may require a higher MOQ to cover setup, labeling, and material sourcing. Ask early whether MOQ applies per color, per logo version, or per size run so no one discovers the math at the approval stage.
Sample fees should also be visible. A standard embroidery sew-out may be credited back after order placement, while a physical cap sample can be priced separately because it uses an actual blank, trims, and labor. If the proof does not mention sample cost, ask whether the shop offers a development sample, a photo sample, or a couriered pre-production sample. A clear sample workflow usually goes: art review, digitizing, sew-out or print test, sample approval, then production release.
Check whether the proof shows hidden add-ons: extra thread colors, back embroidery, custom taping, contrast underbill, woven labels, hangtags, or packaging inserts. Those items can add a few cents to a few dollars each, but they often get missed because they sit outside the main logo image. If the supplier offers certified fabrics, ask for documentation on the specific blank used. A GOTS claim should be tied to the actual organic cotton fabric, while OEKO-TEX Standard 100 applies to safety testing of the textile components, not to the cap design itself.
Timeline, Lead Time, and Approval Bottlenecks to Watch
Timeline is where good cap orders go to die. A proof can look perfect and still miss the event because nobody understood the approval chain. Standard production after final proof approval is often 18 to 22 business days for decorated stock caps, not counting shipping. More complex builds, special fabrics, or custom labeling can push that to 25 to 35 business days or longer. Rush orders usually cost more and reduce the opportunity for sample revisions.
Proofing itself can be quick, but revision loops add friction. If the buyer needs legal review, brand review, event operations review, and procurement review, the calendar can disappear fast. The slowest bottleneck is often not the decorator. It is the decision maker who spots an issue only after the proof has already been distributed to five internal teams. To avoid that, assign one approver with authority to sign off on cap color, logo placement, and text accuracy.
Embroidery orders usually need a digitizing and setup step before the first sew-out. That means the shop may not be able to quote final timing until they know the stitch count and machine capacity. Print orders have their own timing drivers: screen setup, transfer prep, curing time, and drying or cooling between runs. The proof should reflect the actual process so the buyer can compare not just visuals but also realistic lead times.
Ask the supplier to confirm whether the timeline starts at proof approval, sample approval, payment receipt, or art finalization. Those are not always the same date. If the event date is fixed, build in a buffer for transit, customs clearance, and rework. A safe planning window for a one-off event is to approve the cap at least 4 to 6 weeks before need-by date, and earlier if the program includes multiple size runs or different staff roles.
If the supplier offers compliance documentation, request it during the timeline review rather than after approval. WRAP or BSCI audit status, OEKO-TEX Standard 100, GRS, and GOTS documents may take time to pull. A factory can be capable without having every certificate on hand, but the buyer should never assume the paperwork exists just because the fabric looks fine in the proof.
Common Proof Mistakes That Make Staff Caps Look Cheap
The first mistake is approving without reading the decoration method. Embroidery, woven patch, print, and heat transfer all behave differently. A logo that looks sharp as a printed mockup may turn muddy when stitched if the text is too small or the line spacing is too tight. The proof should say exactly which process is being used so the buyer knows whether the design needs simplification.
The second mistake is ignoring seam placement. On a 6-panel cap, the front seam can cut right through a small icon or letter. That might not be obvious in a front-on mockup. If the logo crosses a seam, ask the supplier to move it slightly left or right, widen the art, or switch to a 5-panel blank with a smoother front. On curved crowns, even a well-centered logo can drift visually if the panel shapes are not represented correctly in the proof.
The third mistake is approving a cap color based on screen color alone. Screen rendering does not show sheen, weave, contrast, or underbill color. A charcoal cap may read more brown in warm light, and a black cap can swallow a dark embroidery thread completely. Ask for the nearest stock color name, a Pantone reference if available, and a material note such as brushed twill, canvas, or recycled polyester mesh.
The fourth mistake is leaving small type untouched. Tiny text, thin rules, and detailed crests are where embroidery goes to suffer. If the proof still shows a tagline under 0.15 inches high, ask for a cap-specific version or remove the line entirely. A strong event cap often uses one clean mark, one readable role identifier, and no extra decoration that adds cost without helping visibility.
The fifth mistake is approving without checking placement against the crown shape. A logo can be centered on a flat digital template and still appear too high, too low, or too close to the seam once it is stitched on a real cap. The proof should show measurements from the brim, from the top seam, and from the side panels if the supplier expects tight alignment. For printed caps, ask whether the art area is limited by heat, panel curvature, or front-foam thickness.
The sixth mistake is skipping inspection checkpoints. Before full production, a good order should pass art review, digitizing review, sew-out or print test, thread or ink match, first-article inspection, and final packing inspection. During production, look for loose threads, skipped stitches, crooked back straps, inconsistent crown height, distorted logos, and color variation across the run. If the caps are destined for a big event, ask for AQL-style inspection or at least a documented final random check before shipment.
Expert Review Tips Before You Approve Production
Read the proof like a production document, not like a brochure. Confirm the cap SKU, crown type, panel count, brim style, closure, and fabric composition. A structured 6-panel cotton twill cap behaves differently from an unstructured 5-panel recycled polyester cap, and the proof should make that obvious. If the cap includes a moisture-wicking sweatband, sandwich brim, or contrast stitching, make sure those details are written down rather than implied by the image.
Check the artwork version against the event version list. If there are staff, lead staff, security, and sponsor editions, label each one clearly. The proof packet should show the correct logo files and the exact variation approved for each group. If the event has brand rules, include acceptable Pantone ranges, minimum clear space, and any prohibited treatments such as metallic thread or color inversion.
Request a sew-out photo or physical sample when the logo is complex. A sew-out can reveal if the stitch density is too high, the underlay is bulking up, or the outline is disappearing into the fabric. On a printed cap, ask for a print strikeoff or heat-transfer sample to confirm color, opacity, and wash performance. If the supplier says the blank is OEKO-TEX Standard 100 certified or the recycled content is GRS certified, verify that the certificate matches the actual fabric used for the sample.
Inspect the sample at real distance and real light. Hold it at eye level, then at chest level, then under the lighting you expect at the event. Check whether the logo is still legible from 6 to 10 feet and whether the role text is still obvious at 20 to 30 feet. If the cap is for outdoor use, see how it performs in daylight, not just in a proof PDF or a phone photo.
Keep the approval record organized. Save the final proof, sample photos, color references, and written approval in one place. That file should show the cap style, decoration method, quantity, due date, and any special notes like recycled materials, organic content, or compliance requirements. If a problem comes up later, a clear approval trail is the difference between a quick fix and a very long email chain.
FAQ
What is the most important thing to check in an event staff cap proof? The combination of logo size, placement, and readability. If staff cannot be identified quickly, the cap is failing its main job even if the artwork looks good on screen.
How large should a front cap logo be? Most front embroidery logos work best around 2.25 to 4 inches wide, with the exact size depending on the cap shape, logo complexity, and whether the design crosses seams.
What is a realistic MOQ for decorated event caps? Simple stock caps may start around 24 to 50 pieces, while more customized or branded programs often start at 100 to 300 pieces. At 500 MOQ, a basic embroidered cap can sometimes price around $2.50 to $4.00 per unit before freight.
How long does production usually take? A common lead time is 18 to 22 business days after final approval for standard decorated stock caps, with extra time needed for samples, revisions, or custom materials.
What certifications should I ask about? For textile safety and sustainability, ask whether the blank or material is supported by OEKO-TEX Standard 100, GOTS, or GRS. For factory social compliance, ask about WRAP or BSCI documentation where relevant.
What should the sample process include? A good process usually includes artwork review, digitizing or print prep, sew-out or strikeoff, photo confirmation or physical sample review, then final written approval before production starts.


