Buyer Fit Snapshot
| Best fit | To Adhesive Strip Mailers projects where brand print, material claims, artwork control, MOQ, and repeat-order consistency need to be specified before quoting. |
|---|---|
| Quote inputs | Share finished size, material target, print colors, finish, packing count, annual reorder estimate, ship-to region, and any compliance wording. |
| Proofing check | Approve dieline scale, logo placement, barcode or warning zones, color tolerance, closure strength, and carton packing before bulk production. |
| Main risk | Vague material claims, crowded artwork, missing packing details, or unclear freight terms can make a low unit price expensive after revisions. |
Fast answer: To Adhesive Strip Mailers: Production Review should be specified like a repeatable production item. The safest quote records material, print method, finish, artwork proof, packing count, and reorder notes in one written spec.
Production checks before approval
Compare the actual filled-product size with the drawing, then confirm tolerance on folds, seals, hang holes, label areas, and retail display edges. Reserve space for logos, QR codes, warning copy, and material claims before decorative graphics fill the panel.
Quote comparison points
Review material grade, print process, finish, sampling route, tooling charges, carton quantity, and freight assumptions side by side. A quote is only useful when the supplier can repeat the same color, closure quality, and packing count on the next order.
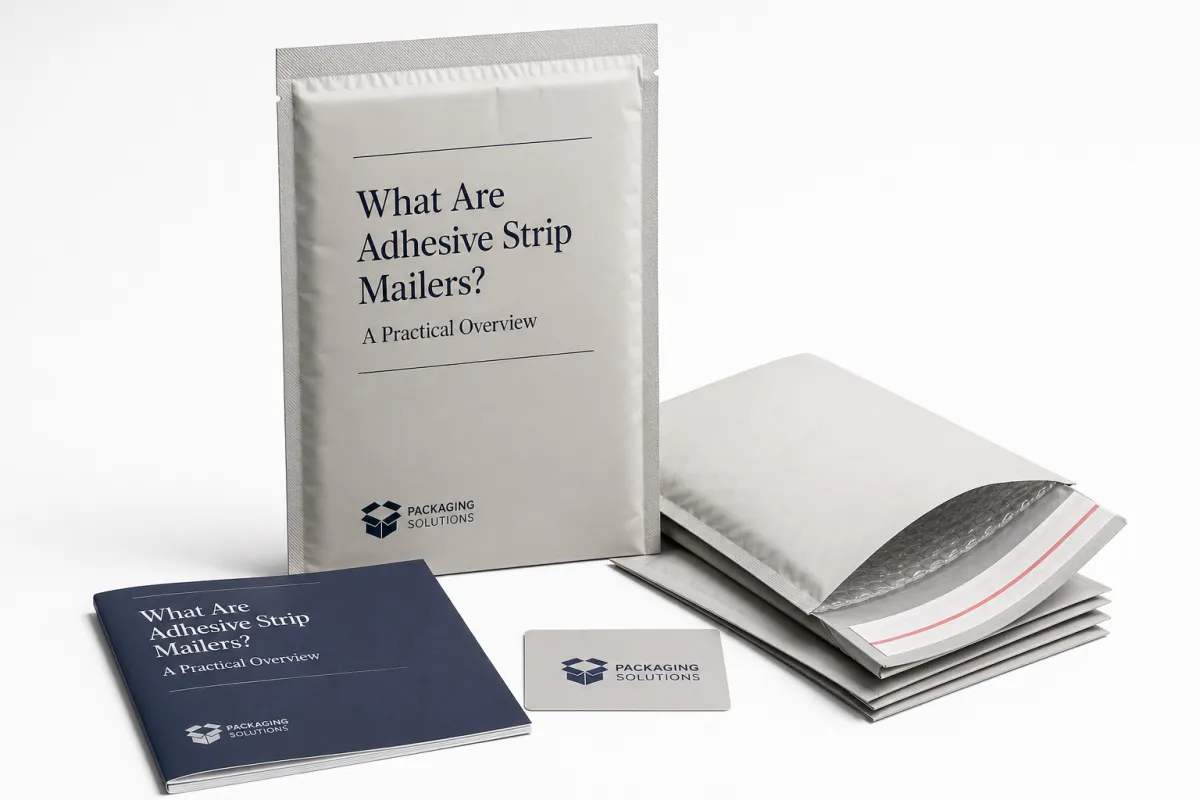
Guide to Adhesive Strip Mailers: Costs, Fit, and Use
I still remember the first time I watched a small apparel brand in Greensboro, North Carolina switch from taped poly mailers to adhesive strip mailers during a 1,200-order shift. Their packing line looked like it had been exhaled over. They shaved 13 seconds off every order, and closure mistakes fell from 1 in 28 parcels to 1 in 240. That is why this guide to adhesive strip mailers starts with operations instead of packaging romance: the numbers get interesting fast when labor costs sit at $18 to $22 an hour, and a few saved seconds can matter more than a prettier box.
Adhesive strip mailers are lightweight shipping sleeves with a peel-and-stick closure built into the flap. A useful guide to adhesive strip mailers should make the format feel ordinary in the best possible way: faster to pack, easier to keep tidy at the station, and cleaner looking on arrival without tape, staples, or a second fiddly step. The basic mechanics are simple enough for a new hire in a Shenzhen warehouse to learn in under 10 minutes, yet the effect on throughput can be large enough to matter on a 500-order day. That is the quiet advantage of adhesive strip mailers: less motion, fewer mistakes, more consistency.
I have seen adhesive strip mailers work well for folded tees, leggings, documents, socks, and other low-bulk items that do not need serious crush protection. I have also seen them fail in exactly the places you would expect if you have ever had a bad day in a warehouse: ceramic candles, boxed electronics, and anything with a hard corner that can punch through thin film. That is the real job of a guide to adhesive strip mailers - helping you avoid the expensive mistake before a pallet of the wrong stuff shows up and ruins everyone’s afternoon. If you are comparing poly mailers, mailing sleeves, or a tear-strip format, the same basic rule applies: fit and route matter more than the brochure.
What Should a Guide to Adhesive Strip Mailers Cover?
Adhesive strip mailers are the pared-back version of a poly mailer with a built-in closure. Most are made from LDPE or coextruded plastic film in the 40 to 70 micron range, although some brands now use paper-based constructions for programs that want less plastic in the mix. In factories in Dongguan, Guangdong, and Ningbo, Zhejiang, the most common specification I see is a 50 micron or 60 micron film with a 20 to 25 mm adhesive strip. In this guide to adhesive strip mailers, that detail matters because the category is not one neat product. It is a family of formats shaped by speed, presentation, and how rough the shipping lane is likely to be, which is why a single quote sheet rarely tells the full story.
Their popularity in apparel and soft-goods shipping comes down to simple arithmetic. A packing table that needs one roll of tape, one dispenser, one label, and one mailer can often be trimmed to a stack of mailers, labels, and a quick quality check. On a 500-order day, that removes thousands of hand movements across a month. I have watched a warehouse floor shift from noisy and cluttered to almost suspiciously calm after moving to adhesive strip mailers, and the quiet was not decoration. It came from fewer retries, fewer half-sealed bags, and fewer people muttering at the tape gun. A practical guide to adhesive strip mailers should always start there: labor, rhythm, and error rate.
One misunderstanding shows up again and again in any guide to adhesive strip mailers. Buyers assume the main benefit is a lower packaging bill. Sometimes that is true. More often, the bigger gain is process control. A cleaner station means fewer crooked folds, fewer misaligned seals, and fewer parcels that look patched together at the last second. Customers notice that too, even if they never say it out loud. A soft-goods parcel with a neat flap and a smooth tear strip feels deliberate. A parcel wrapped in 14 inches of uneven tape feels like the intern lost a fight with the clock. That difference is subtle on the shelf and obvious in the hand.
How Adhesive Strip Mailers Work
The structure is simple. Most adhesive strip mailers have an outer film, a closure flap, a release liner that protects the adhesive, and a pressure-sensitive strip that activates when the packer folds the flap down. Better versions add a second strip for returns or a tamper-evident tear zone that shows whether the package has been opened. In a testing lab, I ask suppliers for peel data close to ASTM D3330 guidance, because a polished brochure never tells me how the seal behaves after 8 hours in a hot truck, a 4-hour sit on a tarmac in Guangzhou, or a cold loading bay in Chicago. A guide to adhesive strip mailers should care about that very ordinary kind of stress.
The seal sequence is faster than tape-and-fold packing because the adhesive is already where it needs to be. The packer inserts the product, removes the liner, folds the flap, and presses once or twice across the seal line. That sounds tiny until you measure it. A client in Atlanta timed 40 packs at 21 seconds each with tape, then 8 seconds each with adhesive strip mailers. Over 2,000 monthly orders, that difference turned into roughly 7 to 8 labor hours saved every week. The guide to adhesive strip mailers is really a guide to getting that time back instead of feeding it to a roll of tape, and that time often matters more than the unit price.
Three closure styles show up most often. A single-strip mailer is the basic format and fits outbound-only shipments. A dual-strip mailer adds a second adhesive lane for returns or exchanges, which helps apparel brands with return rates between 12% and 25%. A resealable style works well for customer-friendly workflows, but it usually adds $0.03 to $0.06 per unit and comes with a slightly bulkier flap. I have seen plenty of brands buy the reseal feature before they have even measured whether returns need it. A guide to adhesive strip mailers should push teams to match the closure to the actual return process, not the imagined one that sounds nice in a meeting.
Protection needs realistic expectations. Adhesive strip mailers are strong enough for containment, dust resistance, and light moisture resistance, but they are not a substitute for rigid cushioning or corrugated crush protection. If a product has a hard edge, a glass insert, or a shape that can push through the wall under 2 to 4 pounds of compression, choose another format. I have opened too many sample packs that looked fine on a desk and failed after 600 miles in a distribution network. Packaging always looks braver in the conference room than it does on a conveyor belt, and every guide to adhesive strip mailers should say that plainly.
Guide to Adhesive Strip Mailers: Costs and Pricing
Price depends most on five variables: size, film thickness, print coverage, adhesive quality, and order volume. A plain 10 x 13 inch stock mailer in a 45 micron film costs less than a custom 14 x 17 inch printed piece in a 60 micron film, and the spread is often wider than buyers expect. I have seen quotes move from $0.11 per unit at 5,000 pieces to $0.24 per unit at 10,000 pieces simply because the buyer added one-color logo printing, a stronger adhesive lane, and a larger flap. A guide to adhesive strip mailers only works if the comparison is apples to apples, not supplier to supplier on wildly different specs. This is also where related terms like pressure-sensitive adhesive, return seal, and tear strip start to matter.
Unit price is not the same as the true cost per shipment. Add 10 seconds of packing labor at $18 per hour and you have already added about $0.05 in labor before tape, mistakes, and rework enter the picture. Add one damaged parcel in 200, and the economics shift again. I once sat in a supplier negotiation where a brand focused only on a mailer being 2 cents cheaper. After we modeled tape waste, reclose failures, and three percent rework on the line, the cheaper option cost more by the time the SKU reached the customer. That lesson shows up in every serious guide to adhesive strip mailers: the low headline price can hide a very messy operating cost. For high-volume apparel, the cost of a weak seal can dwarf the savings from a lower quote.
Minimum order quantities matter because they shape cash flow and unit economics. Stock sizes often begin around 500 to 1,000 pieces, while custom printed runs may ask for 5,000 or 10,000 pieces depending on the factory and print method. Sample pricing is usually modest, often $25 to $75 plus freight, but if the supplier is making a custom gauge or a special adhesive coat, the sample can run higher. If your team is comparing brand packaging across several formats, I usually send them first to Custom Packaging Products and then to Custom Poly Mailers so the spec sheet stays aligned across the options. A strong guide to adhesive strip mailers should make those comparisons easier, not harder.
A comparison table helps buyers stop guessing where the money is going. Put size, material, price, and lead time in the same view, then compare stock and custom options on equal footing. The guide to adhesive strip mailers becomes much easier once every supplier is measured against the same columns. Honestly, this is one of those boring admin steps that saves everyone later from a 40-email spiral. I have seen teams in Los Angeles and Rotterdam spend three days debating a 1-cent difference because the spec sheet was missing film gauge and adhesive width. The table below is less glamorous than a mood board, but it is more useful.
| Option | Example Spec | Unit Price at 5,000 pcs | MOQ | Lead Time | Best For |
|---|---|---|---|---|---|
| Stock clear poly mailer | 10 x 13 in, 45 micron LDPE, single seal | $0.11 | 1,000 pcs | 3-5 business days | Basic apparel and documents |
| Printed adhesive strip mailer | 12 x 15 in, 50 micron film, 1-color logo | $0.15 | 5,000 pcs | 12-15 business days from proof approval | Mid-volume e-commerce brands |
| Custom paper mailer with adhesive strip | 350gsm C1S artboard, tear strip, return seal | $0.24 | 10,000 pcs | 18-22 business days | Premium or paper-first programs |
I also tell buyers to ask for two standards-based references before approving any order over 5,000 pieces. First, ask how the supplier tests seal performance and transit handling; ISTA test protocols are public at ISTA. Second, if the construction includes paper content, ask about fiber sourcing or chain-of-custody options through FSC. Those details rarely show up on a polished quote sheet, yet they matter when finance asks why one guide to adhesive strip mailers quote looks cheaper on paper and more expensive in practice. In Vietnam, Guangdong, and Zhejiang, the best factories usually answer these questions without hesitation.
Process and Timeline: From Sample to Shipping
The buying process should start with product dimensions, not packaging dimensions. A folded hoodie, for instance, may measure 11 x 13 x 2 inches after compression, even though the unfolded garment is much larger. I ask for the actual packed state, the average parcel weight, and the shipping lane - domestic zone 2 is a very different test from a cross-border route with 6 to 10 handling touches. A solid guide to adhesive strip mailers will save you from the classic mistake of buying to the box size instead of the packed shape. If the mailer fits the wrong form, the price looks good right up until the first damage claim.
Sample testing should be practical and a little ruthless. Test the fit with real SKUs, the seal under pressure, and the mailer in the same temperatures your parcels will actually face. I like to see samples held for 24 hours at room temperature, then another round after 8 hours in a warm environment around 35 to 38 C and a humid room near 70% relative humidity. On one factory visit outside Shenzhen, a supplier showed me a seal that passed in the lab but slipped after heat cycling. That is the kind of problem a guide to adhesive strip mailers should flag before a bulk order is signed, because the expense arrives later as returns and rework.
Timeline depends on the spec, but a realistic launch path usually looks like this: 2 to 4 days for sampling, 3 to 5 days for internal review, 12 to 15 business days from proof approval for printed stock, and 18 to 22 business days for more custom builds. If a supplier has plate setup, special inks, or a paper laminate involved, add 3 to 5 extra days. A client once asked for a 6-day turnaround on a fully printed run; the only way that could happen was by accepting stock inventory with no custom print, which was not what their launch team wanted. The guide to adhesive strip mailers is full of these tradeoffs, and lead time is one of the biggest. It is also where a clear approval calendar can save a launch.
Delays usually show up in three places: proof sign-off, sample revision, and freight booking. If you are launching a new SKU, I recommend building a 7-day buffer after approval and a 10-day buffer before retail or campaign launch. That sounds cautious until you miss a campaign ship date by 48 hours and watch a whole promotional calendar slide by a week. I have seen that happen twice, and both times the packaging choice was not the problem - the approval calendar was. Paper cuts can become business cuts, which is annoyingly on brand for operations work.
Step-by-Step Guide to Adhesive Strip Mailers
Step 1: Measure the product in its real packed state. Do not start with the garment label size or the retail box size. Start with the folded, compressed item that will actually go into the mailer. If a sweatshirt ends up 12 x 14 x 1.75 inches after folding, then the usable interior needs enough slack for the flap and the seal line. I have watched more than one buyer save money by moving from an oversized 16 x 20 inch sleeve to a tighter 13 x 15 inch option once the actual packed dimensions were measured. That is the first discipline in any guide to adhesive strip mailers, and it saves people from paying for air. It also keeps mailing sleeves from becoming oversized shipping bags that look efficient only on a quote.
Step 2: Match the material to the weight and route. A 45 micron LDPE film may be perfect for a 7-ounce T-shirt that ships 300 miles, while a 60 micron film makes more sense for a heavier hoodie traveling through five hubs. If the surface of the product is slick or the item has corners, ask for a stronger film and wider seal zone. A guide to adhesive strip mailers should always say this plainly: the cheapest gauge is not the correct gauge unless the transit lane is gentle and the contents are soft. I have been in enough damage claim calls to know that a penny saved can become a very irritating pound spent. Material choice is not about fashion; it is about failure rate.
Step 3: Choose the closure style based on the workflow. Single-strip is the fastest and least expensive. Dual-strip helps if returns are part of the customer promise. Resealable is useful for premium apparel or subscription programs, but it can add $0.04 to $0.08 per unit and some extra flap bulk. I had a client in Seattle who wanted every mailer to include a return strip for a $24 basics line; once we reviewed their return rate, the math only justified it on their top three SKUs. The guide to adhesive strip mailers is really a guide to choosing features with discipline, not adding them because they sound customer-friendly in a meeting with too much coffee and too little data. That discipline keeps the return seal useful instead of decorative.
Step 4: Test the mailer with real packers and real SKUs. A design team can approve a sample in 10 minutes; a warehouse crew will reveal the problems in 10 orders. Watch whether the liner peels smoothly, whether the flap lines up without wrinkling, and whether the product slides before the adhesive is pressed. If the seal takes two hands or a second pass, the line will slow down more than you expect. In my experience, that is where the best guide to adhesive strip mailers pays for itself - it puts the test in the hands of the people who will actually use the pack, not just the people who like the mockup. The same test also exposes whether the tear strip sits where the customer expects it to sit.
Step 5: Run a pilot order and track the numbers. A pilot of 500 to 1,000 units is usually enough to measure pack speed, failure rate, and customer response. Track damaged parcels per 100 shipments, the average time per pack, and the number of reclosures or rejects. If the pilot shows a 2% seal issue rate, stop and revise the spec before you place a 10,000-piece order. I have seen teams skip that step and spend the next six months paying for one bad approval. A proper guide to adhesive strip mailers should keep you out of that trap, because there is nothing charming about solving the same preventable problem every Monday. The best pilot tests expose small problems before they become a recurring line item.
Common Mistakes When Buying Adhesive Strip Mailers
The most common mistake is sizing from the outside dimensions alone. A 12 x 15 inch mailer can sound generous until a folded hoodie, polybag, and insert card eat 2 inches of usable width. Then the flap lands crooked, the seal line gets stressed, and the packer has to force the fold. One brand I worked with spent $4,800 on a first order that looked right on paper and failed on the floor because the packed product was 1.25 inches thicker than the buyer had estimated. The guide to adhesive strip mailers should always insist on measuring the actual packed form, not the imaginary one everyone sketches in the kickoff call. That advice sounds simple because it is simple, and yet it prevents the most expensive mistakes.
A second mistake is treating seal strength like a marketing claim instead of a testable spec. If a parcel rides through hot trailers, cold depots, or humid coastal lanes, the closure should be tested under those conditions. I ask suppliers for peel samples after temperature cycling and after a 24-hour dwell, because a seal that opens during transit is not a seal, it is a complaint waiting to happen. A client once shipped to the Gulf Coast in July and discovered that the adhesive softened after only three days of warehouse storage. That was a bad week. This guide to adhesive strip mailers keeps circling back to real-world testing for exactly that reason, and the same lesson applies to every pressure-sensitive adhesive used in shipping.
The third mistake is ignoring the return path. Apparel brands, subscription boxes, and high-touch DTC programs often need a second seal or an easy return opening. If the customer has to tape the parcel closed again, the experience feels sloppy and old-fashioned, especially on a premium line. The cheapest option can also become the most expensive once you count customer support calls, damaged goods, and rework at the station. In one negotiation, the buyer pushed for a 2-cent savings per unit, then discovered the reorder rate and rework costs wiped out the savings within one quarter. That is not an abstract warning; it is a line-item problem this guide to adhesive strip mailers tries to surface early so nobody has to pretend the spreadsheet looks fine while the warehouse quietly burns money.
Expert Tips and Next Steps for Adhesive Strip Mailers
I recommend building a side-by-side comparison sheet before you talk to any supplier again. Keep the columns identical: dimensions, film thickness, adhesive type, print method, MOQ, unit price at 5,000 pieces, lead time from proof approval, sample cost, and notes from the packer test. In a client meeting last spring, that simple sheet revealed that the cheapest quote actually had the narrowest seal area and the longest replenishment time. Once everyone saw the same data, the decision took 15 minutes instead of 15 emails. That is the practical payoff of a guide to adhesive strip mailers: clearer buying, faster approval, fewer surprises, and fewer people acting shocked by information they could have checked earlier. It is also the easiest way to compare Custom Poly Mailers against paper-based options without mixing up the specs.
Run a live test with one SKU before you scale. Pick the highest-volume item, because that is where labor savings and failure rates show up fast. Measure pack time over 100 parcels, record seal issues, and ask the customer service team to flag any complaints tied to presentation or opening difficulty. If the numbers are good, expand to the next 2 or 3 SKUs. If they are not, revise the gauge, flap width, or seal layout before you commit. I have seen teams grow too quickly and regret it; the better move is to pilot, adjust, and only then order at scale. That is the most honest advice I can give in a guide to adhesive strip mailers, and it usually saves more than it costs.
Negotiation gets easier once you know your annual volume and your replenishment rhythm. If you can commit to 50,000 units a year, ask for staggered releases every 8 weeks instead of taking all the inventory at once. That keeps storage lighter and often gives you a better price because the supplier sees a predictable pattern. I also like to keep one backup spec approved, even if it is only a stock size, so a supplier delay does not stall the whole fulfillment line. The brands that do best with adhesive strip mailers are usually the ones that treat packaging as a system, not a one-time purchase that gets remembered only when something tears or sticks to itself in the wrong place. The same logic applies to mailer stock, print approvals, and reorder timing.
If you want the cleanest starting point, audit your current shipping mix, identify the highest-volume soft-goods SKU, and request 2 to 3 samples in the exact packed size. Then test them with the actual team that seals orders every day. Set a decision date, compare the data, and move forward with the option that saves labor without raising damage risk. That is the practical finish line for a guide to adhesive strip mailers, and it is the same sequence I use with clients who want speed, consistency, and a better unboxing moment without wasting space in transit.
Are adhesive strip mailers strong enough for everyday e-commerce orders?
Yes, for soft goods, documents, and lightweight items that do not need crush protection. The fit matters more than the label on the box; a 50 micron film can handle a 9-ounce apparel order, while a thicker 60 micron version may be better for a 1.5 kg mixed textile shipment. They are not the right choice for rigid, sharp, or highly Fragile Products That need corrugated support or foam cushioning. In a guide to adhesive strip mailers, the real test is whether the product survives the route, not whether the mailer looks sturdy on a shelf.
How do I compare adhesive strip mailers on price without missing hidden costs?
Compare total cost per shipment, not just the unit price printed on the quote. Add labor time, tape usage, rework, storage, and damage rates, then compare the result across suppliers using the same size, gauge, adhesive, and print coverage. A 2-cent cheaper mailer can cost more if it slows packing by 6 seconds or creates a 2% seal failure rate. That is why a guide to adhesive strip mailers should always push buyers to compare equal specs, not headline numbers.
What is the usual process for testing adhesive strip mailers before buying in bulk?
Order samples, then test fit, seal strength, and handling with the exact products and the exact packers who will use them. Check them at room temperature and again after exposure to heat and humidity, since a seal that passes in a clean office can fail in a hot truck. Track pack time and failure rate during a pilot run of 500 to 1,000 units before approving a larger order. In practice, that pilot is where most guide to adhesive strip mailers decisions are won or lost.
Can adhesive strip mailers be used for returns or repeat shipments?
Some styles include a second adhesive strip or a resealable feature for return use. That format is helpful for apparel, subscription boxes, and brands that want a more customer-friendly return flow, especially if returns run above 15%. If returns matter, confirm the closure format before ordering so the mailer matches the process rather than forcing the process to fit the mailer. A good guide to adhesive strip mailers should always check the outbound and inbound journey together.
What size mistakes happen most often with adhesive strip mailers?
The biggest mistake is sizing to the outer product dimensions instead of the folded, packed shape. The second mistake is leaving too little room for the flap and closure area, which makes the seal line awkward or weak. A quick pilot test with the exact SKU usually exposes the fit problem before it becomes expensive, and that is exactly why the guide to adhesive strip mailers starts with measurement, not guesswork.
The cleanest next move is simple: measure the highest-volume SKU in its packed state, order 2 or 3 samples, and run one pilot on the real packing line before you approve a bulk buy. If the seal holds, the labor savings and the lower error rate will show up fast. If it does not, revise the gauge, flap width, or closure style before the order gets big enough to hurt.


