Buyer Fit Snapshot
| Best fit | To Perforated Tear Mailers projects where brand print, material claims, artwork control, MOQ, and repeat-order consistency need to be specified before quoting. |
|---|---|
| Quote inputs | Share finished size, material target, print colors, finish, packing count, annual reorder estimate, ship-to region, and any compliance wording. |
| Proofing check | Approve dieline scale, logo placement, barcode or warning zones, color tolerance, closure strength, and carton packing before bulk production. |
| Main risk | Vague material claims, crowded artwork, missing packing details, or unclear freight terms can make a low unit price expensive after revisions. |
Fast answer: To Perforated Tear Mailers: Film, Print, MOQ, and Carton Packing should be specified like a repeatable production item. The safest quote records material, print method, finish, artwork proof, packing count, and reorder notes in one written spec.
Production checks before approval
Compare the actual filled-product size with the drawing, then confirm tolerance on folds, seals, hang holes, label areas, and retail display edges. Reserve space for logos, QR codes, warning copy, and material claims before decorative graphics fill the panel.
Quote comparison points
Review material grade, print process, finish, sampling route, tooling charges, carton quantity, and freight assumptions side by side. A quote is only useful when the supplier can repeat the same color, closure quality, and packing count on the next order.
A small tear line can change the whole shipping experience. A good guide to perforated tear mailers is really a guide to control: cleaner opening, fewer knife cuts, less chance of nicking the product, and a better first impression the moment the customer touches the pack. I have watched operators, merchandisers, and fulfillment leads circle back to the same issue again and again; if the opening feels awkward, people remember it, and they remember it fast.
Teams comparing formats often start by looking at Custom Packaging Products alongside Custom Poly Mailers. That pairing helps because the right mailer is not only about holding an item in transit; it is also about how the package behaves on the packing table, in the carrier network, and at the front door. A thoughtful guide to perforated tear mailers keeps both the logistics and the customer experience in view, which is where a lot of otherwise decent packaging plans fall apart.
For fast-moving fulfillment teams, a guide to perforated tear mailers becomes most useful when speed and presentation need to live in the same package. Apparel, accessories, promotional kits, and returns-friendly ecommerce shipments all benefit from a mailer that opens along a predictable line instead of forcing customers to search for scissors or improvise with a key, a fingernail, or a box cutter. That kind of friction sounds minor on paper, then turns into wasted time at scale, damaged goods, and avoidable service issues. Customers are gonna notice the difference, even if they never say it out loud.
The advantage is easy to understand: the mailer does part of the work for the recipient. It guides the tear, protects the contents, and gives the pack a more deliberate feel. That is why a guide to perforated tear mailers reaches beyond brand teams. Operations managers, fulfillment leads, and purchasing teams all feel the effect, because the opening feature influences labor, damage rates, returns, and customer satisfaction in one decision. In practice, that means the mailer has to perform on the line and in the hands of the end user, not just in a render.
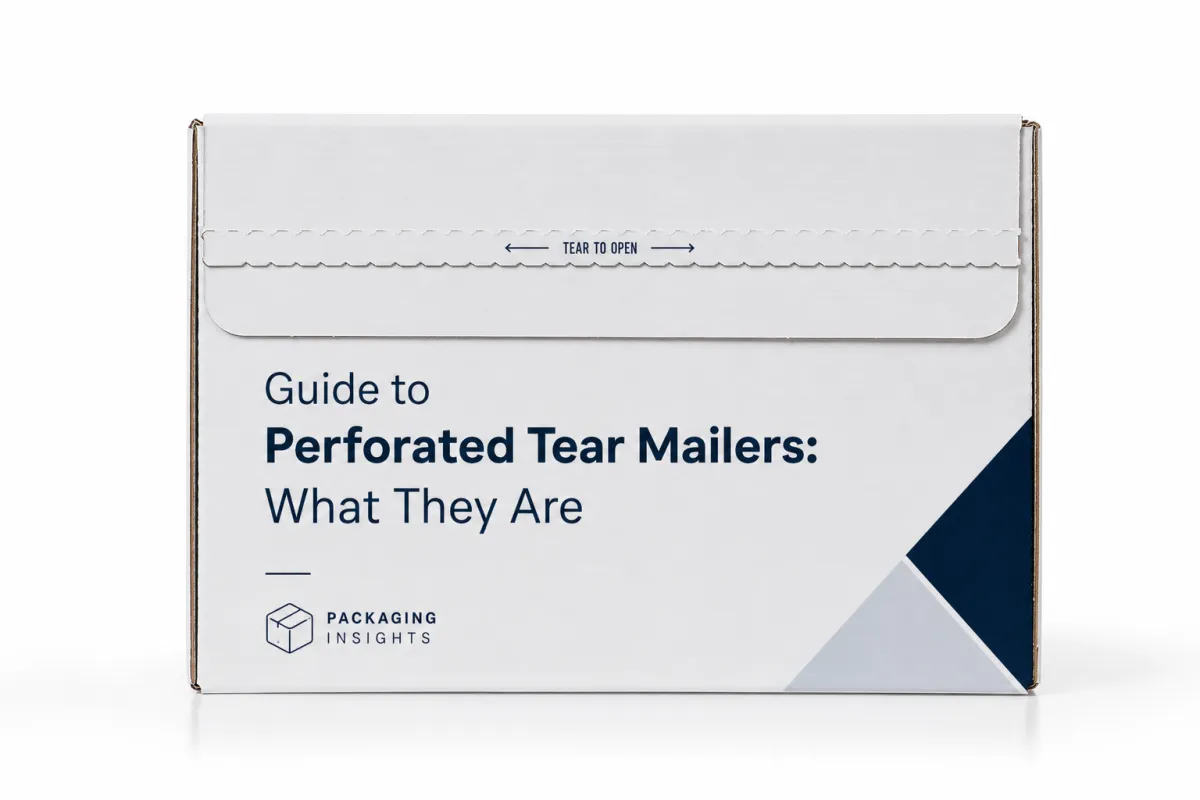
Guide to Perforated Tear Mailers: What They Are
A perforated tear mailer is usually a flexible poly shipping mailer with a built-in tear path, often paired with an adhesive closure flap. The perforation may sit near the top edge, across the face, or along a side panel, depending on the design, but the purpose stays the same: create a controlled opening point that feels easy to follow and hard to misread. In a strong guide to perforated tear mailers, the tear path is the detail that makes the whole pack feel smarter without turning it fragile.
Most of these mailers use LDPE or co-extruded polyethylene film, commonly in thicknesses from 2.5 mil to 4 mil for ecommerce work. The build matters more than many buyers expect. A mailer that is too thin can stretch around sharp corners and split near the perforation in transit; a mailer that is too stiff can make the tear line harder to start. The best guide to perforated tear mailers advice is to treat the package as a system, not a single feature. Film, seal width, closure, print, and perforation all affect the result, and one weak link can undo the rest.
The format fits especially well where presentation matters but box rigidity is not necessary. Apparel is the classic example, though the same structure works for accessories, cosmetics in secondary packaging, subscription kits, event materials, and promotional mailings. If the packout depends on a smooth opening moment, a perforated path helps the customer get to the product without wrestling the outer layer. That is one reason the guide to perforated tear mailers keeps showing up in ecommerce planning conversations, especially when the brand wants a little polish without moving to a carton.
The user benefit shows up in small but meaningful ways. There is less cutter use on the receiving end, fewer accidental product nicks, and a cleaner-looking package after opening. From a buyer's point of view, that can mean fewer service tickets and less friction around returns. A customer who can open the parcel cleanly is also more likely to reuse the mailer for a return if the structure supports that. For many teams, that is the practical win behind the guide to perforated tear mailers: less drama, more consistency, and fewer surprises after the parcel leaves the dock.
Another reason the format matters is that it supports a better first impression without demanding a large material increase. The carrier does not need to treat the package differently; the package simply gives the end user a better control point. That keeps the mailer efficient while still making it feel thoughtful. If a team wants branded packaging but needs to stay inside a disciplined budget, a well-specified guide to perforated tear mailers can land in the right middle ground.
There is also a trust angle here that gets overlooked. A package that opens predictably feels more intentional, and intentional packaging tends to read as more reliable. That does not mean the mailer has to look fancy or carry a lot of ink. It just has to open the way the customer expects. When the opening is obvious, the pack feels better before the product is even out of the sleeve.
Guide to Perforated Tear Mailers: How They Work
The structure is simple enough on the surface, yet the details matter. A typical mailer has a main film body, sealed edges, an adhesive flap for closure, and one perforated line that defines the opening path. In a tear-and-reseal version, a second adhesive strip may be included so the package can be reused on the way back. A clear guide to perforated tear mailers should explain that the perforation is not a random slit; it is engineered so the package tears where the maker intended and nowhere else.
From the customer side, the sequence is direct. The recipient finds the starter tab or tear strip, pulls along the perforation, and the package opens without scissors or a blade. A well-designed mailer follows a predictable line with steady pull force. A poorly designed one produces an uneven split, a stuck corner, or a tear that runs into the product cavity. That is why the guide to perforated tear mailers keeps coming back to one phrase: controlled opening. If the strip is hidden or the tab is too small, customers will kinda just fight with the pack until they give up or grab a tool.
The balance is delicate. Perforation strength has to be high enough to survive packing, sorting, tossing, and compression, while still low enough that the end user can open it without a fight. Too weak, and the mailer can pop open early; too strong, and the convenience feature stops being convenient. In a practical guide to perforated tear mailers, this is not a cosmetic line item. It is a functional spec, just like gauge, seal width, and print coverage. A good spec sheet should say where the tear begins, how it travels, and how the closure is expected to behave after pressure and vibration.
Return-friendly designs add another layer. Some use a dual-strip layout where the first opening is for outbound delivery and the second adhesive strip is reserved for the return trip. Others use a tear-and-reseal style that preserves enough of the mailer to close it again after inspection. For apparel, that can reduce friction in reverse logistics, which is one reason the guide to perforated tear mailers is so useful for DTC brands that want fewer loose ends in the post-purchase experience. I have seen teams save themselves a lot of customer service back-and-forth simply by planning for returns before artwork gets approved.
A perforation is not just a convenience feature; it is a control point. If the tear line is wrong, every packer and every customer feels it.
Validation belongs in the process as well. Teams often review package performance against transit tests such as those used by ISTA, because a mailer that opens beautifully on a desk still has to survive a real shipping lane. That practical check belongs in any serious guide to perforated tear mailers, especially if the contents are soft, compressed, or sensitive to edge abrasion. Bench tests are useful, sure, but they are not a substitute for handling the pack the way it will actually be handled.
One more thing that matters in real use: the starter point needs to make sense under rushed conditions. A warehouse associate should be able to identify the opening direction quickly, and a customer should not need instructions to get started. If the tear line looks decorative instead of functional, the design has probably drifted too far toward appearance and not far enough toward usability.
Key Factors That Affect Performance, Cost, and Pricing
Pricing usually starts with film thickness, because material volume is often the first cost lever. A 2.5 mil mailer is generally cheaper than a 4 mil mailer, but the lower price can be misleading if the thinner pack stretches, scuffs, or splits under load. A useful guide to perforated tear mailers connects cost to performance, because the cheapest mailer on the quote sheet is not always the cheapest mailer in use. If it tears early or gets damaged in transit, the real cost shows up later in replacements, freight, and time.
Print coverage matters too. A one-color logo on a natural or white film is usually easier on budget than full-coverage custom graphics on both sides. Matte films can feel more premium, glossy films often pop harder under store lighting, and specialty finishes can move the unit price up again. If the order is around 5,000 pieces, it is common to see broad ranges like $0.09-$0.15 per unit for simpler stock-style perforated mailers, $0.14-$0.24 for custom printed versions, and $0.18-$0.35 for heavier tear-and-reseal designs, depending on size, color count, and adhesive features. That range is exactly why a guide to perforated tear mailers should never promise a single price without specs. Those are directional figures, not a quote, and the final number can move with lead time, freight, and design changes.
Bag size changes the math as well. Oversized mailers waste film, take up more freight cube, and can let packed goods slide around inside the envelope. Undersized mailers can force the product to buckle or press against the tear line, which raises the risk of premature failure. A solid guide to perforated tear mailers usually recommends measuring the product in its final packed form, not just the bare item dimensions, because folded sleeves, hangtags, tissue, and inserts all consume space. I have seen otherwise well-planned programs stumble simply because someone measured the garment flat and forgot the folded stack was a good bit thicker.
Adhesive selection is another cost driver with a real effect on user experience. A stronger closure helps the package stay shut under carrier handling, but if the flap is too aggressive, the customer may struggle to open the package cleanly. A second adhesive strip for returns adds cost, yet it can save service time later. That tradeoff sits at the center of the guide to perforated tear mailers: spend where the feature reduces friction, not where it only looks impressive in a mockup.
| Option | Typical Build | Approx. Unit Cost at 5,000+ | Best Fit |
|---|---|---|---|
| Standard perforated poly mailer | 2.5-3 mil film, single tear line, standard flap | $0.09-$0.15 | Basic apparel, soft goods, low-touch fulfillment |
| Custom printed perforated mailer | 3 mil film, logo print, cleaner opening path | $0.14-$0.24 | Branded ecommerce, subscription kits, promotional orders |
| Tear-and-reseal premium mailer | 3.5-4 mil film, dual adhesive, return-ready design | $0.18-$0.35 | Returns-heavy programs, premium unboxing, repeat-use needs |
Those numbers only matter if they are tied to shipping reality. A mailer that lowers damage rates by even a small percentage can beat a cheaper alternative very quickly, especially when a damaged order triggers replacement freight, service time, and customer dissatisfaction. A practical guide to perforated tear mailers treats pricing as part of a larger total-cost picture, not a one-line quote. That is the part buyers sometimes skip because it feels slower, but it usually saves money in the long run.
For buyers tracking sustainability claims, material choice matters here too. If the pack includes paper inserts or outer cartons alongside the mailer, FSC-certified paper components can help the overall package story stay cleaner. For a broader look at reduction and recovery, the EPA recycling guidance is a useful reference point. Those references do not replace testing, but they do help shape a more grounded guide to perforated tear mailers.
There is a practical caveat worth saying plainly: recycling acceptance depends on local infrastructure and the package mix, so no packaging spec should pretend the answer is universal. If a supplier makes a broad environmental claim without explaining resin type, film structure, or local recovery limits, that should raise a red flag.
Step-by-Step: Choosing the Right Perforated Tear Mailer
Start with the product, not the packaging catalog. Measure the item in its final packed state, including any folded garments, rigid inserts, sample cards, or protective sleeves. Then note the weight, the sharpest edge, and whether the contents need a premium feel or a plain shipping profile. A strong guide to perforated tear mailers begins with those physical realities because the package has to fit the product as it actually ships, not as it looks in a product photo.
Next, map the route the parcel will take. Will it move through a high-speed pack line, a small warehouse, lockers, cross-dock handling, or direct-to-consumer delivery? Each step changes the stress on the seal and tear path. A package that is easy to handle on a bench can still fail after being stacked under heavier parcels or compressed in a tote. This is where the guide to perforated tear mailers becomes operational, not just descriptive.
- Define the load: record weight, dimensions, and any sharp or rigid components.
- Choose the film: match thickness to the amount of handling and the product profile.
- Select the opening style: single tear strip, edge tear, or tear-and-reseal format.
- Confirm closure needs: standard adhesive, stronger seal, or return-ready second strip.
- Request samples: test real products at actual packing speed before approving the run.
That sequence keeps the decision practical. If the product is soft and lightweight, a 2.5 or 3 mil mailer may be enough. If the contents include belts, hardware, boxed sets, or sharp corners, moving up in film strength is usually money well spent. The right guide to perforated tear mailers also reminds buyers that print quality and film color matter less than function if the package splits during sortation.
Closures deserve careful attention. Some teams need tamper-evident behavior, while others care more about easy opening and returns. A return-ready build with a second adhesive strip can make reverse logistics easier, but only if the strip is placed where the customer can find it without guesswork. The best guide to perforated tear mailers advice here is simple: ask what the customer must do, then design the opening so the answer is obvious.
Finally, test the sample in a real packing environment. Have an operator seal it, label it, and handle it the way a live order would be handled. Watch for wrinkles near the perforation, air pockets, weak corners, or tears that start off-center. Those tiny signs are often the difference between a package that works once and a package that works by the thousand. For teams comparing formats, that is the most valuable part of the guide to perforated tear mailers process. The best sample is not the one that looks nicest on a desk; it is the one that still behaves after a full shift.
Process and Timeline for Sampling, Approval, and Production
Most custom runs follow the same broad path: define the size, review artwork, approve the sample, schedule production, and ship the finished order. The timeline can be short if specs are clean, or it can stretch if the perforation, print, or adhesive configuration needs extra proofing. A realistic guide to perforated tear mailers sets expectations early so nobody is surprised when a custom feature adds a few business days. That calm planning matters more than people think, because rushed approvals tend to produce sloppy packs.
Sample timing matters more than many buyers expect. A digital proof shows artwork placement, but it cannot show how the perforation feels in the hand or how the adhesive behaves under pressure. Physical samples answer the important questions: does the tear start cleanly, does the flap close flat, and does the package hold shape after filling? That is exactly why a guide to perforated tear mailers should encourage hands-on sample review before production locks in.
In many custom programs, sample approval can take 3-7 business days, while production often lands around 12-18 business days after final approval, depending on order size, print complexity, and factory schedule. Higher quantities and more elaborate graphics usually push lead time longer. If a buyer needs a launch date or seasonal inventory window, a good guide to perforated tear mailers will say to build in buffer time instead of gambling on a tight schedule. A delayed pack is annoying; a delayed launch can throw off an entire quarter.
Minimum order quantities also affect planning. Some suppliers will accommodate smaller trial runs, but custom printing generally becomes more efficient at larger volumes, often in the 3,000-5,000 piece range or higher. That does not mean smaller teams are out of luck; it means the economics change quickly as setup work gets divided across fewer units. A practical guide to perforated tear mailers helps buyers compare the cost of a short run against the value of a more confident launch. For some brands, the safer path is a small pilot; for others, the real risk is waiting too long to commit.
Speed improves when artwork is final, die lines are confirmed, and print colors are settled before the job moves into production. The fastest projects usually have one decision maker, one approved specification sheet, and one round of sample feedback. In other words, the cleanest guide to perforated tear mailers process is the one where every question gets answered before the press starts running. That is not glamorous, but it keeps everyone from chasing changes after the line is already moving.
One small but useful habit is to document the sample conditions. Record the fill weight, the operator who packed it, the closure pressure, and the opening result. That makes later comparisons much easier if you are choosing between two similar constructions. In a professional guide to perforated tear mailers, those notes are worth more than a vague impression like "felt okay." They help you spot whether a good result was real or just lucky.
Common Mistakes When Specifying Perforated Tear Mailers
The most common mistake is choosing a tear line that is too weak or too strong. Too weak, and the package can split during handling, especially if the mailer is rubbed against cartons or compressed in a tote. Too strong, and the customer has to fight the opening, which defeats the whole point. A good guide to perforated tear mailers keeps returning to that balance because it is the heart of the design.
Another mistake is ignoring the product's actual shape. A mailer can look right on paper and still fail once the item is folded, sleeved, and labeled. The issue is often not the width, but how the product sits inside the pouch and presses against the opening path. Buyers who skip that step usually learn the hard way. A careful guide to perforated tear mailers always pushes back against paper-only sizing decisions. You really do need the packed sample in hand before you sign off.
Overbranding can create trouble too. Heavy print coverage, specialty finishes, custom colors, and premium adhesive upgrades can push the pack beyond budget without adding much functional value. That does not mean branding should be stripped away; it means the design should support the opening behavior instead of covering it up. The strongest guide to perforated tear mailers recommendation is to keep the graphic layout clean enough that the tear strip remains obvious. If the eye has to hunt for the tab, the pack is already harder to use than it should be.
Testing failure is another expensive habit. A sample may look perfect when opened slowly by one person at a table, then fail after repeated folding, courier compression, or hurried pack-out. Those are not edge cases; they are normal shipping conditions. Good teams use real samples, real weight, and real operators. That practical discipline belongs in every guide to perforated tear mailers workflow.
Return workflows get overlooked until late in the project, which is a mistake. If the package needs to be reused, the closure and perforation structure should support that from the beginning. Adding a return strip after the fact usually means compromise. The most useful guide to perforated tear mailers rule here is to decide on outbound and return behavior before the artwork is finalized. Otherwise you end up with a pack that does one job fairly well and the other job awkwardly.
It also helps to think about the package as part of a broader system. If the pack line is rushed, if the products are oddly shaped, or if the carrier lane is rough, even a well-made mailer can show wear sooner than expected. That is not a failure of the concept; it is a reminder that every guide to perforated tear mailers decision sits inside a real operations environment. Packaging never lives in a vacuum, and the spec should reflect that.
Expert Tips for Better Openings, Seals, and Shelf Appeal
Start by testing the tear direction from the customer's hand, not from the designer's desk. Does the tab sit where the fingers naturally reach? Does the opening motion feel intuitive on the first pull? Small ergonomic details matter because they shape the customer's experience in a few seconds. A professional guide to perforated tear mailers should always respect how people actually grab a package. If the opening point is buried under graphics or tucked too close to a seam, the first use gets clumsy.
Match film strength to the product edge profile. Soft apparel is forgiving, but rigid boxes, metal accessories, or items with hard corners can stress the film near the perforation. If the load has sharp edges, moving to a slightly stronger film or widening the seal zone is often the safer choice. That kind of decision is exactly why the guide to perforated tear mailers is useful to operations people, not just marketers. The label may say "mailer," but the failure mode is usually mechanical.
Keep the graphic design readable. A cluttered print can make the tear strip harder to spot and can make a premium mailer feel busy instead of intentional. Clean branding with good contrast often looks more expensive than a pack covered in artwork. A refined guide to perforated tear mailers approach is usually less about adding effects and more about clearing visual noise. Sometimes the best choice is simply giving the tear line a little breathing room.
Operators should document pack-out steps so every shift seals and places the mailer the same way. That means consistent flap pressure, the same fill orientation, and the same placement of inserts or cards. Uniform pack-out gives the tear line a better chance of performing the same way every time. That consistency is a practical backbone of any guide to perforated tear mailers program that wants repeatable results. If one shift folds the top one way and another shift does it another way, the test data starts to drift.
I like side-by-side sample comparison under the same fill weight. Put two or three candidates on the table, pack the same product into each one, and open them the same way. The difference in feel can be subtle at first, but those subtle differences turn into real outcomes at scale. That is one of the quiet truths behind a strong guide to perforated tear mailers: a few minutes of disciplined comparison can reveal what a spec sheet leaves out. In the pack room, the sample that feels merely "fine" often ends up being the one that causes the fewest headaches later.
- Check the tab placement: the customer should find the opening point fast.
- Watch the seal line: the flap should close flat without curling.
- Inspect the tear path: it should run cleanly and not wander.
- Review the fill load: compare empty, half-full, and fully packed samples.
One more field tip from the practical side: look at the mailer under warehouse lighting, not just under studio lighting. Gloss, contrast, and tab visibility can read very differently once fluorescent or LED fixtures hit the film. That little check can save a lot of guessing.
Next Steps: Put the Guide to Perforated Tear Mailers to Work
Start by measuring the exact product size, packed weight, and fold pattern, then write those numbers down in one place. That simple step trims a lot of wasted quoting and helps suppliers recommend the right structure faster. A practical guide to perforated tear mailers begins with good measurements because the package has to fit the real load, not the rough estimate.
Build a comparison sheet with thickness, closure type, perforation style, print coverage, and estimated unit cost. If returns matter, add a column for second-strip or reseal capability. If premium presentation matters, add a column for matte, gloss, or custom print treatment. This is where the guide to perforated tear mailers becomes a buying tool instead of just reading material. Once the options sit side by side, tradeoffs get much easier to see.
Then request samples and run a short packing trial with the actual team that will use the mailer. Include shipping labels, inserts, and the products themselves. Watch how the tear opens, how the adhesive holds, and how the package behaves after handling. A final guide to perforated tear mailers check should always include the people who will touch the pack every day, because they are the ones who notice whether the design saves time or creates friction. The folks on the line usually spot problems before anyone else does.
Also decide what the package needs to do beyond shipping. Does it need to support returns? Does it need to feel premium on arrival? Does it need to reuse cleanly? Those answers shape the right film, the right perforation, and the right closure choice. The last step in any guide to perforated tear mailers is making sure the budget and timeline match the experience you want the customer to have. If those three things do not line up, the spec needs another pass.
If you are still narrowing options, compare the mailer against other formats in the Custom Packaging Products lineup and check how it stacks up beside the rest of your shipping program. That broader look usually makes the final decision easier, because the best choice is the one that balances function, cost, and customer experience. Used well, a guide to perforated tear mailers becomes more than a buying reference; it becomes a practical checklist for building cleaner openings, better returns, and a more polished shipping experience. The takeaway is simple: measure the product in its packed state, test real samples under real handling, and choose the tear structure that protects both the shipment and the person opening it.
What are perforated tear mailers used for?
They are used for shipping flexible products that benefit from easier opening, cleaner presentation, and less risk of damage from knives or scissors. In a practical guide to perforated tear mailers, the Best Use Cases are apparel, soft goods, accessories, and ecommerce orders that may be returned or reused. They can also be helpful for kits and promo packs where the opening experience matters almost as much as the item inside.
How do perforated tear mailers affect pricing?
Pricing is shaped by film thickness, bag size, print coverage, adhesive upgrades, and the complexity of the perforation or tear-strip design. A useful guide to perforated tear mailers will also point out that a higher unit cost can still make sense if the mailer reduces damage, packing time, or customer frustration. In other words, the cheapest quote is not always the cheapest outcome.
How long does production usually take for custom perforated tear mailers?
Timeline depends on artwork approval, sample review, tooling needs, and order size, so custom jobs usually take longer than stock mailers. Fast approvals and clear specs are the biggest ways to shorten the process, and that is one of the first things any solid guide to perforated tear mailers should tell a buyer. As a planning rule, it is smart to leave buffer time for proofing and freight.
What thickness should I choose for perforated tear mailers?
Choose thickness based on product weight, sharp edges, and how much handling the package will face in transit. Heavier or more abrasive products usually need a stronger film to protect the perforation and the seal, which is why a good guide to perforated tear mailers always starts with the contents first. If you are on the fence, sample both thicknesses and test them with the real packed load.
Can perforated tear mailers be used for returns?
Yes, especially when the mailer includes a second adhesive strip or a tear-and-reseal structure. Return-ready designs make the package more convenient for customers and can reduce friction in reverse logistics, which is one of the strongest practical reasons to follow a guide to perforated tear mailers before placing an order. The return path should be planned from the start, not added as an afterthought.


