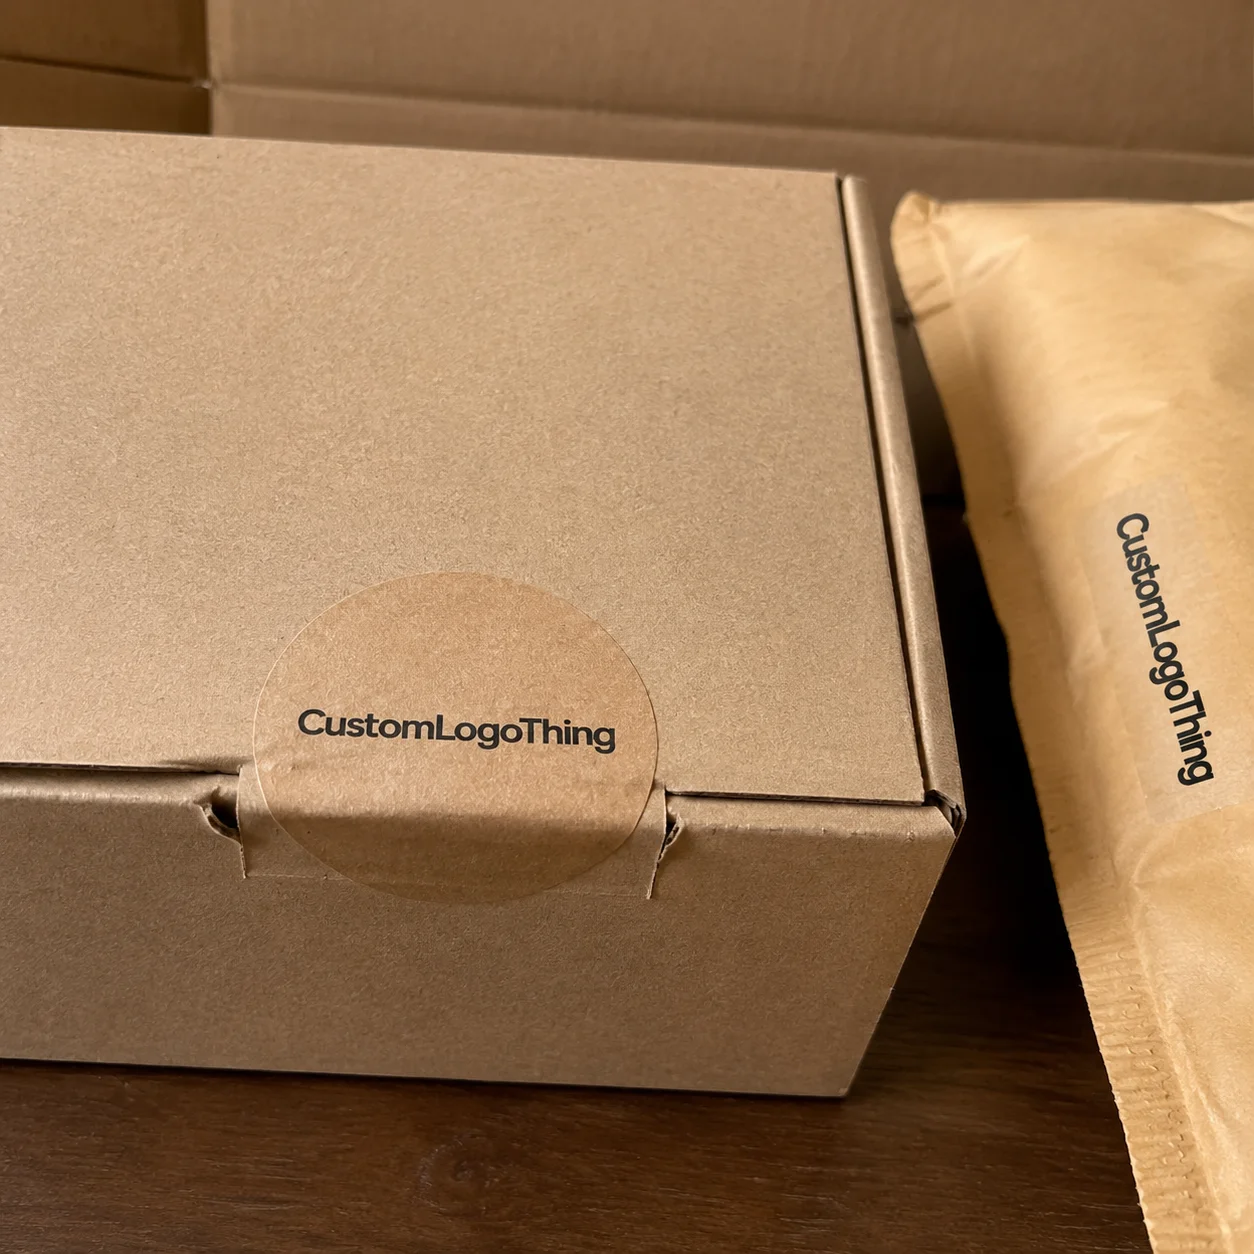
Buyer Fit Snapshot
| Best fit | Box Styles for Products projects where brand print, material claims, artwork control, MOQ, and repeat-order consistency need to be specified before quoting. |
|---|---|
| Quote inputs | Share finished size, material target, print colors, finish, packing count, annual reorder estimate, ship-to region, and any compliance wording. |
| Proofing check | Approve dieline scale, logo placement, barcode or warning zones, color tolerance, closure strength, and carton packing before bulk production. |
| Main risk | Vague material claims, crowded artwork, missing packing details, or unclear freight terms can make a low unit price expensive after revisions. |
Fast answer: Box Styles for Products: Board, Finish, Dieline, and Unit Cost should be specified like a repeatable production item. The safest quote records material, print method, finish, artwork proof, packing count, and reorder notes in one written spec.
Production checks before approval
Compare the actual filled-product size with the drawing, then confirm tolerance on folds, seals, hang holes, label areas, and retail display edges. Reserve space for logos, QR codes, warning copy, and material claims before decorative graphics fill the panel.
Quote comparison points
Review material grade, print process, finish, sampling route, tooling charges, carton quantity, and freight assumptions side by side. A quote is only useful when the supplier can repeat the same color, closure quality, and packing count on the next order.
If you’re trying to figure out how to Choose Box Styles for products, here’s the blunt version: the wrong box will cost you money in damage, freight, labor, and customer disappointment. I’ve seen a $14 candle end up looking like a $4 clearance item because the box style was wrong, and I’ve also seen a $38 serum set survive a rough 2,000-mile ship route because the structure was actually thought through. That’s why how to choose box styles for products is not a design question first. It’s a business decision with board thickness, closure strength, and assembly labor attached to it. In one Shenzhen project, a packaging change from a 300gsm tuck box to a 32 ECT mailer raised the unit cost by $0.19, but damage claims dropped from 4.6% to 0.7% within two months. That’s a trade I’ll take every time.
I’ve spent enough time on factory floors in Shenzhen, Dongguan, and Ho Chi Minh City to know this: structure matters. I’ve sat through supplier meetings where someone tried to “make it premium” by adding three extra layers of nonsense to a box that was shipping a 180g skincare jar. A box can protect, present, stack, Ship, and Sell. Or it can do none of those things and still cost you $0.28 more per unit than it should have. That’s the expensive version of “pretty,” and I’ve seen it from Guangzhou to Mexico City.
In my experience, how to choose box styles for products comes down to four things: product behavior, sales channel, brand message, and budget reality. The rest is details. Important details, sure. But still details. If your SKU is a 95mm-wide glass bottle shipping from Ningbo to Chicago, the structure decision is already half made before anyone starts talking about foil or spot UV.
What Box Styles Actually Do for Your Product
Most people get box style wrong because they treat it like a finish choice. It isn’t. It decides whether a product arrives intact, whether it looks premium on a shelf, and whether your warehouse team hates you by Friday. I’m only half joking. A box style can add 6 to 14 seconds of pack time per unit, and if you’re doing 8,000 units a month in a facility outside Atlanta or Shenzhen, that time adds up fast.
Mailer boxes, tuck end boxes, rigid boxes, sleeve boxes, folding cartons, and Corrugated Shipping Boxes each solve different problems. A mailer box is built for shipping and decent presentation, usually in 1.5mm to 3mm E-flute or B-flute corrugated board. A tuck end box is usually lighter and easier to print, which makes it a strong fit for cosmetics, supplements, and smaller retail items, especially on 300gsm to 400gsm SBS or C1S artboard. A rigid box is the heavy hitter for gifting and luxury presentation, but it costs more because 1.5mm to 2.5mm chipboard and hand assembly are not cheap. A sleeve box adds brand theater. A folding carton keeps things efficient for shelf-ready goods. A corrugated shipping box is the practical one that says, “I care about the item surviving, not impressing a design award judge.”
I remember one client in Los Angeles who insisted their glass diffuser should ship in a lightweight folding carton because the mockup looked clean. We tested it with a 3-foot drop on the corner and the base blew out. The fix was a 32 ECT corrugated mailer with an internal insert and a tighter cavity. That moved the unit cost from $0.46 to $0.71, but damage claims dropped hard. Over a 5,000-unit run, that meant roughly $1,250 less in replacements. That’s a good trade. Cheaper-looking packaging that fails is not cheaper.
The relationship between structure and customer experience is bigger than people think. A box affects protection, presentation, unboxing, shelf impact, and storage efficiency. It also affects how many units fit on a pallet, how much void fill you need, and whether your team can fold 500 of them without losing their minds. A carton that saves 4mm in width can add 180 more units per pallet in some warehouse layouts. If you’re serious about how to choose box styles for products, you need to think beyond artwork and into pallet counts, carton cube, and carrier surcharges.
Box style is not just a design choice. It changes assembly labor, board usage, retail readiness, and shipping performance. A box that saves 8 seconds in folding time can Matter More Than a prettier finish if you’re packing 10,000 units a month. That’s the unglamorous truth. And packaging is full of those. I’ve watched a folding carton design get rejected in Suzhou because the bottom lock needed two extra motions, which turned a 15-second pack into a 24-second pack. Multiply that by 12,000 units and suddenly everyone cares.
“The prettiest box in the room is useless if the product arrives broken.” That was a line I said during a supplier review in Dongguan after a batch of poorly sized inserts cost the client two weeks of replacements. Nobody argued with that one. The replacement order was 3,600 units, and the factory had to rework the die line twice before we got it right.
So when people ask how to choose box styles for products, I ask a different question: what job does this package need to do first? Protect the item? Sell it on a shelf? Survive parcel carriers? Support a subscription unboxing? The answer decides the style, not the other way around. If the product is a 220g cream jar heading through FedEx Ground from Dallas to Denver, that answer is not the same as a 30g lip balm sitting on a retail shelf in Berlin.
How Box Styles Work in Real Packaging Production
To understand how to choose box styles for products, you need to understand how packaging actually gets made. The process starts with a dieline. That’s the flat template showing folds, cuts, glue areas, and panels. Then comes material choice: SBS paperboard, CCNB, kraft, E-flute corrugated, B-flute corrugated, or rigid chipboard. After that, printing happens, followed by finishing like matte varnish, soft-touch lamination, foil, embossing, spot UV, or aqueous coating. Then the sheet gets die-cut, folded, glued, inspected, and packed for fulfillment. On a standard offset line in Dongguan, a folding carton job might move through printing, die-cutting, and gluing in 3 to 5 days before final packing.

That sounds neat on paper. In real production, it’s usually a little messier. Machine setup matters. Sheet size matters. Glue flap size matters. Even the direction of the grain can matter if the box has a tight structural fold. I once saw a luxury sleeve box design get rejected because the closing tab sat too close to the grain direction on a 400gsm board, and the fold cracked during testing. The designer blamed the factory. The factory blamed the designer. I blamed everyone equally and moved the spec to a better board. We switched to 350gsm C1S artboard with a 1.5mm chipboard wrap for the final version, and the crack issue disappeared in the next sample run.
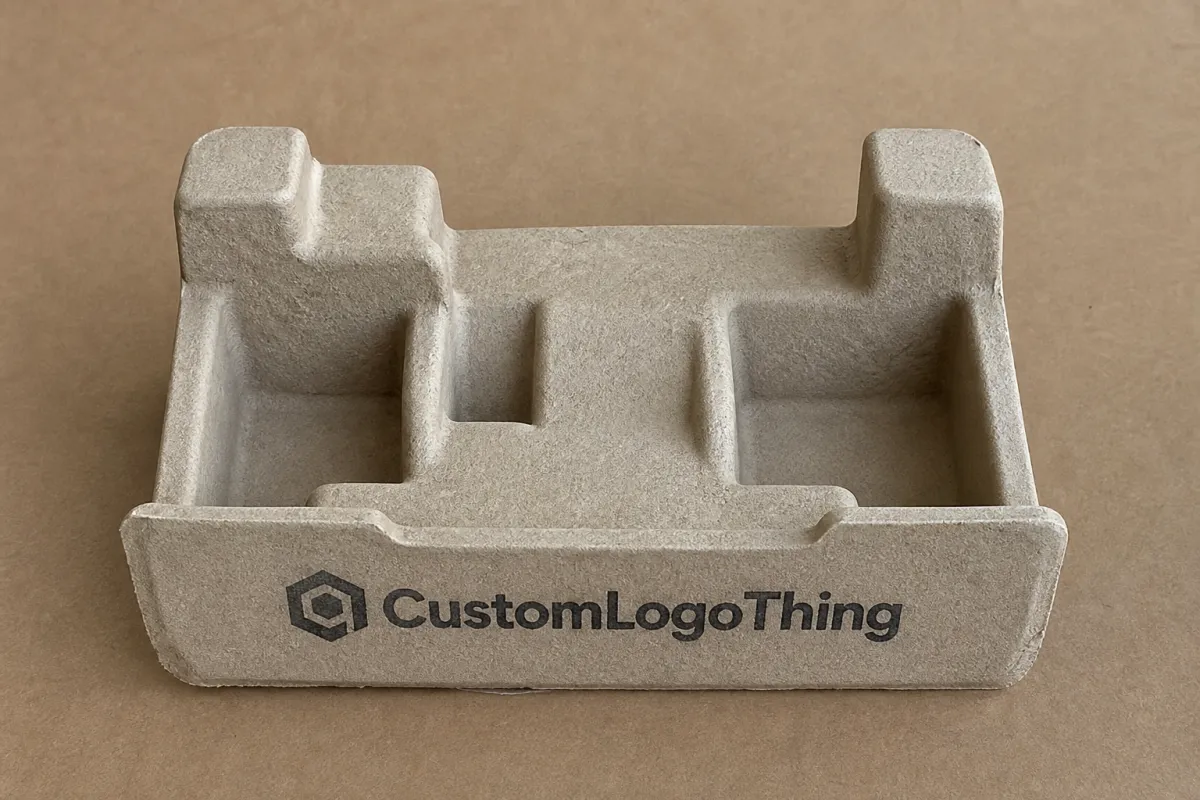
Structural engineering changes how a box performs. Tabs, locks, inserts, partitions, flaps, and reinforcement points all play a role. If you’re choosing how to choose box styles for products, don’t ignore what’s inside the structure. A candle box with a 20mm paperboard insert behaves very differently from the same box without one. A two-bottle serum set often needs a partition or molded pulp tray. A hoodie can get away with a simpler mailer structure, but a subscription kit with five separate pieces needs internal organization or it turns into a cardboard junk drawer. A molded pulp insert in Hangzhou can cost $0.12 to $0.24 per unit at 10,000 pieces, while a custom paperboard insert might run $0.05 to $0.14 depending on complexity.
Here’s how I break it down in plain English:
- Mailer boxes are great when you need shipping strength and decent presentation, usually with 32 ECT or 44 ECT corrugated board.
- Tuck end boxes work well for light to medium retail products with controlled dimensions, often on 300gsm to 350gsm SBS.
- Rigid boxes deliver premium feel and high crush resistance, but they’re more expensive and slower to assemble, especially with 1.8mm grayboard and wrapped art paper.
- Sleeve boxes are useful when you want a reveal moment or layered branding, especially for gift sets and candles.
- Folding cartons are efficient for mass retail and printed shelf display, particularly in pharmacies and beauty aisles.
- Corrugated shipping boxes are for protection first, with branding added as needed through flexo or digital print.
I’ve also seen factories optimize around sheet yield in ways clients never notice until they get the invoice. A custom box size that fits the board sheet better can lower waste by 6% to 12%. That sounds tiny until you’re buying 20,000 units. Then it becomes real money. Usually $400 to $1,200 real, depending on board and run size. On one job in Foshan, we changed the width by 4mm and saved 7.8% on sheet usage, which cut the quote by $620 across a 15,000-unit order. That is why how to choose box styles for products should include production fit, not just product fit.
One practical example: a candle in a straight-sided glass jar needs a snug cavity and good corner support. A serum bottle wants a higher-end feel, maybe a folding carton with a custom insert. A hoodie can ship in a corrugated mailer or a polybag inside a mailer, depending on brand positioning. A subscription kit often benefits from a mailer with compartments because customer experience matters and chaos is not a luxury aesthetic, despite what some brands think. If your set includes 4 items, 1 leaflet, and 2 sample sachets, you need compartment planning before the first sample is cut.
For structural and testing standards, I often point clients to ISTA for transit testing and EPA for broader packaging and materials-related guidance. If sustainability claims are part of your brief, FSC certification matters too. These aren’t decorative acronyms. They help keep decisions grounded. A proper ISTA 3A drop and vibration test can reveal problems in 2 days that would otherwise show up as damaged returns in week 6.
Key Factors That Decide the Right Box Style
If you want a useful method for how to choose box styles for products, start with the product itself. Weight, fragility, size, and shape are the first filters. A 120g skincare jar does not need the same structure as a 2.2 lb glass fragrance set. A squishy textile item behaves differently from a rigid device with sharp corners. That sounds obvious, but I’ve watched people approve a box style based on a render and then act surprised when the product slides around inside like a marble in a shoe box. A 92mm diameter jar and a 104mm cavity are not “close enough” if the jar travels 1,400 miles in a carton.
Sales channel changes everything. E-commerce packaging needs crush resistance, drop survival, and enough stability to survive sorting hubs and porch handling. Retail packaging needs shelf impact, barcode visibility, and a clean face panel that doesn’t get swallowed by legal copy. Subscription packaging needs a strong opening moment and repeatable packing efficiency. If you sell through multiple channels, how to choose box styles for products gets more complicated because one structure may not serve every use case well. A box that works for Amazon FBA out of Ontario, California may not be ideal for a boutique shelf in Milan or a pharmacy endcap in Tokyo.
Branding goals matter too. Luxury, eco-friendly, playful, minimal, technical, or heritage-inspired brands all suggest different box families. A matte black rigid box with gold foil makes sense for a premium fragrance gift set. A natural kraft mailer with one-color print feels right for an eco-minded accessory brand. A clean white folding carton with a sharp die line can suit supplements or beauty. The point is not to force the brand into one box style. The point is to match the packaging structure to the brand promise. A luxury box wrapped in 157gsm art paper with foil stamping in Milan is a different animal from a kraft mailer made in Shenzhen with soy-based ink.
Material choice is where a lot of buyers get tripped up. Paperboard is lighter and cheaper, but it has limits. Corrugated board gives more protection. Rigid chipboard feels premium and holds shape, but it costs more and usually needs more manual handling. Recycled content can help with sustainability goals, though print appearance and board performance need to be checked carefully. And yes, plastic-free matters for many clients now, but it only works if the product still ships intact. Noble intentions do not protect glass. A 350gsm C1S artboard may look excellent on a shelf, but if the product is 480g and fragile, the structure still needs an outer layer or insert.
Budget and volume are decisive. A rigid box can cost several dollars more per unit than a folding carton depending on size, inserts, and finishing. I’ve quoted a custom rigid set at $2.40/unit for 3,000 pieces with a satin wrap and insert, while a comparable folding carton came in around $0.42/unit. That gap is not a rounding error. For a low-margin product, choosing the wrong style can wipe out profit faster than a bad ad spend month. On a 25,000-unit run, that difference becomes $49,500 before freight even enters the chat.
Regulatory and product-specific requirements can force the choice too. Supplements often need ingredient panels and warning labels. Cosmetics may need batch codes or local compliance text. Liquor packaging may need tamper evidence. Some categories need child-resistant functionality. If you ignore these, you’ll pay for redesigns later. Those are never fun. They also are never cheap. In California, a vape accessory package may need warning language and age-related icons on specific panels, which means your structure has to leave room for the copy instead of hiding it under a flap.
Here’s the honest version of how to choose box styles for products: the “best” box is the one that survives the route, supports the brand, fits the budget, and doesn’t slow the line down. That’s not glamorous. It’s just correct. If the pack-out team in Monterrey can assemble 600 units an hour instead of 420, that matters more than a slightly prettier lid.
How to Choose Box Styles for Products Step by Step
When I walk clients through how to choose box styles for products, I use a simple process. It reduces bad guesses. It also stops the endless “can we make it feel more premium?” meeting loop, which somehow never ends until the invoice arrives. The process usually saves one to two revision rounds, and that alone can shave 5 to 8 business days off the schedule.
- Measure the product and everything that goes with it. Include inserts, wrapping, accessories, and protective materials. If the item is 82mm wide with a 6mm cable or a dust cover, measure that too. Don’t eyeball it. Eyeballing is how you get returns. I want the full packed dimensions, not the vanity dimensions. If the jar is 84mm tall and the lid adds 7mm, write down 91mm.
- Decide the main use case. Is this retail display, direct shipping, gifting, or subscription fulfillment? A box style that works beautifully for a gift may be a pain in warehouse packing. If the product ships from Shenzhen to Amazon’s Kentucky fulfillment center, that channel matters more than the mood board.
- Shortlist 2 to 3 structures. Don’t jump to one favorite. Compare options such as tuck end, mailer, rigid, sleeve, or corrugated. This is where how to choose box styles for products becomes practical instead of emotional. I usually ask for one low-cost option, one mid-range option, and one “nice but expensive” option so the tradeoffs are visible.
- Request dielines and structural samples. I always want a physical sample when the product is fragile or the opening needs to feel precise. A PDF can lie. Cardboard tells the truth. A sample from a Guangzhou factory can reveal a 2mm cavity issue that nobody catches on screen.
- Compare quotes on identical specs. Same board, same finish, same quantity, same insert count. If one supplier quotes a “rigid box” and another quotes a “luxury box,” that’s not a comparison. That’s supplier poetry. Ask for 350gsm C1S, 1.5mm grayboard, matte lamination, and a 4-color CMYK print spec if that’s what you actually want.
- Approve a pre-production proof. Check print color, fold lines, glue areas, barcode placement, and finishing details before full production. Fixing a problem after 10,000 units are printed is an expensive hobby. A pre-production proof usually adds 2 to 4 business days, and that delay is still cheaper than scrapping a bad run.
I had a client with a serum duo that wanted a drawer-style rigid box because it looked premium in mockups. After sampling, we discovered the drawer friction was too high for the product’s weight. Opening force felt annoying, not elegant. We switched to a book-style magnetic closure with an insert and saved them from a design that looked beautiful but behaved badly. That project moved from “pretty concept” to “actually sellable.” Big difference. The final box ran at $1.86 per unit for 5,000 pieces out of Dongguan, with a 14-business-day production window after proof approval.
Another time, a hoodie brand wanted a plain corrugated mailer because it was cost-effective. Smart instinct. But the first sample had a lid that flexed too much under stack pressure. We adjusted the flute spec and changed the locking tabs. The box cost went up by $0.09, and the pallet performance improved enough to avoid crush during freight. That is the kind of small engineering change that quietly saves money. The revised sample used B-flute instead of E-flute, which was the right call for that 1.4 kg packed weight.
Step by step, how to choose box styles for products becomes much easier when you treat packaging like a testable system, not a mood board. I’ve seen people spend three weeks debating foil colors while never confirming whether the product even fits the cavity. That’s backwards. The cavity matters first. The foil can wait until the box actually closes.
Box Style Costs, Pricing Traps, and Timeline Reality
Cost is where fantasy meets freight. If you want to master how to choose box styles for products, you need to understand where the money goes. Board type matters. Box complexity matters. Print coverage matters. Coatings, inserts, special finishes, and labor all matter. Even the folding sequence matters if the line is manual or semi-automatic. A manually assembled rigid box in Suzhou can take 45 to 90 seconds per unit depending on the closure and insert design.
A simple tuck box may be cheap to print, but if it needs extra inserts or hand assembly, the labor can eat the savings. A mailer box might seem pricier on paper, but if it eliminates dunnage and reduces returns, the total landed cost can be better. That’s why quoting a box by “unit price” alone is often misleading. I’ve seen a $0.31 folding carton become a $0.53 landed solution once the insert, inner bag, and labor were added. The quote looked cheap. The invoice laughed at everyone.
One pricing trap I see constantly: comparing a plain brown mailer quote to a fully printed Custom Rigid Box quote and calling the rigid box “too expensive.” Well, yes. That’s like comparing a sedan to a leather-trimmed SUV with custom interior lighting and asking why the prices don’t match. Different structures, different labor, different materials. Apples and oranges. Or in packaging terms, apples and molded inserts. A 4-color printed mailer from Dongguan and a hand-wrapped rigid box from Shenzhen are not cousins. They are different budget species.
For realistic numbers, a Custom Folding Carton might run around $0.18 to $0.55 per unit at medium quantities depending on size, board, and print. A corrugated mailer can be $0.42 to $1.10 depending on print and structure. A rigid box can land anywhere from $1.50 to $4.50 or more if you add magnets, foil, ribbon pulls, or custom inserts. Those are broad ranges, not promises. But they’re closer to reality than the “we can make it for pennies” nonsense some people hear from the internet. For example, 5,000 folding cartons in Shenzhen on 350gsm C1S with matte aqueous coating and one-color inside print often land around $0.24 to $0.33 each.
Timeline matters too. Sampling often takes 5 to 10 business days. Revisions can add another week if the structure changes. Tooling and dieline refinement might take a few more days. Production can be 12 to 20 business days, depending on complexity and queue. Freight adds its own clock. If you’re air shipping, you can save time and burn cash. If you’re ocean shipping, you save cash and burn patience. Pick your pain. If proof approval happens on a Tuesday, a standard folding carton job in a Guangdong factory typically lands 12 to 15 business days later, assuming no art corrections and no Chinese holiday interruptions.
Fast turnaround usually costs more because factories pay for priority scheduling, overtime, and often more expensive shipping. Complex structures or special finishes can slow approvals because the dieline has to be locked early. If you keep changing the box style after samples are built, the schedule stretches. That’s not the factory being difficult. That’s physics, production planning, and human indecision colliding. Add 3mm to the cavity after sampling and you may be looking at a new die cut and another 4 to 7 business days.
I’ve negotiated with suppliers where a $0.06 difference in board grade turned into a $4,800 annual swing across one SKU. That kind of thing matters if you’re scaling. A change from 350gsm C1S to 400gsm C1S, or from single-wall corrugated to a stronger flute, can improve performance, but it has to be justified. Otherwise you’re just paying extra because thicker sounds better in a meeting. In one Shanghai quote, moving from 300gsm to 350gsm added $0.03 per unit on 20,000 units, which was worth it because the product stopped buckling in transit.
For brands serious about how to choose box styles for products, I usually recommend quoting at least three suppliers using the same spec sheet. Same dimensions. Same material. Same finish. Same insert count. If the quotes still vary by 20% or more, ask why. Often the answer is machine setup, labor assumptions, or board sourcing. Sometimes it’s margin. Suppliers are not charities. Shocking, I know. A supplier in Ningbo may quote lower on board but higher on labor, while a plant in Dongguan may do the opposite. Compare the full landed figure, not the headline number.
Common Mistakes People Make When Picking Box Styles
The biggest mistake in how to choose box styles for products is picking the prettiest box instead of the one That Actually Works. I’ve watched brands fall in love with magnetic closures, soft-touch wraps, and fancy inserts, only to realize their $19 item can’t support a $3.80 package. That math is not cute. It’s fatal to margins. At 1,000 units, that’s an extra $3,800 before freight. At 10,000 units, it becomes a budget problem with a logo on it.
Another common mistake: ignoring shipping conditions. If your product rides with parcel carriers, gets sorted through hubs, and lands on porches, it needs more than nice graphics. I once saw fragile skincare arrive crushed because the buyer used a folding carton with no outer protection. The team blamed the carrier. The carrier blamed the packaging. Both were right. The box simply wasn’t built for the route. A 28mm glass bottle going through a 3,200-mile route from California to New Jersey needs different protection than a shelf display in a boutique in Paris.
Over-specifying materials is another classic. Not every product needs rigid board, foil stamping, embossing, and a custom insert. Sometimes a clean kraft mailer with one-color print performs better and keeps the product profitable. Fancy is fun. Profitable is better. I’ve seen a shampoo brand in Bangkok spend $1.70 per unit on packaging for a product with a $12 retail price. That ratio was never going to end well.
Closure strength gets ignored too. A box that pops open during transit or handling is a bad box, even if the print looks gorgeous. Tabs need to hold. Magnetic closures need proper alignment. Sleeve tension has to be tested. I’ve seen boxes slide open inside outer cartons because the designer made the sleeve too loose by 3mm. That tiny gap cost the client time and rework. A sleeve that’s 1.5mm too loose might look fine on screen and fail immediately in a warehouse in Dallas or Rotterdam.
Skipping structural samples is a mistake I still see all the time. A mockup on a screen does not tell you if the lid feels weak or if the insert is too tight. A PDF is not a tactile object. It doesn’t fight back, and that’s the problem. Test the real thing. I want a folded sample, a drop test, and a real product inside before anybody signs off. If the sample can’t survive a 36-inch drop onto concrete, it’s not ready for production.
Using a box that’s too large also causes trouble. You need more void fill. Freight costs climb. The product rattles around. The unboxing experience feels sloppy. That’s a triple loss. If you’re serious about how to choose box styles for products, size efficiency has to be part of the decision. A box that is 10mm too wide on each side can waste 0.5 cubic feet per 24-unit shipper, and that hits freight pricing faster than people expect.
Honestly, the worst mistakes come from decision-making by aesthetics alone. A box has to work in transit, in the warehouse, and in the customer’s hands. Not just look good in a render. That’s the whole job. I’ve learned that the hard way on factory visits in Shenzhen, where the nicest-looking box on the table was the one that failed compression testing by 18%.
Expert Tips to Narrow Down the Best Box Style Fast
If you need to make how to choose box styles for products faster and less painful, use a decision matrix. I’ve done this with clients who had six packaging options and no patience. Score each style from 1 to 5 on protection, branding, cost, sustainability, and assembly speed. Suddenly the “favorite” box usually isn’t the best one. Funny how numbers do that. On one project, the team’s favorite rigid style scored a 22 out of 25 on looks but only a 9 out of 25 on pack speed and shipping durability. The matrix killed the fantasy in 10 minutes.
Prioritize the customer moment that matters most. If the product lives and dies on shelf impact, focus on face panel design, structure, and visibility. If the product ships direct-to-consumer, protect the transit lane first. If the product is a gift, the opening sequence and interior reveal matter more. You cannot optimize every variable equally. Packaging is about tradeoffs. A gift set sold in Paris at €48 can justify a premium drawer box; a mass-market supplement sold in Texas for $24 probably cannot.
Ask suppliers for real material recommendations instead of guessing from photos on a website. I’ve seen people select a box style because the image looked “premium,” then discover the board stock was too flimsy for their item. A supplier who has run thousands of boxes can tell you if 300gsm, 350gsm, or 400gsm makes sense. Or if E-flute corrugated is the better choice for your channel. That advice is worth more than another hour in a mood board. In Guangzhou, a good supplier can tell you within minutes whether your product needs a 32 ECT mailer or a 44 ECT shipper.
Test with actual units and real shipping lanes. One sample on a desk means almost nothing. Send it through the same carrier, same warehouse process, same drop risk, same stacking pattern. If the product is delicate, use ISTA-based thinking. If the product has sustainability targets, look at FSC-certified paper options. If you want less landfill pain, check recycled board content and coatings carefully. A claim only counts if the box can still do its job. I like to run a 10-unit pilot through the actual warehouse in New Jersey or Leeds before I say anything is ready.
Always keep one backup box style in mind. Maybe the rigid box is gorgeous, but the lead time is too long. Maybe the mailer box is practical, but the customer moment feels too plain. A backup structure gives you flexibility when price, timing, or supplier capacity shifts. And it will shift. Usually at the worst possible moment, because packaging enjoys drama. If the main supplier in Shenzhen misses a slot, having a simpler tuck carton ready from a Ningbo plant can save the launch.
For brands working through how to choose box styles for products across multiple SKUs, I often recommend standardizing a few core structures and changing the artwork or inserts instead of reinventing every package from scratch. That lowers tooling complexity, reduces quote chaos, and often improves consistency across the line. You can still create variety without making production miserable. For example, one 12-SKU skincare line used the same 350gsm C1S base carton in three sizes and saved about $2,100 on tooling and setup across the first run.
In one negotiation, I got a supplier to shave $0.11 per unit just by changing the locking tab geometry and nesting layout on the sheet. Same visual design. Better production yield. That’s the kind of win that feels small until you multiply it across 30,000 units. Then it becomes the difference between a decent margin and a headache. On a 30,000-piece run, that was $3,300 saved without changing the printed look at all.
The shortcut is this: choose for the product first, the channel second, the brand third, and the budget last. If you do it in reverse, you usually pay for it later. That’s not theory. That’s the invoice. I’ve seen that invoice in Shanghai, in Shenzhen, and in one very awkward meeting in Mexico City.
How to Choose Box Styles for Products: decision table
| Decision area | Best fit | What to verify | Risk if skipped |
|---|---|---|---|
| Board or flute choice | Product protection, stacking strength, and shipping distance | Caliper/flute, crush resistance, and sample fit | Weak structure or oversized cartons increase damage and freight cost |
| Print and finish | Retail presentation, unboxing, and shelf recognition | Color proof, coating, scuff resistance, and logo placement | A good dieline can still look cheap if finish and color drift |
| Packing method | Hand packing, ecommerce fulfillment, or retail-ready cartons | Inner count, master carton, label position, and warehouse handling | Good packaging slows operations if pack-out is ignored |
FAQ
How do I choose box styles for products that ship and display?
Pick a style that balances crush protection with shelf presentation. For many brands, that means a sturdy folding carton inside a mailer, or a retail-ready corrugated box with strong graphics and barcode placement. The structure should support both branding and durability without forcing a compromise that hurts the product. If the item ships from Shenzhen and displays in Chicago, test both the shipping lane and the shelf face before signing off.
What box style is best for fragile products?
Use a box style with enough rigidity for the product weight, then add inserts, partitions, or molded protection if needed. For heavier fragile items, rigid boxes or corrugated boxes usually outperform lightweight paperboard. If the item has glass, ceramic, or multiple loose components, I’d treat protection as the first priority and presentation as the second. A 1.8mm chipboard rigid box with a molded pulp insert can be the right answer for a 420g candle set, while a 32 ECT mailer may work for lighter glassware.
How much does custom box style affect packaging cost?
Quite a bit. Complex structures, thicker materials, inserts, and premium finishes all raise unit cost. Small design changes can also increase setup and assembly costs, so compare identical specs before approving any quote. I’ve seen a “small tweak” add $0.14 per unit and nobody notices until the PO is signed. On a 7,500-piece order, that’s an extra $1,050, which is real money whether the CFO likes it or not.
How long does it take to finalize a custom box style?
Expect time for measuring, dieline review, sampling, revisions, and production approval before full manufacturing starts. Simple styles move faster, while highly customized or rigid structures usually take longer because they need more testing and more careful assembly checks. A straightforward folding carton can move from proof approval to production in 12 to 15 business days, while a Rigid Gift Box with inserts may take 18 to 25 business days depending on the factory in Guangdong or Zhejiang.
What is the biggest mistake when choosing a box style?
The biggest mistake is choosing based on looks alone and ignoring product protection, freight, and assembly realities. A box has to work in transit, in the warehouse, and in the customer’s hands. If it only looks good in a rendering, it is not finished. I’ve seen a beautiful mockup fail on a 90cm conveyor drop test in less than 30 seconds. Pretty didn’t save it.
If you remember one thing from how to choose box styles for products, make it this: the right box is the one that fits the product, survives the route, supports the brand, and stays inside the margin. I’ve seen too many teams chase a beautiful structure that failed in production and cost them weeks. Start with measurements, test with samples, compare quotes on the same spec, and choose the style that actually performs. That’s how to choose box styles for products without turning packaging into an expensive guessing game. And yes, I’d still rather argue about 3mm of cavity space than pay for a 10,000-unit reprint in Dongguan.