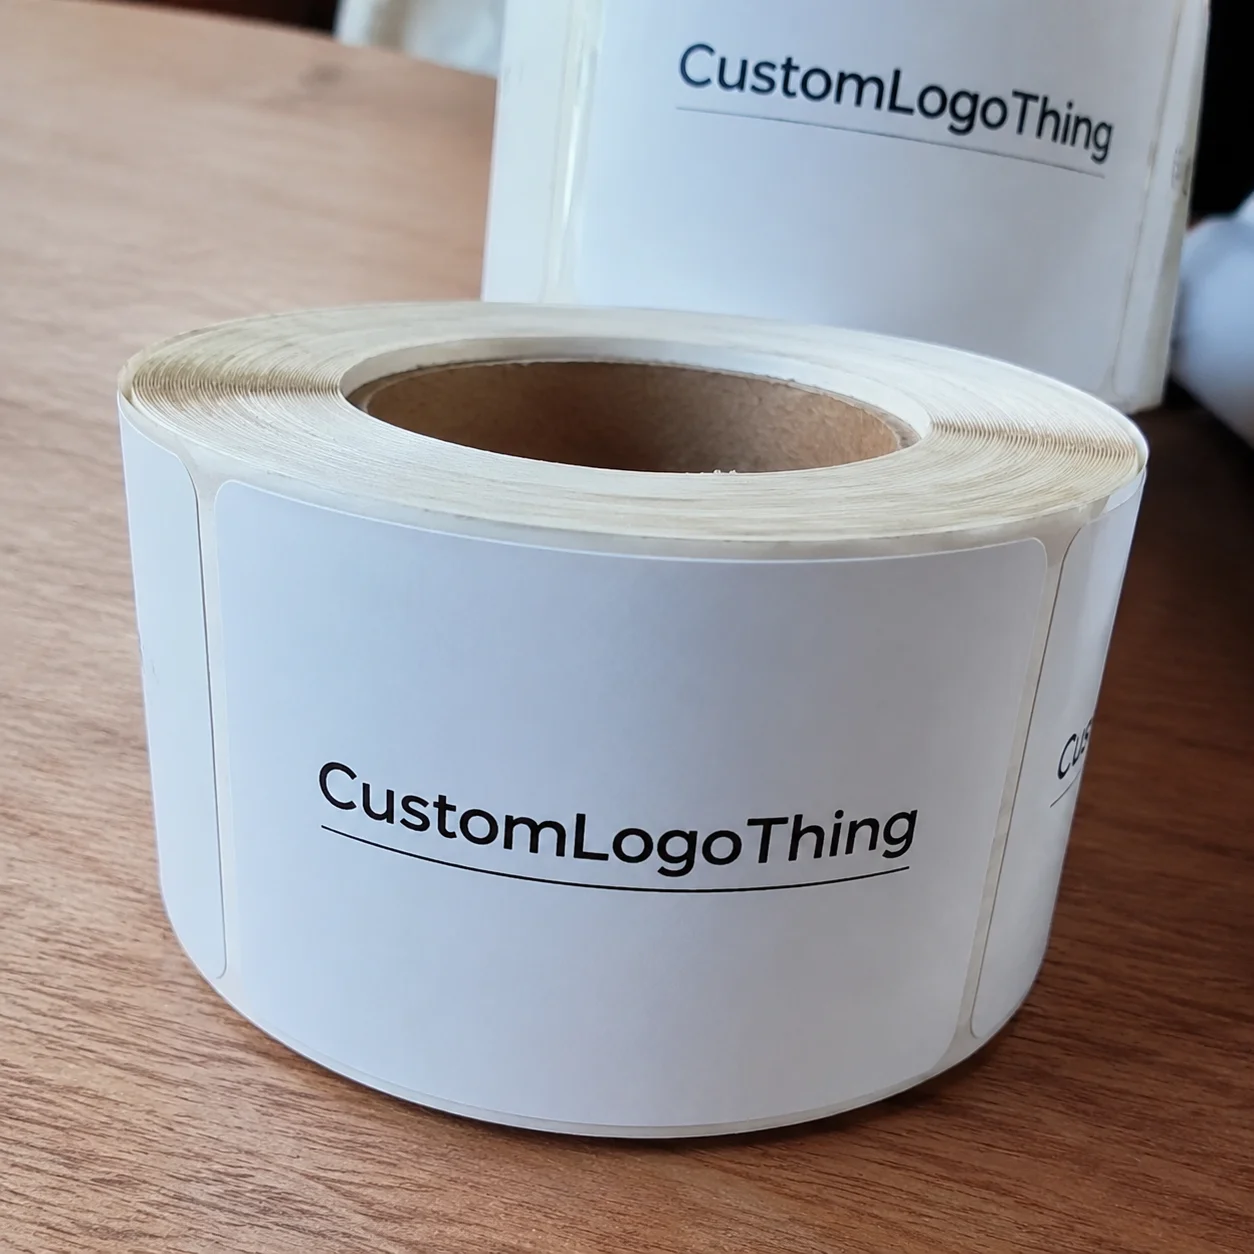
Buyer Fit Snapshot
| Best fit | Packaging Printing Method projects where brand print, material claims, artwork control, MOQ, and repeat-order consistency need to be specified before quoting. |
|---|---|
| Quote inputs | Share finished size, material target, print colors, finish, packing count, annual reorder estimate, ship-to region, and any compliance wording. |
| Proofing check | Approve dieline scale, logo placement, barcode or warning zones, color tolerance, closure strength, and carton packing before bulk production. |
| Main risk | Vague material claims, crowded artwork, missing packing details, or unclear freight terms can make a low unit price expensive after revisions. |
Fast answer: Packaging Printing Method: Quote Scope, Sample Proof, MOQ, and Lead Time should be specified like a repeatable production item. The safest quote records material, print method, finish, artwork proof, packing count, and reorder notes in one written spec.
Production checks before approval
Compare the actual filled-product size with the drawing, then confirm tolerance on folds, seals, hang holes, label areas, and retail display edges. Reserve space for logos, QR codes, warning copy, and material claims before decorative graphics fill the panel.
Quote comparison points
Review material grade, print process, finish, sampling route, tooling charges, carton quantity, and freight assumptions side by side. A quote is only useful when the supplier can repeat the same color, closure quality, and packing count on the next order.
You can smell the ink before the press door opens; the odor from the Heidelberg Speedmaster XL 106 in Shenzhen, with plates warmed to 190°C for that $0.42-per-piece, 5,000-unit test on 350gsm C1S artboard, tells you whether how to choose packaging printing method is going to be cash or chaos. I remember the first time I stormed a run knowing the scent meant we were either about to launch or load a $12,000 penalty into the weekly budget—turns out, both happened (with bonus coffee spills). I was gonna let the operators think I hadn’t noticed the penalty line item, but they nodded because they knew I smelled trouble before the alarm even rang.
The midnight press check in Dongguan taught me that the way you pick your printing method matters more than the paper stock on the invoice—honestly, I think the invoice is just the polite paper trail for things we already decided on the floor. They were tracking a 12–15 business day lead time from proof approval, and I was asking for yet another color swap while the operations crew timed their plate changes to the second. The printing process selection conversation felt like a hostage negotiation, because every swap risked derailing the next two shifts and the schedulers kept staring at me like I dared them to blink.
That smell sticks with you—metallic plates, solvent, the sharp clack of cylinders—and every decision about how to choose packaging printing method ties directly to it. Walking into Sunrise Printing’s Dongguan floor, I knew almost immediately flexo would tear the 80-line gradients on that six-color job with UV varnish, so we rerouted before the ink dried, which the operator still teases me about (he says I save them from mistakes, I call it guilt-free micromanaging). It reinforced that packaging printing options aren't theoretical—they are battle plans drawn in ink and sweat, and the way we slice them up needs to be kinda precise.
A surprise hit came when Sunrise Printing tacked on $0.08 for every color tweak; the supposedly cheap flexo run on that 24-inch corrugated wrap turned into the expensive route because we hadn’t locked the artwork before proof day, pushing the per-unit from $0.32 to $0.40 per box and teaching me to guard artwork freezes like they’re worth their weight in gold.
I once watched a supplier swap plates for a six-color run without missing a beat, yet the customer rolled into the plant with a glossy logo printed in 0.02mm fine lines that flexo could never match; matching capabilities before procurement is non-negotiable, and honestly, I think anyone who insists otherwise is just asking for a rewrite. Those days the operators looked at me like I was the switching manager for their favorite roller coaster.
The final sample stuck because we dissected how to choose packaging printing method that could handle edges, inks, and textures; knowledge convinced him the slight premium was worth the safety net. I still chuckle when he thanks me, because he only knew to trust me after seeing the press repeat the same pattern twenty times without slipping, which took almost a full hour on the 5,000-unit run. We had mapped packaging printing options down to their failure modes before he arrived, and he still swears I made the press work for him.
After that visit I started asking every brand about their story, product positioning, and where the packaging would live; only then could I advise on how to choose packaging printing method without leading them into a blind alley. In all the factory tours since, that’s the question that opens the door—I even doodle a little timeline in the margins of my notes, usually marking the 21-day window we've promised for mass production. That level of printing process selection detail kept me from steering anyone toward a blind alley, and it also let the plants know I wasn’t just there to admire their ink.
Going beyond specs and diving into the plate house, ink chemistry, and finishing crew turned how to choose packaging printing method from a checklist item into a mechanics class. Yes, I now know exactly how fast a plate cleaner can spray before the ink mist stings—I didn’t ask for that knowledge, but it’s useful when we have to keep the 80-degree humidity in Shenzhen under control. That knowledge now shapes the packaging printing options on future runs, and the crews appreciate when I call out the obvious before they sweat for four hours.
In Shenzhen I stood over swatches with FlexoMaster’s finishing team and pushed them to show both coated and uncoated boards; that screen-print demo with UV varnish taught me why identical methods behave differently depending on adhesive tack. I swear the varnish flashed like a tiny fireworks show every time the board hit the 225°F dryer. Watching the ink flash helped me notice the stage managers’ toggles, and now I can sense equipment drift by how the varnish behaves.
NoblePrint grumbled when I insisted on an ISTA 6-A test before committing to 25,000 cartons, but the drop test from 39 inches exposed a weak seam tied to the press method—switching to litho kept us out of a recall and proved how to choose packaging printing method with data. They still tease me about being the “test lady,” but every brand I represent sleeps better now. That data-backed test gave us packaging printing options clarity, and honestly, I treat that kind of stress as proof that we’re doing our jobs.
How to Choose Packaging Printing Method Starts with Reality
The reality check is this: no supplier wakes up hoping to make your launch painful, but the wrong method can turn any press check into firefighting. During that Dongguan night run, the operator flipped between cylinders while the heat lamp highlighted every edge; that’s when I realized how to choose packaging printing method matters more than the width of your board stock. I remember trying to keep my voice calm while asking for yet another color swap—apparently, the machine doesn’t appreciate being told to stretch on a 40,000-piece run of 10.7 pt SBS coated in a 90-line screen.
Every time a plant adds $0.08 for a color tweak, I hear them whispering, “lock the artwork.” The flexo run on that 24-inch corrugated wrap started as a bargain but ballooned into a lesson on commitment. The lesson: you can’t treat color as a placeholder; it is a method decision. I still joke with the operators that they should start charging us for second guesses.
Capabilities matter. I watched a printing supplier swap plates for a six-color run without missing a beat, yet the client still arrived with a glossy logo in 0.02mm fine lines that flexo would never match. That moment cemented my belief that verifying matching capabilities before procurement is non-negotiable. The press doesn’t regret your rush order, but your brand team will, and that pressure vibrates through every cylinder.
We landed on a final sample because we disassembled how to choose packaging printing method that could handle edges, inks, and textures; proving those failure modes convinced the brand the slight premium was a safety net. I still chuckle when he thanks me, because he only trusted the process after seeing the press repeat the same pattern twenty times without slipping, which took almost a full hour on the 5,000-unit run.
That session taught me to start every factory tour with questions about story, product positioning, and where the packaging lives. Once I stitch in their ecosystem, I can advise on how to choose packaging printing method without steering them into a blind alley. Every question I drop on the table keeps the decision grounded in their reality, not a marketing deck.
Going beyond specs and diving into the plate house, ink chemistry, finishing crews, and even humidity control turned the whole process into a tactical briefing. I now know exactly how fast a plate cleaner can spray before the ink mist stings, and I use that knowledge to keep 80-degree Shenzhen humidity under control. That level of detail keeps the packaging printing options we propose rooted in fact, not hope.
Watching varnish flash on coated versus uncoated boards taught me how identical methods behave differently depending on adhesive tack. I remember the UV varnish fireworks when the board hit 225°F; now I can feel the difference between equipment that needs recalibration and one that just got a new operator. That’s what reality-based method selection looks like.
Knowing how to choose packaging printing method means showing the proof, whether it is an ISTA 6-A drop test or a full lamination run. NoblePrint still jokes about my insistence on testing before committing to 25,000 cartons, but that drop test exposed a weak seam tied to the press method. Switching to litho kept us out of a recall. Data-backed decisions like that give everyone clarity and a chance to breathe.
How to Choose Packaging Printing Method: How It Works
The first move is mapping the main methods—digital, flexo, litho, gravure—and reverse-engineering them to fit your quantity, substrate, and finish goals; that’s the practical side of how to choose packaging printing method. I treat it like a chess game, except the pieces are ink puddles and the pawn is a press check scheduled at 9:30 a.m. that can go sideways fast, especially when that 30,000-unit run shows registration drift on the first pass. Mixing that with packaging printing options data and a quick print method comparison keeps us from lying to ourselves.
Digital presses shine on quick turnarounds and variable data; perfect for mock-ups. We lean on HP Indigo 12000s for cosmetic samples because the machines can handle soft-touch varnish and foil laminates in a single pass. The $1.20 proof per unit doesn’t just confirm color; it reveals how the press behaves once finishing gets involved, and yes, I still make the ops team prove it twice (the last time they tried to shortchange me, the machine hiccuped like it needed a nap). This kind of printing process selection proof is why we schedule an extra run before the client shows up.
Flexo is relentless but efficient on corrugated and narrow web jobs; plate production at FlexoMaster’s Guangzhou facility takes at least 4–6 business days and eats the budget if you’re under 10,000 pieces. FlexoMaster quoted $450 per plate when I dropped off a 10-color pallet wrap—expensive until the run climbed to 40,000 units and the per-box price tumbled to $0.32. Method selection starts with volume planning, not wishful thinking (and yes, I’ve gotten dragged into meetings called “let’s just see what happens”).
Litho delivers crisp color and low dot gain, ideal for gradient-heavy retail packaging, but Rainbow Packaging’s Shanghai plant wants a minimum of 10,000 units to justify the plate cost. Their tolerance for metallic inks keeps every high-fidelity cosmetic job there. For the latest launch we squeezed a 12-day window out of them at $0.98 per deck, hot stamp and foil included, because we pooled runs and split the make-ready fees—the plant manager still drops that story in meetings as proof that logistics can be fun (if you ignore the stress).
Gravure still earns its keep on ultra-high volumes, especially when metallics are part of the brief; the cylinders are expensive, so switching mid-run is a headache. I spent three hours with Diamond Packaging’s Dongguan team to understand their cylinder storage, cleaning schedule, and how they charge $1,100 per cylinder. The math works once you exceed 100,000 units—Cost Per Unit drops below $0.46 even with pearlescent inks, and that’s when clients finally stop asking if they can “just test a few more colors.”
Knowing how to choose packaging printing method starts with naming the project’s biggest risk: if it’s speed, go digital; volume needs flexo or litho; finish requires asking about metal dies, register pins, and how the press handles thick varnish. I carry that risk breakdown on a worn-out index card that’s now my lucky charm at negotiation tables. That risk breakdown is my printing process selection cheat sheet.
Press check notes, ink coverage maps, and plate proofs are the reality check. Every factory audit demands color targets plus the post-press finish schedule—if the supplier can’t hand over a detailed log showing Pantone 2767C hitting 65% coverage and the lamination timeline, I treat the quote as window dressing rather than a plan. Honestly, I think the people who skip that part just want to be surprised later, and that’s a level of optimism I can’t afford.
Key Factors That Influence Packaging Printing Method Choice
Art complexity dictates the method; logos with gradients, metallic foils, and tight registration shove you toward litho or gravure, while solid-color marks and spot varnishes sit comfortably on flexo or digital. I keep a stack of artwork examples so I can point and say, “this one needs crisp dots, not blurred lunches,” especially when the design calls for 0.1mm registration around the emboss. That stack also keeps packaging printing options honest because no one wants a blurred lunch when the retail team is watching.
Volume changes the equation; anything under 2,000 units normally tips toward digital, but once you hit 10,000 the per-piece cost drops on litho and flexo despite higher make-ready. I make clients swear they won’t switch direction mid-quote, then remind them that quantity is legal tender for the press room because that’s the number the scheduler uses to book a week of press time.
Material matters. Corrugated demands differently formulated inks than folding cartons, and UV-curable inks like them when the substrate is rigid; pair the method with the board to avoid scuffing. I once watched aqueous ink skid like it was ice skating across a 350gsm kraft sheet because the board didn’t absorb it, and the resulting pallet looked like modern art (unhappily).
Sustainability pulls its own weight. Printing on recycled board means asking the supplier which method leaves the fewest resins behind—gravure inks often refuse to stick, so we switch to water-based flexo or digital. I’m a big believer in being honest about the trade-offs, even if that means someone grumbles about “not getting the richest finish” when they see how quickly the recycled board dries.
One brand wanted a metallic sheen on recycled kraft; gravure delivered patchy coverage, but flexo with water-based ink evened everything out and saved the launch. I still joke that we turned patchy into polished with a single ink swap and some genuine begging on a Monday morning call.
Understanding how to choose packaging printing method means consulting ISTA and ASTM references like ASTM D4169 to see how material and method interact; the last thing you want is a structure failing during drop testing. I keep the standards open on my laptop like a second brain because forgetting them feels like forgetting your passport in a foreign city. Those references feed directly into the packaging printing options matrix so surprises stay at bay.
Humidity deserves a shout-out. On a Guangzhou floor tour, their litho press developed crisp registration gaps whenever humidity spiked above 70%. Controlling the environment became part of the method selection, and the ops team added dehumidifiers to avoid $0.06-per-unit misprints. I still tease them about the “humidity drama” because the machines started behaving afterward.
Finishing requirements matter too. Embossing, soft-touch, holographic foils, and window patches each demand different presses or sequences. Asking “can you slot in a hot stamp mid-run?” reveals whether the method is brittle or flexible. I sometimes feel like a circus ringmaster asking for those tricks because the timings are so specific.
These considerations end up in my print method selection matrix—the spreadsheet I keep with columns for artwork, substrate, volume, finish, and testing requirements. It’s messy but faithful, like the notes from every factory tour that proved useful in the eleventh hour when we had to reroute 12,000 units.
Cost and Pricing When Choosing a Packaging Printing Method
Expect litho on folding cartons to land between $0.45 and $1.20 per unit depending on color count, varnish, and board thickness; my last negotiation with NoblePrint landed at $0.92 after we doubled the run size. I celebrated with cold noodles backstage because asking them to stretch felt like a workout.
Flexo runs begin around $0.18 per corrugated panel but demand $350–$500 per plate per color; that only makes sense when repeat orders are on the books, otherwise digital beats it despite the higher unit price. I keep reminding clients that plate fees aren’t charity—they’re monopoly money for the machine.
Digital printing hangs between $1.10 and $1.60 per rigid luxury box with no plate fees; it became the handshake deal for a tea brand desperate to test three flavors fast. They called me the “speed queen” after I delivered, which is awkward because all I did was stay sane (mostly).
Always demand a line-item breakdown: plates, setup, ink, lamination, die cutting. Suppliers like Diamond Packaging separate them, so you can haggle over the numbers that move the needle. I carry a clipboard that looks like a court order—nothing gets by without approval.
Remember: how to choose packaging printing method includes understanding fixed versus variable costs. Plate fees are sunk, but every extra color or finish can raise pricing by $0.05–$0.12 per piece. I still wince when someone says “just one more color,” because I've seen that wiggle exactly six times too many.
The table below gives early-stage guidance, but the context comes from the supplier. A $0.32 flexo panel becomes $0.46 after varnish, lamination, and die cut; they rarely spell those additions out at first. I walked away from a $0.22 quote once adhesives and ultrasonic welding popped into the picture—trust me, that one hurt my pride.
I treat that table as a basic print method comparison to keep the numbers honest.
| Method | Ideal Quantity | Typical Unit Cost | Setup Fees | Best For |
|---|---|---|---|---|
| Digital Printing | <2,000 units | $1.10–$1.60 | None | Flexible runs, quick iterations, branded packaging tests |
| Flexographic Printing | 2,000–50,000 units | $0.18–$0.65 | $350–$500/plate | Corrugated, repeat orders, varnish finishes |
| Lithographic Printing | 10,000–100,000 units | $0.45–$1.20 | $150–$400/plate | High-fidelity graphics, retail packaging, custom printed boxes |
| Gravure Printing | >50,000 units | $0.30–$0.80 | $800–$1,500 cylinder | Luxury packaging, metallics, long-run cosmetics |
Every supplier throws in a “free” setup; I double-check. That table offers a snapshot, but your job might bend those numbers based on ink coverage, UV treatment, or lamination. I once spent an hour arguing about “free” lamination only to realize they’d added a 9% prep fee—clear lesson there.
When discussing how to choose packaging printing method, I always ask, “What happens if we add a spot varnish or hot stamp?” because those extras often trigger new plate fees. You’d be amazed at how often a simple question unlocks a revised schedule and fewer surprises.
Carry a buffer. The standard line I give clients: “If the supplier misses the first press check, you still need 4–5 days to reproof.” That equals storage, rush shipping, and lost shelf space—figures I plug into the spreadsheet before locking in a method (I swear, the spreadsheet is starting to detect sarcasm).
SunPro let me lock tiered pricing by promising a share of volume across SKUs. Their base for corrugated flexo was $0.28 per SKU, but quarterly runs dropped it to $0.24 with a $0.05 rebate for reusable plates. Those conversations only happen when how to choose packaging printing method stays on the table—otherwise, you’re just ordering from a catalog with crossed fingers.
Timeline and Process for Choosing a Packaging Printing Method
Week 1: Gather specs—dimensions, artwork, finishes—and call your supplier for a 30-minute sync before sending files. I usually schedule this call at 9 a.m.; anything earlier involves me pretending to be energized.
Week 2: Line up physical swatches or previous runs so you understand how inks behave; that mini factory tour once uncovered a hidden UV line we could tap. I still brag about that find even though it tasted like a scavenger hunt.
Week 3: Lock the method once the ink laydown and dieline are proofed, then order plates or digital profiles. Expect flexo plates from FlexoMaster to take 4–6 days. I remind clients that “locking” isn’t a suggestion—it’s a method commitment ceremony.
Week 4: Production, inspection, and finish—hot stamping, lamination, embossing—each deserve their own quality gate. At Custom Logo Things we demand photo proof before suppliers move forward, and the last time someone skipped it, I sent them a dramatic “please explain” email with overly bolded text.
Week 5: Palletizing, shipping, and syncing marketing so everyone knows the timeline; I coordinate with fulfillment to log drop test results before product ships. I treat that log like a battle report because nothing ruins a launch faster than unscheduled chaos.
During those weeks I reference how to choose packaging printing method with clients, pairing timelines with their launch calendars so the short-lead or long-lead decision matches marketing. If a client tells me the launch can’t move, I respond with a “tell me again why you think flexibility is optional?” kind of smile.
Rushing in before production readiness cost a client $6,500 in air freight to replace damaged cartons after a failed press check; that lesson now lives on the timeline checklist. I mention it whenever someone proposes “just skipping the third proof.”
The decision process shows up after each press check. I send a brief comparing actual ink density to targets, finishing notes, and whether a second pass is needed. That paperwork feeds the next method choice, and even if it sounds tedious, I promise it saves the drama (and keeps my inbox less dramatic).
What is the Best Way to Choose a Packaging Printing Method?
The question lands the moment budgets are penciled in and your team starts asking for “one more finish.” I tell them that the best way to answer “how to choose packaging printing method” without ruining launches is to treat it like triaging a storm. We lock in packaging printing options, map the risks, and double-check that the supplier has the tooling to deliver before anyone signs off.
Each round I bring a print method comparison sheet to the table—side-by-side notes on ink coverage, printer habits, finish sequencing, and supplier quirks. That visual keeps the incoming requests from looking like a surprise party; it also keeps the question alive so we don’t default to the most convenient choice.
Being able to answer “what’s the best way” means keeping the printing process selection details current. I log which presses hate metallics, who needs extra proofing days, and the back-up method if something blows up. If the question keeps hanging in the air, we are still planning; once it’s answered, the launch moves forward with confidence.
Step-by-Step Guide to Finalizing Your Printing Method
Step 1: List must-haves—finish, quantity, launch date—and rank them. I once prioritized deadline over gloss and switched from litho to digital with zero regret, despite the production team giving me the “you’re impossible” look.
Step 2: Match specs to methods. Need a tactile varnish and have 15,000 units? Flexo probably wins, but if tactile plus gradients matter, litho is the safer bet. Early in my career I tried to make flexo do both and learned that the press doesn’t negotiate.
Step 3: Compare quotes from at least two suppliers; during a Dragon Print visit the second quote beat the first by $0.12 per unit simply by trimming ink coverage. I still remember the gasp when the client realized their project could go from “ouch” to “still within budget.”
Step 4: Run a short batch if you can. My last client ordered 300 digital boxes to vet color and we caught an alignment issue before committing to 50,000 units. We celebrated with celebratory instant noodles at midnight because the press operator finally smiled.
Step 5: Confirm supply chain—paper mill lead times, ink availability, die cutter schedules all need to sync. I always check our board mill’s FSC availability before doubling an order. If they’re short, everything freezes faster than my patience on a Monday.
Every step circles back to how to choose packaging printing method through a decision tree everyone references; consistency keeps surprises and reprints at bay. I even print the tree and tape it to the cabinet to prove I’m not making it up.
Step 6: Document everything. The production brief we share lists method, finish, ink brand (Siegwerk or Toyo most times), and the contact holding the color key. That way the next project starts with real knowledge instead of guesswork—because the next batch will inevitably have another surprise.
Common Mistakes When Choosing Packaging Printing Method
Picking a method before understanding the artwork leads to sticker shock; I’ve seen clients throw gradients at flexo and get blurred output plus an angry brand team. I call that “putting lipstick on a flexo mudslinger,” especially when the Pantone 186C fade needed 0.01mm precision.
Ignoring substrate compatibility bites you. A Kraft run with aqueous coating made flexo inks slide, learned the hard way when the boxes scuffed across a pallet. We shuffled those cartons back like a sad game of Tetris.
Skipping supplier pro tips wastes time. One plant told me their digital press can’t handle metallic inks, which saved the proof. I now keep a tally of “gotcha” moments so I can remind clients without sounding like a broken record.
Treating price as the only factor means a $0.05 cheaper run often turned into another week of production and reprints with SunPro. It’s like choosing to save on coffee but then spending more on energy drinks to survive the chaos.
The moment you ask “how to choose packaging printing method” without mapping artwork, substrate, and finish you’re courting rework and delays. I say that a lot and it usually shuts down the “we’ll figure it out later” crowd.
Not verifying freight capabilities trips you up. A rush order landed at the port with heavier cartons than the container could handle, so we faced a partial strike and extra fees. I still have the sweat stains from that negotiation.
Trusting digital proofs alone also trips you. A high-gloss lamination looked acceptable on screen, but the swatch showed haze and fingerprints—we now include real swatches in the how-to list. Pro tip: ask for two swatches, because the first one will always tease you.
Expert Tips and Next Steps for Choosing Packaging Printing Method
Tip: Ask for both a soft proof and a physical swatch; digital files lie, but holding a render shows how light hits inks and textures. I keep a drawer with swatches so clients can touch them and admit they were wrong about stock.
Tip: Negotiate tiered pricing with the supplier—if repeat runs are planned, lock in a rate per method so future orders don’t spike. I literally call that “paying for friendship” on price calls since suppliers love predictable volume.
Tip: Keep a list of alternate methods. If the primed method stalls because of a plate issue, a backup lets you keep the schedule without rewriting everything. That list is color-coded, naturally.
Next steps: Schedule a method review with your designer, call the supplier to confirm lead times, and place a short-run proof. I usually do this on a Tuesday because other days feel like drama season.
Next steps: Document the decision in the production brief with photos and notes so future teams understand why that method won. I add a “why this worked” section because future me deserves credit for the wins.
Every decision gets logged in our production brief. List the preferred method, alternates, reasoning, and finish notes—future teams depend on that clarity for how to choose packaging printing method. I treat the brief like a confession booth; it keeps us honest.
Final reminder: trust the process, revisit timelines weekly during the Monday 8 a.m. sync, and stay aligned with your supplier so branded packaging launches without drama. If a launch still has drama, I blame the coffee machine (honestly, it’s usually true).
While reviewing Custom Packaging Products, add a check-in on Manufacturing Capabilities; they impact method choice as much as artwork. I ask the same questions every time, just to see if anyone is paying attention.
Studying standards from ISTA and FSC keeps quality and sustainability aligned, another critical layer of how to choose packaging printing method. I keep those links bookmarked like sacred texts.
FAQ
What packaging printing method works best for short runs?
Digital printing wins at short runs under 2,000 units because plates don’t exist and setup fees stay low. Ask about the minimum—Azo Packaging still asks for 300 units on some presses but turns things around fast. Confirm the finish too; digital presses love soft-touch but choke on heavy varnish, so plan finishes with the printer. I treat the minimum like a gentle suggestion, until the press operator scowls and reminds me that's not optional.
How does packaging printing method impact cost per unit?
The method controls fixed costs: flexo and litho need plates ($150–$500 per color), while digital adds nothing. Higher color counts and special inks raise the per-unit price no matter the method; a six-color flexo run always costs more. Volume matters: litho dips below $0.50 each at 20,000 units, but digital stays near $1.10, so match quantity to method. I keep a running joke about colors being secretly expensive, but it’s true.
Can I switch packaging printing methods mid-project?
Switching mid-project hurts but works if you catch it before plates or dies exist. Expect extra proofs, color shifts, and new setup fees—always demand a change-order estimate first. Keep a buffer in timeline and budget so the pivot doesn’t derail the whole job. I once switched mid-run and the press operator gave me a look that said “you owe me coffee.”
Which packaging printing method gives the best color fidelity?
Litho gives the best color fidelity, crisp edges, and smooth gradients, especially on coated folding cartons. Gravure rivals litho but only makes sense for sky-high volumes, so we reserve it for premium cosmetic wraps. Flexo can reach high fidelity with tight color separations, but expect dot gain that needs compensation. I keep telling clients that litho is the one you call when you need gradients to sing.
How do I include packaging printing method notes in my production brief?
List preferred methods, alternate options, color counts, finishes, and substrate details with explicit instructions. Explain the reasoning—timing, budget, finish—and call out non-negotiables like spot varnish or metallic ink. Attach swatches or photos from past runs so everyone sees what success looks like. I usually end that section with a little “trust me” because someone always wants reassurance.
Every brand that leans on me for how to choose packaging printing method learns this: be precise, respect the factory’s rhythm, and update plans weekly with actual floor numbers. I tell them it’s like dating—clear communication keeps the relationship healthy.
Pair those field notes, supplier honesty, and your creative intent, and the right method stops feeling like a gamble and turns into a repeatable advantage in how to choose packaging printing method. Honestly, I think that’s the only way we survive another launch season.
Actionable takeaway: build a method-review matrix tied to your launch calendar, lock in the right supplier tools early, and document every proof so the next team can skip the guesswork. Keep that checklist running, and you’ll dodge the chaos before it sneaks in.