A tiny sticker can make a plain jar, mailer, pouch, or thank-you card look finished without rebuilding the whole package. Cheap? Sometimes. Powerful? Often. That is why 2 inch round stickers custom orders keep appearing in branded packaging projects that need polish, speed, and a sane budget.
These stickers are circular labels or promotional pieces printed to a specific artwork file, adhesive, material, finish, and quantity. The 2 inch diameter sits in a useful middle zone: large enough for a logo, short phrase, simple QR code, batch mark, or product cue, but small enough for lids, bags, boxes, envelopes, sample packs, candle dust covers, bakery cartons, and event giveaways.
The shape looks uncomplicated. The buying decision is less so. A sticker used to seal tissue paper does not need the same adhesive as one sitting on a chilled glass bottle. A giveaway sticker handed out at a market does not need the same roll direction as a label feeding through an applicator. Those details decide whether the finished order feels like a small packaging upgrade or a box of expensive regrets.
Why 2 Inch Round Stickers Custom Orders Are So Popular
Most buyers are not chasing a technically perfect label at first. They are solving a practical problem: the package looks unfinished, the mailer needs a branded seal, the jar lid needs identification, or the launch needs something better than a blank box. A 2 inch round sticker is often the fastest fix.
There are several jobs hiding under the same circular format. Product labels usually need stronger material specs because they stay with the item through storage, handling, shipping, and sometimes moisture or refrigeration. Brand stickers are more about visual identity and package presentation. Packaging seals need dependable adhesive because their purpose is mechanical as much as decorative. Promotional stickers need to feel good in the hand, especially if they are going into event bags, retail inserts, or counter displays.
That distinction matters. A paper sticker on a dry bakery box may be perfectly reasonable. The same paper sticker on a cold bottle sweating in a cooler is a small tragedy preparing to peel. Material, finish, adhesive, artwork resolution, and quantity all affect cost and performance.
For packaging buyers, custom 2 inch round stickers offer room to test without committing to new printed bags, custom boxes, or full structural packaging changes. A brand can run 250 stickers for a seasonal promotion, 1,000 for a product launch, or 10,000 for a repeat SKU. The financial risk is smaller than changing primary packaging, and the production timeline is usually friendlier.
They also create consistency across messy real-world packaging systems. Many small brands use stock boxes, stock jars, plain mailers, and off-the-shelf pouches. Stickers can pull those pieces into the same visual family. Not magic. Just a low-cost branding layer that works surprisingly hard.
How Round Sticker Printing Works from Artwork to Finished Roll
The basic production flow is simple: artwork check, proof creation, material selection, printing, coating or lamination, die cutting, waste removal, winding or sheet cutting, packing, and shipping. Each step is boring until it goes wrong. Then it becomes everyone’s problem at 4:45 p.m. on a Friday.
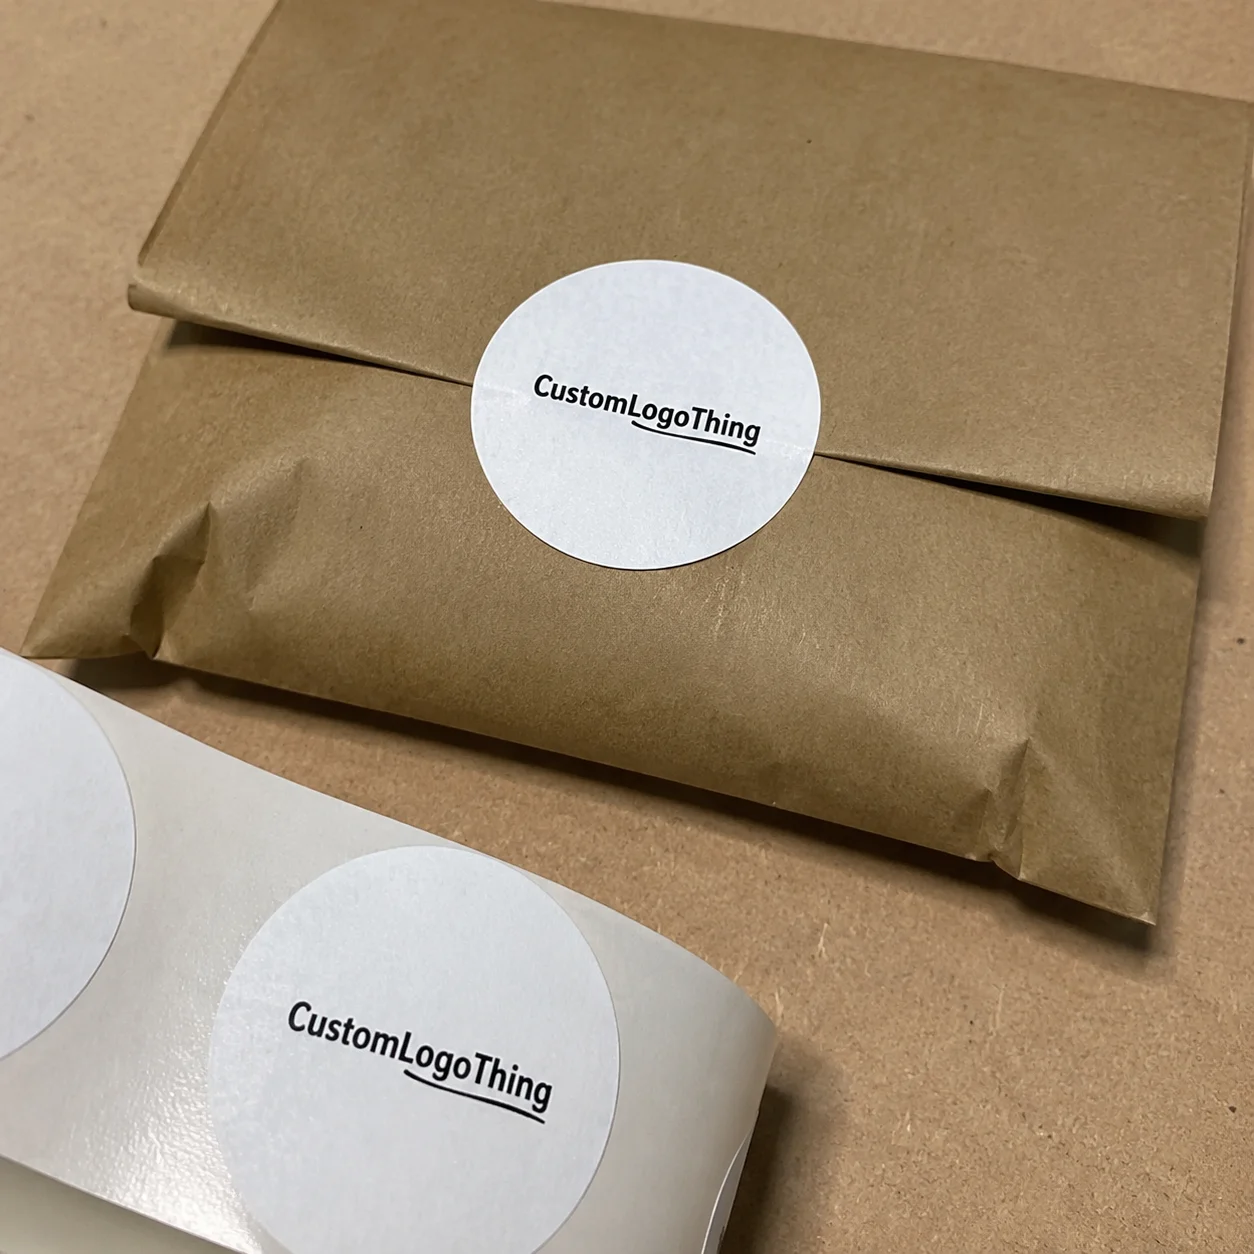
Most custom round sticker projects are produced in one of three formats. Rolls are best for label applicators, production lines, and fast hand application. Roll specs may include 1 inch or 3 inch core size, outside roll diameter, unwind direction, and labels per roll. Sheets are useful for small batches, office storage, and low-volume packing stations. Individually cut stickers work well for giveaways, thank-you inserts, retail counter freebies, and event bags.
Printing method depends on quantity, complexity, and repeatability. Digital printing is common for short runs, multiple designs, variable artwork, and faster setup because it avoids traditional plate costs. Flexographic printing often makes more sense for larger repeat orders, usually several thousand to tens of thousands of pieces, especially when the artwork is stable. Specialty processes can add metallic effects, clear film looks, white ink layers, spot varnish, embossing, or premium tactile finishes.
Proofing deserves more attention than it gets. A 2 inch circle gives you about 3.14 square inches of area. That is not a billboard. A logo, slogan, social handle, QR code, certification mark, flavor name, and legal note cannot all be the hero. Pick the main job. Maybe add one supporting detail. Let the box, hangtag, or website carry the rest of the information like civilized adults.
Production reality: Die cutting has normal tolerance. A shift of 1/32 inch may not sound dramatic, but on a 2 inch circle it can make tight borders look visibly off-center. Use bleed and safe zones unless you enjoy Stickers That Look trimmed by a raccoon.
A practical file setup usually includes 0.0625 inch bleed beyond the cut line and at least 0.0625 to 0.125 inch safe space inside the cut line for text and important graphics. Fine borders near the edge are risky. Concentric circles are even less forgiving because the eye notices uneven spacing fast.
For larger packaging programs, teams may also check how labels behave through shipping, storage, and handling. Groups such as ISTA publish packaging performance test procedures used in distribution testing. A sticker order by itself may not require formal transit validation, but labels that seal cartons, identify products, or support retail presentation should survive the packaging journey they are part of.
Material, Adhesive, and Finish Choices That Actually Matter
Paper is the budget-friendly workhorse. Use it for dry, indoor, short-term applications: bakery boxes, candle packaging, mailer seals, paper bags, sample cards, thank-you inserts, and simple promotional packaging. Common options include semi-gloss paper, matte paper, uncoated paper, kraft paper, and textured stocks.
Paper can look excellent. It also has limits. Moisture, oil, abrasion, refrigeration, and frequent handling expose those limits quickly. A textured paper label may look warm and handmade on a soap box. On a refrigerated drink bottle, it may wrinkle, stain, or release from the surface.
Film materials cost more but solve real performance problems. White BOPP is a clean, moisture-resistant option for many jars, bottles, pouches, cosmetics, and food packages. Clear BOPP creates a “printed-on-container” look, but only if the surface and artwork support it; white ink backing may be needed so colors do not disappear. Vinyl handles outdoor or rougher use better. Polyester suits higher durability, chemical resistance, or industrial-style applications.
Adhesive is not glamorous. It is also the part that decides whether the sticker stays put. Permanent adhesive is standard for packaging seals and product labels. Removable adhesive works for temporary promotions, reusable containers, or surfaces where residue would be a problem. Freezer-grade adhesive matters for frozen foods, cold storage, and chilled products. Aggressive adhesive helps with textured kraft paper, certain plastics, curved containers, or low-energy surfaces.
Finish changes both appearance and function. Matte gives a softer premium impression and reduces glare. Gloss makes color pop and can sharpen bright logos or photo-based artwork. Soft-touch lamination feels expensive, though it can show scuffs depending on handling. Uncoated paper gives a natural craft look, but it can absorb oils and show marks faster.
| Option | Best Use | Typical Tradeoff | Practical Buying Note |
|---|---|---|---|
| Paper with matte or gloss finish | Dry boxes, mailers, bakery packaging, inserts | Lower cost, weaker moisture resistance | Good for indoor use under 3 to 12 months |
| White BOPP | Jars, bottles, cosmetics, pouches | Higher cost than paper, cleaner performance | Strong default for moisture-prone product packaging |
| Clear BOPP | Glass, clear jars, premium packaging | Artwork may need white ink backing | Request a proof that shows white ink layers clearly |
| Vinyl or polyester | Outdoor, abrasive, or industrial use | More expensive, sometimes overbuilt | Use only if durability actually matters |
Surface compatibility is the annoying detail that separates clean packaging from scrap. Glass, kraft paper, plastic jars, metal tins, coated boxes, and flexible pouches all behave differently. Curved containers add tension. Textured paper reduces adhesive contact. Oily surfaces are rude. Serious orders should include samples or a pilot run, especially before buying thousands of custom 2 inch circle stickers for a new container.
Cost, Pricing, MOQ, and Unit Cost for 2 Inch Round Stickers
Sticker pricing is driven by quantity, material, finish, adhesive, print method, number of designs, format, proofing, shipping, and specialty effects. A plain paper sticker on sheets is not priced like a laminated BOPP roll label with freezer adhesive and white ink. Obvious? Apparently not, judging by quote requests that say only “need round sticker price.”
For small digital runs, expect higher unit costs but lower total commitment. A batch of 100 to 250 pieces might land around $0.35 to $1.25 per sticker depending on material, finish, and supplier setup. Around 500 to 1,000 pieces, many standard paper or BOPP stickers may fall closer to $0.12 to $0.45 each. At 5,000 to 10,000 pieces, standard roll labels can sometimes land around $0.03 to $0.15 each, depending on specs, print coverage, and freight.
Those are planning ranges, not universal promises. Shipping bulky rolls across zones can quietly wreck a “cheap” quote. Specialty adhesives, foil, white ink, custom shapes, rush production, or multiple artwork versions can also push pricing up.
Minimum order quantities vary by supplier and print method. Very low MOQs are useful for farmers markets, test launches, seasonal promotions, and short campaigns. Higher MOQs make sense for repeat fulfillment, subscription boxes, retail packaging, and stable SKUs. If you reorder every month, a larger run can reduce unit cost and simplify inventory. If your logo may change next week, do not buy 25,000 stickers because the unit price looked cute.
Unit cost can mislead. The cheapest sticker is not cheap if it peels off a cold bottle, smears on an oily jar, or makes the package look bargain-bin sad. For branded packaging, appearance and failure rate count. If 3% of a 10,000-piece run fails because the adhesive was wrong, that is 300 bad impressions before labor waste enters the calculation.
Ask for quotes with exact specs. Include 2 inch round size, material, finish, adhesive, quantity, roll or sheet format, core size, roll direction, number of designs, delivery address, and deadline. If you are also buying boxes, bags, or other packaging components, compare the sticker plan against your broader Custom Packaging Products so the full presentation works together.
Process and Timeline: What Happens After You Request a Quote
The normal buyer path looks like this: submit specs, share artwork, receive quote, approve proof, confirm payment, start production, complete quality checks, and ship the order. Cleaner information makes the process cleaner. Funny how that works.
For simple digital orders using standard paper or BOPP, production may run about 3 to 7 business days after proof approval. Add transit time. Larger runs, specialty materials, white ink, foil effects, custom adhesives, or multiple SKUs may need 8 to 15 business days or more. Imported or highly customized programs can stretch longer, especially if material sourcing is involved.
Proof approval is usually the real clock starter. Not the first email. Not the vague quote request. Not the message that says, “How much for stickers?” Production teams need approved artwork, confirmed specs, payment terms, and shipping details before the schedule becomes real.
Common delays are painfully predictable: low-resolution logos, missing dielines, unclear quantities, late payment, last-minute copy changes, untested surfaces, and deadlines that ignore physics. A QR code nobody tests until after printing is another classic. Scan it at actual size, from a normal distance, on the chosen finish. Gloss glare can make a technically valid code annoying in real life.
Build buffer time for launches, trade shows, seasonal promotions, subscription box drops, and retailer deadlines. For event use, order at least 2 to 3 weeks before stickers need to be in hand if possible. For retail launches, allow more room because packaging changes often move through approvals, barcode checks, carton packing tests, and freight scheduling.
Quality control should be practical, not theatrical. Check count, color consistency, die-cut registration, edge quality, lamination, roll winding, label spacing, and whether the stickers release cleanly from the liner. For roll labels, confirm the unwind direction before production if an applicator is involved. For hand application, check whether the liner is easy to peel. Small nuisance, large labor cost.
If the sticker is part of a larger label system, pair it with the right packaging component from Custom Labels & Tags. Matching finish, color tone, and adhesive performance across the full package usually looks more professional than piecing everything together from random sources.
Common Artwork and Ordering Mistakes to Avoid
The biggest mistake is crowding the circle. A 2 inch diameter gives limited room, and the human eye needs hierarchy. Logos, slogans, ingredient callouts, social handles, QR codes, legal copy, and certification marks do not all deserve front-row seats. Choose the job of the sticker first, then design around that job.
Good artwork starts with clean files. Vector formats such as AI, EPS, or press-ready PDF are best for logos and crisp edges. Raster images should be 300 DPI at final print size, not 300 DPI in someone’s imagination after they dragged a 400-pixel web logo into a layout. Set files in CMYK for print, outline fonts, include bleed, and keep key text inside the safe zone.
QR codes need more respect than they get. Keep them large enough to scan, usually at least 0.75 inch square for simple codes and larger for dense URLs. Give them quiet space. Use strong contrast. Test the printed proof or a sample on the actual material and finish. A black QR code on matte white BOPP behaves differently from a pale tan code on kraft paper.
Color expectations cause plenty of avoidable disappointment. Screens glow. Stickers print with ink. Kraft paper warms colors. Clear film lets the container color influence the design unless white ink is used. Matte finish softens contrast. Gloss can deepen color but add glare. A digital proof helps with layout, but it does not perfectly predict every substrate and finish combination.
Do not choose material by price alone. Refrigerated drinks, oily cosmetics, curved jars, outdoor products, and heavily handled packaging need better specs. If sustainability claims matter, ask about recycled content, wash-off adhesives, FSC-certified paper, or supplier documentation. The Forest Stewardship Council is a useful reference point for paper sourcing claims, though certification depends on the specific material and chain of custody.
- Bleed: Add about 0.0625 inch beyond the cut line so color reaches the edge.
- Safe zone: Keep text and logos at least 0.0625 to 0.125 inch inside the trim.
- Resolution: Use 300 DPI raster artwork at final size, or vector artwork when possible.
- Color: Build files in CMYK and ask how spot colors or white ink are handled.
- Testing: Apply samples to the real surface for at least 24 to 48 hours before judging adhesion.
Next Steps Before You Place a Custom Round Sticker Order
Before ordering, measure the application area. Do not guess from a product photo. Check lid diameter, box flap width, pouch curve, jar shoulder, or mailer seal area with a ruler or caliper. A 2 inch circle looks generous on a small lip balm tin and tiny on a large shipping carton. Scale is not a vibe. It is math.
Decide whether you need rolls, sheets, or individually cut pieces. Rolls are efficient for packing teams and applicators. Sheets are manageable for low-volume hand application. Singles are better for giveaways and inserts. If you use an applicator, confirm core size, roll direction, liner type, and maximum roll diameter before ordering. A beautiful roll that does not fit the machine is just an expensive paperweight.
Confirm the surface material and use conditions. Indoor or outdoor? Dry shelf or refrigerator? Smooth glass or textured kraft? Flat box or curved bottle? Will the sticker face moisture, oil, cold, abrasion, or frequent handling? These details drive material and adhesive selection more than personal preference does.
Prepare a clean artwork file plus a simple spec sheet. Include size, quantity, material preference, finish, adhesive needs, format, number of designs, delivery address, and deadline. This turns quoting from a 12-email scavenger hunt into an actual buying process. Suppliers can quote faster, and you get fewer surprises.
For new product packaging, order samples or a short pilot run before committing to a large batch. Apply stickers to real containers. Let them sit. Chill them if they will be chilled. Rub them if they will be handled. Pack them into cartons if they will ship. Standards such as ASTM test methods may be used in larger packaging validation programs, but even a basic real-use test catches plenty of problems before money gets burned.
Compare quotes by total landed cost, not just sticker price. Look at setup, proofing, shipping, lead time, defect handling, reorder consistency, and communication quality. For 2 inch round stickers custom buying, the smartest move is matching the specs to the surface, use case, artwork, and timeline before chasing the lowest unit price.
FAQ
What are 2 inch custom round stickers best used for?
They work well for jar lids, bakery boxes, candle labels, mailer seals, product samples, thank-you inserts, event giveaways, and small brand labels. They perform best when the design stays simple: logo, short phrase, icon, QR code, or one clear product message.
How much do custom 2 inch circle stickers cost?
Pricing depends on quantity, material, finish, adhesive, format, number of designs, and shipping. Small runs often cost around $0.35 to $1.25 each, while larger standard roll-label runs may fall much lower per sticker with more upfront spend.
What file type should I send for 2 inch round sticker printing?
Vector files such as AI, EPS, or press-ready PDF are best for logos and crisp edges. High-resolution PNG or TIFF files can work if they are at least 300 DPI at final print size and include proper bleed.
Can 2 inch round custom stickers be waterproof?
Yes, if you choose a film material such as BOPP, vinyl, or polyester with the right adhesive and protective finish. Paper stickers are usually not the best choice for wet, refrigerated, oily, or outdoor applications.
How long does it take to produce custom 2 inch round labels?
Simple digital orders can often move in 3 to 7 business days after proof approval, before shipping. Specialty materials, larger quantities, multiple designs, artwork issues, delayed approvals, unclear specs, and long transit distances are the usual timeline killers.

