Order Custom Bike Stickers Online for Durable Rides
A bike sticker looks simple until it has to live on a real bike. Anyone planning to order custom bike stickers online should look past the artwork preview and check the construction: face stock, adhesive, laminate, cut path, ink coverage, and whether the design actually fits the surface it will touch.
Why Custom Bike Stickers Online Are More Technical Than They Look
A decal on a notebook has an easy life. A bike sticker does not. It deals with flexing tubes, UV exposure, rain, sweat, trail grit, chain lube, cleaning chemicals, cable rub, frame bags, gloves, repair stands, and car racks. That is a hostile environment for a thin printed film.
Buyers searching for custom bike stickers online are also buying for different jobs. A rider may need a clean name label on a top tube. A cycling club may need matching frame decals for 75 bikes. A shop may want branded labels for rentals. Event organizers might need sponsor decals, helmet stickers, QR code tags, safety labels, or promotional sticker sheets for race packets.
Those are not identical products. A giveaway sticker can be forgiving. A fork decal exposed to mud and washing needs more discipline. A serialized rental fleet label needs repeatable print, readable data, and adhesive that stays put after staff clean the bike for the tenth time.
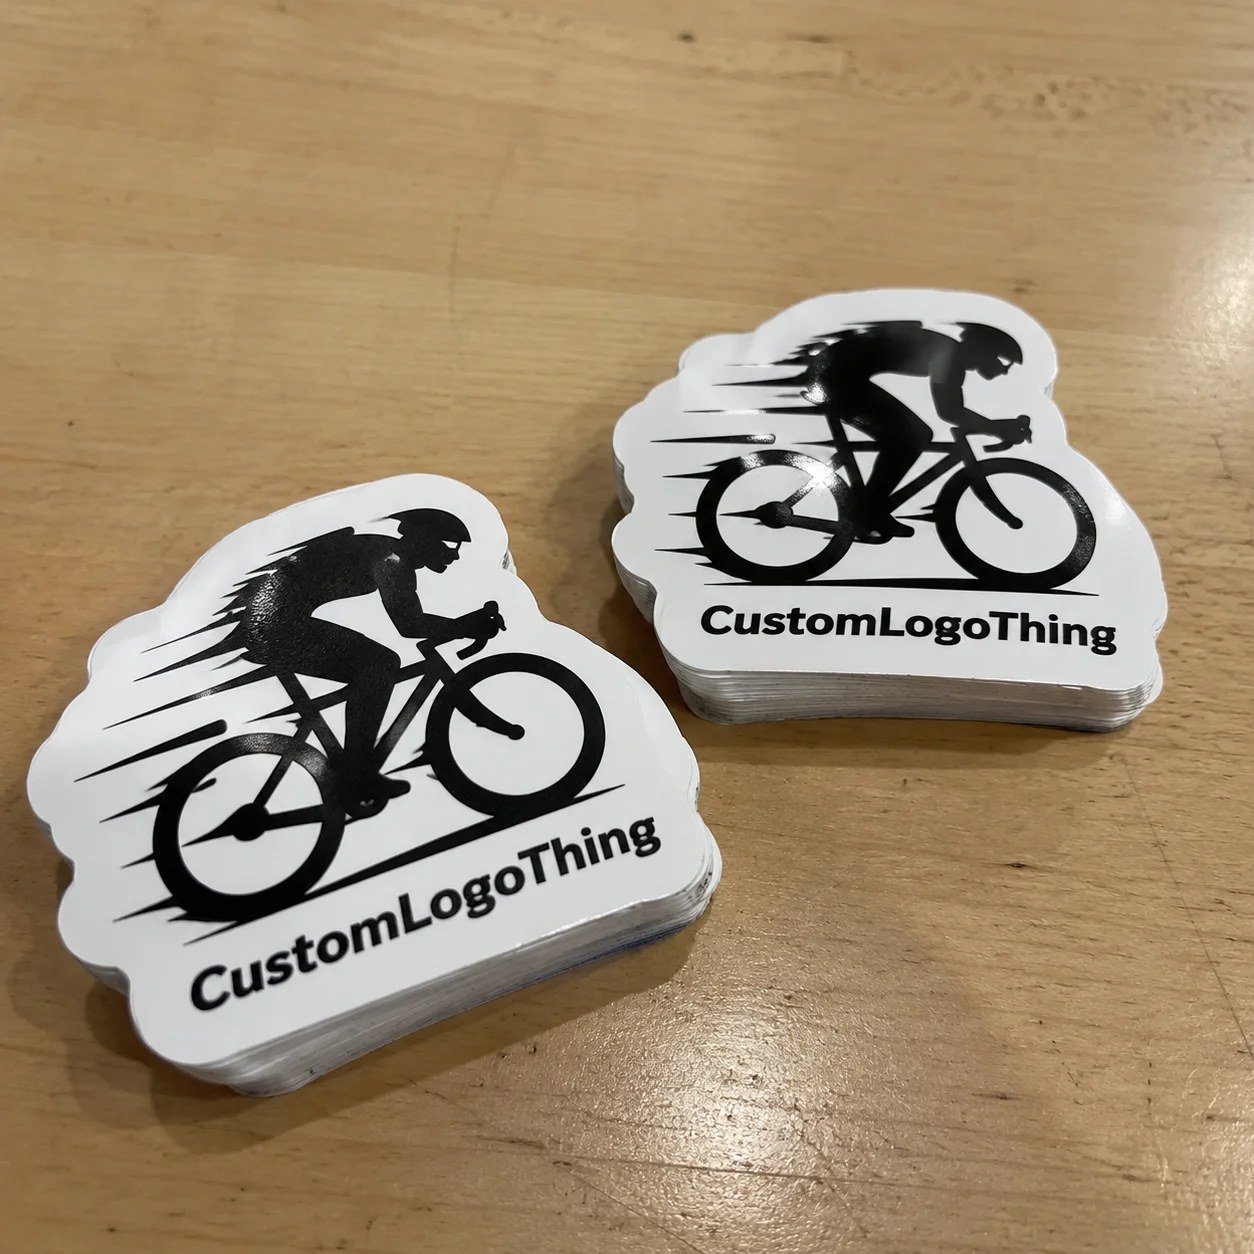
“Bike stickers” can mean frame decals, wheel rim decals, fork graphics, helmet graphics, reflective safety labels, serial-number labels, bottle decals, toolbox decals, and small shop-branded handouts. Some are decorative. Others behave more like production labels, where bond strength, legibility, and repeatability matter as much as the art.
The common mistake is treating the design file as the whole job. A production-ready bike decal needs outdoor material, a suitable adhesive, abrasion-resistant overlaminate, accurate contour cutting, clean prepress setup, and sizing that respects curved or tapered frame geometry. The same 4-inch logo can behave differently on glossy carbon, matte powder coat, anodized aluminum, molded plastic, or a clear-coated helmet shell.
Production reminder: the best bike sticker is not automatically the thickest or most expensive one. It is the one matched to the surface, expected life span, handling, and application method.
A good online order is built from clear specifications, not guesswork. Before production starts, you should know the material, size, finish, quantity, proofing process, price structure, and realistic turnaround.
How Bike Sticker Materials and Finishes Work
For outdoor bike use, vinyl is the usual workhorse. It handles moisture, sunlight, and curved surfaces better than basic paper sticker stock. Paper can be fine for packaging inserts, envelope seals, or short-term indoor promotional labels. It is the wrong starting point for a frame that will be washed, ridden in rain, or rubbed by bags and gloves.
Adhesive choice matters more than many buyers expect. A permanent adhesive is common for long-term frame branding, fork decals, helmet graphics, and shop fleet labels. A removable adhesive can make sense for temporary event use, demo bikes, short campaigns, or sponsors that change between races. A high-tack adhesive can help on textured plastics, powder-coated surfaces, or harder-to-bond accessories, although testing is still smart for unusual coatings.
Lamination is the protective layer buyers often skip because it is less visible than the print. A clear gloss, matte, or satin overlaminate sits over the ink and helps resist scuffs, sunlight, incidental abrasion, washing, chain lube, and rubbing from clothing or bags. Unlaminated ink may look fine at delivery and still show wear fast after muddy rides or repeated cleaning.
Finish changes both performance and appearance. Gloss increases contrast and often suits bold sponsor graphics. Matte looks quieter, especially on stealth builds and high-end frames. Satin sits between the two. Clear vinyl lets frame color show through, but color opacity can be weak unless white ink is printed behind the design. Reflective vinyl costs more, yet it adds practical visibility for commuter bikes, safety programs, school fleets, delivery bikes, and night-riding applications.
Cut format affects application, packing, and cost. Die-cut stickers follow the logo shape and feel polished as individual pieces. Kiss-cut stickers stay on a backing sheet, making them easier to peel during team distribution or retail packing. Transfer decals help apply separated letters or shapes in alignment. Sticker sheets bundle several decals together, which works well for clubs, bike shops, event kits, and branded accessory packs.
Most short-run, full-color bike decals are digitally printed because digital production handles gradients, variable names, QR codes, mixed designs, and small batches without expensive plates. Spot-color or specialty production can still be useful for strict brand colors, metallic effects, or large repeat orders where consistency matters more than flexibility.
If you already manage Custom Labels & Tags for product lines, the logic is familiar: surface, handling, and expected life span should guide the material stack. A label that works on a cardboard box may fail on a curved powder-coated tube. The substrate decides more than the mockup does.
Process and Timeline From Artwork Upload to Delivery
The online ordering flow usually sounds simple: choose the sticker type, enter size and quantity, upload artwork, select finish and laminate, review pricing, approve a digital proof, then move into production. The technical work sits between those steps.
During file review, prepress checks resolution, vector paths, bleed, cut lines, color mode, small text, thin strokes, and whether the design will cut cleanly at the requested size. Vector files such as AI, EPS, PDF, and SVG are preferred for logos and contour-cut decals. Raster artwork, such as PNG or TIFF, should be high resolution at final print size. For detailed bike graphics, 300 dpi at the finished size is a common baseline, not a luxury.
The digital proof is the buyer’s checkpoint. Do not treat it like a receipt. A proof confirms final dimensions, cut shape, background treatment, spelling, color notes, sticker quantity, and sometimes sheet layout. If the club name is misspelled, the left-side fork decal is mirrored incorrectly, or the background should be transparent instead of white, proof review is the cleanest place to catch it.
Production generally follows a practical sequence: print, allow ink to cure or stabilize if required, laminate, contour cut, weed or sheet the stickers, inspect, count, pack, and ship. On some runs, the stabilization window is short. On heavier ink coverage, specialty films, or certain equipment setups, rushing that stage can affect handling, finish quality, or edge cleanliness.
Turnaround depends on the job. Simple laminated vinyl decals with clean artwork usually move faster than reflective decals, large multi-design sheets, transfer decals with fine lettering, or orders with several proof revisions. Many custom sticker runs fall into a several-business-day production window after proof approval. Larger or specialty orders need more planning.
Shipping adds another variable. Race packets, shop openings, rental fleet rollouts, and sponsor kits often have fixed dates. In those cases, the delivery date matters more than the print date. A sticker that ships on time but arrives after the event is still late.
The most common schedule delay is not always the press. Waiting on corrected artwork, proof approval, final quantities, missing addresses, or unclear packing instructions can consume more time than printing. If an event date is fixed, build in approval time and shipping time before placing the order.
Pricing, MOQ, and Unit Cost Factors to Compare
Sticker pricing is driven by more than piece count. Material, size, print coverage, laminate, adhesive, cut complexity, setup time, finishing style, packing method, and shipping all affect the quote. A 2-inch kiss-cut helmet sticker and a 12-inch laminated down tube graphic are different jobs, even if both use outdoor vinyl.
MOQ means minimum order quantity. Plainly, it is the smallest practical batch a manufacturer can produce while covering setup, proofing, printing, cutting, inspection, and handling. Very small orders can be made in many digital workflows, but the unit cost may look high because setup labor is spread across only a few pieces.
Unit cost usually drops as quantity rises. A 25-piece batch may feel expensive per sticker because file prep and setup still happen. A 250-piece or 500-piece batch spreads the same prepress time over more units, so the per-piece price often improves. Exact pricing depends on specifications, but the pattern is consistent across most label and decal production.
| Sticker Type | Typical Use | Common Spec | Cost Sensitivity |
|---|---|---|---|
| Top tube name decal | Rider names, team bikes | 2–5 in. laminated vinyl | Lower material use; variable names may add setup time |
| Down tube logo decal | Club, shop, sponsor branding | 6–14 in. outdoor vinyl with gloss or matte laminate | Size and print coverage strongly affect price |
| Reflective safety sticker | Commuter visibility, fleet safety | Reflective vinyl with durable adhesive | Reflective film costs more than standard white vinyl |
| Sticker sheet | Events, retail packs, team kits | Kiss-cut decals on one sheet | Sheet size, number of cuts, and spacing drive cost |
| Clear frame decal | Subtle graphics, overlays | Clear vinyl, optional white ink layer | White ink and opacity requirements may add cost |
Size has a direct effect. A small top tube label uses less material and press space than a large down tube graphic. Oversized or unusual shapes may reduce how many pieces fit across a sheet or roll, increasing waste. Cut complexity matters too; a simple oval runs faster than a logo with 40 tiny internal corners.
Finish-related costs are easy to miss. Laminated outdoor vinyl usually costs more than unlaminated promotional stickers, but the added protection is often justified for bikes. Reflective films cost more than standard white vinyl. Metallic or clear materials can add specialty pricing, especially if white ink, close color matching, or multiple layers are required.
Compare quotes using the same specifications: size, quantity, laminate, adhesive, cut style, material, packing, and shipping terms. A laminated outdoor decal should not be compared against an unlaminated indoor promotional sticker as if they were equal. The same rule applies across Custom Packaging Products, custom printed boxes, retail packaging, and product packaging: a quote only makes sense when the construction is comparable.
If the design will be reordered, ask whether the approved proof and cut file can stay on hand. That can speed repeat production and help maintain consistent sizing, color treatment, and contour cuts across later batches.
Step-by-Step Guide to Ordering Bike Decals Without Rework
Start with the surface and the job the sticker needs to do. A painted aluminum frame, carbon fork, helmet shell, water bottle, toolbox, rental bike, and packaging insert can each call for a different material choice. If the decal will live outdoors for months or years, laminated vinyl is a safer starting point than paper or unprotected film.
- Identify the surface. Note whether it is glossy, matte, textured, powder-coated, plastic, carbon, metal, or already clear-coated.
- Measure the placement area. Use a flexible tape, paper strip, or printed mockup at full size, especially on curved tubes.
- Check obstacles. Look for cable routing, welds, bottle mounts, frame taper, suspension pivots, shoe rub, and constant hand contact.
- Prepare artwork properly. Use vector files for logos and cut paths. Keep raster graphics high resolution at final print size.
- Choose the cut format. Kiss-cut sheets are easy for teams, die-cut singles suit giveaways, and transfer decals help align separated lettering.
- Select the finish. Matte suits subdued builds, gloss supports bright graphics, clear works for subtle overlays, and reflective improves visibility.
- Review the proof slowly. Check spelling, scale, orientation, cut line, background color, white ink needs, and spacing between stickers.
Measurement deserves extra care. A design that looks perfect on screen may feel too tall once wrapped around a narrow tube. For a down tube graphic, even a difference of 0.25 inch can change the visual balance. For small text, letters that look readable on a monitor may be hard to read after printing or difficult to weed during cutting.
Artwork quality is another common fork in the road. Vector artwork gives the cleanest logo edges and easiest contour paths. If a logo only exists as a small web image, it may need rebuilding before production. Fonts should be outlined or embedded, and any requested cut line should be clearly separated from the printed art.
Clear decals need extra thought. On a white frame, a clear sticker with colored ink may look close to the proof. On a black or dark matte frame, the same ink can lose contrast or disappear. Ask whether a white ink layer is needed behind the art before approving the file.
Proof approval is the point of commitment. Approve only when the proof matches the real-world goal. Changing artwork after printing starts can require a rerun, new material, extra labor, and a delayed ship date. That is an expensive way to discover that left and right fork decals were not set up as a matched pair.
If sustainability or chain-of-custody claims matter for your broader packaging design or package branding program, ask directly about available materials and documentation. Paper-based packaging may involve FSC-certified board; the Forest Stewardship Council explains how FSC certification works. Bike decals are commonly vinyl-based, so do not assume the same sourcing standards apply without confirmation.
Common Mistakes That Shorten Sticker Life
The first mistake is choosing indoor paper stickers for outdoor bikes. They may look fine on day one, especially in product photos, but paper can absorb moisture, scuff quickly, and fail around the edges after rain, washing, or sweat exposure. Use indoor paper for low-contact packaging inserts, not long-term frame decals.
Skipping laminate is another risky shortcut. Printed ink alone is more exposed to abrasion from gloves, racks, bags, mud, washing, sunlight, and cleaning products. A protective overlaminate adds cost, but for frame and helmet stickers it often pays for itself in longer visual life.
Poor surface preparation can ruin a good decal. Dust, wax, polish, silicone residue, wet paint, and oily fingerprints prevent adhesive from making a clean bond. Clean the area, let it dry fully, and apply at room temperature. Many pressure-sensitive adhesives continue building bond strength after application, so heavy washing or trail use immediately after installation is not ideal.
Sizing mistakes shorten life as well. A decal that is too large for a curved tube may wrinkle at the edges or bridge over the surface instead of laying flat. Tiny lettering can become unreadable, and delicate shapes may lift during application. Overly intricate cut lines, hairline bridges, and tight internal corners can slow production and reduce consistency.
Color assumptions create a different kind of disappointment. Screen color is not proof of final print color. Matte laminate can soften contrast. Clear film can change how color reads over a dark frame. Metallic bases can shift the appearance of brand colors. If a sponsor logo or shop identity requires tighter control, say so before the proof is approved.
There are also handling and distribution mistakes. Sticker sheets packed loose in a race bag may bend if they are not sized well. Transfer decals need clear instructions for riders who have never applied them. Rental fleet labels may need serialized order or labeled bundles so staff can apply them quickly. Packaging professionals think about the full chain: print, pack, transport, handout, application, and use.
For general transport testing and package handling standards, groups such as the International Safe Transit Association are useful references. Bike stickers are not usually tested like shipping cartons, but the mindset still applies: the product has to survive the real path from production to use, not just look good on a proof.
Next Steps Before You Request a Bike Sticker Quote
Before requesting pricing, gather the essentials: artwork, desired size, placement photos, quantity, deadline, preferred finish, and any special application details. A clean quote request saves time and helps the production team recommend the right construction instead of guessing.
Send a photo of the bike or application area with approximate dimensions whenever possible. That one step can catch scale, contrast, and surface issues early. A black logo on a dark matte frame may need a white outline. A long sponsor decal may need to be shortened for a tapered tube. A rental label may need stronger adhesive if the surface is textured.
Group the order by purpose. Frame decals, helmet decals, shop giveaway stickers, event sponsor decals, rental fleet labels, and packaging inserts may not all need the same material or packing style. Individual pieces are easy to hand out one at a time. Sticker sheets work well for teams and retail packs. Labeled bundles help staff apply decals quickly across multiple bikes or departments.
- Ask what material is recommended for the exact surface and expected life span.
- Confirm whether laminate is included and whether it is gloss, matte, or satin.
- Request the expected turnaround after proof approval, not just after inquiry.
- Ask what file format is preferred and whether fonts, cut lines, or white ink layers are needed.
- Clarify revision handling so you know what happens if the proof needs changes.
The strongest orders tend to feel boring in the best way. The artwork is clean. The placement is measured. The finish has a reason. The deadline includes proofing and shipping. If you order custom bike stickers online with clear specs and realistic timing, the finished decals are far more likely to apply cleanly, look sharp, and hold up through real riding conditions.
Frequently Asked Questions
What materials are best for custom bicycle stickers online?
Outdoor vinyl with a protective laminate is usually the best all-around choice for bike frames, forks, helmets, and shop branding. Use reflective vinyl when visibility matters, clear vinyl for subtle frame graphics, and high-tack adhesive for textured or harder-to-bond surfaces. Avoid basic paper sticker stock for bikes that will see rain, washing, sunlight, or abrasion.
How do I size custom bike decals before ordering?
Measure the actual placement area with a flexible tape, paper strip, or printed mockup at full size. Account for tube curve, cable routing, welds, bottle mounts, and frame taper before finalizing dimensions. Keep small text large enough to read and avoid designs that wrap too far around narrow tubes.
How much do custom bike stickers usually cost?
Cost depends on size, quantity, material, laminate, cut style, artwork complexity, and shipping needs. Unit cost usually decreases at higher quantities because setup and proofing time are spread across more pieces. For accurate comparison, request quotes using the same size, quantity, finish, adhesive, and cut format.
What file type should I upload for custom cycling stickers?
Vector files such as AI, EPS, PDF, or SVG are preferred for logos, text, and contour-cut decals. High-resolution PNG or TIFF files can work for full-color artwork if they are built at final print size. Include fonts outlined or embedded, and ask for help if the design needs a cut line or white ink layer.
How long does it take to order custom bike stickers online?
The timeline usually starts after artwork is approved, not when the first inquiry is sent. Simple vinyl decals with clean files can move faster than specialty materials, complex cut paths, or large multi-design orders. Build in extra time for proof review, revisions, production, packing, and shipping if the stickers are needed for a race, shop event, or fleet rollout.


