What Custom Crosshair Stickers Are and Where They Work Best
A small aiming-mark decal can look sharp on a laptop lid, controller case, range notebook, tool box, product insert, or branded packaging accent. It can also fail fast. Thin lines break up, weak adhesive lifts at the edges, and the wrong finish makes a clean design look cheap.
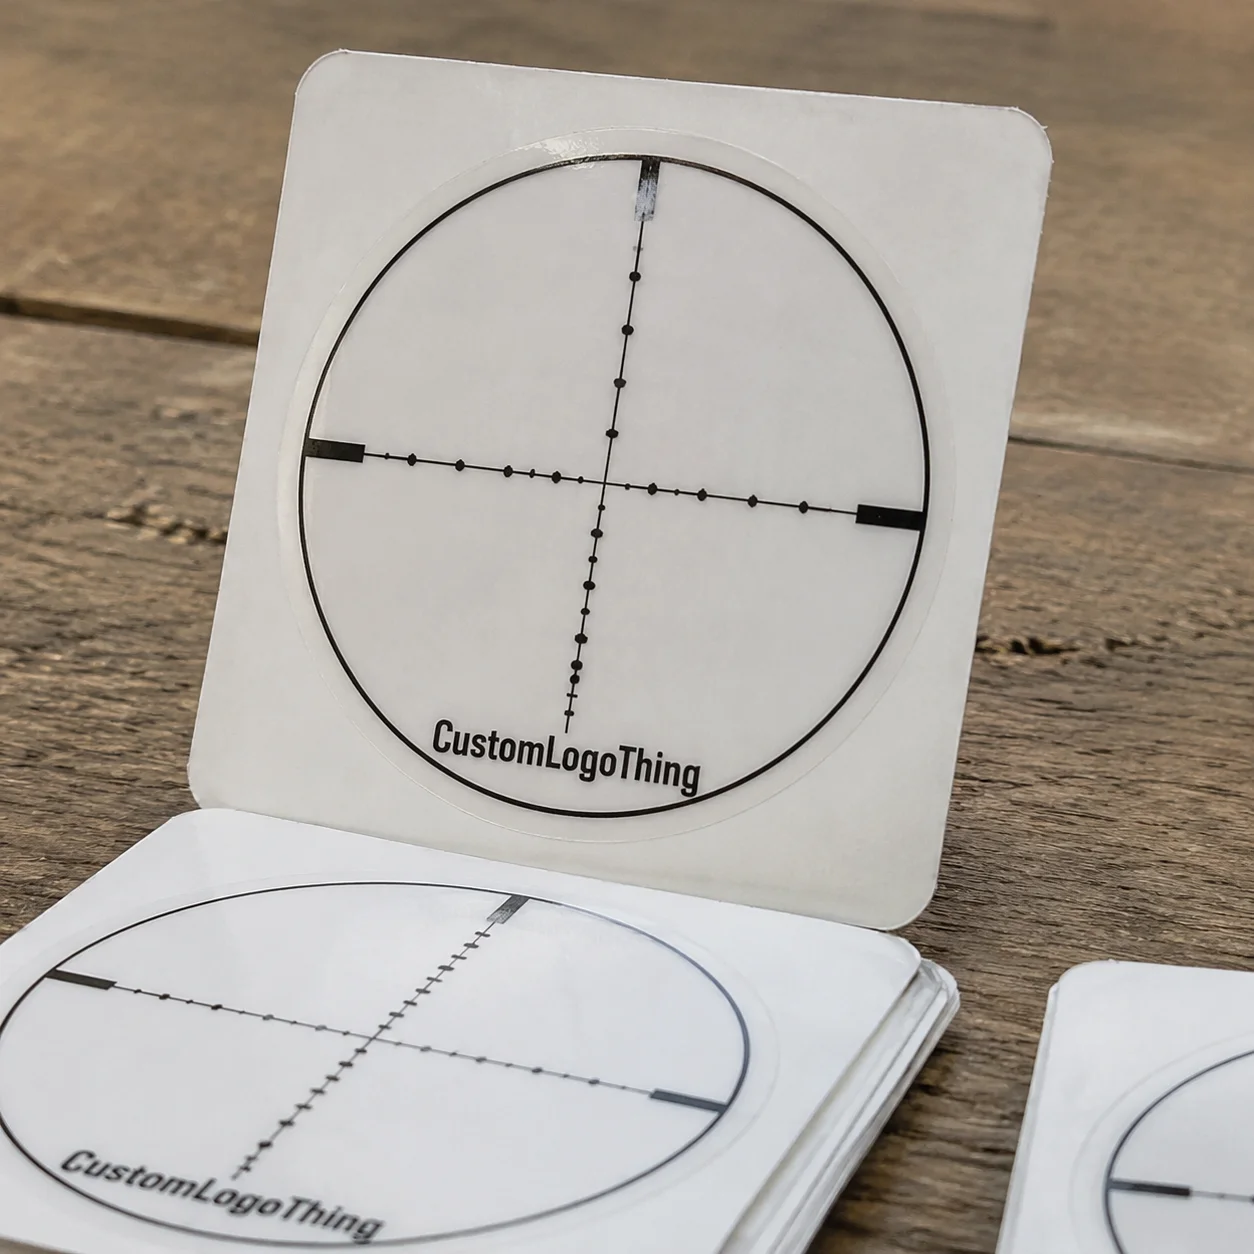
Custom crosshair stickers are printed or precision-cut decals built around reticle-style artwork. Buyers use them for gaming setups, shooting sports accessories, tactical-themed packaging, hobby brands, club merch, event handouts, product labels, and small promotional add-ons. The artwork looks simple: rings, center dot, four lines, maybe a logo. Production is less forgiving.
There are several common formats. Printed stickers carry ink on white vinyl, clear vinyl, paper, BOPP, or a specialty film. Die-cut decals are trimmed to a custom outside shape, often a circle, square, or contour around the artwork. Kiss-cut sheets keep multiple decals on one liner so each piece peels away cleanly. Clear vinyl creates a floating look on smooth surfaces. Transfer-style vinyl uses cut film for the crosshair lines themselves, which can look crisp but becomes risky when the strokes are too narrow.
The crosshair shape is fussy by nature. Concentric circles, hairline strokes, transparent negative space, small center dots, tick marks, and tiny logo type all affect how readable the decal is after proof approval. A mark that looks perfect at 300% zoom may turn into a gray blur at 1.25 inches wide on black plastic. A cut path that works on a big wall decal may be too fragile for a thumb-sized transfer sticker.
Most projects fall into one of two groups: decorative branding or functional identification. Decorative stickers need clean presentation and good shelf appeal. Identification stickers need durability, legibility, and repeatable placement. Handled gear needs a tougher build than a one-day giveaway. A retail-ready insert needs cleaner packing than a bulk roll used at an assembly bench. Obvious, yes. Still where plenty of sticker orders go sideways.
How Reticle-Style Sticker Production Works
The production path starts with artwork review. The file is checked for scale, cut line, bleed, line weight, color setup, transparent areas, and material fit. Then comes proofing, printing or cutting, lamination if needed, finishing, inspection, counting, and packing. Good proofing catches most expensive mistakes before the press or cutter touches material.
Full-color digital printing is the better route when the design includes logos, gradients, camouflage textures, multiple colors, small background details, or brand-specific color fields. The artwork prints onto white vinyl, clear vinyl, paper, BOPP, or specialty film. A die or contour cutter then finishes the outside shape. For outdoor use or frequent handling, a clear laminate usually goes over the ink.
Vinyl cutting works for simple one-color reticles, bold minimalist marks, and clean decals with limited internal detail. The cutter follows vector paths, then the excess vinyl is weeded away. That word matters. If the design has four long hairlines and a tiny floating dot, the production team still has to remove the waste material while keeping every usable piece aligned and intact.
Thin lines cause most of the trouble. Very fine strokes can lift from the liner, tear during weeding, fill in on absorbent stock, or vanish visually on dark and textured surfaces. For printed work, the smallest line should be checked at final size before quoting a precision look. For cut vinyl, the safe minimum depends on the film, adhesive, liner, cutter, and weeding process. A slightly heavier line usually beats a delicate one that barely survives production.
Material choice changes both the look and the lifespan. White vinyl gives strong opacity and predictable color. Clear vinyl lowers the visual footprint but needs contrast planning. Metallic, brushed, or holographic films can make merch feel collectible, although they add cost and can swallow tiny reticle details. Paper stock works for indoor promotions, mailers, and short-term packaging accents. It is not the right pick for water, abrasion, outdoor exposure, or products that get tossed into bags.
Finishing is practical, not decorative fluff. Matte laminate reduces glare and fingerprints, useful for tactical themes, camera-facing gear, and understated tech accessories. Gloss laminate gives stronger color punch and a slick retail feel. Soft-touch-style films can feel premium on a backing card or insert, but they may show scuffs faster. No laminate is fine for short-term indoor use where cost matters more than wear.
Production callout: If the sticker will go on molded plastic, powder-coated metal, rubberized cases, curved gear, or textured packaging, ask about adhesive fit before proof approval. A perfect print still fails if the adhesive cannot wet out on the surface.
Packing format should match use. Singles are easy for giveaways and retail add-ons. Rolls fit bench application or labeling workflows. Sheets are efficient for multi-version club decals and insert packs. Backing cards help when the sticker is sold as merchandise. Bundled inserts work well with custom packaging products, especially for launch kits, subscription boxes, and accessory packaging.
Key Specs: Size, Shape, Material, Adhesive, and Finish
Start with size. Reticle artwork only works if the smallest line, center dot, and ring spacing stay visible at normal viewing distance. A 0.75-inch sticker needs simpler artwork than a 3-inch decal. Print the design at actual size on a desktop printer, cut it out roughly, place it on the real item, and look at it from arm’s length. Five minutes. Worth it.
Shape comes next. Circular die cuts feel natural for scope-style graphics and centered emblems. Square or rectangular stickers work better as packaging labels, inventory marks, seals, and product insert accents. Custom contour cuts create a merch-style look, especially when a reticle wraps around a logo or mascot. For very small interior cuts, printed transparent areas may hold up better than transfer vinyl.
Line weight needs a reality check. Avoid ultra-thin strokes, tiny breaks, dense rings, and small center type unless the sticker is large enough to carry them. For many small decals, a line around 0.5 mm to 0.75 mm is more forgiving than a true hairline. The exact minimum depends on material, print method, cutter capability, and inspection tolerance. If a brand mark has tiny text in the center, enlarge the sticker or simplify the mark.
Material should follow the environment. Vinyl is the workhorse for water resistance and frequent handling. Clear BOPP or clear vinyl works for transparent looks on smooth packaging or gear. Paper is best for budget indoor promos, shipping inserts, and short-term retail packaging accents. Specialty films add impact, but they should support the brand style rather than bury the reticle under sparkle. Sparkle has a way of doing that.
Adhesive is the quiet spec buyers underestimate. Smooth painted metal, glass, coated cardboard, laptop shells, molded plastic, and powder-coated tool boxes all behave differently. Oils, dust, silicone residue, texture, low surface energy plastics, and compound curves reduce adhesion. A pebbled controller case may need high-tack adhesive. A laptop giveaway may call for removable adhesive so the user can take it off without a fight.
Finish changes appearance and handling. Matte reduces glare and fingerprints. Gloss adds contrast and color density. Clear film keeps the mark low-profile. Textured or specialty finishes should be judged next to the actual product, not just selected from a quote sheet. If the decal is part of broader product packaging, compare it with Custom Printed Boxes, inserts, hang tags, labels, and retail cards so the whole presentation looks intentional.
| Specification | Common Choice | Best Use | Buyer Watchout |
|---|---|---|---|
| White vinyl | 3 to 4 mil film with permanent adhesive | Gear decals, laptop stickers, outdoor-leaning use | Needs laminate for stronger abrasion resistance |
| Clear vinyl | Clear film with optional white ink | Floating reticle look on smooth surfaces | Light colors may vanish on dark gear |
| Paper stock | Matte or gloss adhesive paper | Event handouts, inserts, indoor packaging | Poor choice for moisture or heavy handling |
| Metallic film | Silver, gold, brushed, or holographic | Premium merch and limited-run promotions | Higher cost and reduced fine-detail readability |
Cost, Pricing, MOQ, and Unit Cost Drivers
Sticker pricing is driven by quantity, finished size, material, version count, cut complexity, laminate, packing format, proofing needs, and setup time. A simple 2-inch printed circle on white vinyl is not the same job as a 1.25-inch transfer decal with thin floating tick marks and individual retail bags.
MOQ, or minimum order quantity, is about efficiency. Some sticker projects can run in small batches, especially digitally printed work. Unit cost drops as setup time, material waste, press calibration, cutter setup, counting, and packing are spread across more pieces. That is why 100 pieces may feel expensive per sticker, while 1,000 or 5,000 pieces land in a more reasonable range.
A simple-looking reticle can cost more than expected because the complexity is not always in the ink. Thin cut paths, interior negative spaces, tight print-to-cut registration, clear materials, specialty films, white ink layers, and individual packing add labor and inspection time. If a small center dot must sit perfectly inside two rings, normal production tolerance becomes part of the quote discussion.
As a planning range, small indoor paper sticker sheets might run about $0.08 to $0.20 per sticker at moderate quantities, depending on layout and print coverage. Laminated vinyl singles may sit closer to $0.18 to $0.45 each around 1,000 to 5,000 pieces, with size and packing pushing the number up or down. Specialty films, backing cards, barcoded retail packs, multiple versions, and rush schedules can move well beyond that. Treat those numbers as planning guidance, not a formal quote.
Compare two common scenarios. A paper sticker sheet for event giveaways is usually the low-cost route, especially if several designs share one sheet. A weather-resistant laminated vinyl decal packed as a retail-ready single costs more because it needs better film, protective finishing, cleaner counting, and sometimes an insert card or bag. Neither option wins by default. Use drives the spec.
For an accurate quote on custom crosshair stickers, prepare the final size, quantity, artwork file, preferred material, indoor or outdoor use, application surface, finish, packing method, and delivery deadline. If sustainability requirements matter, ask about certified paper options or chain-of-custody material availability; the Forest Stewardship Council is a useful reference point for paper-based sourcing language.
Sampling can save money when the surface is tricky. A digital proof may be enough for standard printed vinyl. Material samples or a pre-production sample make sense when the sticker must match a product shell, a coated box, or a specific finish. To control cost, simplify the cut line, choose a standard size, combine versions on one sheet, skip decorative films that do not add value, and order enough volume to reduce unit cost.
Process and Timeline From Artwork to Finished Stickers
A clean ordering sequence keeps small decals from becoming large delays. Define the application first. Choose size and material. Send vector or high-resolution artwork. Confirm the proof. Approve production. Receive packed stickers in the format you actually need: rolls, singles, sheets, or insert bundles.
Artwork review is where technical problems show up. Production checks bleed, safe area, cut line, line thickness, color setup, transparent areas, and whether small details will survive printing or cutting. For reticle graphics, the cut line should be clearly separate from printed artwork. Fonts should be outlined. Circles should be clean vector shapes, not fuzzy raster edges.
A good digital proof should show final size, shape, cut path, color notes, material, quantity, and backing or sheet layout. If the decal is clear, transparent areas should be obvious. If white ink is used under color on clear film, the proof should identify that layer. For brand color matching, provide Pantone references or physical standards when possible, while allowing for normal digital print tolerances.
Production steps vary by method. Printed decals are printed, dried or cured as required by the ink system, laminated if specified, then die cut or contour cut. Vinyl-cut work is cut from film, weeded, transfer-taped if needed, inspected, counted, and packed. Each step has tolerance. Reticle graphics make those tolerances more visible because the eye quickly spots off-center circles and uneven line spacing.
Simple Printed Vinyl Stickers can often be produced in about 5 to 10 business days after proof approval, depending on quantity and workload. More complex orders with specialty film, white ink, multiple versions, retail packing, or physical sampling may run 12 to 20 business days or longer. Shipping time sits on top of production. If the stickers support a product launch, event, subscription kit, or coordinated packaging run, build in proof review time instead of treating approval as a same-day formality.
Common schedule risks are predictable: late artwork revisions, unclear color references, thin details, material changes after approval, missing delivery information, and packing decisions made after production starts. The smoothest timelines happen when the buyer sends one organized spec and one approved artwork package. Basic, but apparently still rare enough to mention.
If the stickers ship inside a larger package, check timing against the rest of assembly. A decal used with custom labels and tags, printed inserts, or carton labels should arrive before packing starts, not during the final pallet build. For formal distribution testing around packed goods, ISTA provides widely used package testing resources. Sticker adhesion still needs its own surface testing.
Common Mistakes That Make Crosshair Decals Hard to Use
The biggest mistake is designing the crosshair on a large screen without checking it at final size. A 4-inch artboard can hide problems that jump out at 1 inch wide. Fine ticks become specks. Center dots disappear. Tiny logo text turns into a smudge. Print it actual size before ordering, tape it to the gear, and look at it like a user would.
Hairline artwork is another trouble spot. Strokes that look clean in a PDF can cut poorly, peel during weeding, or vanish against dark, busy, or textured surfaces. Buyers often want a technical look, which usually means very fine lines. Production rewards bolder geometry. A slightly heavier ring often looks cleaner in the real hand than a delicate line that barely made it onto the liner.
Clear sticker assumptions cause plenty of surprises. Clear material looks sleek on a proof, but ink is not always opaque enough to stand out on dark surfaces. White, light gray, yellow, and pale green can disappear unless a white ink layer, white base material, or different art approach is planned. If the application surface varies across the order, clear film becomes harder to control.
Poor adhesive matching leads to edge lift. Standard permanent adhesive can work beautifully on smooth glass, coated cardboard, and many laptop shells. It may struggle on textured controller cases, powder-coated metal, rubberized plastics, oily tool boxes, or curved surfaces with memory. Surface testing is not overkill. It is how you avoid blaming the sticker for a surface it was never built to hold.
Missing bleed and safe zone create visible defects after normal production movement. If artwork sits too close to the cut edge, a tiny shift can make the border look uneven. For printed decals, include bleed beyond the cut line, often around 0.0625 to 0.125 inch depending on supplier requirements. Keep small text, center marks, and key logo features inside a safe zone.
Finish mismatch can hurt the final presentation. Gloss decals may glare on tactical, outdoor, or camera-facing products. Matte finishes can soften contrast on a retail peg or display card. Metallic films can overpower fine reticle lines. Finish should be chosen after viewing the sticker next to the gear or package, not from a material name alone.
Storage and application matter after delivery. Stickers applied over dust, oil, moisture, cold surfaces, or cleaning residue will not bond as well. Many pressure-sensitive adhesives need firm pressure and dwell time to build full strength. Store unused decals flat, clean, and away from heat spikes. Good materials still need decent handling. Annoying, but true.
Build a Clear Spec Before You Request Samples
Before requesting samples or pricing, write a short spec. Decide where the sticker will be applied, how long it needs to last, whether it faces water or sun, whether removal matters, and how it will be packed. A decal for a gaming controller case has different needs from one used as an insert inside custom printed boxes.
Measure the real application area with a ruler. Do not guess from a mockup. If the available space is 1.5 inches wide, a 2-inch crosshair will not magically fit because it looked balanced on screen. Also check curves, seams, screw heads, rubber feet, molded logos, and textured zones. Those physical features decide where adhesive can sit flat.
Prepare artwork in vector format when possible. AI, EPS, and clean PDF files are usually preferred because circles, strokes, and cut paths stay sharp at any size. Outline fonts. Label the cut path. Mark which elements print, which areas stay transparent, and whether any layer needs white ink. If you only have raster artwork, send a high-resolution file at final size and avoid screenshots.
Choose two or three material directions before quoting. For example, compare matte white vinyl for general durability, clear vinyl with white ink for a low-profile technical look, and metallic film for premium merch. That gives the quoting team enough direction without locking the order into the wrong option too early.
Request quantity breaks. A practical quote might compare 250 pieces for a test run, 1,000 pieces for launch quantity, and 5,000 pieces for a reorder. Seeing unit cost at each level helps you decide whether extra volume is worth it. Also ask whether combining versions on one sheet reduces cost, especially for clubs, teams, and small merch drops.
Ask for a digital proof at minimum. Request a physical sample when the sticker must match a specific product surface, packaging finish, or retail presentation. If the decal supports broader branded packaging, compare it with the box, insert, label, and any other printed piece before approving the full run.
With a clear size, surface, material, finish, packing method, and quantity, custom crosshair stickers become easier to quote, proof, produce, and apply cleanly. The artwork may be small. The specification should not be vague.
FAQ
What material is best for custom reticle stickers used on gear?
White or clear vinyl is usually the safest choice for handled gear because it resists moisture and general abrasion better than paper. Add laminate for longer wear, especially on cases, laptops, bottles, outdoor accessories, or products handled often. Choose clear vinyl only after checking contrast against the application surface; dark surfaces may require white ink or a white base.
How small can custom crosshair decals be without losing detail?
The safe minimum depends on line weight, spacing, material, and cutting method. Very fine hairlines are usually the first details to fail. Print the artwork at actual size before ordering and check it from normal viewing distance, not zoomed in on a screen. If the design includes tiny tick marks, center dots, or text, increase the size or simplify the artwork.
Are custom crosshair stickers waterproof?
Vinyl stickers with suitable ink and laminate can be water-resistant and appropriate for many wet or handled environments. Paper stickers are better for indoor, short-term, or packaging-only uses where moisture is not a concern. Water resistance also depends on surface prep, edge exposure, curing time, and whether the sticker is rubbed or cleaned frequently.
What files should I send for crosshair sticker printing?
Vector files such as AI, EPS, or PDF are preferred because crosshair lines, circles, and cut paths stay sharp at any size. If using raster artwork, send a high-resolution file at final print size and avoid fuzzy edges or compressed screenshots. Include notes for material, finish, finished size, cut shape, transparent areas, and exact brand colors.
How do I lower the unit cost on crosshair sticker orders?
Order higher quantities when possible because setup, proofing, and machine handling are spread over more stickers. Use standard materials and simple cut shapes instead of complex tiny cuts, multiple specialty films, or individual retail packing. Request quantity breaks so you can compare a test run, launch run, and larger reorder.

