Cold storage is hard on print, but most label failures start before the freezer. A carton comes off a warm packing table, moisture settles on the surface, the label goes on too quickly, and the adhesive never gets a clean chance to bond before the first temperature swing. That handoff from room temperature to refrigerated or frozen storage is where problems usually begin.
For apparel operations, that matters across a few package types: poly bags for folded garments, corrugated cartons, inventory totes, dispatch packs, and internal bins that move through staging and cold holding. The label is part of the packaging system, not a separate decoration. If the system is built well, the label stays readable and attached. If it is not, the failure shows up fast as lifting corners, smeared ink, or barcodes that will not scan.
The best buyers approach freezer labeling the same way they approach Custom Labels & Tags and other packaging components: they start with the surface, the storage conditions, and the handling path, then choose the print build to match.
What Custom Freezer Labels Need to Survive
A label usually fails because the surface was damp, the package was handled too soon, or the stock was never designed for the temperature range it saw in production. Once those causes are separated, the specification becomes manageable.
Freezer-ready construction has four jobs. The face stock needs to stay dimensionally stable. The adhesive has to wet out on the substrate and keep gripping through cold cycles. The print layer has to resist scuffing, condensation, and abrasion. The liner has to release cleanly so the label can be applied without stretching, misfeeds, or edge damage. If any one of those elements is weak, the whole label becomes a point of failure.
In clothing and soft-goods operations, these labels show up in a few familiar places:
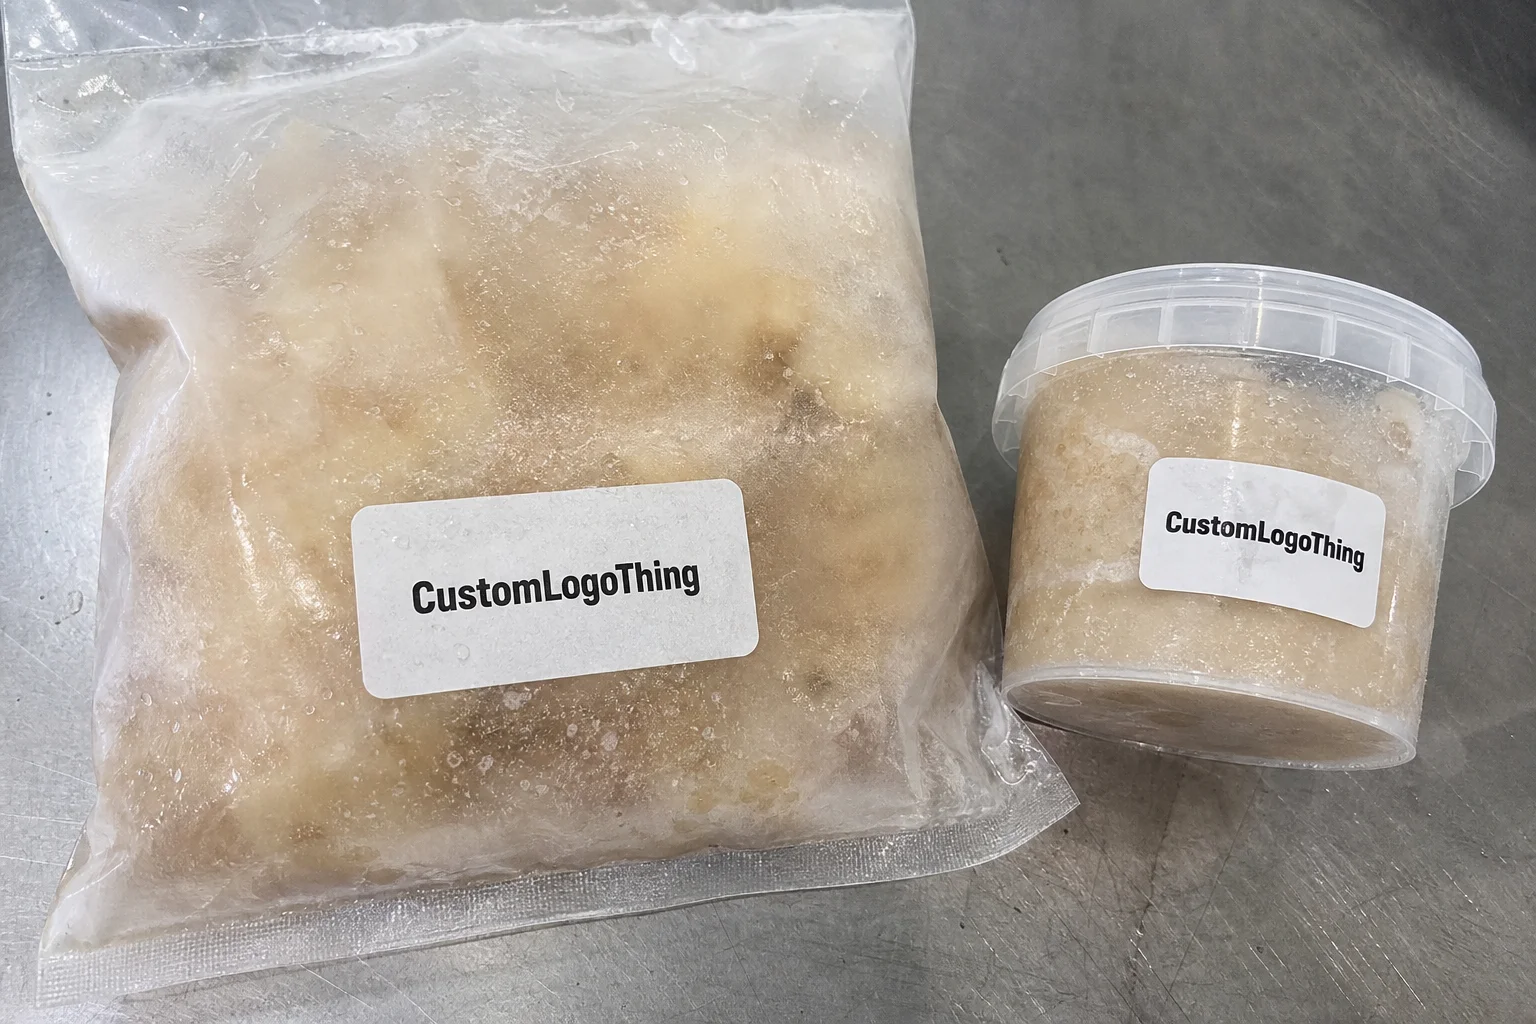
- Poly bags for folded garments stored in cold rooms.
- Inventory totes that move between sorting, staging, and chilled storage.
- Carton ends used for receiving, lot IDs, and dispatch.
- Shipping packs that must keep barcodes readable after temperature change.
There is no universal best stock for all of those uses. A label for a short dwell time on a carton end is not the same as one that needs to survive repeated contact on a flexible film bag. The right answer depends on the substrate, humidity, dwell time before freezing, and how much handling happens after application.
A freezer label rarely fails because the freezer is cold. It fails because the surface was damp, the pack was handled too soon, or the adhesive never got time to anchor.
How Freezer-Ready Labels Are Built and Applied
Every freezer-capable label is a stack of layers working together. The face stock is the printed layer. The adhesive does the holding. The liner protects the adhesive before application. Then there is the print itself, which may be direct printed, transfer printed, or protected by a coating or laminate depending on the job.
Print method matters more than many buyers expect. Thermal transfer is often the first choice for barcodes, lot numbers, and logistics labels because the ribbon can deliver good scuff resistance and crisp variable data. Digital printing works well for shorter runs, changing artwork, and color-heavy branding, but it usually needs the right finish or protective coating if the labels will be handled frequently. Flexographic printing is a strong option for larger volumes where repeatability and line efficiency matter more than quick artwork changes.
Application conditions can make or break performance. A clean, dry surface gives the adhesive a fair chance. A frosted, oily, or damp surface does not. Flat carton board is easier than textured corrugate. Smooth film is easier than rough or embossed plastic. If the package is already cold, the label may seem to stick at first and still fail later because the adhesive never fully wet out.
The practical rule is simple: apply to a dry surface, press with firm even pressure, and allow dwell time before the first freeze cycle. In many operations, that means waiting several hours, and sometimes a full shift, before the package goes into deep cold storage. The exact window depends on adhesive chemistry, substrate, ambient humidity, and whether the package has already been chilled during transit or staging.
For broader branded packaging programs, the same discipline applies across the line. A label does not behave in isolation. It has to work with the carton, bag, or tote it is attached to, which is why the same production thinking behind Custom Packaging Products also shows up in successful cold-chain labeling.
Material, Adhesive, and Finish Choices That Matter
Material selection starts with the package surface and the storage condition. Paper can work for dry, short-duration applications, especially on cartons that are not exposed to heavy abrasion. Film stocks, usually polypropylene or polyester, are stronger choices when moisture, rubbing, or repeated handling are part of the workflow. Specialty synthetic facestocks are often the safest route when labels need to remain legible after several temperature swings and contact with cold surfaces.
Adhesive choice deserves the same attention as the facestock. A permanent cold-temperature adhesive is the most common request because it is designed to grab in cooler environments and resist edge lift once the package is in storage. A removable adhesive may be appropriate for internal process labels, but it is not the default for freezer use. More aggressive formulations can help on textured cartons or difficult films, though they are not always the right answer if the label needs to come off later without residue.
Finish changes performance, not just appearance. A matte surface often improves readability under warehouse lighting and reduces glare around barcodes. Gloss can support stronger color and sharper branding, but it may show scuffs sooner. A protective coating or overlaminate can improve resistance to moisture, rubbing, and repeated scanning.
| Label Build | Typical Use | Approx. Unit Price at 5,000 | Strengths | Tradeoffs |
|---|---|---|---|---|
| Paper stock with cold-temp adhesive | Carton IDs, short-duration cold storage | $0.10-$0.18 | Lower cost, easy printability | Less abrasion and moisture resistance |
| Polypropylene film with permanent adhesive | Poly bags, bins, handling-heavy packs | $0.18-$0.30 | Better durability, cleaner scuff resistance | Higher material cost |
| Polyester or specialty synthetic with protective finish | Longer cold exposure, barcode-critical jobs | $0.24-$0.42 | Strong readability, higher moisture resistance | More expensive, sometimes slower to source |
If the label is part of a larger packaging design or custom printed boxes program, the surface finish on the carton or bag matters too. A coated carton panel is not the same as uncoated corrugated board. A soft-touch film is not the same as untreated polyethylene. Good package branding respects those differences rather than forcing one specification across every surface.
For buyers who also think about sustainability, it helps to ask whether the label structure affects downstream recycling or waste handling. Organizations such as the Institute of Packaging Professionals and standards groups like ISTA are useful references when you want to consider the label as part of the full transport system.
Production Steps, Proofing, and Lead Time
Most well-run jobs follow the same sequence: spec review, artwork setup, proofing, material selection, printing, finishing, inspection, packing, and shipment. The sequence sounds routine, but this is where a lot of delays hide. If the buyer has not locked size, barcode content, temperature range, application method, and packaging format, the proof loop slows down quickly.
Proofing should answer practical questions, not just confirm that the artwork looks correct on screen. Does the size fit the package? Is the barcode quiet zone correct? Is the copy readable at the expected handling distance? Will the label be applied by hand or by machine? Does it need to dispense from rolls in a particular orientation? Those details determine whether the label runs cleanly in the warehouse or creates waste on the floor.
Lead time changes with quantity and construction. A straightforward repeat order can often move in roughly 7 to 10 business days after proof approval if materials are in stock and the setup already exists. A more specific freezer-safe build with specialty adhesive, custom die-cutting, or roll orientation for applicators often lands closer to 12 to 15 business days, and can run longer if testing is requested before release to production.
There is a practical tradeoff here. Small standard runs can move quickly, but freezer-safe constructions deserve more attention. If the label is meant for cold storage and the package surface is unfamiliar, a short test run is usually smarter than rushing to full volume.
Clear specs also improve the rest of the packaging line. When the label construction is settled early, the order tends to behave better across related items as well, from Custom Packaging Products to shipping materials and internal identification systems.
Cost, Pricing, and MOQ Tradeoffs
Pricing is usually driven by five variables: size, material, adhesive, print complexity, and quantity. Add finishing, die-cut shape, roll format, or specialty testing, and the number rises again. The real cost is not only the unit price, but the labor and waste created when the label peels, smears, or fails to scan in storage.
For freezer-ready work, minimum order quantity, or MOQ, is usually tied to setup time and material yield. If a converting line has to be configured for a custom construction, the run has to be large enough to make that setup efficient. That is why low-volume custom work can look expensive on a unit basis even when the label itself is small. Standardizing size and stock can save money without sacrificing performance.
The better way to judge value is to compare the label cost with the cost of failure. If a lower-cost label peels on 15 percent of cartons, the rework cost can erase the savings quickly. A slightly better label that scans cleanly and stays in place through storage often pays for itself in labor alone.
Typical pricing ranges for a 5,000-piece order with moderate artwork complexity often look like this:
- Basic paper construction: $0.10-$0.18 per unit.
- Film stock with cold-temp adhesive: $0.18-$0.30 per unit.
- Premium synthetic with protective finish: $0.24-$0.42 per unit.
Those ranges move with ink coverage, shape complexity, sheet or roll format, and whether the labels are supplied for manual application or automated dispensing. If the order is barcode-heavy, variable-data, or tied to a broader custom printed boxes program, the quote should also reflect extra prepress time and quality checks.
Common Ordering Mistakes That Cause Peeling or Smudging
The most common mistake is treating freezer use like standard indoor labeling. A general-purpose label may look fine on paper, then begin peeling when it meets condensation, rough handling, or a package that moves from warm staging into cold storage. That is usually not a print defect. It is a specification error.
Surface condition is the second major miss. Dust, frost, oils, textured film, and trapped moisture all weaken adhesion. Even a strong adhesive can struggle if the pack is damp at the moment of application. This is why the same label may work well on one substrate and fail on another, even inside the same warehouse.
Artwork issues matter too. Barcodes printed too small, type set in low contrast, or designs with heavy ink coverage can look polished on screen and still fail in use. Smudging often appears after contact, rubbing, or stacking. If a label has to survive handling and cold cycling, the print build should be designed for that reality rather than for a mockup.
Timing is another variable buyers underestimate. Apply a label too soon after unpacking a cold shipment, and the surface may still be chilled or damp. Put the package into deep freeze before the adhesive has settled, and edge lift becomes much more likely. The fix is straightforward: clean surface, correct adhesive, proper pressure, and dwell time before freezing.
For broader branded packaging systems, these same habits keep package branding from breaking down in the back room. A label that stays put reduces rework, relabeling, and manual checking.
What to Send Before You Request Samples
The fastest way to get a useful sample is to send complete specs up front. Include the package material, label size, storage temperature, application method, quantity, print content, and whether the label has to be removable or permanent. If the label will live on a poly bag, say that. If it will go on a carton end, say that too. The substrate is the main variable.
Ask for a proof or sample on the actual surface whenever possible. A label that behaves well on paper may act differently on film. A sample on the real bag, tote, or carton tells you far more than a generic swatch. That point matters especially for programs that move through packaging, inventory, and shipping in a single day.
A simple test checklist keeps the evaluation honest:
- Apply the label to the real package surface.
- Allow the adhesive to dwell before cold exposure.
- Run the item through the expected storage cycle.
- Check for edge lift, bubbling, or curling.
- Rub the printed area after handling.
- Scan all barcodes or QR codes after temperature change.
FSC guidance can also matter if your packaging program includes paper-based components or responsible sourcing goals. For buyers balancing compliance, storage performance, and brand presentation, that kind of detail belongs in the spec review, not as an afterthought. The same goes for packaging standards and transport testing from groups like FSC and ISTA.
FAQ
How do custom freezer labels stay attached in cold storage?
They rely on a cold-temperature adhesive that can bond before deep freezing begins. Clean, dry application is just as important as the label construction, and the right dwell time gives the adhesive a chance to settle before the first temperature cycle.
Can freezer labels be used on clothing poly bags and bins?
Yes, as long as the label matches the surface and the storage conditions. Poly bags, bins, and cartons all behave differently, so the same label stock may perform well on one and fail on another. Testing on the actual package is the safest route.
What affects custom freezer label pricing the most?
Size, material, adhesive type, print complexity, and quantity drive most of the cost. Specialty finishes, die-cut shapes, and low-volume runs usually raise the unit price. The quote should also reflect whether the labels are supplied in sheets or rolls.
How long does production usually take for freezer labels?
Lead time depends on proof approval, material availability, order size, and finishing requirements. Simple repeat jobs can move faster than highly customized constructions that need more checks. Sharing complete specs early is the best way to avoid delays.
What should I test before placing a full order?
Test adhesion after the label has had time to set, then run it through the expected temperature cycle. Check edge lift, smudging, barcode readability, and abrasion after handling. If the label will live on a specific package surface, test on that exact surface rather than a substitute.
Start with the real package, the real temperature range, and the real handling path. That is the practical route to labels that stay readable, stay attached, and keep clothing inventory moving without rework.