Order Hang Tags for Clothing That Carry the Sale Before the Garment Is Tried On
For many shoppers, Hang Tags for Clothing are the first hard evidence that a garment belongs in a certain price tier. They sit at the edge of the product, but they do a lot of work: identify the item, support the brand story, and signal whether the piece feels thought through or rushed.
A tag can carry a barcode, size, SKU, fiber content, origin, care information, and a short message without looking crowded. It can also fail in a dozen quiet ways. Thin stock curls in transit. Bad hole placement tears at the neck. A glossy finish looks sharp in a sample and scratched in a carton. Those are production problems, not styling preferences.
The best result is usually simple. The tag should look intentional from arm’s length, scan cleanly at retail, survive packing, and match the garment’s price point without trying too hard.
What Hang Tags for Clothing Do Beyond the Price
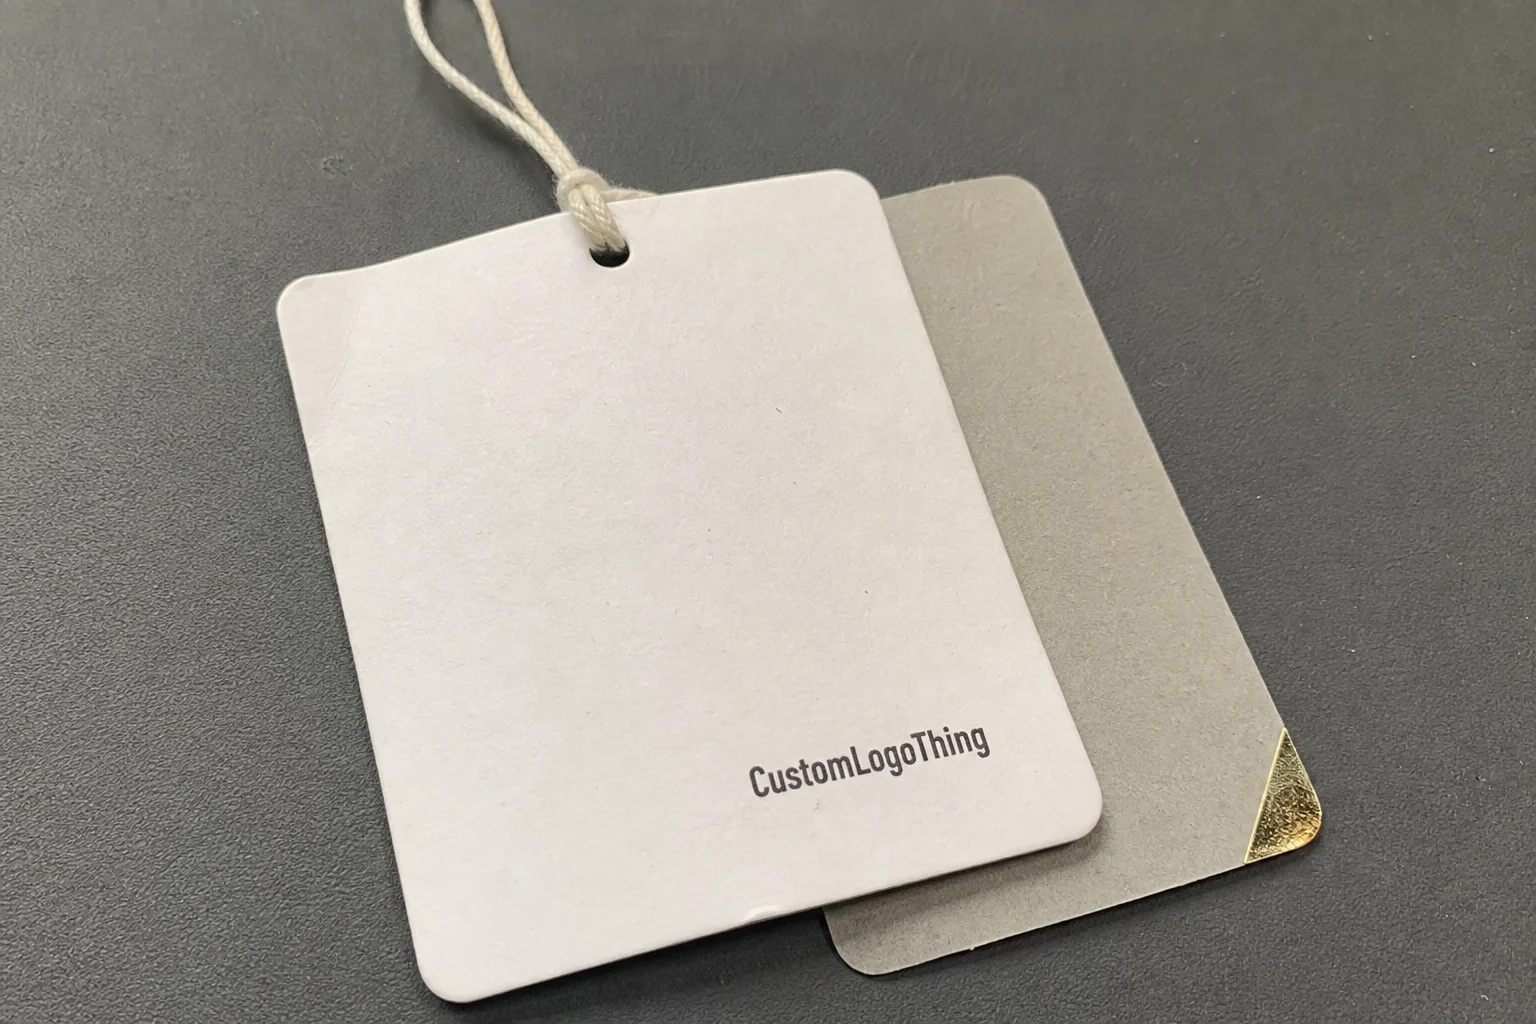
Most buyers start with the text on the tag. That matters, but the real job is broader. Hang tags for clothing shape first impression, organize product information, and help an item move through retail without friction. If the tag feels generic, the garment often does too.
There is a practical split here. On the front end, the tag is part marketing collateral. On the back end, it is an operations tool. It may need to support scanning, sorting, warehouse intake, and compliance. Those requirements can live on the same piece, but only if the layout has hierarchy. When every line gets equal weight, the tag turns into paperwork with a logo.
Retail buyers usually care about three things at once: how the item presents on the rack, whether the data is easy to read, and how the piece holds up after handling. Staff touch tags constantly. Customers bend them, flip them, and compare them. A good spec anticipates that abuse.
A hang tag should look like part of the garment system, not a loose afterthought.
If your packaging already includes woven labels, inserts, or carton stickers, the hang tag should not repeat everything. It should carry the message that matters most in the moment. A consistent visual system across Custom Labels & Tags makes the whole line feel more controlled, especially when different SKUs need slightly different information.
How the Tag Structure and Attachment Work
The structure starts with stock. Most apparel hang tags are built from paperboard or heavy cover stock, then cut into a rectangular, rounded, folded, or custom silhouette. The shape is not just decoration. It affects print area, folding behavior, rack visibility, and cost. A standard rectangle is efficient. A custom cut adds identity, but it also adds setup, waste, and the risk of awkward spacing if the artwork was not built for the shape.
Front and back coverage matter too. A one-sided tag keeps the message clean and usually costs less. A two-sided tag gives room for story copy, size, origin, material details, and retailer data. That is useful if the front needs to sell the product immediately and the reverse needs to support operations.
Attachment methods that actually fit the product
String tie remains the most common attachment because it is inexpensive, easy to apply, and works across most categories. Loop fasteners are useful for larger runs because they hold securely and speed up assembly. Plastic barb attachments can make sense in certain retail systems, though they are not a good fit for every fabric. Seal ties are useful when tamper resistance or bundled presentation matters more than a soft hand feel.
Fabric sensitivity changes the decision. A rough plastic barb that is fine on denim can snag silk, rib knit, or brushed fleece. On premium pieces, a softer tie and smoother hole finish are usually better. On basics, speed and durability often matter more than an upscale look. That is the kind of tradeoff that should be made on purpose, not by default.
Hole placement and reinforcement are not minor details
If the punch is too close to the edge, the tag can tear during handling. If it sits off-center, the tag hangs crooked and looks cheap even when the print quality is good. Reinforced holes, eyelets, and thicker board help, but only when the supplier knows the tags will face real retail handling rather than sit in a sample pouch.
Packaging also affects appearance before the item reaches the store. Tags packed loosely in cartons curl faster and tangle easier than tags packed with spacers or tied in tidy bundles. That becomes visible the minute a store team opens the box. The print can be correct and still look damaged if the packing method was careless.
Material, Finish, and Brand Signal Choices
Stock choice sets the tactile tone. Coated cover stock prints sharply and gives strong color reproduction. Uncoated stock feels more natural and usually fits heritage, workwear, or outdoor brands better. Recycled board can support an environmental message, but only if the texture and print quality still fit the product. FSC certification is worth asking for if sustainability claims are part of the brand story; the standard framework is outlined at FSC.
Thickness matters more than many briefs admit. A 14pt tag is common and economical. A 16pt or 18pt tag feels firmer in hand and tends to hang better on the rack. That extra stiffness can help denim, outerwear, and premium basics. For lightweight garments, though, an oversized board can feel heavy and out of scale with the product.
Finish should reinforce the brand, not just consume budget. Matte coatings reduce glare under store lights and keep the look restrained. Soft-touch lamination adds a smoother, more premium feel and can hide minor scuffs better, though it raises cost and can slightly mute fine detail. Gloss produces brighter color and higher contrast, but fingerprints and scratches show faster.
Foil stamping, embossing, and spot UV are useful when a logo or mark needs a stronger focal point. They also raise the bar on file preparation and proof approval. Small alignment errors become obvious fast on a tag, because the surface area is limited and the eye goes straight to the center mark.
Color is part of the signal. Black and white works well for tailored or minimalist lines. Earth tones fit denim, organic cotton, and utility-driven collections. Bright neons can work in activewear or youth streetwear, but they can feel wrong on a luxury knit even when the print quality is technically excellent. The point is not to be trendy. It is to make the garment look like it belongs to the brand.
For brands building a consistent packaging system, the tag should match the typography and tone used on inserts, labels, and stickers. If you need a broader mix of label and tag options, keep the hierarchy disciplined. A tag does not need to do everything. It needs to do the right things cleanly.
Finish choices and the tradeoffs they create
- Matte finish: Lower glare, cleaner reading under retail lighting, and a restrained look.
- Soft-touch lamination: Strong tactile appeal for premium lines, with added cost and some risk of softening very fine type.
- Gloss coating: Brighter graphics and sharper contrast, but easier to scuff in packing.
- Foil or embossing: Clear brand emphasis when used sparingly, but not worth forcing onto every SKU.
Cost, Pricing, MOQ, and Quote Factors
Pricing usually comes down to a few variables: quantity, board thickness, print sides, finish, attachment hardware, and whether the order needs sorting or pre-kitting. A simple one-color tag on standard board is a different job from a custom die-cut piece with foil, soft-touch lamination, and pre-attached string.
The cheapest unit price is rarely the real decision point. Landed cost matters, but so does how the tag changes the product on the shelf. A tag that costs a little more and makes the line feel more credible can be worth it if it helps the garment justify a higher price or reduces presentation problems at retail.
MOQ tradeoffs are straightforward. Small runs are useful when testing a new line or a seasonal drop, but the unit price is usually higher because setup is spread across fewer pieces. Larger runs improve pricing, though they increase storage risk if the collection changes or sells through faster than planned. For smaller brands, a mid-size run often sits in the practical middle.
| Spec tier | Typical use | Typical unit cost at 5,000 pcs | Lead time impact |
|---|---|---|---|
| 14pt, single-sided, string tie | Basics, promos, entry-level apparel | $0.10-$0.18 | Fastest |
| 16pt or 18pt, two-sided, matte finish | Core retail line, stronger shelf presence | $0.18-$0.32 | Moderate |
| Heavy board, soft-touch, foil or spot UV | Premium, boutique, giftable apparel | $0.28-$0.55 | Longest |
How to get a quote that is actually comparable
Send the same facts to every supplier. Finished size, board thickness, print sides, number of colors, finish, attachment method, artwork status, quantity tiers, shipping location, and whether the tags need to be bundled or assembled. Without that detail, two quotes can look similar while covering different work.
Also ask what the quote includes. Proofing, plates or setup, packing, cartonization, and freight can move the final number more than people expect. A low headline price is not useful if the order picks up hidden finishing charges later. Clarify that before comparing suppliers.
If recycled content or transit performance matters, ask for documentation instead of verbal claims. For shipping resilience, test language aligned with ISTA is a useful reference point, especially when tags are packed with other retail components and need to survive multiple handoffs.
Typical pricing reality: on a clean 5,000-piece order, straightforward tags often land around $0.12-$0.22 per unit, while premium builds can move well above that once specialty finishes and assembly are added. The spread is normal. The spec drives the number.
Production Steps, Timeline, and Lead Time
The production flow is not complicated, but it is easy to slow down if the file or spec is incomplete. It starts with artwork review and prepress checks, then proofing, print setup, cutting, punching, finishing, assembly, and packing. Each stage depends on the one before it.
For standard hang tags for clothing, a straightforward run often takes 8-12 business days after proof approval. If the order includes custom shapes, specialty finishes, or pre-attached hardware, 12-15 business days is a more realistic expectation. Complex work or stock substitutions can push that further if materials need to be sourced mid-job.
What usually slows the schedule
- Missing or low-resolution artwork.
- Late proof approval or copy changes after sign-off.
- Custom die-cuts that require a new cutting form.
- Specialty finishes that need extra setup or drying time.
- Stock shortages that force a board change.
The fastest way to keep a project moving is to decide who approves the proof before the proof arrives. Too many tag orders stall because one person wants the logo moved, another wants the legal text changed, and nobody owns the final decision. That can cost days.
Clean artwork matters too. Supply files in the correct format, include final copy, and specify color references rather than leaving the supplier to guess. If the launch date is fixed, choose standard stock and standard finishing wherever possible. A controlled spec beats a clever one that slips a week.
Packing is part of production, not an afterthought. Cartons should protect corners and prevent string tangles. A tag that leaves production in good shape can still arrive bent if the carton fill is wrong. That is one of the easiest places to lose value.
Common Mistakes That Undercut Retail Impact
The most common mistake is visual overload. Too much copy, too many fonts, and too many logos turn a small surface into a cluttered one. From a shopper’s distance, that reads as confusion, not detail.
Mismatch causes damage too. A heavy embossed tag on a low-price tee can feel overbuilt in the wrong way. A flimsy tag on premium outerwear makes the garment feel cheaper than it is. The tag needs to match the price point and the fabric story, or the presentation feels off before the customer touches the item.
Operational errors are just as costly. A barcode that does not scan cleanly slows store staff. Missing origin or care information can create compliance problems. Weak hole reinforcement leads to tearing. A finish that scuffs during packing makes the tag look older than the garment.
The mistakes below show up often:
- Putting the story copy on the front instead of the decision-making information.
- Using type that reads well on screen but disappears in hand.
- Choosing a finish that looks good in a sample and marks up in transit.
- Ignoring how the attachment behaves on knitwear, silk, or coated fabric.
- Ordering a quantity that saves pennies but leaves dead stock behind.
If the tag cannot survive packing, shipping, and store handling, the design is not finished.
Multi-SKU programs are where discipline matters most. A smart system keeps enough variation to identify the product clearly, but not so much variation that every colorway becomes a separate production puzzle. Standardization cuts errors and makes reorders faster.
How to Choose Specs and Place the Order
The cleanest way to spec hang tags for clothing is to work from the garment outward. Start with the product category and price point. Decide what the tag must communicate. Then choose stock, finish, shape, and attachment. That sequence keeps the order practical instead of decorative.
A practical ordering path
- Define the garment type, price point, and retail setting.
- List the required information: brand name, size, SKU, barcode, care, origin, or retailer-specific data.
- Choose the paperboard, finish, and die-cut shape that match the line.
- Pick the attachment method that will not damage the fabric or slow production.
- Build quote tiers so suppliers can compare like for like.
For the quote package, include final dimensions, artwork files, color references, quantity, and packing rules. If the tags need to be grouped by size or style, say so up front. If they need to ship with other packaging components, note that too. The fewer assumptions a supplier has to make, the fewer corrections show up later.
Brands that already have a broader packaging system should evaluate the tag in context. If inserts, woven labels, stickers, and hang tags share the same type family, board tone, and print discipline, the product line feels more mature. That is where a consistent set of Custom Labels & Tags helps across seasonal reorders and new drops.
The next move is simple: review one current product line, identify what the tag is missing, remove anything that does not help the sale or the operation, and turn that into a cleaner spec for the next run. Small changes in size, stock, or attachment can shift how the garment reads on the rack and how efficiently the order moves through production. Done well, hang tags for clothing do more than label the product. They make the product look ready before anyone tries it on.
FAQ
What should hang tags for clothing include?
At minimum, include the brand name, garment size, SKU or price code, and any barcode the sales channel needs. Add care, material, or origin details when the retailer or product category requires them, but keep the front of the tag readable.
Which stock works best for clothing hang tags?
Heavy cover stock is a common choice because it feels sturdy, prints cleanly, and keeps its shape on the rack. Recycled, textured, or uncoated stocks work well when the brand wants a more natural tactile feel.
How do I compare hang tag quotes accurately?
Make sure every supplier is quoting the same size, stock, print sides, finish, attachment method, and quantity tier. Check whether the quote includes proofing, setup, packing, and freight, since the lowest headline number is not always the lowest landed cost.
What affects hang tag turnaround time most?
Proof approval speed, specialty finishing, and stock availability usually have the biggest effect on schedule. Clean artwork and a clear spec sheet help the job move through prepress and production without avoidable delays.
Can small brands order custom clothing hang tags?
Yes. It helps to start with a standard size, one or two finishes, and a quantity tier that matches launch volume. A tighter spec keeps the order affordable and makes the next run easier to improve based on sales feedback.