Personalized Party Boxes: How to Order Custom Packaging That Actually Holds Up
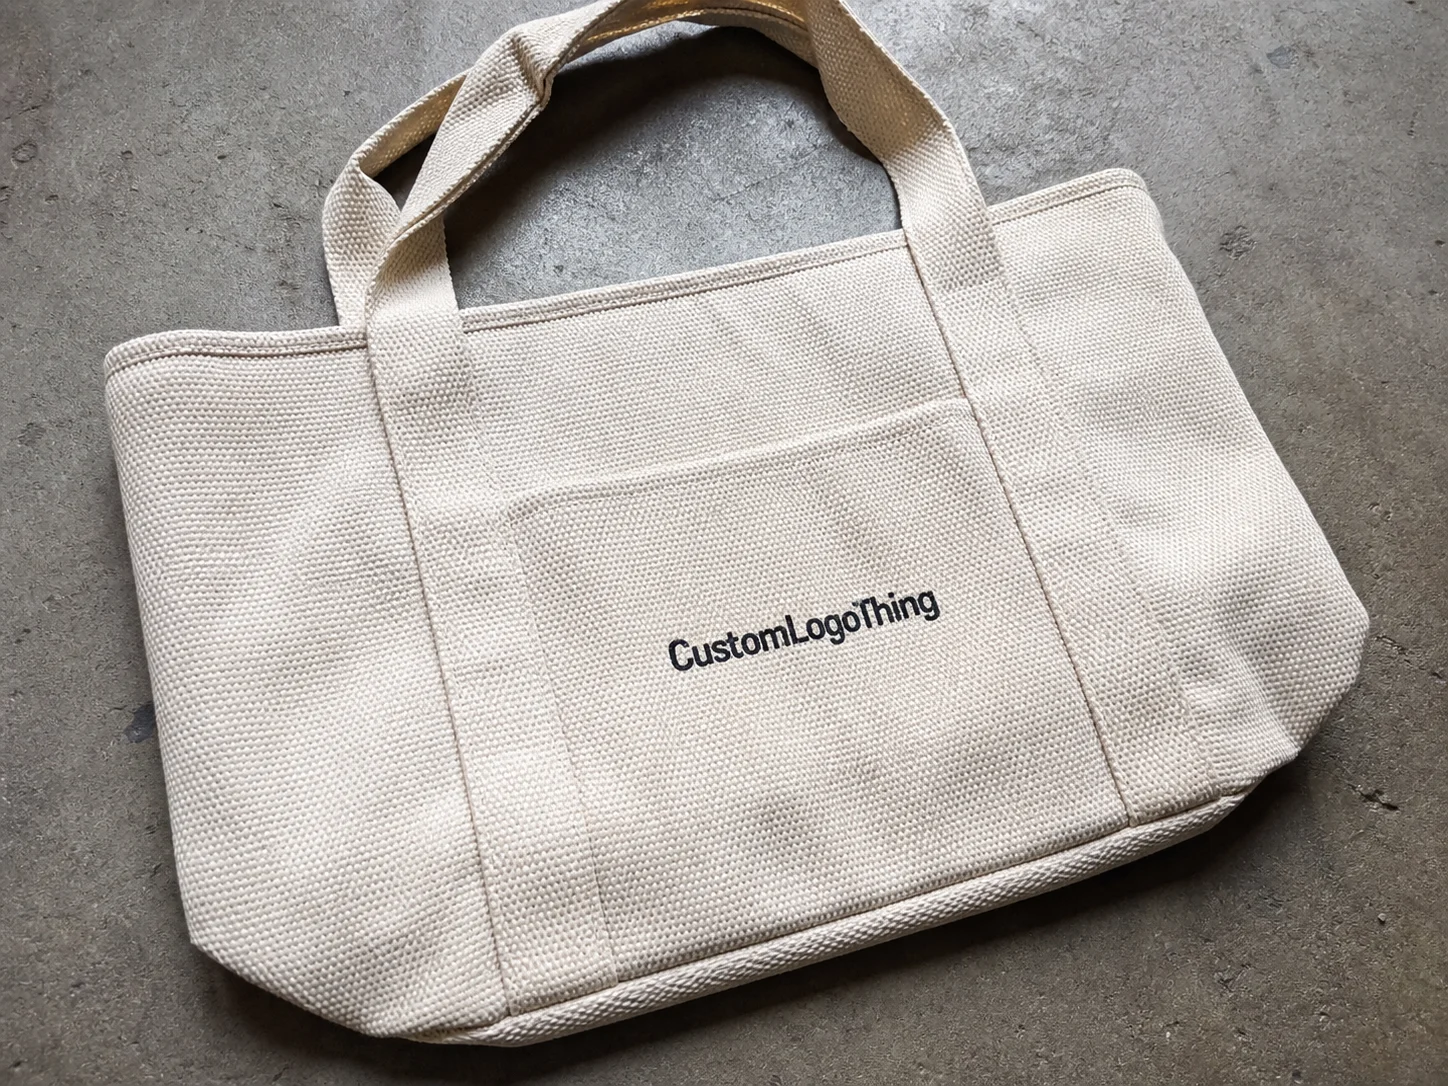
Personalized party boxes change the first impression before the contents are even seen. A plain carton says the item was packed; a box with a name, date, brand mark, or event graphic says the package was planned. That difference is not cosmetic trivia. It affects perceived value, the unboxing sequence, and, in many cases, whether the contents survive handling without looking tired by the time they arrive.
For event favors, small retail sets, birthday kits, bridal party gifts, and mailer-friendly promotions, the box is doing two jobs at once: presentation and protection. The catch is that the best-looking box on a mockup is not always the one that prints efficiently or ships well. Buyers usually learn that only after a second round of revisions, which is why the practical details matter more than the mood board.
A useful way to approach personalized party boxes is to treat the order like a small production run, not a decoration exercise. The structure, stock, finish, and pack-out method shape the result as much as the artwork does. Get those right, and the graphics can do their job without fighting the box.
Why personalized party boxes feel more premium
Packaging has a simple psychology behind it. People judge the outer layer first, then decide whether the contents feel special enough to keep, photograph, or give. That is why a box with a thoughtful layout often outperforms a louder design with more colors or more gloss. The eye reads order as quality. The hand does too.
The difference shows up in small details. A lid that closes squarely. A logo that sits clear of the fold. A panel that holds its color after die-cutting instead of cracking at the crease. These are not dramatic features, but they are the things buyers notice after the first hundred boxes are assembled.
There is also a practical advantage. Personalized party boxes can consolidate multiple pieces into one tidy presentation, which helps with favors, sample sets, cupcake assortments, small gifts, and kits with inserts. Instead of loose items shifting around in a shipping carton, the box becomes the organizer. That reduces visual clutter and can lower the chance of damage during handling.
“A box does not have to be extravagant to feel considered. It only has to fit the item well, print cleanly, and close without drama.”
That last part matters more than most briefs admit. Premium is not the same as crowded. In a lot of packaging jobs, restraint prints better than ambition.
What to include in a clean quote request
Most delays start with missing information. If a supplier has to guess the item size, finish, or delivery method, the quote becomes a rough estimate instead of a usable number. A better brief cuts out that back-and-forth and gives the production team enough detail to check whether the structure will actually work.
At minimum, the request should include the box dimensions, the contents, quantity, artwork format, finish preference, and delivery timeline. If the contents are fragile, oddly shaped, or likely to shift, say so. A gift box for wrapped candy does not need the same internal support as a box for glass jars or bottles.
A concise spec sheet usually answers these questions:
- What goes inside the box, and what are the exact dimensions or weight of the item?
- How many boxes are needed, and is there a small allowance for spoilage or replacements?
- Should the boxes ship flat or arrive pre-assembled?
- Do you need inserts, windows, partitions, ribbon, tissue, or a hang tag?
- Is the finish matte, gloss, soft-touch, foil stamped, embossed, or uncoated?
Those details drive the quote more than the artwork does. A one-color logo on a standard folding carton is a different job from a full-wrap print with a custom insert and a window patch. If the production team is building the job from a vague brief, the result will usually be a vague price.
Artwork files should be sent with the dieline whenever possible. A dieline shows the trim, folds, glue areas, bleed, and safe zones. It is the technical map for the box. A design that looks balanced on a flat screen can still fail once the carton is folded. Names, dates, and logos that sit too close to a crease are the usual casualties.
How structure, stock, and finish change the result
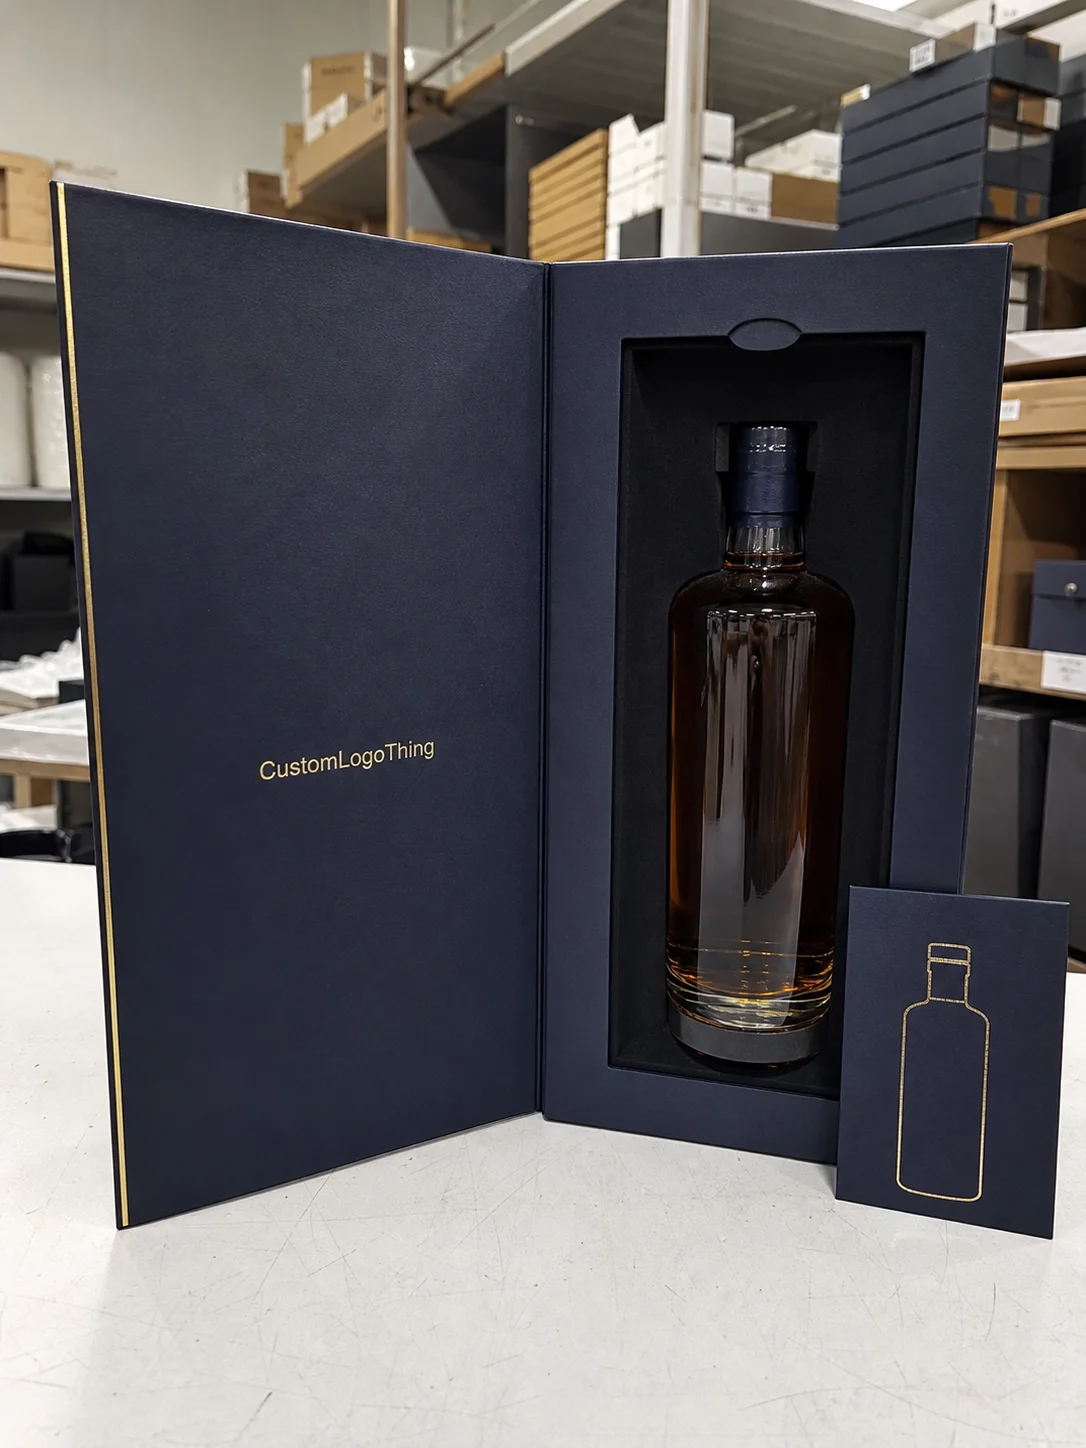
Structure is where a lot of packaging decisions become real. A tuck box, sleeve-and-tray set, window box, and rigid magnetic box all create a different experience. They also cost different amounts to produce, pack, and ship. The right answer is not always the most premium-looking one. The right answer is the one that suits the item, the handling, and the budget.
For light favors and small retail items, folding cartons are usually the most efficient option. They ship flat, run quickly, and keep tooling costs lower. For a more deliberate presentation, sleeve-and-tray construction adds a sense of reveal. A window box works well if visibility matters and the item benefits from being seen before opening. Rigid boxes are the strongest option in terms of perceived value, but they require more board, more hand assembly, and more freight space.
Material choice affects both feel and performance. A 14pt folding carton, a 350gsm SBS or C1S board, an E-flute mailer, and a 1.5mm rigid setup box are all common packaging materials, but they behave differently in production. Thin stock can look crisp in a render and still feel too flexible in the hand. Thicker board generally performs better for heavier contents, but it raises cost and can make folding more labor-intensive.
Finishes are another place where appearance and production trade off against each other. Matte coating reduces glare and usually photographs well. Gloss coating can make colors pop but may show fingerprints more readily. Soft-touch feels expensive, though it adds cost and is not always the best choice for items that will be handled heavily. Foil stamping and embossing can lift a simple design, but both add tooling, setup, and another point where alignment must be checked.
There is no universal best combination. A box for a child’s birthday favor, for example, may be better served by a sturdy folding carton with bright print and a simple closure. A premium gift set for a milestone celebration may justify a rigid box with an insert and a restrained foil accent. Different jobs, different economics.
Cost factors that move unit price
Pricing on personalized party boxes can change quickly because several variables affect the quote at the same time. Quantity is the obvious one. A 250-piece run carries a far heavier setup burden than a 5,000-piece run. Fixed costs like die cutting, plate setup, and proofing do not scale kindly on small orders.
Material thickness matters next. Heavier board generally improves structure, but it increases material cost and can slow down folding or gluing. Coverage also changes the price. A single logo on a white panel is cheaper than a full-bleed graphic, especially if the design uses multiple spot colors, foil, or interior printing.
Assembly affects the total more than many buyers expect. Flat-packed cartons are efficient. Pre-assembled boxes take more labor and freight volume. Inserts add value, but they also add another component to print, cut, and check. Window patches add material and placement work. Each upgrade is small in isolation. Together, they can push a quote into a very different bracket.
Here is a practical comparison of common box styles and what usually drives their price:
| Box style | Typical use | Approx. unit price at 5,000 pcs | Setup and finishing notes |
|---|---|---|---|
| Folding carton tuck box | Small favors, light gifts, retail add-ons | $0.28-$0.55 | Efficient to run, easy to ship flat, best for straightforward graphics |
| Sleeve and tray | Premium favors, candy sets, small kits | $0.42-$0.85 | More assembly than a tuck box, stronger presentation, higher die-cut complexity |
| Window box | Items that should be visible before opening | $0.35-$0.70 | Window film and placement add cost; the window must stay clear of folds |
| Rigid magnetic box | Gift sets, premium event kits, luxury presentation | $1.50-$3.00 | Higher board cost, more hand work, stronger perceived value, more freight space |
Those figures are guides, not promises. Print method, insert complexity, paper source, freight distance, and delivery timing all move the final price. A buyer comparing quotes should make sure the spec is actually the same across vendors. A cheaper number can hide thinner board, fewer finishing steps, or an assembly method that will not survive the use case.
If shipping durability is part of the brief, it is reasonable to ask whether the package should be tested against ISTA testing methods. If paper sourcing matters for sustainability reporting or procurement standards, ask for FSC-certified materials in the quote. Those details are easier to clarify early than to retrofit after approval.
Print, proof, and QC details that matter
A digital mockup is not enough to judge a packaging job. It can hide color shifts, fold stress, and alignment issues that only appear once the carton is cut and assembled. A proper proofing process usually starts with a digital proof, moves through a revised proof if needed, and then reaches either a physical sample or a production proof before full run approval.
The sample is where reality shows up. The buyer can check whether the box folds cleanly, whether the print lines up after creasing, whether the surface coating behaves as expected, and whether the contents fit the insert without scraping or rattling. A box can look perfect in a PDF and still fail in the hand if the fit is too tight or the closure is too loose.
Quality control on packaging is usually a mix of visual checks and structural checks. Good suppliers will inspect registration, color consistency, glue integrity, cut accuracy, and board finish. That sounds basic, but the work is in the repetition. A good first sample does not guarantee a clean full run if the press drifts, the board batch changes, or the glue line becomes inconsistent.
There are a few faults that show up over and over again:
- White edges from missing bleed or poor trim control.
- Cracked ink at the folds because the design sat too close to a crease.
- Misaligned windows or inserts that shift the visual balance.
- Closures that are too tight on the sample and too loose in production.
- Color variation between proof, sample, and final run.
One more point: the sample should reflect the actual stock and finish, not just the shape. A plain paper dummy helps with structure, but it will not tell you how a soft-touch coating, foil accent, or laminated surface will look in real use. For jobs where presentation is the whole point, that distinction matters.
Timelines and production realities
Lead time is usually more complicated than the first quote suggests. Production is only one part of the schedule. Artwork review, proof approval, sampling, finishing, packing, and freight booking each add time. A buyer who only hears “ten to fifteen days” may be underestimating the full timeline by a wide margin if the project has special finishes or a fixed event date.
For a straightforward printed carton, 12-15 business days after proof approval is a common production window. That can shift depending on press capacity, stock availability, and the amount of finishing involved. Rigid boxes, foil, embossing, custom inserts, and window patches usually need more handling. More steps means more points where the job can be delayed if something needs a correction.
Most delays come from a small set of problems:
- Artwork changes after approval.
- Files that need bleed or safe-zone corrections.
- Late decisions on coating, foil, or insert type.
- Material backorders, especially on specialty board or window film.
- Freight booked too late for the event date.
The safest schedule separates factory time from transit time. That sounds obvious until a delivery window gets squeezed by customs, carrier delays, or a last-minute reprint. Event packaging has a narrow tolerance for surprises. If the boxes are tied to a launch, a wedding, a seasonal sale, or a party date, build in a buffer. A little extra time is cheaper than a rushed re-run.
There is a second reason to avoid last-minute approvals. People tend to make better packaging choices when the timeline is not collapsing around them. The finish is easier to judge, the structure is easier to compare, and the quote is easier to interpret. Pressure creates bad compromises. Packaging exposes those compromises fast.
Common mistakes that make a good design look cheap
Packaging rarely looks cheap because of one big mistake. It usually happens through a chain of smaller ones. Oversized artwork is a common example. A pattern or logo that crosses a fold without planning will distort once the box is assembled. The same problem appears when text is pushed too close to the trim line and gets clipped or feels cramped.
Thin stock is another culprit. It can work for very light items, but it tends to disappoint when the box is handled often or holds anything with weight. Weak closures have a similar effect. If the lid pops open too easily or the flap does not hold, the box stops feeling finished.
Design clutter is more subtle, but it ages the package quickly. Too many colors, too many fonts, and too much copy make the surface harder to read. A clean brand mark, a limited palette, and one strong visual idea usually print better than a dense layout that tries to say everything at once.
Skipping the sample is a cost-saving mistake that usually costs more later. A mockup cannot tell you how the carton feels in the hand, how the coating behaves under light, or whether the insert grips the item correctly. The physical sample is where the guesswork ends.
There is also a production truth that gets overlooked: paperboard and rigid board behave differently. A design that feels elegant on a rigid box may look crowded on a folding carton. The structure should lead the design, not fight it. That is the difference between a box that looks considered and a box that just looks decorated.
A practical way to spec your next run
If you are ordering personalized party boxes for the first time, the best move is to define the structure before the artwork. That order reduces revisions and keeps the design tied to the actual box geometry. Start with the item dimensions, the required clearance, and the handling method. Then choose the box style that makes sense for the job.
From there, build the spec around the use case. A box for a small party favor that sits on a table only needs enough structure to present cleanly and survive transport. A box that ships direct to a customer needs stronger corners, more predictable closure behavior, and a finish that resists scuffing. A premium gift set may justify heavier board and a more complex presentation, but only if the added cost is visible in the final experience.
Before approving a quote, compare these points side by side:
- Same box dimensions and closure style.
- Same board thickness and print method.
- Same finish, insert, and window spec.
- Same quantity, packing method, and delivery location.
That comparison prevents the cheapest quote from being the smallest quote in disguise. It also makes tradeoffs visible. Maybe the lower price comes from thinner board. Maybe the higher one includes a better coating, tighter print registration, or a more stable insert. Once the specs are aligned, the decision is easier.
Personalized party boxes work best when the packaging choices are disciplined. The graphics should support the structure, the structure should support the contents, and the contents should arrive looking like they were packaged with intention. That is the whole point, and it is usually more convincing than trying to force luxury through decoration alone.
How many personalized party boxes should I order for a small event?
Order slightly above the guest count to cover spoilage, last-minute additions, and any samples you want to keep aside. A small overage also helps absorb setup waste and can reduce the per-box cost if the supplier has a practical minimum run.
What is the best material for personalized party boxes?
The best material depends on the weight of the contents and how the box will be handled. Lighter favors usually work well in folding cartons, while heavier or higher-value items benefit from thicker board or rigid construction.
Do I need print-ready artwork for custom boxes?
Yes. Print-ready files should be built to the dieline with correct bleed and safe margins. If the artwork is still in concept form, ask for a template review before approval so layout problems are caught before production.
What affects the turnaround time the most?
Proof approval, special finishing, insert complexity, and material availability affect timing the most. Shipping time is separate from factory time, so both need to be included in the schedule from the start.
How can I keep the cost down without losing the custom look?
Use a standard size, simplify the print setup, and choose one finish that does the visual work instead of stacking several effects. A strong layout usually looks better, and costs less, than a crowded box with too many extras.