Personalized Satin Sewing labels do something small and surprisingly powerful: they make a garment feel complete the moment it is turned inside out. The touch is softer than many woven alternatives, the surface catches light in a cleaner way, and the brand message feels more deliberate. That combination matters in apparel, babywear, sleepwear, handmade goods, and private-label accessories, where the label sits close to skin and has to look polished without adding bulk or scratchiness.
The appeal is not only visual. A good satin label can carry a logo, size, care information, and fiber content while still fitting neatly into a seam. A bad one can twist, fray, fade, or feel oddly stiff after one wash cycle. That gap is why buyers who order labels once tend to think differently the second time around. The spec is the product, not just the artwork.
For brands comparing options, the real decision is rarely “Do we want a pretty label?” It is “Which construction, finish, and fold will behave properly in the garment we actually sell?” That question sounds technical because it is. The best results usually come from matching the label to the fabric weight, seam allowance, laundering frequency, and the amount of text that has to fit on the face.
Why personalized satin sewing labels feel so premium
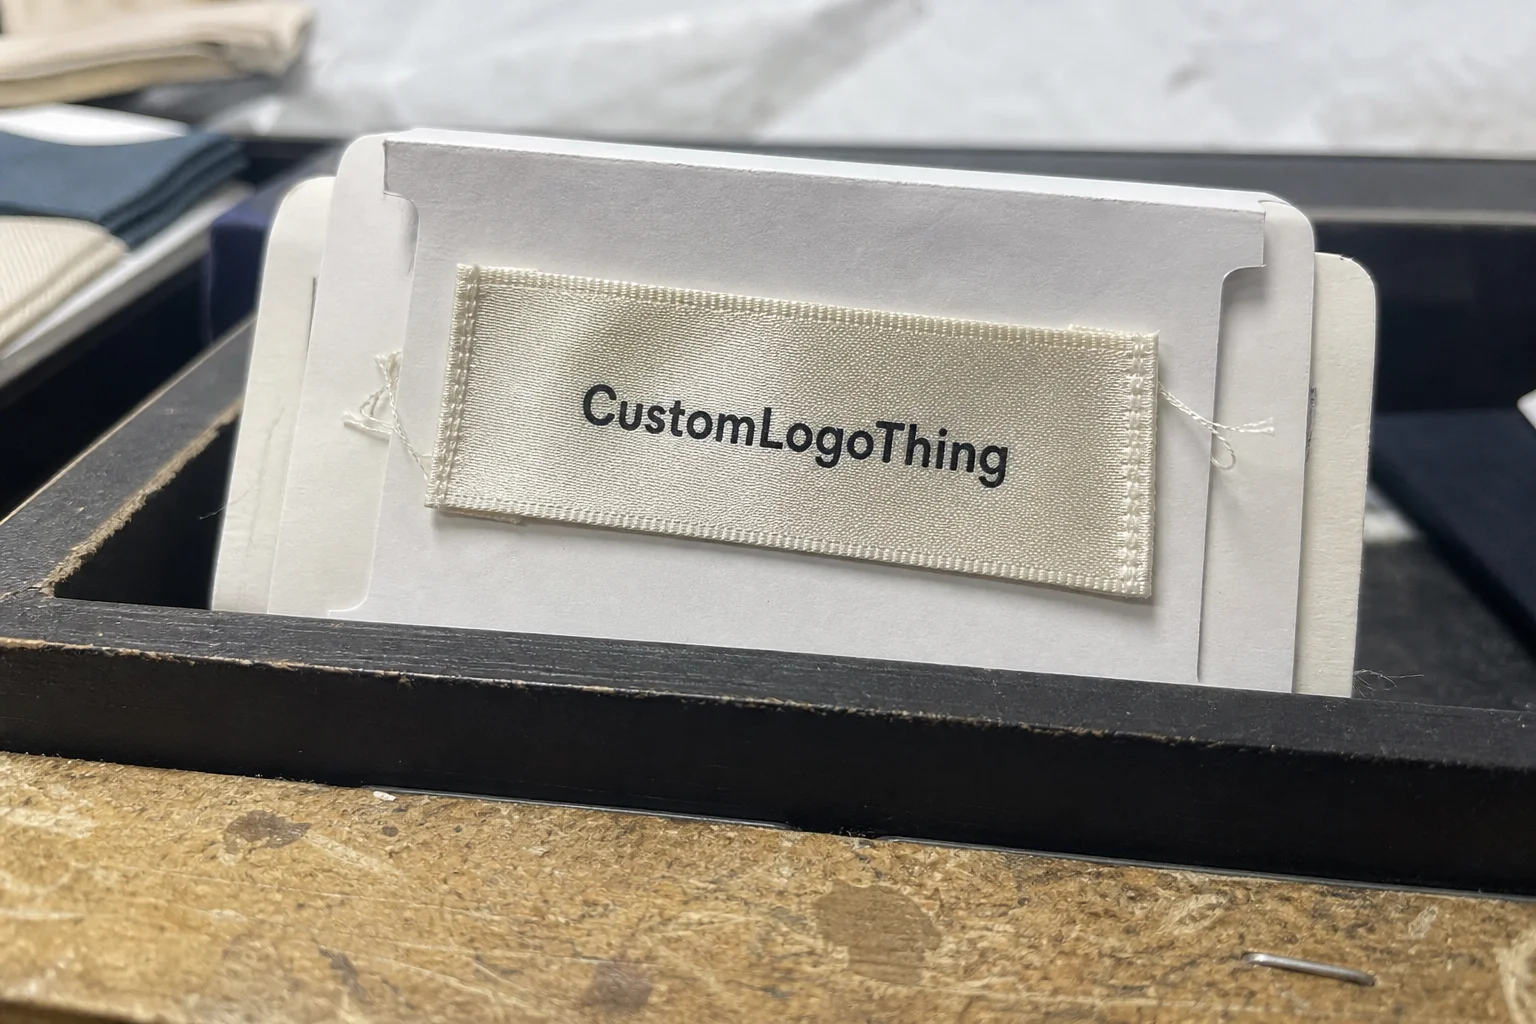
Satin has a smooth face and a soft hand-feel, so it tends to read as more elevated than a plain rough-edged tag. In practice, that softness is often the reason buyers choose it for neck labels, lining seams, or garments aimed at children and sleepwear. The customer may not consciously analyze the label, but they will notice if it scratches, wrinkles badly, or looks cheap against a carefully made garment.
That tactile experience has real branding value. A label is one of the few parts of a garment the customer touches before they read the care instructions or sizing. On a boutique piece, it can reinforce the impression that the item was made with attention rather than simply assembled. On a mass-produced line, it can raise the perceived quality without changing the cut or fabric.
There is also a practical reason satin stays popular: it can carry enough information without becoming visually heavy. A sewn-in care label that includes a logo, size, and washing details often has to work very hard in a tiny area. Satin gives that copy a softer frame, especially when the design is clean and the type is not overcrowded.
“A good label should be noticed once, then disappear into the garment in the right way.”
That balance is not automatic. Satin can look premium and still fail if the edges are poorly finished or the artwork is too dense. The strongest orders usually come from buyers who understand that comfort, durability, and legibility all have to line up at the same time.
How satin sewing label production works
The production process usually starts with the artwork, but the artwork is only one part of the specification. A supplier typically checks the logo, text, size, fold style, intended placement, and quantity before preparing a proof. That proof matters because a design that looks balanced on a screen can become cramped once it is reduced to label size.
There are a few ways satin labels are made. Some are printed on satin ribbon or satin fabric, some use heat transfer, and others are woven with a satin-like finish. The terminology gets loose in sales material, so it helps to ask how the design is actually applied. A printed satin label and a woven satin label do not behave the same way in washing, sewing, or edge wear.
Printing tends to work well for simple logos, short care messages, and sharp contrast. Heat transfer can handle certain fine details and can be useful when the design contains more than one element. Woven versions create the artwork as part of the structure, which can improve durability but may limit how tiny the text can get. The right method depends on what has to be shown and how much handling the label will take.
Most production runs follow the same broad pattern: artwork review, proof, approval, manufacturing, finishing, packing, and shipment. Where buyers run into trouble is usually not the machine side of the order; it is the input side. Missing dimensions, unclear fold direction, low-resolution files, and last-minute text changes can stall an otherwise simple run.
Construction style changes how the label sits in the garment:
- Single-fold labels are folded once and often sewn into a seam for a compact finish.
- Center-fold labels are folded in the middle and attached into a seam, which keeps the message visible on one side.
- End-fold labels have folded ends for a cleaner edge and a more finished look.
- Straight-cut labels are cut square or rectangular and need careful edge treatment so they do not fray.
- Loop-fold labels can show information on both sides or be used where a hanging point is needed.
Edge finishing deserves more attention than it usually gets. Satin can fray if the cut is not clean or if the edge is left exposed in a high-friction area. Some suppliers use heat cutting or ultrasonic cutting; others rely on folding to hide the raw edge inside the garment. A folded label in a protected seam can tolerate more wear than a flat cut label attached in a rougher location.
Proofing should include more than a glance at the logo. A good check covers spelling, alignment, fold orientation, edge placement, and whether any care text remains readable at actual size. For brands working with a specific color standard, a proof is also the place to check how the final method will approximate those tones. Satin finishes can shift the appearance of color slightly because of sheen, weave, and print absorption.
If you are sourcing labels across more than one style, the same logic applies to broader Custom Labels & Tags programs. The material may change, but the production discipline does not: clear specs, legible copy, and a realistic sewing plan still drive the result.
Key specs that affect look, feel, and durability
The satin base itself is the first thing to evaluate. A lighter satin usually feels softer and drapes better, while a heavier satin holds shape more firmly and often gives a cleaner edge after cutting or folding. That choice affects not just the look but also how the label behaves in stitching. A flimsy base can pucker, while an overly stiff one can sit awkwardly against thin fabric.
Size is the second spec that changes everything. A label around 1 inch by 2 inches can handle a logo and a short line of text. Add care symbols, fiber content, or a longer brand statement, and the layout starts to crowd quickly. Tiny type can work on satin, but only if the design is simplified and the production method supports fine detail. If not, the text may blur after printing or disappear into the sheen of the material.
Color contrast also matters more than many buyers expect. A light logo on a glossy background often reads better on screen than in real life, where lighting, stitching, and fabric texture interfere with clarity. Dark text on pale satin is usually safer, but even that can lose some crispness if the label has too much shine. A sample or pre-production proof is the best way to judge it at actual scale.
Placement affects comfort and durability at the same time. A neck label needs to stay soft and flat. A waistband label can tolerate more structure. Side seams usually offer more room, but if the seam allowance is narrow, the label may bunch, fold back on itself, or shift during sewing. The intended stitch location should be part of the order spec from the start.
Durability depends on use pattern. A sleepwear label may be washed repeatedly and still needs to stay readable. A decorative pouch label may face less abrasion but more visual scrutiny. If the garment will be packed tightly, worn against skin, or laundered often, then the label needs secure edges, strong print adhesion, and artwork that avoids hairline details.
| Spec choice | Typical effect | Best for |
|---|---|---|
| Lightweight satin | Softer drape, lower structure | Neck labels, babywear, lingerie |
| Heavier satin | Cleaner body, more stability | Outerwear, bags, waistbands |
| Simple 1-color print | Clear text, lower production complexity | Care labels, minimalist branding |
| Multi-color artwork | Richer brand appearance, higher setup needs | Retail collections, premium presentation |
For brands that manage product testing, label evaluation should sit alongside the rest of the quality plan. Distribution testing references from ISTA and packaging stewardship materials from EPA are useful touchpoints if the label is part of a broader packaging and transport workflow. They do not tell you how to design a satin label, but they do help frame how the finished product will be handled downstream.
Cost, pricing, MOQ, and unit cost factors
Pricing for personalized satin sewing labels usually comes down to five variables: size, material weight, print complexity, fold style, and quantity. The unit cost is rarely a fixed number because the setup effort does not shrink at the same pace as the order size. A small run can cost a lot more per piece than a larger run with the same design simply because the prep work is spread across fewer labels.
For a straightforward order, a moderate production run might land in the range of roughly $0.08 to $0.20 per label, though small quantities often come in higher once proofing and setup are included. Complex artwork, special folding, tight registration, or custom packing can move the price upward. Rush scheduling usually does the same. Those are normal manufacturing variables, not hidden fees in the abstract.
MOQ means minimum order quantity, the smallest run a supplier will agree to make for that spec. Lower MOQs are useful for sampling a new collection or testing whether the label matches a garment line, but they often carry a higher per-unit cost. That happens because the fixed work—file review, machine setup, color matching, and cutting—still has to be done.
There are a few cost drivers that can surprise first-time buyers:
- Artwork cleanup if the supplied file needs redrawing or resolution repair.
- Special cuts if the label has a custom shape, rounded corners, or unusual dimensions.
- Extra folds that add handling and inspection time.
- Rush production when the schedule is compressed.
- Retail packing such as bundled counts, bagging, or carton labels by style or size.
Sampling nearly always costs more per unit than full production. That is not a penalty; it is the cost of proofing a tiny run with the same setup effort as a larger order. A sample is cheaper than correcting a thousand wrong labels, which is why experienced buyers treat sampling as part of the production budget rather than an optional extra.
When requesting a quote, the more complete the brief, the more accurate the number. Exact dimensions, fold type, artwork file, quantity, intended garment use, sewing position, finish preference, and timeline all shape the final estimate. If the supplier has to guess whether the label is going into a neck seam or a side seam, the price will usually be less reliable.
Process and timeline: from artwork to delivery
The order process usually begins with an inquiry and a specification review. After that comes the proof, then approval, then production, finishing, and shipment. On paper, it is a straightforward sequence. In practice, the speed depends heavily on how quickly the buyer can answer proof questions and whether the artwork is ready to print without revision.
Delays usually come from three places: incomplete artwork, late copy changes, and slow approvals. A label order can sit idle if one line of care text is still under review or if the dimensions were never fully confirmed. That is especially true when the supplier cannot release the production slot until the proof is signed off. The machine time is often less of a problem than the paperwork.
Standard lead times are typically counted after proof approval, not from the first message. For many custom orders, buyers may see something like 12 to 15 business days once everything is confirmed, though larger quantities, complicated finishing, or heavy season demand can extend that. Rush service is sometimes available, but it usually adds cost and reduces flexibility in proof changes.
Finishing and packing can add another layer of time. If labels need to be counted into exact bundles, sorted by size, packed by style, or boxed in a specific order, the final stage takes more handling. For Apparel Brands That are building a seasonal launch, it is usually better to receive the labels early and hold them than to schedule sewing before the labels arrive.
That timing discipline also matters across the rest of the product flow. If packaging, sewing, and transport are coordinated badly, even a well-made label can create friction later. Small items tend to expose sloppy planning quickly because they are easy to overlook until the last minute.
Step-by-step: how to order the right label spec
Start with the use case. A label that only needs to show a logo can be much simpler than one that must carry a logo, size, fiber content, and care instructions. If the label has too many jobs, it will usually become too small, too dense, or too hard to read after sewing. Deciding what the label is supposed to do is the fastest way to narrow the spec.
Choose the size and fold based on the garment location. Neck labels need comfort and flatness. Side-seam labels can usually be a little wider. Waistbands may need more structure to stay in place. For babywear and sleepwear, soft edges and low bulk should be prioritized. For bags or pouches, the visual finish may matter more than skin contact.
Then prepare the artwork properly. Clean vector files are best, but at minimum the design should be sharp, legible, and not dependent on ultra-thin lines. Tiny details often vanish on satin. Fonts need enough weight to survive production, and the overall layout should be tested at actual size rather than only on a computer screen. If the supplier gives minimum stroke guidance, follow it.
Ask for a proof or sample before approving the run. Check spelling, spacing, contrast, fold orientation, and how the label will sit when sewn. Read any care text as a customer would. A mistake on a label is hard to ignore because it gets repeated across the whole production batch.
Before the order is released, confirm quantity tolerance, packaging format, and the delivery window. Save the approved spec sheet. That document becomes the reference for reorders and helps keep branding consistent across future drops. Brands that manage multiple styles often find that a stable label spec reduces avoidable production noise more than any other small item in the workflow.
Common mistakes when buying satin clothing labels
The most common mistake is trying to fit too much information onto a small piece of satin. A logo, a long brand line, several care instructions, a size marker, and a web address can look manageable in a mockup and turn unreadable in production. Satin is not forgiving of clutter. Once the design gets crowded, the sheen and the stitching start working against legibility.
Another issue is choosing the wrong fold or cut for the stitch location. If the label is too stiff or too long for the seam, it can fold awkwardly or leave a noticeable ridge. If the edge is not protected, fraying can show up sooner than expected. The sewing method and the label shape should be planned together rather than separately.
Readability problems come up when buyers use pale text on a glossy background or rely on very fine lines that disappear under real lighting. A design that looks elegant on a monitor can become faint on fabric. Small type is possible, but only when the production method and the material weight support it.
Wash testing gets skipped more often than it should, especially on short runs. That is a risk. Even a label that feels perfect on day one can become distorted, scratched, or rough after laundering. If the label is going inside apparel, a quick comfort check and a simple wash test are worth the time.
Incomplete specifications also cause avoidable revisions. If the order does not state dimensions, placement, fold style, packaging requirements, or quantity tolerance, the supplier has to pause for clarification. That slows the job and can lead to resampling. In label production, clarity is not administrative fluff; it is how mistakes are prevented before they become inventory.
Expert tips for better results and next steps
Keep the message short. The strongest personalized satin sewing labels usually do one or two jobs well. If there is limited space, put the brand mark first and let the care details live in a separate panel or separate label where they can breathe. Density is the enemy of clean satin work.
Ask for a pre-production sample image or proof photo when matching an existing line. That matters more than most buyers admit, especially if the label needs to coordinate with a specific fabric shade, thread color, or prior season’s packaging. Visual comparison catches mismatches that written specs cannot.
Build one master spec sheet and keep it updated. Include size, fold type, artwork version, color reference, sewing position, quantity range, and packing format. Reorders become much easier when the baseline is already documented. For brands with several product types, that single sheet can prevent a lot of avoidable back-and-forth.
Plan inventory using real consumption rather than rough guesswork. A garment with two labels per unit does not run on the same math as one that only needs one. Labels are small, but they still create stock issues if they are not counted properly. The better the reorder math, the fewer last-minute compromises on artwork, finish, or delivery speed.
Review the approved sample, confirm the sewing position on the garment, and reorder before stock gets tight so the same personalized satin sewing labels can stay consistent across every shipment. That consistency protects presentation and keeps production from stalling on a tiny component that should have been invisible.
What are personalized satin sewing labels used for in clothing?
They identify a brand, size, care instruction, or product line inside apparel and soft goods. They are a common choice when a softer, more premium-feeling label is preferred against skin.
Are personalized satin sewing labels durable enough for washing?
Yes, if the print method, material weight, and edge finish are chosen for laundering. Durability improves when the artwork is simple, contrast is strong, and the label is sewn into a protected seam.
How do I choose the right size for satin sewing labels?
Match the size to the amount of text and logo detail you need. Leave enough room for folds, seam allowance, and readability after sewing.
What affects the price of personalized satin sewing labels the most?
Quantity, label size, fold style, number of colors, and finishing complexity are the biggest drivers. Rush orders and custom packaging can also raise the final unit cost.
How long does production usually take for custom satin labels?
Lead time depends on proof approval, order size, and current production load. Clear artwork and quick approvals usually shorten the schedule.