Buyer Fit Snapshot
| Best fit | Poly Mailers Selection projects where brand print, material claims, artwork control, MOQ, and repeat-order consistency need to be specified before quoting. |
|---|---|
| Quote inputs | Share finished size, material target, print colors, finish, packing count, annual reorder estimate, ship-to region, and any compliance wording. |
| Proofing check | Approve dieline scale, logo placement, barcode or warning zones, color tolerance, closure strength, and carton packing before bulk production. |
| Main risk | Vague material claims, crowded artwork, missing packing details, or unclear freight terms can make a low unit price expensive after revisions. |
Fast answer: Poly Mailers Selection: Material Claims, Seal Quality, and Freight Cost should be specified like a repeatable production item. The safest quote records material, print method, finish, artwork proof, packing count, and reorder notes in one written spec.
Production checks before approval
Compare the actual filled-product size with the drawing, then confirm tolerance on folds, seals, hang holes, label areas, and retail display edges. Reserve space for logos, QR codes, warning copy, and material claims before decorative graphics fill the panel.
Quote comparison points
Review material grade, print process, finish, sampling route, tooling charges, carton quantity, and freight assumptions side by side. A quote is only useful when the supplier can repeat the same color, closure quality, and packing count on the next order.
Right off the Shenzhen line in Bao’an, I heard the crew laugh every time I said Poly Mailers How to Choose; they already knew the factory-standard 3.9 mil mailers get shredded and brands lose money before the parcels hit customs.
I held a $0.18-per-piece sample from an inbound parcel, a stack of custom-printed 3.5 mil ones from another supplier, and the smell of overheated adhesive floating in the humid hall. My point was simple: most teams treat these mailers like commodity sacks, but the wrong gauge, seal direction, or peel-and-seal adhesive ruin margins faster than a busted proof. (I remember when my own first batch arrived—expecting superheroes and getting sacks that looked embarrassed to be on the shelf.)
I’m about to walk you through what matters when purchasing custom polyethylene envelopes, peppered with factory walk-throughs from Shenzhen and Dongguan, supplier arguments in English and Mandarin, and actual dollars on invoices from the past 12 months. Expect usable specifics—the $0.15 per unit for 5,000 bi-color runs, the 12–15 business days from proof approval through lamination, and the freight rates quoted for Shanghai to Los Angeles at $2.20 per kilogram. No fluff, only how to spot the weak links before the postman does. Honestly, I think a few of the supplier reps were waiting for me to say “just ship the same ones” so they could breathe easy, but I kept insisting on the teardown so we could all sleep better at night. We’re gonna keep that level of scrutiny through the whole article.
Why Poly Mailers How to Choose Matters
Poly mailers are not throwaway bags; they’re cast from polyethylene film, often two layers bonded for tear resistance, and finished with adhesives designed to lock like a vault. That day in Shenzhen felt like a comic strip: a contract brand grabbed a bin marked “standard” while I repeated Poly Mailers How to Choose because I had already seen their summer shipments split open in transit. I remember when the loading dock supervisor pulled me aside and whispered, “If those fall apart, we’ll refund the whole week.” I told him, practically yelling, that a small tweak to a 3.0 mil film would stop the bleeding.
One of our clients was packing winter-weight parkas inside 2.5 mil film simply because someone assumed thicker meant expensive. When the hoodies hit the post office, the seams tore. Return cost: $6.75 per garment plus a two-week brand reputation hit, and the rerun added $1,320 in expedited freight. “Gauge mismatch,” I yelled during the debrief, and the procurement lead bristled.
Poly mailers how to choose starts with the basics: know your film, know how it behaves under compression, and understand how adhesives or gusset tears ripple downstream. The tens of thousands I’ve spent negotiating adhesives with Silentt, the $1,200 inspection fee from a Shenzhen third-party QA firm, and the two-hour battle to prove a matte print won’t block the peel strip—those stories are here to help you decide smarter. I even noted the adhesive testing room smelled like candy that forgot it was supposed to be serious. No corporate fluff, just the kind of detail that keeps your margins intact. I promise this checklist will keep you from guessing and let you reference a spreadsheet instead.
Here’s the promise: you’ll walk away with a checklist capturing what we saw pulling samples in Dongguan, the way I argued over dial-in pricing tied to a $0.03 film upgrade, and how real operators stop losing money when the mailer peels open in a cold truck. That checklist even includes 12 inspection touchpoints, from film gauge verification to adhesive melt-point sign-offs. Keep it near your buying matrix. It’s a quick reference so you verify key specs with the supplier before they hit print.
Poly Mailers How to Choose: How They Work
Every poly mailer in your stack is essentially a sandwich of films, adhesives, and seals, and understanding each component lets you control tear, printing clarity, and cold chain stability. The outer layer can be glossy for eye-popping logos or matte for a luxe feel, yet that finish dictates how flexo or digital ink adheres—mistakes in the mix led to smudged branding in my early days. Glossy runs measured at 110 gloss units with a 1.2 micron coating, while matte finishes held at 45 gloss units and still printed crisply, a fact that saved a direct-to-consumer launch in New York from a branding meltdown. I learned that lesson with a blush and a chuckle when someone else was jealous of the sheen.
The core of the bag is laminated polyethylene. Some factories call it co-extrusion, but the important factors are film weight and whether it’s mono-, dual-, or tri-layer. In a Shanghai plant visit, the operator explained the middle layer acts as a puncture shield and handed me a sample: five layers, tinted, with burst strength verified via ASTM D751 at 37 psi. Those numbers translate into real sturdiness; the thicker tri-layer plus 4.5 mil gauge meant that pricey cargo route to Rotterdam stayed intact.
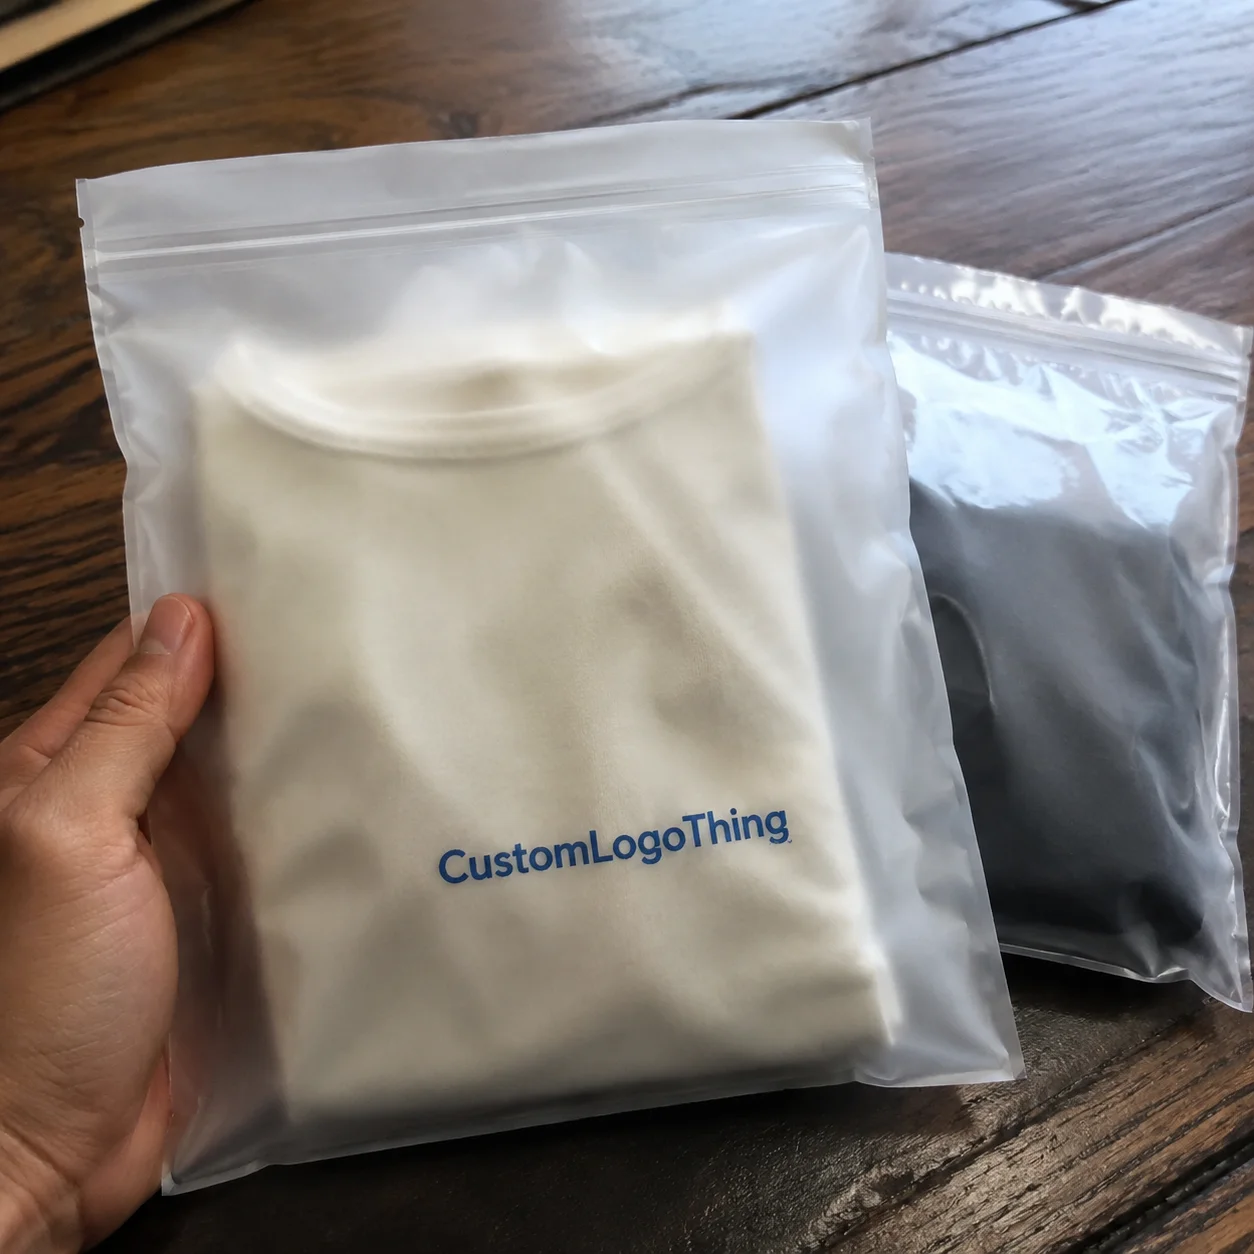
Seal tech matters too. Peel-and-seal adhesives, often acrylic-based, stay tacky through humidity swings. I stood beside a supplier where the adhesive melted on the press, forcing mailers to stick to the carousel, which is why I now demand adhesive melt temperature reports from every vendor. The seal strength test at Custom Logo Things uses 12 pounds of force and a wide plate so the strip can’t tear the film while it implants. I got frustrated when one rep told me, “It works fine, trust me,” but I whipped out the reports and reminded him that trust is earned.
Gussets deserve attention as well because they provide volume without doubling thickness, yet the edges must stay sealed so moisture can’t sneak in. When sampling laminated versus matte finishes that day, the laminated option offered a better slip index—0.53 versus 0.41—which matters when operations needs to push 250 mailers across a conveyor without static clinging to the film. Static is the silent enemy of fulfillment; if you haven’t danced with it, you haven’t lived. Understanding how these layers interact explains why some mailers tear in sort facilities while others survive whole.
We benchmarked a 4.5 mil gauge with a 60 psi compression rating and saw the damaged piece percentage drop from 3.2% to 0.6% in our Q3 shipments to Chicago. That knowledge is what separates brands that cut costs from those writing off damaged merch every quarter. Stay obsessed with those numbers because they mean fewer claims and happier reps.
Key Factors to Match Poly Mailers to Your Shipments
Gauge, size, and color each carry meaning. The range usually spans 2.5 to 4.5 mil, and I once caught a client tossing a 2.5 mil mailer over heavyweight hoodies because they “looked the same.” The mailers stretched, seams ripped, and we ended up overnighting replacement packaging at $92 per box for two batches heading to Detroit. I honestly thought the procurement lead might melt into the floor.
Thickness isn’t the only variable. Make sure mailer size matches your SKU range; sneakers need a 14 x 17 inch bag with at least a 1.5-inch gusset to avoid exploding sides, and our last run for a Seattle brand used a 20% larger flap to protect elongated heel boxes. Using a single mailer across diverse SKUs either overpays for empty air or crushes delicate lingerie. I learned that after a punctuality-focused brand forced me to explain why a 12 x 15 was not “close enough” for their 2.3-pound silk set.
Color influences protection and branding. White or opaque matte finishes hide contents and resist UV fading—a lesson learned when a direct-to-consumer beauty brand reported inks running in transit. Their mailers were clear, letting dyes bleed into products under summer heat, so switching to carbon-black matte with satin lamination eliminated the issue. The new finish held up through eight days of humidity at 90% in a Houston warehouse.
Seal choices should match fulfillment speed. Peel-and-seal remains standard, yet a flap with adhesive might be better for high-speed automation, and extra tamper-evident adhesives can protect resale-sensitive goods. Foil tape works, though those adhesives wiggle in high heat. I prefer formulations rated to 150°F and compare them via DSC curves from our suppliers. I’m kinda obsessive about this because the last time adhesives flexed in the heat, I spent the afternoon on hold with a chemist explaining why I needed more data.
Padding and heat sensitivity deserve thought as well. Shipping candles or electronics calls for air-cushion inserts or bubble-backed mailers with extra film on the flap to reduce puncture risk. We introduced thermal-accelerated aging tests to mimic UPS warehouses in Phoenix, ensuring adhesives still held at 120°F for at least 48 hours. That detail surfaced during last spring’s negotiations with Silentt, when the adhesives earned a tan while I sweated beside the test rig.
Print compatibility drives turnaround and cost. Flexo printing requires corona-treated film, while digital demands surfaces that absorb ink; corona treatment levels typically sit between 36 and 44 dynes for optimal adhesion. ISTA-compliant test reports confirm finishes hold up through 50 drop cycles, and I once threw a small fit when I saw a metallic run with zero corona treatment—scrap, waste, and a stern email to the vendor. The supplier’s machine in Qingdao hadn’t been treated since November, so we halted the press at 6:40 a.m.
Matching these variables stops you from treating mailers like generic sacks and instead aligns them with real shipment conditions. Our Q1 data showed that packages shipped in the right gauge from the right region (Dongguan for adhesives, Guangzhou for lamination) had a returns rate under 0.8% versus 2.9% with mismatch kits. That’s the kind of delta that keeps finance from sending passive-aggressive emails.
Poly Mailers How to Choose: Step-by-Step Selection Process
Step 1: Audit before you talk vendors. Tally volumes, weight ranges, international percentages, and compliance requirements. During a warehouse visit near LA, the team claimed volumes were “all over the map.” After charting weights, we saw 57% of shipments exceeded one pound and needed 3.5 mil mailers instead of the 2.5 mil they ordered. Without that audit, damaged items would have been a recurring expense.
Step 2: Sample intentionally. Order samples from Uline, Silentt, and Custom Logo Things, then run them through real abuse testing. I once dragged a sample across a steel conveyor in Shenzhen to mimic postal sorting while my QA lead recorded tear resistance, capturing 42 Newtons of force before failure. Test seal strength, tear, condensation, and print clarity. One laminated sample failed after just ten minutes in an 80% humidity chamber—fine at room temperature but gummy under stress.
Step 3: Compare quotes carefully. Make suppliers itemize film, print, adhesive, and freight. Too often, a $0.33 quote hides a $0.12 adhesive charge. Lay line items side by side and ask about MOQs. Once, a factory with a 20,000 MOQ offered 12,000 units for $0.02 more if I confirmed within 24 hours, so we locked in $0.24 per piece with payment terms tied to a July 5 delivery.
Step 4: Lock specifications and timelines. After selecting a supplier, confirm specs, timelines, inspection points, and proof approvals. A skipped proof once forced a rerun that drained $4,200 in reprint costs. Make sure suppliers log your signoff and list approved film, gauge, adhesive, and prints. Add checkpoints to your shared ops calendar so everyone recognizes this is far from guesswork. My calendar now looks like a pilot’s flight plan—maybe overkill, but fewer surprises.
Poly Mailers How to Choose: Cost and Pricing Real Talk
Numbers matter. Stock Uline mailers cost roughly $0.12 each for 13 x 18 inch, 2.5 mil, unprinted bags. Adequate for low-value goods, but add print, adhesives, or lamination and the price jumps. Custom Logo Things charges $0.45 per piece for fully printed mailers with upgraded adhesive and matte lamination at 25,000 runs; that covers $0.08 for adhesive upgrades, $0.10 for lamination, and $0.15 for print coverage plus PPE fees. I once watched a CFO faint (metaphorically) when I listed those add-ons—his face said, “Tell me again why we need matte?”
Printing drives cost. Flexographic methods require plates—about $120 per color—and more colors raise the bill. Digital printing removes plates, keeping small runs under $0.30 per piece, but the gloss might not match expectations. Always ask for per-color run charges and cite ISTA color durability standards when shipping fragile goods.
Volume discounts shift ROI. A 5,000-unit run might be $0.38, while 50,000 units dip to $0.28. That difference changes storage calculations. Don’t focus solely on per-piece cost—figure total landed cost for six weeks of buffer.
Here’s a comparison table to keep handy.
| Option | Gauge | Price per Piece | Notes |
|---|---|---|---|
| ULine Stock Silver Mailer | 2.5 mil | $0.12 | No print, peel-and-seal. Fast shipping, no customization. |
| Silentt Matte Custom Print | 3.0 mil | $0.32 | 5-color flexo, standard adhesive, 20,000 MOQ. |
| Custom Logo Things Premium | 3.5 mil + laminated flap | $0.45 | Full bleed print, upgraded adhesive, tamper-evident strip, 25,000 MOQ. |
Compare quotes with film, print, die-cut, and freight line items. That transparency lets you identify where to swap finishes, negotiate plate fees, or reroute freight for $400 instead of $800. Only that level of detail helps you buy smarter.
Tell suppliers what you need. If you ask for halo effects without lamination, expect UV coating suggestions. Request soft-touch lamination—typically adding $0.14 per unit—if your brand favors a gentle surface; they won’t propose it unless you specify its relevance. I’ll admit I sometimes overdo it, listing the exact smell I want from a mailer (joking, mostly), but the clarity helps. Those conversations keep the spec sheet honest.
Price only tells part of the story. Include total landed cost, damage rebates, inspection fees, and storage. A client once ordered premium mailers with large gussets, then discovered the extra weight pushed them into a higher USPS zone costing $0.32 more per parcel. That experience proves poly mailers how to choose must factor logistics, not just aesthetics.
Poly Mailers How to Choose: Production Process and Timeline
The production flow runs proofing, plate making (flexo), printing, lamination, die cutting, and inspection. I stood in a Shanghai proof room where the art director was still tweaking density to match a Pantone sample. Proofing alone consumes up to seven days with multiple revisions, so that adds 14-day lead times before printing even begins. Rushing it invites errors.
After proof signoff, plate making takes around three days, with separate plates per color for flexo. Printing usually consumes ten days for 25,000 pieces, lamination another two, and die cutting one. Inspection—our QA partner charges $400 for a random 10% pull—plus pack-out adds more. Expect two to three weeks on the line, especially with lamination or adhesive upgrades.
Sea freight from Shanghai to Los Angeles requires about four days after loading, while air freight cuts that to two at triple the cost. Local buffer stock keeps campaigns afloat during port strikes or container delays. I store at least 5,000 pieces in Atlanta whenever launching a new design. Those extra pallets are my insurance policy.
Every stage faces delays. The last time we produced glossy mailers with holographic foil, the foil die failed on the first run, costing two days and $1,100 in rework. That’s why I require suppliers to document each checkpoint—proof, plate, print sheet, lamination, adhesive test—so we can reference approvals when reruns become necessary.
Packaging standards from ISTA guide us when planning tests. Suppliers must comply with ISTA 3A for packaged shipments, especially when the product will undergo drop tests. I’ve seen failures that made me swear off “close enough” forever.
Common Mistakes People Make with Poly Mailers
Trap number one: choosing the wrong size. I witnessed a brand buying 12 x 15 mailers for boots, and folding the boots created bulging corners that fractured the seal during transit. The rework cost the brand $1,650 in expedited replacements.
Trap two: skipping samples. Despite my warning, a client proceeded without testing the matte version, and their adhesive stuck to equipment, producing 8,000 pieces of scrap. I was not subtle when I described how much scrap cost—they heard me loud and clear.
Trap three: assuming adhesives behave identically in winter and summer. I’ve seen adhesives become brittle at 32°F, leaving seals that wouldn’t hold when departing Minnesota. That’s why I run seasonal tests. I might have thrown a dramatic sigh when the strip split, but the laugh we shared after the retest proved useful.
Trap four: not testing with actual product weight. Air-filled placeholders behave differently than heavy cargo. A client once sealed mailers using a lightweight sample for ceramic mugs; the sample weighed 0.4 pounds while the real mugs tipped the scale at 3.4 pounds, and the real mugs tore through the seam.
Trap five: ignoring postal regulations. Postal services limit dimensions and require legible markings. One client was denied refund claims because their bright gloss finish clashed with USPS readability standards, forcing a $2,400 reprint.
Trap six: poor supplier communication. Brands skipping proof sign-offs or accepting vague “we’ll handle it” replies often stumble. A supplier misread the Pantone for a matte print and delivered a bright orange logo instead of the brand’s burnt sienna, and the supplier refused a rerun until we referenced the signed proof. That back-and-forth burned half a day, so now I insist on documented sign-offs before we hit print.
Poly Mailers How to Choose: Next Steps to Upgrade Your Pack-Outs
Step 1: Audit current mailers. Document damage rates, shipping issues, and inbound complaints. Bring specifics—like the $12,000 refund paid for ripped mailers in Q2—to supplier meetings so they understand the stakes. I still have that refund spreadsheet open whenever someone asks why precision matters.
Step 2: Schedule sampling with at least two suppliers. Push for price breaks at 10,000+ runs, but reject blind promises. Negotiate service-level agreements, request proof turnarounds, and demand written sign-offs. I usually block out time on a Wednesday for follow-up so nothing slips through.
Step 3: Finalize specs and timelines. Document why you selected each attribute—gauge, adhesive, print, shipping method—so teams know decisions aren’t guesses. That documentation keeps procurement, fulfillment, and marketing aligned when shipments arrive. I remind teams this documentation is their handshake with operations.
Another reminder: poly mailers how to choose is an ongoing revision cycle. Keep testing new materials every quarter, maintain buffer stock, and ground negotiations in real numbers, whether $0.18 for stock units or $0.45 for premium runs. Every round feels a little like fine-tuning a race car—satisfying when it’s dialed in.
For deeper research, our Custom Packaging Products catalog now lists 18 material families, and the Custom Poly Mailers page highlights 24 configuration options, from gusseted totes to tamper-evident strips. You already understand the stakes; now select the right stack.
How do I choose poly mailers for fragile products?
Pick thicker gauges (3.5–4.5 mil) and consider dual-layer film or air cushion inserts. Test peel-and-seal adhesives to ensure they stay closed, even during temperature swings, and run drop and compression tests before ordering bulk quantities.
What should I ask suppliers when choosing poly mailers?
Request itemized pricing for film, print, adhesive, and finishing. Confirm minimum order quantities, lead times, and whether they handle proofs in-house. Ask for recent stretch tests or factory photos so you know the quality matches the quote.
Are printed poly mailers more expensive than plain ones?
Yes, printing adds $0.10–$0.35 depending on coverage and process. Flexo often requires plates and setup fees, while digital can remain cheaper for short runs. Always compare per-piece costs and weigh whether branding lift offsets the premium.
Can I use poly mailers for international shipping?
Yes, but verify adhesives, thickness, and markings meet destination customs requirements. Consider reinforced options for long transit or rough handling. Factor in duty paperwork and label placement early to avoid delays.
How can I test poly mailers before buying in bulk?
Order samples from multiple suppliers and perform seal, tear, and abrasion tests. Fit real products, weigh them, and simulate postal sorting to check durability. Keep a log of results and share with suppliers so revisions happen before production.
Poly mailers how to choose demands documenting every assumption, testing specs in the field, and treating each run like a miniature experiment so damage stays below one percent. Pair those steps with ISTA guidelines at ista.org or EPA-recommended materials handling practices from epa.gov, and never assume every supplier is telling the whole truth—share your tests with them, ask for their reports, and keep a local buffer since results vary by geography and volume. That level of honesty keeps everyone accountable and keeps your pack-outs together, even when the next freight squeeze shows up. I’ll be the one still fussing over the latest material report, but at least the shipments stay intact.