Printed PVC Zipper Garment Bags Sample Approval Checklist
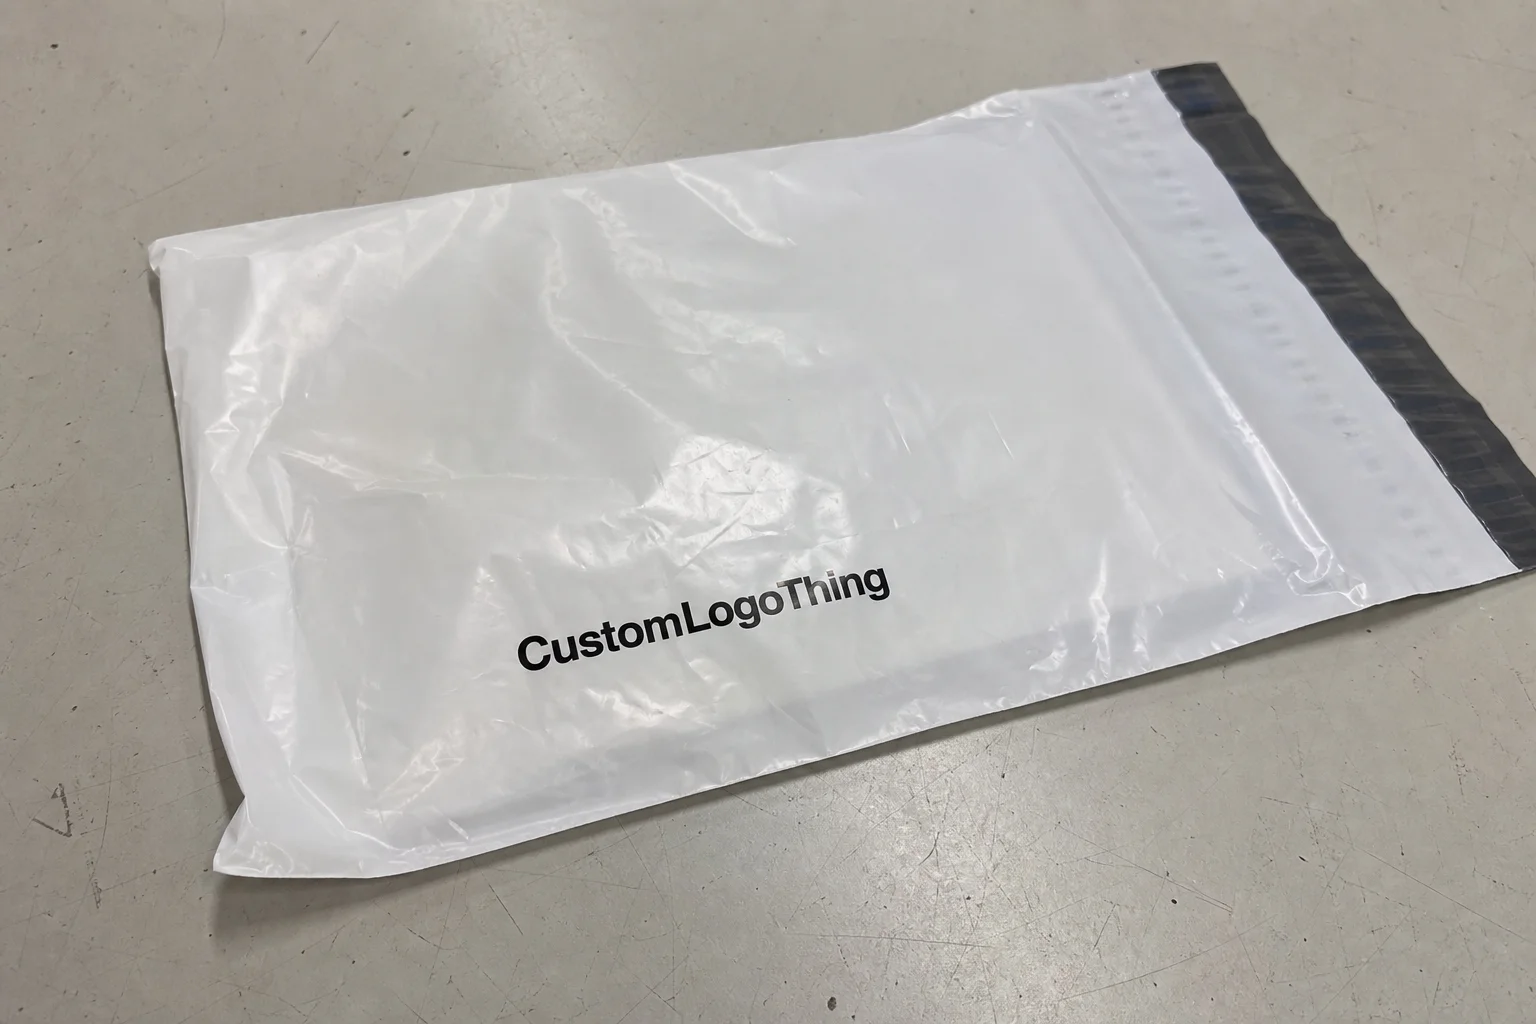
A Printed PVC Zipper Garment Bags Sample Approval Checklist sounds like paperwork. Fine. It is paperwork. But it exists because a garment bag can look clean and expensive on a screen, then fail the second it lands in your hand.
The zipper catches at the shoulder. The logo scratches with light rubbing. The gusset looks deep enough until a real coat goes inside. The hanger opening tears because nobody checked the stress point. None of these problems are dramatic during sampling. They become expensive when 5,000 pieces arrive packed in cartons.
Sample approval is not “the logo looks right, go ahead.” It is a buyer-side inspection step before bulk production, while there is still time to correct PVC thickness, print placement, zipper selection, hanger opening, seam width, carton packing, and the way the bag behaves with the actual garment.
PVC garment bags are judged by more than visual design. Touch the material. Flex it. Smell it. Zip it. Hang it. Fold it if that is how it will be stored. Check whether the print sits cleanly on clear, tinted, or frosted PVC. A glossy transparent bag can make ink look lighter than expected. Frosted PVC can soften logo edges. Stiffer PVC may hang well on a retail rail but crease more sharply in carton packing.
This checklist belongs after artwork confirmation and before mass cutting, heat welding, printing, zipper attachment, final packing, and shipment. Once production materials are purchased and welding fixtures are set, even a small change can create cost and timing problems. Move the logo 15 mm? Add 20 mm to the gusset? Change from white zipper tape to black? Those are not harmless tweaks after approval.
Practical rule: approve the physical sample as if it will become the factory’s production reference, because in most custom packaging projects, that is exactly what happens.
The goal is simple: review the sample with clear eyes, request corrections in measurable language, and avoid receiving bulk garment bags that look close to the proof but fail during daily use.
How Sample Approval Works Before Bulk Production
A custom garment bag project usually follows a predictable path: confirm dimensions and material, submit artwork, prepare a mockup or proof, produce a sample, review buyer comments, revise if needed, then approve for bulk production. For Printed PVC Zipper Garment bags, the sample stage matters because the finished item is part packaging, part storage cover, and part brand presentation.
Not all samples prove the same thing. A digital mockup shows layout, logo scale, and general placement, but it cannot prove zipper feel or PVC stiffness. A printed strike-off checks ink color, opacity, and print behavior on the selected PVC film, often without the full bag structure. A counter sample may show size and construction using available material, though not always final trim. A full pre-production sample should use the final PVC, zipper, puller, print method, seam style, hanger opening, and packing format.
Many buyers save the wrong five days here. They approve a digital proof because the launch schedule is tight, then discover that transparent PVC changes the logo color under warehouse lighting. Or the zipper tape looks slightly wrong against the brand color. Or the bag is fine empty and miserable when loaded. Physical review is not delay for the sake of delay. It catches problems photos politely ignore.
Heat sealing, often called high-frequency welding in PVC bag production, affects both appearance and strength. Check whether the seal is even, whether the corners have enough weld area, and whether stress points near the zipper ends or hanger hole feel reinforced. A 6 mm seal may be acceptable for light apparel. Heavier coats, uniforms, or repeated handling may need wider welds, stronger trim, or reinforcement patches.
Keep the approval record in writing. Include approved sample photos, Pantone or CMYK references, size tolerance, PVC thickness, zipper color, puller style, packing method, carton quantity, and any accepted deviations. A clean written record prevents the familiar production argument: “We thought the sample photo was only for layout.” Nobody enjoys that conversation.
Material, Zipper, Print, and Size Factors to Inspect
Start with material. PVC film controls feel, clarity, weight, carton compression, crease behavior, and perceived value. Common custom garment bag PVC thicknesses may range from about 0.08 mm for lighter dust covers to 0.18 mm or 0.20 mm for more substantial retail, bridal, or uniform bags. Some suppliers quote in microns, some in gauge, and some in millimeters. Write the agreed spec clearly, including tolerance if the supplier provides one.
Look at clarity under different light. Clear PVC should not appear cloudy unless a frosted effect is specified. Tinted PVC should be consistent across panels. Frosted PVC should have an even surface texture, not patchy haze. Also check odor. PVC often has a material smell shortly after production, but a sharp chemical odor may be unacceptable for apparel, hotel uniforms, bridal products, or retail storage.
Zippers need their own inspection. Run the slider 10 to 20 times, not once. Feel for catching at the zipper start, curved shoulder area, or lower stop. Confirm the zipper length opens wide enough for real garment loading, especially for coats, suits, gowns, robes, or bulky uniforms. Check slider color, puller shape, zipper tape color, end stops, and attachment method. A zipper that feels fine on an empty bag may strain once the gusset is filled.
Print inspection needs both eye and hand. Confirm logo position from the top edge, side edge, zipper line, and hanger opening. Check ink opacity on the selected PVC; white ink underbase may be needed if the design must look solid over clear or tinted film. Gently rub the print with a dry cloth. If the bag will see heavy handling, ask your supplier which rub resistance checks apply to the print system. ASTM testing methods are often referenced in packaging and materials work; for broader standards context, buyers can review resources from ASTM International.
Size is where the sample either proves itself or fails fast. Measure length, width, gusset depth, zipper opening, hanger hole location, shoulder slope, bottom shape, and seam width. Then put the intended garment inside. A dress bag that measures correctly while flat may still be too narrow at the shoulders. A suit bag may need a 60 mm to 100 mm gusset, while a lightweight blouse cover may not need one at all.
Tolerances should be realistic. Many buyers use around ±5 mm for smaller dimensions and ±10 mm for larger panels, depending on construction and production method. Heat-welded PVC is not machined metal. Expect small variation, but define what small means before production starts.
Finishing options belong in the review too. Handles, snaps, document pockets, piping, breathable vents, reinforced hanger openings, and bottom eyelets can all change cost and performance. If the bag will hang in a retail environment, the hanger opening must look neat. If it will be used for uniform issue, label pockets and repeated zipper use may matter more than showroom polish.
Pricing, MOQ, and Unit Cost Items Hidden in the Sample
A sample is also a cost document. It reveals price drivers that are easy to miss in a flat quote: PVC thickness, zipper grade, logo coverage, bag size, gusset structure, reinforcement patches, print colors, packing style, and whether the design uses standard tooling. Two garment bags can look similar in a PDF and land at very different unit costs once material weight and finishing labor are counted.
As a rough buying range, a simple clear PVC zipper garment bag with one-color printing may sit around $0.65 to $1.20 per unit at 5,000 pieces, depending on size, thickness, print area, and packing. A larger reinforced garment bag with heavier PVC, gusset, two-color print, custom zipper puller, and individual packing can move into the $1.50 to $3.20 per unit range or higher. These are planning ranges, not promises. Freight, raw material pricing, compliance requirements, and construction details can move the final number quickly.
| Sample Feature | Typical Buyer Choice | Cost Impact | Approval Check |
|---|---|---|---|
| PVC thickness | 0.10 mm, 0.15 mm, or 0.20 mm | Higher thickness increases material cost and carton weight | Confirm feel, clarity, crease behavior, and hanging strength |
| Print coverage | Small logo, large panel print, or two-side print | More ink, screens, and handling can raise unit cost | Check opacity, edge sharpness, registration, and rub resistance |
| Zipper grade | Standard zipper or heavier-duty zipper | Heavy zipper tape and better sliders add cost | Test repeated opening with the real garment inside |
| Gusset structure | Flat bag, side gusset, or shaped gusset | More material and welding steps increase labor | Measure filled depth and check shoulder fit |
| Packing method | Bulk pack, individual polybag, or tissue separator | Extra packing materials and labor affect price | Check crease marks, print transfer, and carton compression |
MOQ can change fast. Standard clear PVC and common zipper colors may support lower order quantities. Custom tinted PVC, custom zipper tape, large print coverage, or special tooling can push minimums higher. For many custom PVC garment bags, MOQ may begin around 1,000 to 3,000 pieces for simpler builds, while custom color film or special hardware may require 5,000 pieces or more.
Ask about sample fees, setup charges, plate or screen costs, and whether any of those fees are credited back after bulk order approval. A sample charge might be modest for a basic counter sample. A full pre-production sample using final print screens, sourced zipper, and custom material can cost more. That is not automatically a red flag. It may simply reflect real setup work.
Before approving the sample, request unit pricing at your target quantities, carton dimensions, gross weight, freight assumptions, and the cost impact of changing the approved sample. A 20 mm increase in gusset depth changes PVC consumption across every unit. A heavier zipper can change both unit cost and packing weight. The approval checklist should make those decisions visible before the purchase order is locked.
Process Timeline and Lead Time From Sample to Shipment
For a normal custom printed garment bag order, the sequence is spec confirmation, artwork preparation, sample making, buyer review, revision if needed, material purchasing, production, inspection, packing, and shipment. Each step sounds simple. Delays usually build in the handoff between steps.
A practical timeline may look like this: 1 to 3 business days to confirm specifications and artwork files, 5 to 10 business days for a basic sample, 2 to 5 business days for buyer review and comments, then another 5 to 10 business days if revision is needed. After final approval, bulk production might take 15 to 30 business days depending on quantity, print complexity, PVC availability, zipper sourcing, and production queue. Freight timing comes after that.
The fastest projects are usually not the simplest designs. They are the clearest projects. Usable vector artwork, confirmed Pantone references, final dimensions, accurate garment measurements, and fast sample feedback remove a surprising amount of dead time. Slow projects usually involve missing artwork files, late brand color decisions, a garment that does not fit the first sample, or dimension changes after the supplier has prepared material.
Test the sample with the actual garment type and hanger style. If the garment will be displayed on a thick wooden hanger, use that hanger. If retail staff will fold the bag into cartons, fold the sample and inspect crease behavior after 24 hours. If the garment bag ships filled, think about carton compression and transport handling. ISTA packaging test procedures are useful reference points for shipment performance thinking, even when formal lab testing is not required; see ISTA for general transport packaging standards.
Build a timeline buffer for trade shows, seasonal apparel drops, hotel uniform programs, bridal collections, retail packaging rollouts, and warehouse changeovers. A 7-day buffer may be enough for a repeat order with no changes. A new custom printed PVC bag with special film, revised artwork, and imported freight may need several extra weeks of planning room. Annoying, yes. Cheaper than panic shipping.
Step-by-Step Sample Review for Buyers
A strong Printed PVC Zipper Garment Bags sample approval checklist should be easy to follow, even if merchandising, purchasing, warehousing, and brand teams are all involved. Start by labeling the sample. Note the date received, version number, supplier reference, quoted material spec, artwork version, sample type, and any known differences from the quotation.
- Compare the paperwork first. Match the sample against the quote, artwork proof, and specification sheet before judging appearance. Confirm material thickness, bag size, zipper color, print method, packing style, and quantity assumptions.
- Measure the bag flat. Record overall length, width, gusset, zipper length, hanger opening, seam width, shoulder angle, and bottom shape. Use millimeters where possible because “a little short” is not production language.
- Measure the bag filled. Insert the garment and check whether the usable internal space matches the need. A flat 600 mm width does not always mean the garment has 600 mm of comfortable shoulder room once seams and gussets pull into shape.
- Test the zipper. Zip and unzip several times with the garment inside. Check the start point, end stop, slider feel, and whether fabric catches near the zipper tape.
- Hang and handle it. Place it on the real hanger, lift it by any handle, fold it if required, and check stress around the hanger hole, shoulders, gusset, and bottom corners.
- Inspect the print. Compare color to the approved reference, check alignment, look for smudging or pinholes, and gently rub the print to see whether it marks easily.
- Review packing. Check folding method, individual packing, carton quantity, separator sheets, print transfer risk, and whether the bag will arrive in usable condition after compression.
Photos help, but mark them clearly. Use arrows, circles, and numbered comments such as “move logo 10 mm upward,” “increase zipper opening by 30 mm,” or “use 0.15 mm PVC instead of 0.12 mm.” Good comments reduce guessing. Bad comments create second samples that are different but not necessarily better.
Your final written status should say one of three things: approved, approved with listed corrections, or revise and resubmit. Be careful with “approved with changes.” If the change affects size, material, zipper, print color, or packing method, ask whether a revised sample or at least a marked production proof is needed before cutting bulk material.
Common Approval Mistakes That Cause Bulk Order Problems
The most common mistake is approving from photos only. Photos can show obvious logo placement, zipper color, and general shape, but they cannot reliably show PVC stiffness, odor, zipper smoothness, print rub resistance, or whether the garment strains the side seams. A bag that looks perfect against a white background may feel thin, noisy, sticky, or too stiff in hand.
Another frequent miss is checking the empty bag but never testing the actual garment. Bulky coats, gowns, suits, uniforms, robes, and retail hanging items all behave differently. A coat shoulder can push into the zipper line. A gown may need extra length so the hem does not bunch at the bottom. A suit may look fine flat but pull tight once the hanger lifts the garment weight.
Vague feedback causes waste. “Logo too light” might mean the ink opacity is low, the color is wrong, the PVC tint is affecting appearance, or the logo is printed on the wrong side. Better feedback sounds like this: “Increase white opacity,” “match Pantone reference more closely,” “shift logo 10 mm upward,” or “change zipper tape from bright white to warm white.” Measurable comments protect both buyer and supplier.
Packing issues also get overlooked. PVC bags can stick together if packed too tightly or before print is fully cured. Heavy carton compression can create fold marks. Print can transfer if printed surfaces touch under pressure. Depending on the print method and finish, each bag may need an individual polybag, tissue separator, or revised fold pattern. That small packing choice can prevent a large receiving problem.
Last-minute changes after approval are not harmless. Changing the bag width, PVC thickness, zipper color, logo size, or packing format can reset pricing, tooling, sample timing, and production schedule. The approved sample becomes the manufacturing reference, so treat changes after approval as controlled revisions, not casual edits.
Final Next Steps Before You Approve Production
Before issuing approval, compare the sample to the quote, artwork proof, and spec sheet line by line. Do not rely on memory. Check dimensions, PVC thickness, clarity or tint, zipper details, print colors, logo placement, hanger opening, gusset, reinforcement, packing method, carton quantity, delivery address, and required ship date.
Create an approval packet that can travel with the purchase order. It should include clear sample photos, final dimensions, material thickness, zipper color and puller style, print references, packing instructions, order quantity, carton marks, shipping terms, and any accepted tolerances. If your company has internal quality requirements, attach them before production starts, not after cartons are finished.
Confirm acceptance tolerances in writing. Size may allow ±5 mm or ±10 mm depending on the dimension. Print placement may allow a few millimeters of movement. Color can vary slightly between sample and production, especially on transparent or frosted materials, but the acceptable range should be discussed before bulk printing. Seam appearance, zipper operation, carton count, and packing orientation should also have a shared standard.
Send one concise approval email. State exactly what is approved, list any remaining corrections, attach marked photos, and ask the supplier to confirm that production will follow the approved sample and written notes. If any correction changes cost or timing, ask for an updated proforma invoice or production schedule before work begins.
A Printed PVC Zipper Garment Bags sample approval checklist turns a subjective sample review into a production control step. It gives buyers, suppliers, designers, and quality teams the same reference point before bulk production. That is how you protect fit, finish, cost, and delivery without pretending the sample is just a formality.
Frequently Asked Questions
What should a printed PVC zipper garment bag sample approval checklist include?
It should include bag dimensions, PVC thickness, clarity or tint, zipper quality, logo placement, print color, seam strength, hanger opening, packing method, carton details, and written approval status. Add marked photos with numbered comments so corrections are easy to understand before bulk production starts.
Can I approve printed PVC zipper garment bags from photos only?
Photos can confirm layout and obvious print placement, but they cannot reliably show zipper feel, PVC stiffness, odor, print rub resistance, or garment fit. For custom retail, uniform, bridal, suit, or coat bags, a physical sample is strongly recommended.
How does PVC thickness affect sample approval and pricing?
Thicker PVC usually feels stronger and hangs better, but it increases material cost, carton weight, and sometimes shipping cost. Thinner PVC can lower unit cost, but it may crease more easily or feel less premium depending on the garment type and storage method.
How long does sample approval take for custom printed garment bags?
Timing depends on artwork readiness, material availability, print complexity, and whether the first sample needs revision. Buyers can shorten the timeline by approving specs early, sending usable artwork files, and giving clear written feedback within 1 to 2 business days of receiving the sample.
What is the biggest mistake when approving printed PVC zipper garment bag samples?
The biggest mistake is approving appearance without testing the bag with the real garment, hanger, folding method, and packing setup. A bag that looks correct on a table may still be too tight, too short, too stiff, or poorly packed for daily use.


