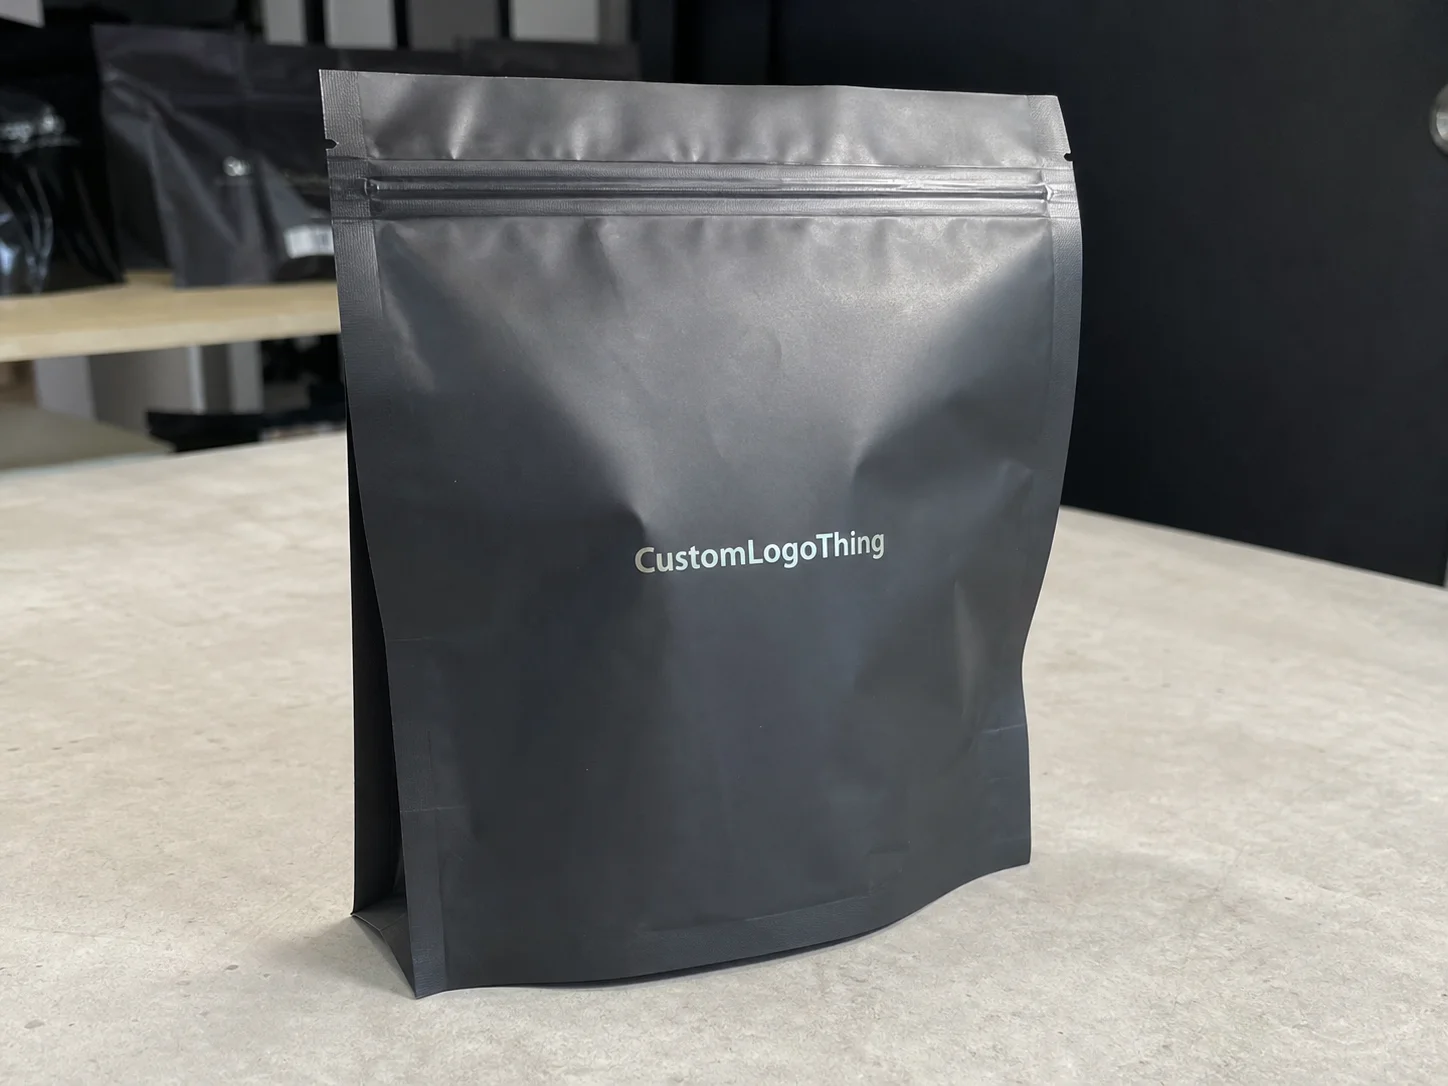
Buyer Fit Snapshot
| Best fit | Shipping Boxes Design Packaging projects where brand print, material claims, artwork control, MOQ, and repeat-order consistency need to be specified before quoting. |
|---|---|
| Quote inputs | Share finished size, material target, print colors, finish, packing count, annual reorder estimate, ship-to region, and any compliance wording. |
| Proofing check | Approve dieline scale, logo placement, barcode or warning zones, color tolerance, closure strength, and carton packing before bulk production. |
| Main risk | Vague material claims, crowded artwork, missing packing details, or unclear freight terms can make a low unit price expensive after revisions. |
Fast answer: Shipping Boxes Design Packaging: Board, Finish, Dieline, and Unit Cost should be specified like a repeatable production item. The safest quote records material, print method, finish, artwork proof, packing count, and reorder notes in one written spec.
Production checks before approval
Compare the actual filled-product size with the drawing, then confirm tolerance on folds, seals, hang holes, label areas, and retail display edges. Reserve space for logos, QR codes, warning copy, and material claims before decorative graphics fill the panel.
Quote comparison points
Review material grade, print process, finish, sampling route, tooling charges, carton quantity, and freight assumptions side by side. A quote is only useful when the supplier can repeat the same color, closure quality, and packing count on the next order.
If you want shipping Boxes Design Tips that actually save money, reduce damage, and keep your order fulfillment team from muttering under their breath, start with the box itself. I’ve seen a $0.08 board upgrade save a client from more than $11,000 in crushed returns over a single quarter, and I’ve seen that happen after one ugly run where the product fit “technically” but rattled like a maraca in transit. Shipping Boxes Design tips are not about pretty graphics first. They are about package protection, dimensional weight, and making the whole system work without drama on routes from Los Angeles to Chicago.
At Custom Logo Things, I’ve spent enough time on factory floors in Dongguan, Shenzhen, and Xiamen to know the difference between a box that looks good in a mockup and one that survives a 3,000-mile ride in a hot trailer. One client in the supplement space kept losing bottles because the insert was loose by just 2 mm. Two millimeters. That tiny gap turned into a pile of broken caps, angry emails, and a very expensive lesson in transit packaging. Good Shipping Boxes Design Tips solve those problems before they become refunds, chargebacks, and rerun fees.
Below, I’m walking through the real side of box design: structure, print, cost, freight, and the stuff your warehouse team actually deals with at 6:45 a.m. in a facility outside Atlanta or Rotterdam. Not theory. Not brochure language. Real decisions, real suppliers, real consequences, with numbers you can actually use.
Shipping Boxes Design Tips: What They Are and Why They Matter
Shipping boxes design tips are the practical rules that help you build a box around three things at once: protection, cost, and brand presentation. If one of those is off, the whole job gets messy. A box can be gorgeous and still fail at order fulfillment. It can also be plain brown and still be the smartest packaging move in your entire SKU lineup. That tension is the whole job, whether you’re shipping 500 units from Dallas or 50,000 units through a fulfillment center in New Jersey.
I remember a cosmetics client who insisted on a deep, oversized carton because “it looked premium.” It looked premium right up until the first freight invoice arrived. The extra inch on every side pushed them into higher dimensional weight charges, and the filler material costs stacked up fast. That one design decision added roughly $0.42 per shipment across 18,000 units, which is nearly $7,560 in added cost before you count labor. For shipping boxes design tips, that’s the kind of math that matters.
Think of shipping box design as a balancing act between board strength, print method, box size, and freight efficiency. It also affects customer experience. A box that arrives crushed does not feel premium, even if your logo is foil stamped in three colors. A box that opens cleanly, holds its shape, and fits the product properly tells the customer you know what you’re doing. That matters whether the carton is headed to a boutique in Austin or a warehouse in Manchester.
There’s also a big difference between plain shipping cartons, branded mailers, and retail-ready packaging. Plain cartons focus on durability and cost. Branded mailers add personality with less material. Retail-ready packaging does both and usually asks for more design work, tighter production tolerances, and a better understanding of how the product will sit on a shelf or survive a courier toss. Shipping boxes design tips change depending on which one you’re building, and the price can swing from $0.22 per unit to well over $1.20 depending on structure and finish.
“We thought the issue was print quality. It turned out the box was too loose by 3/8 of an inch and the product was bouncing around like a pinball.”
— operations manager I worked with in a Shenzhen packaging plant
That’s why I always tell clients that shipping boxes design tips are structural, operational, and financial. If you only care about the artwork, you’re designing a poster with flaps. Nice idea. Bad packaging. A good box should handle a 1.2-meter drop, a 32-pound top-load stack, and a warehouse worker folding 600 units before lunch.
How Shipping Box Design Works in the Real World
Real shipping boxes design tips start with a measurement sheet, not a mood board. The process usually begins with the product dimensions, the weight, the accessory count, and how the item will be packed during ecommerce shipping. From there, a structural designer builds a dieline. That dieline becomes the map for the box: score lines, flap sizes, glue areas, and the exact amount of board needed to make the thing work. For a 10-inch by 8-inch by 4-inch product, even a 1/4-inch change can alter the carton style, insert size, and freight class.
I’ve watched teams skip the measurement stage and jump straight to artwork. Bad move. One client sent us a “final” file before we even knew the product had a charger, cable, and leaflet. That added an insert, changed the internal height, and forced a full dieline revision. It cost them 6 business days, and the factory in Hangzhou had already queued paperboard for the wrong spec. Not because the factory was slow. Because the brief was incomplete. Shipping boxes design tips are boring until they save a week.
Corrugated board choice matters more than most people think. E-flute is thin and good for crisp print and lighter products. B-flute gives better cushioning and stacking performance. C-flute is common for more demanding package protection. Double-wall board is used when the product is heavy, fragile, or likely to get abused in transit packaging. Board strength, measured through specs like ECT and burst strength, determines how much compression and handling stress the box can take. For example, 32 ECT is common for lighter ecommerce cartons, while 44 ECT or 200# burst is often chosen for heavier loads.
Print method changes cost and timing. Flexographic printing is usually faster and cheaper for larger runs, especially if you want one or two colors. Litho-lam can give you sharper graphics, but it usually adds setup complexity and cost. Digital print is helpful for shorter runs and variable artwork, but it can be pricier per unit. I’ve had suppliers quote me $0.19 per unit for a simple one-color flexo box at 10,000 pieces and $0.61 per unit for a more detailed digital version at 2,500 pieces. Same footprint. Different economics.
Box size directly impacts dimensional weight. That’s the shipping charge based not just on actual weight, but on the space the box occupies. A box that’s one inch too tall can push you into a higher billing tier on UPS or FedEx. I’ve seen a company shipping lightweight skincare pay more for air than for the product inside. That’s not an exaggeration. That’s a pricing system doing exactly what it was built to do: charge for wasted space, whether the parcel moves through Memphis, Louisville, or Ontario, California.
There’s also warehouse reality. If the box is awkward to fold, hard to stack, or too large for your shelving, your packing team pays the price in wasted motion and slower order fulfillment. One inch of unnecessary height can also mean more void fill, more tape, and more labor. Multiply that by 5,000 units, and the “small” issue turns into a line item. At $0.04 extra tape and filler per box, that is another $200 gone before shipping labels even print.
If you want a solid technical reference point, the International Safe Transit Association publishes test methods for shipment hazards and package performance: ISTA. I’ve used ISTA-style testing in sample approval meetings more times than I can count, and it’s usually where the weak spots show up before the customer does. A carton that passes ISTA 3A in a lab in Cincinnati will usually tell you far more than a glossy mockup from a photo studio.
For broader packaging material guidance, the Paper and Packaging Board’s industry resources at packaging.org are useful when teams want to understand board grades, recyclability, and material choices without drowning in jargon. Honestly, that happens a lot, especially when procurement is comparing a $0.31 board and a $0.39 board and asking why the numbers look different on the quote.
Key Factors in Shipping Boxes Design Tips
Every useful set of shipping boxes design tips starts with the product itself. Weight matters. Fragility matters. Shape matters. If the product has glass, sharp corners, loose components, or a center of gravity that shifts, the box design needs to account for it. I’ve worked on boxes for candles, electronics, supplements, and apparel. Each one needs a different balance of strength, size, and packing method. A 14-ounce candle jar in a 350gsm C1S artboard mailer is a very different problem from a 6-pound mixer in a double-wall carton.
Branding matters too, but not in the “slap the logo everywhere” sense. Good shipping boxes design tips treat branding like a sequence. What does the customer see first? What do they touch? Where does the logo sit when the box is stacked on a porch in Phoenix, a shelf in Paris, or a warehouse pallet in Toronto? A strong outside message can make a plain mailer feel intentional. A cluttered one can make an expensive brand look cheap.
Protection First, Then Everything Else
Package protection is the non-negotiable part. If the product fails in transit, the rest of the design is decoration. I once visited a co-packer in San Diego where a brand was using attractive mailers with zero crush resistance. The mailers looked fine until pallets were stacked three high. The bottom row got flattened. That’s not a design problem on paper. That’s a shipping boxes design tips problem in real life, and it shows up fast when a pallet jack hits a dock at 7:10 a.m.
Consider stacking pressure, drop height, vibration, and temperature. If your product ships through multiple hubs, the box needs to handle repeated handling. If it ships in summer, adhesives and coatings need to survive heat. If it ships in cold conditions, board memory and tape performance change. None of that is glamorous, but all of it affects package protection. A cold-weather route through Minneapolis can expose weak glue in a way a room-temperature sample never will.
Branding and the Unboxing Moment
Unboxing matters, but only after the box survives the trip. A clean logo, a strong typography system, and a simple message can do a lot without driving up print complexity. Some brands want six colors, foil, embossing, and spot UV on a shipping carton. I usually ask one question: how much of that will the customer actually notice before they recycle the box? That question usually cuts through the fantasy, especially when the finish adds $0.18 to $0.35 per unit.
A good brand moment might be a bold one-color logo on the exterior and a smart interior message inside the flaps. That often delivers more perceived value than adding three extra inks. For brands exploring broader packaging options, I usually point them to Custom Packaging Products and Custom Shipping Boxes so they can compare formats before choosing a direction. It is easier to decide once you can compare a mailer, an RSC carton, and a retail box side by side.
Sustainability Without the Theater
Eco packaging is not just a marketing checkbox. It can reduce cost when done properly. Right-sizing a carton means less corrugated board, fewer void fill materials, and lower freight charges from dimensional weight. Recycled content can also be a smart purchase if the board still meets your performance needs. FSC-certified board is a strong option if your brand wants documented sourcing. You can verify certification info through FSC. In many cases, the board comes from mills in Guangdong, Ontario, or Wisconsin, and the paper grade matters more than the slogan on the side panel.
Here’s what most people get wrong: they assume “green” means expensive. Not always. A carton that is sized correctly and packed with less filler can be cheaper than the oversized version. A right-sized box can save $0.06 in board, $0.09 in void fill, and another $0.12 in dimensional weight on a single order. Sustainability and cost control are not enemies unless the design team makes them enemies.
Cost, Pricing, and Order Quantity
Material grade, print complexity, finishing, tooling, and MOQ all affect price. A simple RSC corrugated carton with one-color print might land around $0.28 to $0.44 per unit at 5,000 pieces, depending on size and board strength. Add custom inserts, multi-color print, or specialty coatings, and the number moves quickly. I’ve had suppliers quote a 12-15 business day sample cycle for a basic box and 20-25 business days for a more complicated structure with inserts and custom print. That is normal when the factory is in Shenzhen, Ningbo, or Ho Chi Minh City and the artwork is locked on time.
Below is a simple comparison that shows how shipping boxes design tips affect cost and performance in practice.
| Box Type | Typical Use | Estimated Unit Cost | Lead Time | Notes |
|---|---|---|---|---|
| Plain corrugated carton | General ecommerce shipping | $0.22-$0.38 | 10-15 business days | Best for low-cost package protection |
| Branded mailer box | Subscription and retail-style unboxing | $0.38-$0.78 | 12-20 business days | Better presentation, higher print costs |
| Heavy-duty shipping carton | Fragile or heavier products | $0.45-$0.95 | 15-25 business days | Stronger board, more freight-safe |
| Box with custom insert | Glass, electronics, premium items | $0.62-$1.35 | 18-30 business days | Higher protection, more tooling and labor |
If your budget is tight, standard sizes are your friend. If your product is fragile, trying to save $0.07 on board grade can turn into a much larger replacement cost later. I’ve watched brands save pennies and lose dollars. It’s a hobby, apparently, and the invoice usually arrives from a warehouse in Pennsylvania or a returns center in Nevada.
What Are the Best Shipping Boxes Design Tips for Fragile Products?
If the product can crack, chip, leak, or deform, shipping boxes design tips need to start with movement control. Fragile products do not forgive loose fit. They punish it. The best approach is usually a tighter internal cavity, a board grade with enough crush resistance, and an insert that stops the item from shifting during transit packaging. For glass, ceramics, and electronics, that often means more structure and less empty air.
Choose a box that matches the real pack-out, not the object on its own. Add room for protective wrap, foam, molded pulp, tissue, or corrugated inserts if the item needs them. Then test the assembled package, not just the carton. A box may pass a visual check and still fail because the product moves 6 mm under vibration. That kind of motion is enough to crack a corner or scuff a finish over a long freight route.
Testing matters here more than anywhere else. Drop tests, compression testing, and route simulation can reveal weak points before customers do. I’ve seen a small increase in board strength cut breakage rates by more than half for glassware. That kind of result usually costs less than the returns it prevents, and it beats learning the hard way from a wave of one-star reviews.
For fragile items, shipping boxes design tips should also consider edge protection and stacking behavior. If the product is moving through warehouses, pallets, or multi-stop carrier networks, the outer carton needs to survive pressure from above and handling from the sides. A little extra board can be cheaper than a lot of replacements. That is especially true for items shipped to dense routes where cartons are stacked, tossed, and scanned repeatedly.
Step-by-Step Shipping Boxes Design Process and Timeline
Good shipping boxes design tips are easier to use when you follow a clear process. I like to break it into five steps, because trying to “just figure it out” usually ends in a dozen email threads and one very tired project manager. A project that starts in Monday morning chaos in Chicago can still be on track by the following Friday if the measurements are clean and the approvals stop moving.
Step 1: Audit the Product
List every product dimension, accessory, insert, and packing need. Measure the longest edge, widest point, and heaviest configuration. Don’t forget accessories like cords, manuals, and sample packs. If the product ships with bubble wrap or tissue, include that too. Your internal dimensions must reflect the real pack-out, not the bare product sitting alone on a table. A 9.75-inch product with a 1-inch cable coil is not a 9.75-inch product in packaging terms.
I once worked with a small appliance brand that forgot to include the power cord in the measurement. The box was 1.25 inches too short. That forced a redesign after samples were already approved. Two weeks lost. All because someone measured the wrong version of the product, and the warehouse in Columbus had already printed the receiving labels.
Step 2: Build the Dieline and Choose Board Specs
The dieline is the technical drawing that defines the structure. At this stage, board choice matters. E-flute is often used for nicer print and lighter items. B-flute is better if you need more stiffness. C-flute is a common middle ground for transit packaging. If the product is heavy, double-wall board may be the right call. This is where shipping boxes design tips stop being artistic and start being mechanical, because a 350gsm C1S artboard lid and a 44 ECT corrugated shipper do not perform the same way.
A good supplier should ask about shipping method, palletization, storage conditions, and the carrier network. If they don’t ask, that’s a red flag. I’ve negotiated with factories in Dongguan and Xiamen where the first quote looked cheap until I asked about board construction. The “same” box suddenly needed upgraded paper and a stronger glue line. Funny how that works. It is also why a $0.15 per unit quote for 5,000 pieces can become $0.23 once the real spec lands on the table.
Step 3: Review Print Layout and Messaging
Before sampling, review the print layout carefully. Check logo placement, barcode area, fold lines, and glue flaps. Keep critical artwork away from seams and score lines. I’ve seen beautiful designs ruined because a brand name landed directly on a fold. It looked crooked on the finished box and caused a second round of approvals. In one case, the fix took 48 hours and saved a reprint that would have cost $1,200.
Barcodes need quiet space around them. Regulatory marks should be placed where they won’t be covered by tape or labels. If you’re using custom logo packaging, make sure the messaging supports the brand without interfering with the carrier labels, return labels, or inventory stickers. Order fulfillment teams will thank you. Quietly. Probably. A logo printed 1/8 inch too close to a seam is a tiny problem that becomes very visible on a packed pallet in New Jersey.
Step 4: Prototype and Test
Samples are not vanity items. They are proof. Test the box with the actual product, actual packing materials, and actual warehouse people. Not someone in design. Not someone in sales. The person who packs 200 orders before lunch is the one whose feedback matters most, especially if the packing station sits in a 68-degree room at 9:00 a.m. and climbs to 84 degrees by afternoon.
Drop testing, compression testing, and vibration testing should be part of the approval process if the item is fragile or high value. ISTA protocols are useful here, and ASTM-based material checks can help verify board quality and adhesive performance. If your box fails a test, fix it before mass production. Testing costs far less than returns. A $300 round of sample testing is a bargain compared with a $9,000 replacement cycle.
Step 5: Approve Artwork and Confirm Production Timing
After the sample works, lock the artwork and spec sheet. Production timing depends on quantity, print method, board availability, and freight method. A simple run can move from proof approval to delivery in about 15-20 business days. A more complex custom structure can take 25-35 business days, especially if inserts or specialty finishes are involved. Rush fees usually appear when the timeline gets squeezed after approvals are already behind. That’s not a surprise. That’s a bill, and it often starts at $150 to $400 depending on the factory.
Here’s a realistic timeline example:
- Product audit and measurements: 1-2 days
- Dieline and structure review: 2-4 days
- Artwork placement and proofing: 2-5 days
- Sampling and revisions: 5-10 business days
- Final production: 10-20 business days
- Freight and delivery: 3-12 days depending on shipping method
That timeline is not fixed. If your art is ready, your supplier is responsive, and your spec is simple, things move faster. If someone keeps changing the logo size on round seven of revisions, all bets are off. Shipping boxes design tips work best when the spec stops moving, the approval chain stays under three people, and the proof arrives before the freight booking closes.
Common Mistakes When Designing Shipping Boxes
The biggest mistake I see is choosing a box that is too large. Oversized boxes cost more to ship because of dimensional weight, and they usually need more filler. More filler means more labor, more material, and more chances for the product to move. That movement creates damage risk. So yes, the “extra room” people ask for often creates the problem they were trying to avoid, especially when the box is billed at 18 x 12 x 10 instead of 16 x 10 x 8.
Another common mistake is prioritizing graphics before structural strength. A box can look incredible in a render and still collapse in transit. I’ve had clients approve a design because the mockup “felt premium,” then call me after three damaged shipments. Pretty does not replace compression resistance. It just doesn’t. A gold logo on a crushed lid is still a crushed lid.
Ignoring warehouse packing behavior is another expensive error. The way a box is designed on screen is not how it is packed under time pressure. If a box requires three awkward folds, four tape strips, and a prayer, your team will hate it. And they’ll pack it badly. That’s human nature. Shipping boxes design tips should respect the pace of real order fulfillment in facilities where every second counts and every label printer seems to jam at the worst possible moment.
Overcomplicating print is also a classic mistake. Too many spot colors, specialty coatings, and tiny details can drive up cost and create longer proof cycles. If your brand doesn’t need a seven-color exterior on a transit carton, don’t pretend it does. One-color or two-color print often gives you 80% of the brand benefit at a far better price. A clean black logo on kraft board can look sharper than a cluttered full-bleed design that costs $0.27 more per unit.
Skipping test shipments is probably the most painful one. A sample on a desk is not a transportation test. Send the box through the same route your customers use. Ship it to a real address. Let it get scanned, stacked, dropped, and delivered. You’ll learn more from 10 real shipments than from 10 pretty renderings. Maybe not what the design team wants to hear, but reality rarely cares about feelings, especially on a route from Ohio to Florida in August.
Expert Shipping Boxes Design Tips to Cut Cost and Improve Quality
Here are the shipping boxes design tips I give clients when they want to lower cost without turning the package into a cardboard apology. First, use standard sizes whenever possible. Standard dimensions reduce tooling complexity and often improve production speed. If your product can fit into a common box size with a well-made insert, that is usually cheaper than forcing a fully custom structure. In many plants, a standard-size carton can shave 3 to 5 days off tooling and approval time.
Second, simplify print. One-color printing on kraft or white corrugated board can look sharp if the typography is strong. Clean design beats busy design nine times out of ten. I’ve stood on press floors where the smallest print simplification shaved nearly $0.11 per unit on a 7,500-piece run. That is real money, and in some cases it is the difference between a $0.31 box and a $0.42 box.
Third, make the design modular. If you sell three product sizes, try to build a packaging system that uses one box family with minor insert adjustments rather than three totally different structures. That helps with inventory, storage, and reordering. It also makes supplier negotiations easier because you can quote volume across related SKUs instead of starting from zero every time. A factory in Shenzhen is far more willing to hold a price when the carton family repeats across 12,000 pieces.
Negotiate the Right Way
When you’re talking to suppliers, ask about board substitutions, MOQ flexibility, and freight quoting options. I’ve saved clients money simply by swapping from a specialty paperboard to a more common corrugated grade that still met the drop test. One supplier in Shenzhen wanted to charge a setup premium for a custom coating. We walked away from that finish and kept the same visual hierarchy with better board selection. The client saved about $1,850 on the first run alone, and the delivery window stayed at 12-15 business days after proof approval.
Also ask what happens if the order quantity changes by 10% or 20%. That matters more than people think. Many factories are fine at 5,000 pieces but get awkward at 4,200 or 6,300. If you know your reorder pattern, tell them up front. That gives you more honest pricing. Honest pricing is wonderful. It’s rare, but wonderful, especially when the factory is quoting from Ningbo or Guangzhou and freight is moving through Long Beach.
Keep the Critical Art in Safe Zones
Any critical logo, brand claim, or QR code should be placed away from folds, seams, and glue areas. I’ve seen a beautiful design lose its impact because the main slogan landed on the dust flap. The box still functioned, but the print looked sloppy. A small layout shift can fix that. Shipping boxes design tips often come down to the boring part: placement, and a 1/8-inch adjustment can make the difference between polished and awkward.
Think about how the box will be opened. If the top flap is where the customer sees the brand first, use that space well. If the side panel is exposed in warehouse shelving, make that side readable too. Clear hierarchy matters. You do not need to scream. You do need to be legible, even when the parcel is sitting on a conveyor in Phoenix or Newark.
Spend More Where It Actually Helps
Sometimes the cheapest box is the most expensive choice. If your product is fragile, a stronger board or a custom insert can save far more than it costs. I worked with a small glassware brand that was fighting breakage at 4.8%. We upgraded the insert and changed the box depth by 5 mm. Damage fell to 0.9%. The insert cost them $0.14 more per unit. The return savings and reduced replacement costs were well above that.
That’s the kind of decision shipping boxes design tips are meant to support. Not just “how do we save five cents?” but “where does the five cents matter?” Sometimes you spend a little more on package protection so the rest of the operation runs cleaner. A box that costs $0.19 more can still be the less expensive choice if it cuts returns by two percentage points.
For brands that want more control over their shipping materials, I often recommend comparing cartons and mailers side by side. If the item is soft goods, a well-made mailer can be more efficient than a corrugated carton. If the item is fragile, a stronger box wins every time. For apparel and lightweight accessories, Custom Poly Mailers can be a good fit when box structure is overkill. A poly mailer that ships at $0.15 to $0.24 per unit may be the right answer for a 10-ounce garment that never needs crush protection.
Here are a few practical shipping boxes design tips I use on repeat:
- Keep product movement under 5 mm inside the box.
- Reduce void fill before reducing board strength.
- Use the fewest print colors that still support the brand.
- Test the box with real warehouse labor, not just a sample photo.
- Lock the spec sheet so future orders match the approved version.
If you want a better box, start with the box that ships, not the box that photographs well. That sentence has saved more budgets than any design trend ever did, especially on reorders from factories in South China where a tiny spec drift can quietly turn into a month of unnecessary cost.
Next Steps for Applying Shipping Boxes Design Tips
If you’re ready to apply shipping boxes design tips, begin with a one-page packaging brief. Include product dimensions, product weight, shipping destination, target quantity, branding goals, and any special handling notes. If you’re selling through ecommerce shipping channels, write down the carrier you use, the average parcel weight, and the typical shipping zone mix. Those details change the box choice fast, especially if half your orders ship to Zone 7 and the rest stay inside Zone 2.
Then request samples from at least two suppliers. Compare board strength, print quality, fit, and pricing. Ask for a quote on the exact same structure if possible. That way you’re comparing apples to apples instead of a budget carton to a premium one and pretending it’s a fair comparison. It isn’t. A supplier in Vietnam may quote $0.27 while a plant in Shenzhen quotes $0.31, but if one uses 32 ECT and the other uses 44 ECT, the comparison is meaningless.
Run a live packing test with the actual team that will use the boxes. Time how long it takes to assemble 20 units. Record how much tape, filler, and labor each unit needs. Track the differences. I’ve seen a box that looked cheap on paper turn out to be expensive because it took 22 seconds longer to pack than the better-designed version. Multiply 22 seconds by 8,000 orders, and suddenly the “savings” disappear. That kind of drag matters in a facility running 1,500 orders a day.
Track damage rates, shipping cost, and packing speed on the first run. If returns drop and fulfillment gets faster, you know the design is working. If not, revise the structure or the board grade. Do not wait for a customer complaint to tell you the packaging was wrong. That complaint will be much more expensive than a sample revision, and it usually lands after the item has already been reshipped from a warehouse in Ohio or Texas.
Finally, lock the spec sheet. This is the part people skip because it feels administrative. It is administrative. And it matters. Once the approved version is set, make sure the supplier, your warehouse, and your procurement team all use the same file. Consistency keeps reorders from turning into a scavenger hunt. If the approved carton is 10 x 8 x 4 with 44 ECT board and one-color print, every department should be quoting that exact spec, not a version that drifted by half an inch.
Good shipping boxes design tips are not about making packaging fancier. They’re about making it smarter. Better package protection. Lower dimensional weight. Faster order fulfillment. Fewer damaged shipments. Stronger branding where it counts. The clear takeaway: measure the real pack-out, choose the lightest structure that still passes transit testing, and lock the spec before production starts. That’s how shipping boxes design tips turn into fewer returns and fewer headaches, whether your boxes are made in Guangdong, Mexico, or the Midwest.
FAQs
What are the best shipping boxes design tips for fragile products?
Use stronger corrugated board, a tighter internal fit, and inserts that stop movement. Test drop performance before mass production instead of trusting a mockup. Avoid oversized boxes, because extra space usually means more damage and more filler. I’ve seen fragile items survive a 1.2-meter drop once the internal movement was reduced to under 5 mm, and the package stayed intact on routes through Denver and Atlanta.
How do shipping boxes design tips help reduce shipping costs?
Right-sized boxes reduce dimensional weight charges and wasted void fill. Simpler print specs and standard box sizes usually lower tooling and production costs. Better design can also cut damage-related replacement expenses, which often matters more than a few cents saved on material. A box that trims $0.12 in freight and $0.07 in filler can outperform a cheaper-looking carton every time.
How long does the shipping box design process usually take?
Simple projects can move from concept to sample quickly if measurements and artwork are ready. Custom structural designs need time for dielines, sampling, revisions, and final approval. Production timing depends on board availability, print complexity, and freight method, but I usually tell clients to plan for 15-35 business days from final approval to delivery depending on complexity. If the supplier is in Dongguan or Ningbo and the proof is approved by Tuesday, a 12-15 business day run is realistic for simpler builds.
What is the biggest mistake people make with shipping boxes design tips?
They focus on branding first and forget the box has to survive transit. They also approve a size that looks fine on paper but performs badly in packing and shipping. Skipping testing is the fastest way to create expensive problems, and I’ve watched that mistake cost brands thousands in returns. A $0.33 box that fails is far more expensive than a $0.41 box that actually protects the product.
Should I choose a plain box or a branded box for shipping?
Choose plain boxes if cost control and speed matter most. Choose branded boxes if customer experience and repeat purchase value matter more. A hybrid approach works well too: simple exterior branding with strong structural specs. That usually gives you the best mix of price, protection, and presentation, especially when the outside print is one color and the inside uses a single, clean brand message.