Quick Answer: Skincare Sample Plastic Bags Carton Label Review
A skincare sample bag can look polished in a product photo and still fail on the packing line. The label curls. The barcode scans once, then refuses to scan after the bag is filled. The film feels flimsy next to a premium serum packet. That is the practical starting point for a skincare sample Plastic Bags Carton label review: the pack has to look clean, fill cleanly, protect the samples, and carry the information a buyer, packer, retailer, or customer needs without drama.
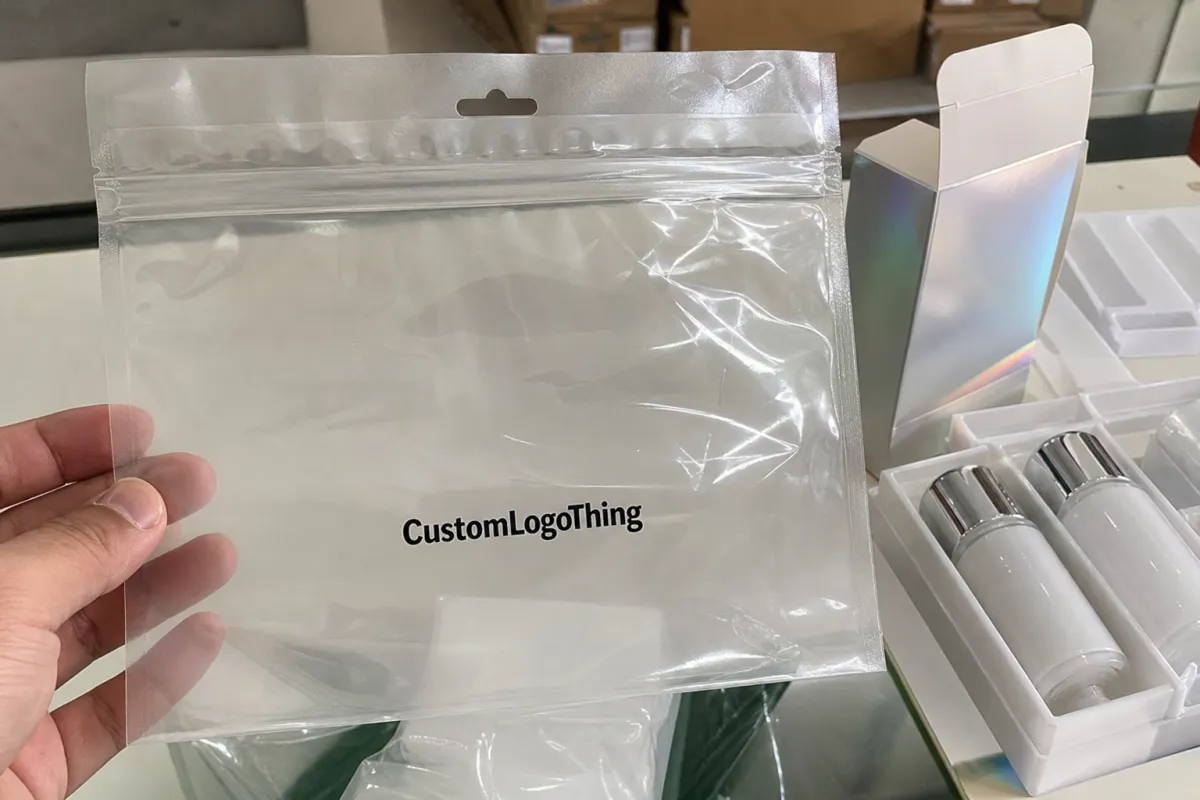
For most skincare trial kits, the safest middle ground is a clear or frosted LDPE or PE sample bag with a resealable zipper, paired with a pressure-sensitive printed carton label. The bag needs enough flat surface for the product name, routine order, INCI reference, batch or lot code, shade or formula variant, warning copy, QR code, and barcode if the kit moves through retail, clinic inventory, subscription fulfillment, or warehouse receiving.
The best format depends on what is inside. Foil sachets already carry the main barrier protection, so the outer bag is mostly for grouping, presentation, and picking accuracy. Mini tubes need more puncture resistance because caps and shoulders create pressure points. Mixed discovery sets need usable fill space, a gusset, or stronger side welds because sachets, cards, scoops, and small jars never settle as neatly as the mockup suggests.
Practical rule: approve the package only after it is filled, closed, labeled, scanned, stacked, and lightly shaken. A flat proof on a desk tells you almost nothing about label behavior under product pressure.
A useful review looks past the bag photo. It checks tactile feel, label compatibility, filling speed, freight efficiency, code readability, and the production details that prevent a late repack job. The real question is not whether the bag looks nice empty. The question is whether it survives normal handling from kitting table to customer unboxing.
Top Options Compared for Skincare Sample Bag Kits
Sample programs usually start with one question: should the bag sell the product, organize the product, or protect the product? Those are different jobs. A low-cost flat bag may be right for three foil packets inside a carton. A frosted zipper pouch makes more sense for a five-piece routine kit the customer may open and close for several days.
| Bag Format | Best Use | Protection | Presentation | Labeling Room | Typical Unit Range |
|---|---|---|---|---|---|
| Flat poly bag | Foil sachets, ampoules, single-use sleeves | Light | Basic to clean | Moderate if not overfilled | $0.04-$0.12 before kitting |
| Resealable zipper bag | Routine kits, cleanser and serum samples | Medium | Strong everyday option | Good on front panel | $0.10-$0.28 depending on gauge and size |
| Frosted PE pouch | Spa, apothecary, clinical, or premium kits | Medium | Soft and elevated | Good, but contrast matters | $0.16-$0.40 with label |
| Stand-up mini pouch | Retail sample sets and small display packs | Medium to high | Retail-friendly | Very good | $0.22-$0.55 depending on structure |
| Carton-labeled kitted bag | Multi-SKU sets, influencer mailers, clinic trials | Depends on bag spec | Highly controlled | Excellent if planned early | $0.18-$0.60 including label and handling |
Flat poly bags are the leanest option when the product is already sealed. Think foil packets, small ampoule sleeves, sample cards, or single-use masks. They fill quickly, pack flat, and keep freight weight low. The downside is feel. If the film is too thin, the kit can read as cheap, no matter how expensive the formula is.
Resealable zipper bags are the best all-around choice for many skincare sample projects. Customers can open, inspect, and store the contents without destroying the pack on first use. A 2.5-3 mil LDPE zipper bag is often enough for light-to-medium kits. Heavier or more angular contents may need thicker film, a reinforced pouch, or a different layout inside the bag.
Frosted PE and EVA-style pouches have a quieter look. They hide scuffs better than high-gloss clear material and suit clinical, spa, apothecary, or muted luxury positioning. The catch is readability. A pale beige label on a frosted pouch may look tasteful in a rendering and nearly invisible under warehouse lighting. Very elegant. Very annoying.
Stand-up mini pouches are stronger for retail or display use. They give more label area, more structure, and a better shelf face. They also cost more and usually require a more careful approval cycle because the structure, gusset, seal width, and artwork all affect how the pack stands after filling.
A carton label helps most with multi-SKU sample packs, subscription inserts, dermatology trial sets, retail sample cartons, and influencer mailers where the bag must connect to a carton, campaign, batch, or replenishment code. Off-the-shelf blanks plus labels move faster and suit small tests. Fully custom printed bags look cleaner at volume, but they require tighter artwork control, longer setup, and confidence that copy will not change after approval.
Detailed Reviews of Materials, Closures, and Print Feel
LDPE is the dependable everyday material for sample bags. It is flexible, smooth, and forgiving during hand packing. It works well for light-to-medium kits where the outer bag protects against dust, handling, and grouping errors rather than acting as the main moisture barrier. For many trial kits, LDPE between 2 and 4 mil gives a sensible balance of hand feel and cost.
HDPE and PP options can provide crisper structure and cleaner clarity. PP often presents well in retail because the surface looks sharper and less cloudy. It can also be less forgiving around sharp carton edges, crimped sachet corners, or small accessories packed together. If the kit includes mini spatulas, metal crimp tubes, rigid inserts, or vial caps, test corner stress before signing off.
Frosted films, soft-touch finishes, and matte laminations can raise the perceived value of a simple sample set. Skincare buyers often associate muted surfaces with clinical or premium positioning. Frosted material can be a good choice for mixed kits because it softens visual inconsistency, but it should not be approved without checking label contrast, rub resistance, fingerprint visibility, and how the pack looks after being handled a dozen times.
Closure Choices That Affect Cost and Use
An adhesive flap is inexpensive and fast for low-cost sealed sets, especially if the customer only opens the bag once. A zipper closure costs more but works better for discovery kits with several products or multiple days of use. Heat sealing gives better tamper evidence, though it adds process control and can slow packing. Drawstring closures feel gift-like, but they are better for gentle handoff than tight freight stacking.
Closure choice also changes usable space. Zipper tracks and heat-seal zones take room away from the fill area. A bag that looks large enough by outside dimensions can become tight once the zipper, seal, label panel, and product thickness are considered. That is a common sizing mistake, and it is not a charming one.
Print and Label Feel
Pressure-sensitive carton labels are flexible, efficient, and forgiving when copy changes. Direct flexographic or gravure-style printing looks cleaner on repeat runs and removes label edges, but setup cost and minimums are harder to justify for short campaigns. Digital labels work well when shade names, routines, barcode data, or small-batch variations change often, and Custom Labels & Tags planning can help before the bag format is locked.
Most problems are not exotic. Ultra-thin bags wrinkle around rigid mini jars. Glossy clear films show fingerprints. Tiny labels on curved or overfilled bags tunnel, lift, or distort the barcode. These dull details matter because they are exactly what trigger production complaints after the first pallet is packed.
Carton Label Fit, Barcode Scanning, and Compliance Space
Carton-label planning should happen before the bag size is finalized. The label needs a flat landing area, a proper quiet zone around barcodes, and placement that still reads after the samples settle inside the bag. If the label bridges over a tube cap or sachet fold, it may look acceptable for five minutes and then wrinkle during transit.
Common label fields include product name, usage order, net contents where applicable, batch or lot code, shade or formula variant, INCI reference, warning text, QR code, recycling notes, and distributor details. If the bag goes inside a folding carton or shipper, the bag label and carton label should use the same SKU logic and visual hierarchy so fulfillment teams do not mix sample sets during picking.
Test labels on filled bags, not empty ones. Lotion tubes, sachet corners, folded leaflets, and small jars create ridges that change the label surface. Matte white label stock with black barcode printing is usually safer than high-gloss, metallic, or low-contrast stock. QR codes need enough size and contrast to scan after the bag has been handled, not just when the label is perfectly flat.
A practical label size for a small sample bag is often in the 2 x 3 inch to 3 x 4 inch range, but the right size depends on bag width, product thickness, language requirements, and whether the label is doing branding work or mostly logistics work. For retail or clinical kits, it is usually better to protect a clean barcode zone than to fill every millimeter with design elements.
Barcode placement deserves its own review. A UPC, EAN, Code 128, or internal warehouse barcode should sit on the flattest possible area. Avoid placing it over a zipper track, side seam, heat seal, gusset fold, or the curve created by a mini tube. If the label must wrap slightly around a filled bag, keep the barcode on the front-facing flat area and put secondary copy on the wrap zone.
Compliance copy can become crowded quickly on skincare sample sets. Even when the sachets or tubes carry primary ingredient and warning details, the outer bag may still need set identification, caution text, country or market-specific language, recycling marks, batch traceability, or customer service information. Requirements vary by destination and product type, so packaging teams should leave space for review rather than treating the outer label as decoration only.
Label adhesive also matters. General-purpose permanent adhesive works for many LDPE and PP bags, but lower surface energy plastics may need a stronger adhesive or a label stock designed for poly applications. Removable labels can be convenient for operations, but they may lift in warm storage or during transit. If the bag will be chilled, exposed to humid bathrooms, or handled with lotion residue on fingers, adhesive testing is not optional.
When a sample bag is paired with a folding carton, shipper, or presentation sleeve, the outside carton label should match the bag label data. This is where a small review step prevents a large fulfillment problem. A mismatched shade name, kit version, or barcode can cause receiving errors, returns, or the wrong sample set being placed into a campaign mailer. For carton-based programs, teams may also review custom paper boxes alongside the bag and label so the complete pack has consistent sizing and code placement.
Cost, Pricing, MOQ, and Unit Cost Tradeoffs
The unit cost of skincare Sample Plastic Bags depends on film type, gauge, closure, print method, label stock, quantity, packing labor, and inspection level. A simple clear flat poly bag may be inexpensive by itself, but the total pack cost can rise when it needs a separate label, manual application, carton matching, barcode checking, and kitting labor.
For small pilot runs, using stock bags and digitally printed labels is often the most flexible approach. It lets teams test sizes, claims, routine order, artwork hierarchy, and barcode performance without committing to high minimums. The unit price may look higher than a fully custom production run, but the risk is lower because copy and kit contents often change after the first round of customer feedback.
For larger repeat runs, custom printed bags or custom-sized zipper pouches can become more attractive. The break-even point varies by supplier, print process, material, and the number of SKUs, but many projects begin comparing custom production once they move from a few thousand units into tens of thousands of units. At that stage, eliminating a separate label application step can save labor and improve consistency, provided the artwork is stable.
Typical cost drivers include:
- Film thickness: Thicker material improves feel and puncture resistance, but increases resin use, freight weight, and unit cost.
- Closure type: Adhesive flap bags are usually less expensive than zipper or slider closures, while heat sealing adds equipment and labor control.
- Label stock: Matte paper labels are economical, while film labels, textured stocks, metallic effects, and specialty adhesives add cost.
- Artwork versions: Multiple kit versions, shades, languages, or QR codes increase setup time and can raise waste if not grouped efficiently.
- Kitting complexity: A three-sachet routine packs faster than a mixed set with tubes, jars, folded cards, and sequence-specific placement.
Minimum order quantities vary widely. Stock bags can often be purchased in relatively small quantities, while custom printed bags may require larger runs to make printing setup efficient. Labels are usually more flexible, especially with digital printing. For a campaign with uncertain demand, a common strategy is to buy a moderate quantity of blank bags and print labels in smaller versioned batches.
It is tempting to choose the cheapest bag and spend more on the label, but that combination can backfire if the film feels weak or the bag wrinkles under the label. It is also possible to overspend on a premium pouch when the sample kit will be placed inside a larger mailer and viewed for only a few seconds. The best value comes from matching the bag to the customer touchpoint: retail display, subscription box, professional clinic handout, e-commerce insert, or event sampling.
Freight and storage should be part of the review. Flat bags store efficiently. Stand-up pouches, rigid inserts, and heavy carton-labeled kits take more space. If the program involves multiple variants, packaging components should be clearly carton-labeled at the case level so the kitting team can distinguish day routine, night routine, sensitive skin, oily skin, or shade-specific sets without opening every case.
Process Timeline and Production Steps
A smooth sample bag project usually follows a practical sequence: define kit contents, estimate filled thickness, choose bag style, confirm label area, produce prototypes, test scanning, approve artwork, run production, inspect packed samples, and document the final specification. Skipping the early physical test is the most common cause of rework.
For stock bags and digital labels, a typical timeline may be relatively short if artwork and copy are ready. Teams often allow several business days for label proofing, a few days for sample assembly, and additional time for internal review. For custom printed bags, lead times usually stretch because printing plates, tooling, material availability, color matching, and production scheduling all need coordination.
A realistic approval process should include:
- Content confirmation: List every sachet, tube, card, applicator, insert, and coupon that will go into the bag.
- Filled mockup: Pack the actual components, not substitutes, and measure the final width, height, and thickness.
- Label trial: Apply labels to filled bags and review lifting, tunneling, wrinkles, contrast, and barcode readability.
- Handling test: Stack, shake, drop lightly, and place samples into the intended carton or mailer.
- Final specification: Record bag material, gauge, closure, label stock, adhesive, print method, barcode size, and placement.
Color approval should be handled carefully. A frosted pouch can make label colors look softer. A clear bag with visible sachets behind the label can change perceived contrast. If the label is printed on clear stock, white ink backing may be needed for readability. If the label is printed on paper stock, edge scuffing and moisture exposure should be considered, especially for products likely to be stored in bathrooms.
Production lines for sample kits are often semi-manual. Operators may count samples, place them in sequence, close the bag, apply the label, scan the code, and place the finished unit into a carton or case. A bag that is easy to open and label can save meaningful labor across thousands of units. A bag that sticks, collapses, or refuses to sit flat can slow the line even if the material price looks attractive.
Quality checks should include more than visual appearance. A practical sampling plan may check seal integrity, zipper function, label position, code accuracy, count accuracy, and carton match. If several sample formulas look similar, the kit should use clear variant marking. A small colored dot, secondary code, or bold routine name can reduce mispicks without overwhelming the design.
How to Choose the Right Bag
Start with the contents, not the artwork. A bag for three flat sachets has very different needs from a bag containing two mini tubes, a jar, a folded leaflet, and an applicator. Lay out the actual components and decide whether the customer should see them clearly, discover them through a frosted finish, or experience the pack as a more finished retail item.
If the sample set is low-cost and single-use, a flat clear bag with a neat label may be enough. If it is a multi-step skincare routine, a resealable zipper bag is usually more user-friendly. If it will be sold, displayed, or used as a premium brand introduction, a frosted pouch, stand-up pouch, or bag-with-carton combination may be more appropriate.
Use the following decision points:
- Product protection: Choose thicker film or a structured pouch when caps, jars, or rigid parts create pressure points.
- Customer use: Choose a zipper when the customer may open the kit more than once.
- Label reliability: Reserve a flat front panel for the label and barcode before approving bag size.
- Retail needs: Use stronger structure, clean code placement, and consistent carton labeling for shelf or inventory environments.
- Budget control: Use stock bags and versioned labels for pilots, then consider custom printed bags for stable repeat programs.
For skincare, the sensory message matters. A serum sample may be tiny, but the outer packaging tells the customer whether the brand is clinical, playful, natural, luxury, or purely functional. A crisp label on a decent film often feels more trustworthy than a thin bag with an overdesigned label. Materials do not need to be extravagant, but they should feel intentional.
Do not forget the receiving and fulfillment teams. They need cartons that are clearly labeled, cases that identify kit versions, and barcodes that scan consistently. A package that delights the marketing team but confuses the warehouse creates avoidable cost. Strong packaging review balances brand presentation with real packing, stocking, and shipping conditions.
Recommendation and Next Steps
For most skincare sample Plastic Bags Carton label projects, the best starting specification is a 2.5-3 mil clear or frosted LDPE zipper bag with a matte white pressure-sensitive label. That combination is usually flexible, cost-aware, and easy to adjust for small-batch testing. If the kit includes heavier tubes, jars, applicators, or multiple inserts, move toward thicker film, a stand-up pouch, or a larger front panel before trying to solve everything with a bigger label.
Use a label that supports both branding and operations. Keep the product name and routine order readable at arm's length. Keep barcodes on a flat area. Keep lot or batch space practical for the way the product will actually be coded. If the label will carry multiple languages, QR codes, or regulatory references, increase the label size early instead of shrinking type later.
The most reliable next step is a filled sample review. Pack the actual sachets, tubes, jars, and inserts into two or three candidate bags. Apply the intended labels. Scan the codes. Put the finished bags into the intended carton or mailer. Stack them for a short period and review how the label, film, and contents behave. This small test usually reveals more than a long discussion about materials.
If the project is still changing, stay flexible with stock bags and digital labels. If the campaign is stable and volume is predictable, review custom printing, custom sizing, and carton matching to reduce labor and improve consistency. Either way, define the specification clearly so reorders match the approved sample, not just the general idea.
FAQs
What is the best plastic bag for skincare sample kits?
A resealable LDPE zipper bag is often the best all-around option for skincare sample kits because it is flexible, affordable, and easy for customers to reuse during a multi-step routine. Flat poly bags work well for simple sachet sets, while frosted or stand-up pouches suit more premium or retail-facing programs.
What thickness should a skincare sample plastic bag be?
Many light-to-medium sample kits use material in the 2-4 mil range. Flat sachet sets may sit at the lower end, while kits with mini tubes, caps, jars, applicators, or folded inserts often need thicker film or a more structured pouch. The right gauge depends on filled weight, pressure points, handling, and desired feel.
Should skincare sample bags use labels or direct printing?
Labels are usually better for pilot runs, multiple variants, small-batch campaigns, and projects with changing copy. Direct printing can look cleaner for high-volume repeat runs, but it requires more stable artwork and often higher setup commitment. Many brands start with labels, then move to printed bags once the program is proven.
How do I stop labels from peeling on plastic sample bags?
Use a label stock and adhesive designed for the bag material, apply labels to clean and dry surfaces, avoid placing labels over ridges or curves, and test on filled bags. Low surface energy plastics such as PE and PP may need stronger adhesives than paperboard cartons. Warm storage, humidity, lotion residue, and overfilled bags can all increase lifting risk.
Where should the barcode go on a sample bag label?
The barcode should go on the flattest available label area, away from zipper tracks, side seals, gusset folds, and product ridges. It should have enough quiet zone, strong contrast, and a size suitable for the scanner environment. Always test barcode scanning after the bag is filled and handled.
Can one label work for both the bag and the carton?
Sometimes, but it depends on size, adhesive, surface, and information needs. A carton label may not adhere properly to a plastic bag, and a bag label may be too small for carton handling requirements. It is usually safer to align the data and visual hierarchy while specifying the correct label stock for each surface.
What should be checked before approving a skincare sample bag?
Check filled fit, closure function, label adhesion, barcode scanning, copy accuracy, carton match, case labeling, and how the pack looks after normal handling. The approval sample should use actual components and the intended label stock rather than empty bags or placeholder inserts.


