Beauty Sample Plastic Bags Barcode Placement Checklist: Why Tiny Bags Cause Big Scan Problems
A skincare brand can have 20,000 foil-mask sachets packed, counted, and booked for a retailer, then lose the receiving slot because one small UPC sits across a heat seal. Tiny bag. Expensive problem. Very glamorous, obviously.
A practical beauty Sample Plastic Bags barcode placement checklist prevents that kind of failure before artwork reaches production. Barcode placement is not “put the UPC somewhere on the back.” It covers the exact location, orientation, quiet zone, contrast, print method, background opacity, and surface stability that allow scanners to read the code without drama.
On a 3-inch by 5-inch sample pouch, every millimeter is already crowded. Ingredients, warnings, INCI names, scent variants, icons, fill weight, recycling marks, batch space, usage directions, retailer copy, and brand language all compete for the same back panel. The barcode usually gets treated as the dull legal object. Then it becomes the only thing a warehouse cares about.
Beauty samples are uniquely irritating from a scanning standpoint. Glossy film creates glare. Metallized layers bounce light. Clear bags show the product behind the code. Zipper tracks and hang holes steal space. Tear notches often sit exactly where someone wants to place the barcode because the back panel “looks cleaner” there. Sure. Until a scanner sees a distorted ladder of black lines and gives up.
Retailers, warehouses, marketplaces, and third-party fulfillment teams do not reward pretty non-scanning packages. A failed barcode can mean relabeling, delayed intake, chargebacks, refused appointments, or a full packaging reprint. For retail-bound sample pouches, the barcode needs to scan quickly under normal handling conditions, not after five tries and a prayer.
The checklist below focuses on the decisions that usually decide whether small beauty sample bags pass receiving: scanner behavior, bag style, placement zone, print specs, cost tradeoffs, production timing, and proof checks.
How Barcodes Scan on Small Beauty Sample Bags
A barcode scanner reads contrast between dark bars and a light background. It does not read the brand team’s hopes and dreams. If the bars are too small, too shiny, too stretched, too close to a fold, or printed over a reflective patch, scan reliability drops fast.
Most beauty sample packaging uses one of four code types. UPC-A is common for U.S. retail. EAN-13 is common for international retail. Code 128 is often used for internal warehouse tracking, batch IDs, fulfillment labels, or carton handling. QR codes usually support product education, instructions, marketing pages, authentication, or batch lookup. They are not a substitute for a retail checkout barcode unless the retailer specifically accepts them that way.
Quiet zones are the blank spaces on the left and right sides of a linear barcode. They tell the scanner where the code starts and ends. Kill that space with a logo, border, ingredient line, pouch edge, crimp texture, or seal line, and the scanner may treat the code as random decoration. That is not the vibe anyone wants at receiving.
Orientation matters too. In picket-fence orientation, the bars stand vertically like a fence. In ladder orientation, the bars run horizontally like rungs. Picket fence often works well on flat panels because handheld scanners can sweep across the bars cleanly. Ladder orientation can help in some layouts, but it may suffer if sealing, filling, or film tension compresses the horizontal lines. The right orientation depends on the bag shape, fill behavior, scanner angle, and available panel width.
Plastic film adds its own small acts of sabotage. Gloss creates glare. Transparent film reduces contrast. Metallized film reflects scanner light. Matte varnish can reduce shine but may soften printed edges if the artwork and print method are not controlled. White ink backing is often the quiet hero because it gives black bars a stable, opaque field.
Flexible substrates also move. Film can stretch during printing, laminating, slitting, sealing, packing, or filling. On a large retail pouch, a tiny dimensional shift may not matter. On a miniature sachet, the same shift can eat into the quiet zone or thicken narrow bars enough to reduce scan quality.
The practical rule is simple: put the barcode on the flattest, lightest, least interrupted panel available. Keep it away from seals, folds, notches, crimped edges, zipper tracks, hang holes, gussets, and areas that wrinkle after filling.
Best Placement Zones for Sachets, Zip Bags, and Flat Pouches
The best barcode zone changes by bag style. A flat sachet, zipper bag, header bag, and mini stand-up pouch do not behave like the same package just because they are all small and plastic. They fold differently. They fill differently. They scan differently.
Flat sample pouches and three-side-seal sachets
For flat sachets, the lower back panel is usually the safest placement zone if there is enough room. Keep the code clear of the bottom seal and both side seals. A clearance target of at least 0.125 inch from seals is a common starting point for very small pouches, and more space is better if the seal is wide, textured, or crimped.
If the sachet is extremely small, center back may scan better than forcing a barcode into the lower corner. A centered barcode with proper quiet zones beats a “neat” corner placement that touches a seal or bends over a product bulge.
Mini stand-up pouches
For mini stand-up pouches, use the back center or lower back panel above the base gusset. Do not place the barcode on the gusset unless the supplier and retailer have tested it after filling. The base curves, expands, and distorts printed lines once product is inside. That cute lower wraparound placement can become a wrinkled little barcode crime scene.
Zipper sample bags
For zipper bags, place the barcode below the zipper track but not so low that settled product creates wrinkles behind it. Powder, beads, masks, sponges, applicators, and mini tools can all press unevenly against film. If the bag will be hand-filled, allow extra space because fill variation can push the barcode panel into a curve.
Header bags and hang-hole bags
For header bags, the header card or upper back panel can work if the hanging area stays flat and visible during receiving. Keep the barcode away from the hang hole, euro slot, staple zone, and folded header crease. If the retailer scans cases rather than individual bags, ask whether they need an inner-pack label, outer-carton GS1-128 label, individual consumer UPC, or all three.
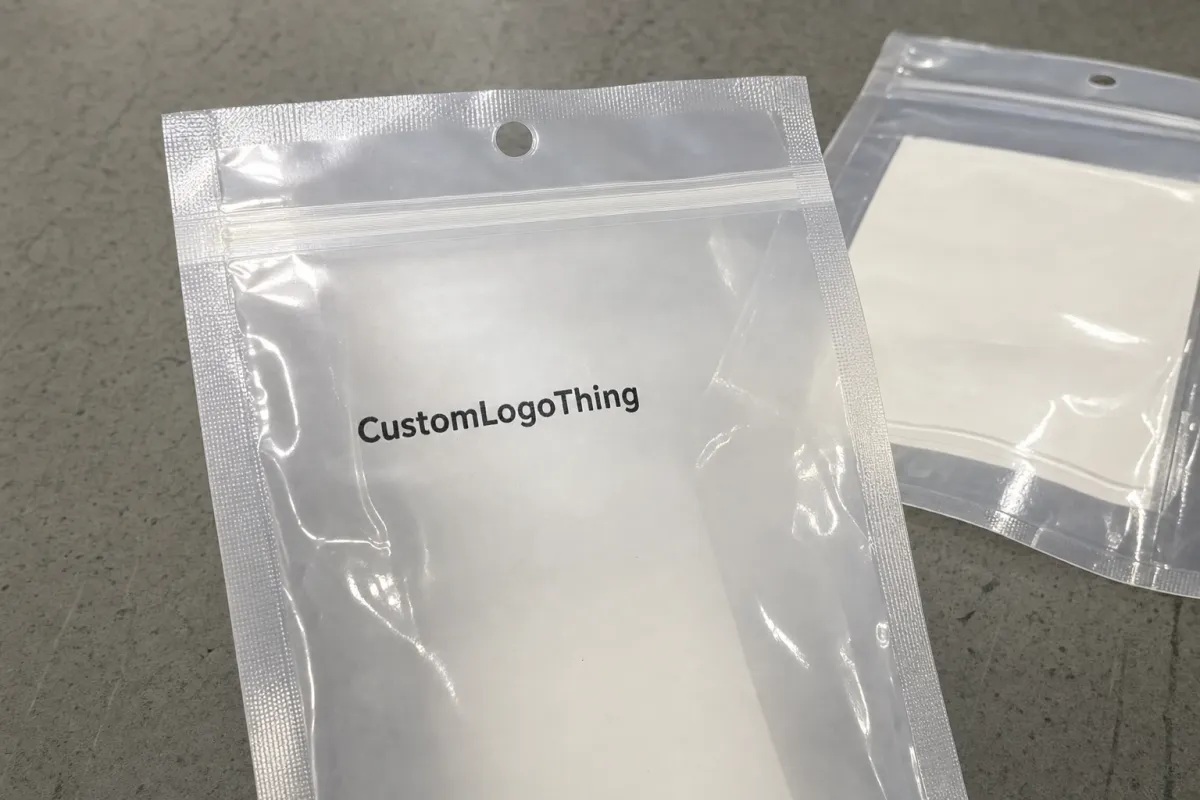
Transparent bags need a white ink box or applied label behind the barcode. Otherwise the scanner reads through product color, shadows, air bubbles, shimmer powder, glitter, or whatever chaos the formula creates behind the code. A white box that extends 0.08 to 0.125 inch beyond the barcode on each side is a useful starting point, but final dimensions should follow the barcode provider’s quiet-zone rules.
Minimum barcode size depends on the code type, magnification, print method, retailer requirements, and substrate. UPC and EAN symbols can be reduced within allowed limits, but tiny cosmetic pouches tempt teams to shrink them too far. Do not guess. Confirm minimum size with the retailer, GS1 guidance, or barcode provider, then place the code on the dieline at actual scale.
Printed barcodes look cleaner and work well for repeat production. Labels are safer for low-volume tests, late SKU changes, retailer-specific codes, or pilot launches under 1,000 to 3,000 units per SKU. Not glamorous. Often smart.
| Bag Style | Best Barcode Zone | Watch Out For | Practical Advice |
|---|---|---|---|
| Flat sachet | Lower or center back panel | Side seals, bottom crimp, tiny quiet zones | Keep the code fully inside the flat print area |
| Mini stand-up pouch | Back panel above gusset | Curved base and fill distortion | Avoid printing across the bottom gusset |
| Zipper bag | Below zipper, above product-settling zone | Zipper ridge, wrinkles, hand-fill variation | Test with filled samples, not empty bags only |
| Clear sample bag | Flat panel with white ink box or label | Product color and shadows behind code | Use an opaque background behind the barcode |
Key Barcode Specs to Confirm Before Artwork Approval
Before approving artwork, confirm the barcode type, number assignment, size, magnification, quiet zone, color, background, orientation, and human-readable digits. That sounds basic because it is. Basic errors still cause expensive reprints every week.
Black bars on a white background are boring because they work. Designer colors can work if contrast is high enough, but the barcode is not the place to prove how committed the brand is to beige-on-blush minimalism. Many scanners use red light, so red, orange, metallic, transparent, and low-contrast bars can fail. Dark navy, deep green, or rich brown may scan in some conditions. Black remains the safest option for retail and warehouse use.
Use vector barcode artwork whenever possible. An EPS, PDF, AI, or SVG file from a proper barcode source is far better than a stretched screenshot, a copied spreadsheet image, or a JPEG pulled from an email. Screenshots often have fuzzy edges and wrong proportions. Once those bars are distorted, premium packaging language cannot rescue the scan.
White ink backing matters on clear, frosted, tinted, and metallized plastic. Beauty samples often hold creams, oils, powders, masks, gels, and tinted formulas. Each fill can change the background behind the code. A consistent white barcode panel keeps the scanner from dealing with product variation. On metallized film, white ink can also reduce reflectivity and improve contrast.
Flexible packaging has print tolerances. Film can stretch during printing, laminating, slitting, sealing, and filling. A barcode placed at the minimum possible size has less room for that movement. Ask the printer about the recommended minimum X-dimension, line gain, and inspection method. If that language stalls the conversation, ask it plainly: “Will this barcode scan after printing and converting at this exact size?”
Practical rule: do not approve the bag because the mockup looks clean on a screen. Print the barcode at real size, place it on the intended material if possible, and scan it before production.
For retail-bound bags, request a digital proof and, when risk is high, a physical pre-production sample. This is especially useful for clear film, metallic film, heavy varnish, small pouches, international retail, or marketplace fulfillment programs. Barcode verification is its own check, but shipping and handling still matter. Industry groups such as ISTA focus on transport testing, while standards bodies such as ASTM publish packaging-related test methods. A code that scans in the design file still has to survive packing, cartons, rubbing, and intake.
Cost, Pricing, and MOQ Tradeoffs for Printed Barcodes
Barcode placement affects cost because it touches bag size, material, print method, number of colors, white ink layers, plates or setup charges, proof revisions, barcode version changes, and order quantity. A beauty sample Plastic Bags Barcode Placement checklist is partly a quality tool and partly a cost-control tool. Not exciting. Very useful.
Printed barcodes look cleaner and reduce labor at scale. For 10,000 to 50,000 pieces per SKU, printing the barcode directly on the bag is usually the cleaner operational choice. Applied labels make more sense for small runs, pilot programs, late UPC changes, retailer-specific coding, formulas still moving through approval, or shade ranges that may be cut after testing.
Small custom runs carry higher unit costs because setup is spread across fewer bags. For simple label-based sample bags, added label costs often land around $0.03 to $0.12 per unit depending on label size, application method, and labor. For custom-printed flexible bags, a small 5,000-piece run may fall around $0.18 to $0.45 per unit depending on material, print coverage, structure, and number of SKUs. Larger runs can drop lower, but inventory risk rises if formulas, claims, retailer rules, or barcodes change.
MOQ gets tricky when each scent, shade, or formula needs its own barcode. One base lotion in six scents may count as six SKUs. If each SKU needs a different printed barcode, each version may need separate plates, files, setups, or minimum quantities. A supplier might quote 5,000 pieces per design, not 5,000 total across all variants. Ask that question before the artwork set multiplies.
Hidden costs are less cute than the quoted bag price. Failed scans can mean relabeling labor at $18 to $35 per hour, rushed label printing, delayed shipments, retailer chargebacks, refused receiving appointments, or full reprints because the barcode sat over a seal. Nobody puts “we saved $40 on artwork review and spent $2,000 fixing it” on the mood board.
Cost-saving moves are straightforward. Standardize one bag size across variants. Reserve one consistent barcode zone. Use one shared back-panel template. Keep the barcode position the same across scents, shades, and kits unless a retailer requires a change. Ask whether barcode verification, white ink backing, physical sampling, and proof revisions are included or quoted separately.
| Option | Typical Best Fit | Cost Tradeoff | Main Risk |
|---|---|---|---|
| Printed barcode | Repeat runs over 5,000 to 10,000 units per SKU | Cleaner unit flow, possible setup or plate costs | Late barcode changes can trigger reprints |
| Barcode label | Tests, pilots, retailer changes, low MOQs | Label and application labor added per unit | Crooked labels, peeling, slower packing |
| White ink barcode box | Clear, frosted, tinted, or metallized film | Adds ink layer and proofing attention | Skipping it can cause contrast failures |
| Master back-panel layout | Multiple scents, shades, or formulas | Saves design and proofing time | Poor setup repeats across every SKU |
Production Steps, Lead Time, and Approval Timeline
A sane production process starts before design. Confirm the bag format, gather retailer barcode requirements, assign UPC or EAN numbers, create artwork, check placement on the dieline, approve the digital proof, produce a sample if needed, print, convert, inspect, pack, and ship. Skip steps and time is not saved. The problem just moves later.
Barcode placement should be locked before plates, cylinders, or production files are finalized. Moving the code after proof approval can trigger new proofs, new setup, delayed printing, or extra charges. For flexographic printing, plate changes are not magic. Digital printing may make changes easier, but proof control and SKU accuracy still matter.
Lead time depends on custom film availability, print method, number of SKUs, proof revision speed, pre-production sampling, order quantity, and the factory queue. Simple label-based sample bags can sometimes move in 5 to 10 business days after materials are ready. Custom-printed plastic sample bags with multiple SKUs, white ink, and retail compliance checks often need 15 to 30 business days after final proof approval. Sampling can add another 5 to 15 business days, depending on structure.
The buyer controls more of the schedule than people admit. Provide final barcode numbers, retailer guidelines, finished artwork, approved dielines, material choices, fill volume, and SKU counts early. If the supplier has to chase the UPC file three times, the timeline is already leaking.
Build in extra time for first retail launches, new bag structures, metallic or clear film, many formula variants, international barcode formats, subscription-box deadlines, or warehouse automation. If the bags are headed to retail receiving, third-party fulfillment, or marketplace intake, ask for a pre-shipment scan check on random production samples. Five minutes with a scanner can save days of back-and-forth later.
Common Barcode Placement Mistakes on Beauty Sample Packaging
Most barcode failures are not mysterious. They come from predictable choices made under deadline pressure. A strong checklist catches them before production, while fixes are still cheap.
- Placing the code on unstable areas: heat seals, bottom gussets, zipper tracks, tear notches, hang holes, crimped edges, and fold lines are bad barcode real estate.
- Shrinking the code too far: extra claims do not help if receiving cannot scan the bag. Protect the barcode before adding another “clean beauty” icon.
- Printing directly on clear film: black ink over transparent plastic can fail when product color, powder, glitter, liquid, or shadows sit behind it.
- Using premium finishes in the scan area: metallic ink, foil effects, gloss varnish, and low-contrast brand colors may look expensive and scan terribly.
- Changing bag size after approval: resizing a pouch can shift seals, folds, fill zones, and barcode scale. Recheck the artwork at actual size.
- Killing the quiet zone: borders, icons, text, and pouch edges too close to the barcode can confuse scanners.
- Assuming the printer owns compliance: good suppliers flag issues, but the brand owns the barcode number, retailer rules, and final approval.
- Testing only on a screen: a 27-inch monitor makes everything look readable. Print the proof at actual size and scan it.
Another common miss is forgetting how the bag behaves after filling. Empty film lays flat. Filled film bulges, wrinkles, and pulls near seals. Thick cream, loose powder, sheet masks, and slippery oil sachets each distort film differently. If the formula changes the shape of the pouch, test the barcode on a filled sample whenever possible.
Final Checks Before Ordering Beauty Sample Bags
Before ordering, confirm the bag dimensions, fill volume, material type, print area, barcode type, barcode number, retailer rules, and preferred placement zone. Mark the barcode zone on the dieline before design begins, not after the back panel is already stuffed with ingredients, warnings, recycling marks, icons, batch space, and a tiny brand manifesto.
Create one master back-panel template for all sample SKUs. Keep the barcode in the same location across shades, scents, formulas, and kits unless a retailer asks for something different. Consistency reduces proofing errors and makes production easier to inspect.
Request a printed proof when using clear film, metallic film, matte varnish, very small bags, or retailer-compliant barcodes. Scan the proof with more than one device. A phone app is useful for a quick check, but a POS scanner, warehouse scanner, or receiving scanner is better if the bags are retail-bound.
Send the packaging supplier a complete quote package: bag style, size, material, quantity by SKU, number of print colors, white ink needs, barcode files, artwork files, dieline, fill weight, and any retailer barcode placement rules. If sustainability claims or paper components are involved, verify claims with credible sources such as FSC for paper-based materials rather than dropping vague eco language onto the back panel.
- Confirm the barcode type and number before artwork starts.
- Reserve a flat barcode zone on the dieline.
- Use black bars on a white or opaque background unless verified otherwise.
- Keep the code away from seals, folds, gussets, zipper tracks, and notches.
- Print and scan the proof at actual size.
- Run a final scan check on production samples before shipment.
Use the checklist before approving artwork, placing a purchase order, or sending bags into production. It is cheaper to move a barcode on a dieline than to relabel 20,000 sample bags after a retailer says no.
FAQs
Where should a barcode go on beauty sample plastic bags?
Use the flattest back-panel area available, usually lower or center back, while keeping clear of heat seals, side seams, bottom gussets, zipper tracks, tear notches, and hang holes. Leave enough quiet zone on both sides of the barcode and avoid placing it where filled product will wrinkle or distort the film. For clear bags, add a solid white background behind the barcode so scanners are not reading through the product.
Can I print a barcode directly on clear beauty sample bags?
Yes, but the barcode usually needs a white ink block or opaque label area behind it. Direct black ink on clear film can fail if product color, glitter, powder, liquid, or shadows interfere with contrast. If the formula or fill color changes by SKU, a consistent white barcode box is the safer choice.
What barcode size works best for small cosmetic sample pouches?
The right size depends on barcode type, retailer requirements, print method, and available panel space. Do not shrink a UPC or EAN just to fit a crowded design; reduced size can hurt scan reliability, especially on flexible plastic. Ask the retailer or barcode provider for minimum size rules, then have the supplier place it on the dieline at actual scale.
Is it cheaper to print barcodes or use barcode labels on sample bags?
Printed barcodes are usually cleaner and more efficient for larger runs because there is no extra labeling labor. Barcode labels are often better for low quantities, pilot launches, SKU testing, or late barcode changes. The cheaper option depends on MOQ, number of SKUs, setup charges, labeling labor, and the cost of fixing scan failures later.
What should I check before approving a beauty sample bag barcode proof?
Check barcode type, number accuracy, size, quiet zone, contrast, orientation, background color, and distance from seals or folds. Print the proof at actual size and scan it before approval; screen mockups are not enough. If the bags are for retail or fulfillment, test with the scanner type most likely to be used at receiving, POS, or warehouse intake.

