A serum trial kit can look beautiful in a render and arrive as a rattling little disaster: a leaking sachet, a scuffed mini tube, a crushed carton corner, and an insert that gave up halfway through transit. Very glamorous. Very avoidable. A Skincare Trial Plastic bags carton insert checklist prevents that failure before the quote, before the sample, and definitely before the deposit.
Trial packs are small, not simple. A 2 ml sachet lies flat. A 5 ml tube springs back against the bag seal. A glass ampoule behaves like a tiny hammer if it is allowed to move. A 10 ml jar adds weight in one concentrated spot. The packaging has to manage all of that while still looking intentional on a bathroom counter, retail peg, influencer mailer, or sample counter.
The job is not “make it cute.” Cute helps. Cute does not stop a cap from loosening under pressure.
A working trial-kit system has three jobs: protect the product, present the brand, and make packing repeatable. If the warehouse needs five minutes, two hands, and a prayer to load each kit, the packaging is not premium. It is an operations problem with foil stamping.
Skincare Trial Plastic Bags Carton Insert Checklist
The first question is dull and useful: what exactly goes inside the kit? Not the campaign name. Not “three minis and a card.” The actual physical contents. Count the samples, measure each filled container, weigh the loaded set, and identify fragile points before anyone designs the carton.
A basic skincare trial kit might use one clear LDPE bag, one paperboard divider, one 350gsm folding carton, and one master shipping case. A more premium version may use a frosted zipper pouch, a die-cut reveal platform, FSC-certified paperboard, spot UV, foil stamping, and a printed instruction card. Both can work. Both can fail if the bag, carton, and insert are sourced like unrelated objects.
Your checklist should answer these points before quoting:
- Product count: sachets, tubes, jars, ampoules, droppers, spatulas, cards, coupons, or accessories.
- Loaded size: maximum width, height, depth, and weight after products are placed in the bag or insert.
- Bag function: leak backup, SKU grouping, tamper cue, retail display, reuse, or customer-facing presentation.
- Insert function: product separation, reveal, impact reduction, packing speed, or structural support.
- Carton function: retail shelf presence, mailer protection, giftable unboxing, or internal sample shipment.
- Compliance details: ingredient copy, barcode, warning text, batch code area, lot tracking, country marks, and recycling claims.
Practical rule: approve the structure before you fall in love with finishes. Soft-touch lamination does not rescue a carton that lets a glass vial bounce around like loose change.
Most trial-kit failures start with the wrong sequence. Someone approves a bag size, then a carton size, then an insert drawing, and nobody tests the loaded pack until the first sample arrives. That is backwards. The product creates the bag requirement. The loaded bag and desired reveal create the insert requirement. The insert, closure clearance, and crush risk create the carton requirement.
One more unglamorous detail: measure the product after labeling and capping, not from an empty component drawing. Labels add thickness. Pumps and caps vary. Sachet crimps flare. Tubes do not always sit flat after filling. A 1.5 mm surprise across five samples can turn a clean insert into a jammed paper sculpture.
How Trial Kit Plastic Bags, Cartons, and Inserts Work Together
The usual packaging stack moves from the inside out: primary skincare sample, inner plastic bag, carton insert, outer folding carton, then master case if the kits ship through parcel, retail distribution, or fulfillment. Each layer has a job. If one layer skips its job, another component gets blamed later.
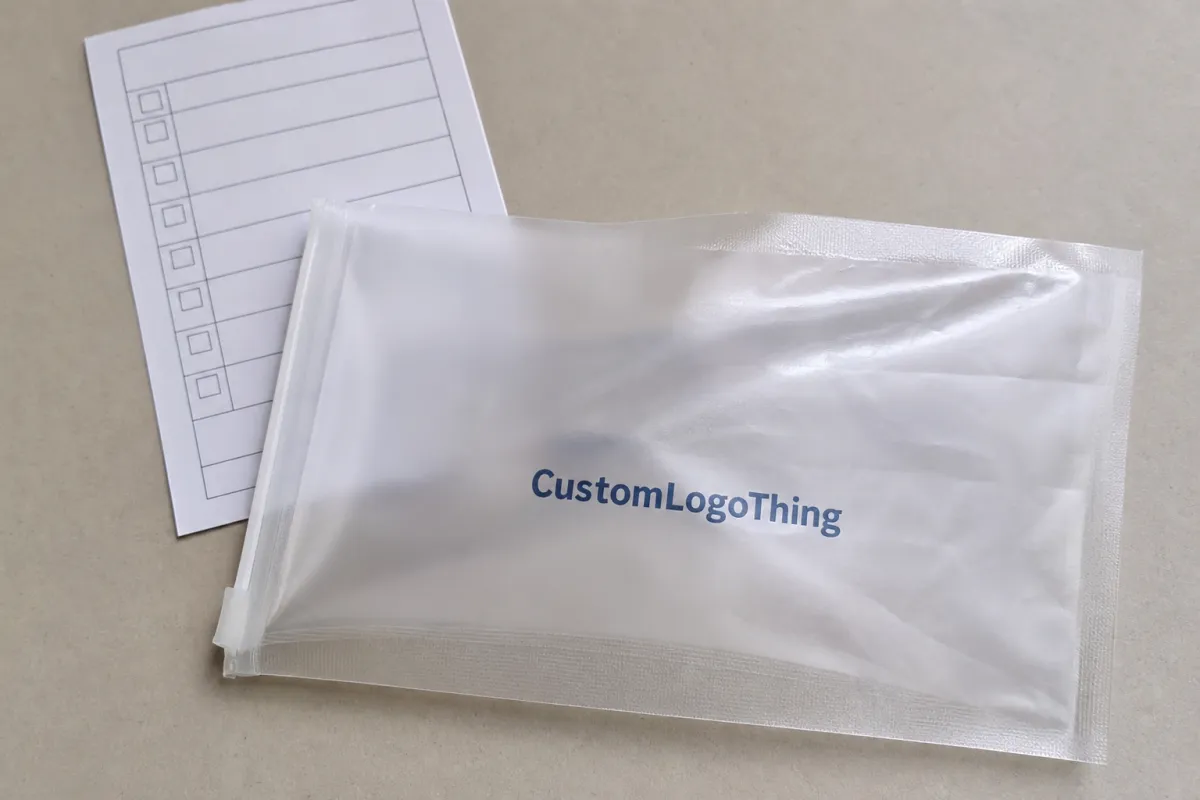
The plastic bag can act as a contamination barrier, leak backup, grouping tool, tamper cue, or presentation layer. A plain clear poly bag may be enough for warehouse grouping. A frosted PP zipper pouch feels more cosmetic and reusable. A header bag with a hang hole works for retail pegs. A printed LDPE bag adds brand color while staying soft enough for fast hand loading.
Common bag formats for skincare trials include flat poly bags, resealable zipper bags, adhesive flap bags, header bags, frosted cosmetic pouches, and custom printed LDPE or PP bags. LDPE has a softer feel and handles curves well. PP is clearer and crisper, but less forgiving around sharp carton corners or rigid caps. Frosted film hides scuffs better than crystal-clear film, which matters because fulfillment tables are not museum displays.
The insert does the quiet work. It stops movement, separates SKUs, improves the first reveal, and keeps delicate components from smashing into each other. Insert options include simple paperboard dividers, die-cut platforms, tuck-in trays, molded pulp supports, and hybrid structures that pair a plastic bag with a paperboard tray.
Tighter packaging often looks more expensive. Too tight packaging slows packing and can damage labels, seals, pump collars, or sachet edges. For rigid items, a practical clearance range is often 1.5-3 mm around the cavity, with more space for flexible tubes or products loaded by hand at speed. Zero tolerance looks precise on a dieline. On a packing line, it looks like overtime.
The carton then has to do two different things: protect the set and frame the brand. A folding carton made from 300-400gsm SBS or C1S board may work for lightweight sachets and tubes. Heavier jars, glass droppers, or multi-step regimens may need stronger board, deeper inserts, a locking bottom, or micro-corrugated support. The board choice is not only about “premium feel.” It is about compression, corner strength, closure memory, and whether the carton bows after the loaded kit sits for a week.
Key Specs to Confirm Before You Ask for a Quote
A supplier cannot quote accurately from “small skincare sample bag, premium look.” They can send a number, of course. It will be fiction with a unit price.
Start with product facts: sample count, fill volume, container shape, cap style, loaded kit weight, and whether any item can leak under pressure. Include photos, but do not rely on photos. Measurements matter more.
Bag dimensions should be based on usable internal space, not flat width and height alone. A 100 mm x 150 mm flat bag does not provide 100 mm x 150 mm of comfortable product space after zipper tracks, side seals, bottom seals, product thickness, and loading clearance. Mini tubes and jars need a loaded-bag test before the carton is locked.
Material choice matters. LDPE is common for soft flexible bags, often in the 40-80 micron range for sample kits. PP is popular when the brand wants higher clarity and a crisper hand feel, often around 30-60 micron depending on format. Frosted films can create a more cosmetic finish, but they may reduce barcode contrast if artwork placement is careless. Recyclable options may be available, yet they depend on film type, ink coverage, lamination, closure style, and local recovery systems. A recycle icon is not a sustainability plan.
Closure decisions affect cost and packing speed. Heat seals look clean and can provide a tamper cue, but they require sealing equipment or supplier-side packing. Adhesive flap bags are practical for lower-volume kitting. Zippers add perceived value and reusability, though they add bulk at the top edge and can force a deeper carton. Tear notches, perforations, hang holes, euro slots, and header cards should be specified before tooling.
Insert specifications need the same discipline. Confirm board thickness, finish, tab design, glue points, die lines, product cavities, finger notches, and whether the insert ships flat or pre-assembled. For lightweight sachet sets, 300-400gsm paperboard may be enough. For glass ampoules, jars, or droppers, a deeper die-cut platform, E-flute micro-corrugated structure, or molded pulp support may be safer.
Artwork is not decoration only. Confirm print area, bleed, white ink on clear or frosted film, color targets, barcode placement, ingredient or compliance copy, warning text, and lot-code windows. If the carton carries the main branding, the bag may only need a small logo, usage cue, QR code, or shade identifier. Branding on every surface can look less premium, not more. Sometimes restraint is the expensive-looking choice.
Also specify tolerances. Film bags can vary by a few millimeters due to cutting, sealing, shrink behavior, and material stretch. Paperboard shifts with humidity, scoring, folding, and die-cutting. If a cavity only works with perfect dimensions, it does not work.
Cost, MOQ, and Unit Pricing Drivers for Trial Packaging
Pricing usually sits in three buckets: plastic bag production, carton and insert production, and assembly or kitting labor. Ask suppliers to break those apart. Bundled pricing is convenient, but it can hide the expensive part.
Plastic bag costs are driven by material, thickness, print colors, ink coverage, closure style, size, tooling, and order volume. A stock clear bag may cost only a few cents. A custom printed zipper pouch with full-coverage artwork can climb quickly at lower quantities. For many skincare trial programs, custom printed bags may land around $0.08-$0.35 per unit at practical volumes, while specialty pouches can run higher depending on film, closure, and finish.
Carton and insert costs depend on board grade, print method, finish, die-cut complexity, number of cavities, assembly style, and hand-glued areas. A simple folding carton with a basic divider is efficient. A multi-cavity reveal insert with tight locks, several tabs, and glue points costs more because it consumes setup time, die-cutting time, waste allowance, and labor. Shocking, I know: complicated things cost more.
| Component | Typical Specification Range | Common Unit Cost Range | Main Tradeoff |
|---|---|---|---|
| Flat LDPE bag | 40-80 micron, clear or 1-2 color print | $0.04-$0.16 | Low cost, less premium feel |
| Frosted zipper pouch | 60-100 micron, logo print, resealable zipper | $0.14-$0.45 | Better presentation, thicker carton fit |
| Folding carton | 300-400gsm SBS or C1S board, CMYK print | $0.18-$0.55 | Strong brand surface, needs accurate sizing |
| Die-cut paperboard insert | 300-500gsm board, 2-6 cavities | $0.08-$0.38 | Clean reveal, may slow hand packing |
| Assembly or kitting | Manual loading, inspection, master carton packing | $0.10-$0.60 | Saves internal labor, requires clear instructions |
These ranges are planning references, not universal quotes. Currency, freight, region, ink system, production method, labor rate, waste allowance, and order timing all move the number. A low-volume run with heavy ink coverage and several approvals will not price like a repeat 50,000-piece order using existing tooling.
MOQ reality is blunt. Custom printed bags often have higher minimums than plain stock bags. Cartons and inserts may have separate minimums based on print method, dieline, and tooling. A low MOQ protects cash flow, but the piece price rises. A larger run lowers unit cost, but it can trap you with obsolete packaging if formulas, claims, shades, ingredients, barcodes, or regulatory copy change.
Ask for quantity breaks at 1,000, 3,000, 5,000, and 10,000 units. The meaningful price drop often appears after tooling and setup are spread across enough pieces. Ask suppliers to show setup fees, plate or cylinder charges, dieline charges, sampling fees, packing fees, and freight. These are not surprise fees. They are the dull physics of custom manufacturing.
Process, Timeline, and Lead Time From Dieline to Delivery
The normal flow is product measurement, packaging brief, dieline creation, artwork placement, material confirmation, quote approval, prototype or sample, production proof, manufacturing, QC, packing, and shipping. The timeline starts after correct specifications and artwork are approved, not when someone sends a blurry photo of a tube beside a ruler.
For a first custom trial kit, a realistic planning range is often 3-7 business days for brief review and dieline work, 5-12 business days for physical sampling, 10-20 business days for mass production after approval, and additional time for freight. Air freight may take days. Ocean freight can take weeks. Domestic production can shorten transit, but the unit price may be higher.
Custom Printed Plastic Bags and folding cartons may run on different production schedules. Coordination matters if both components must arrive together for kitting. A carton sitting finished in one warehouse while printed bags wait for film is not a launch plan. It is a calendar problem wearing a purchase order.
Common delay causes are missing product samples, late legal copy, barcode changes, unclear insert cavities, new claims, finish swaps, and cap changes after the dieline has been built. Gloss to matte? New ingredient warning? Different tube shoulder? Each change can affect plates, proofs, dielines, packing instructions, or production slots.
A digital mockup is enough for early artwork alignment and stakeholder discussion. A physical prototype is non-negotiable for glass ampoules, pump tubes, droppers, multi-piece sets, and tight inserts. Gravity is more honest than a render.
Testing does not need to start with a laboratory protocol. Start with the obvious: shake, drop, squeeze, stack, open, close, and reload the kit like a tired customer. Then let the packed kit sit for several days and check for leaks, label rub, carton bowing, insert cracking, zipper pressure, and product migration. Some failures are patient.
For formal distribution testing, review resources from the International Safe Transit Association, especially if kits will ship through parcel networks. If paper sustainability claims matter, review certification expectations from groups such as the Forest Stewardship Council. Claims should match the actual material and chain-of-custody documentation, not the mood board.
Step-by-Step Checklist for Building the Packaging Brief
A good brief keeps suppliers from guessing. Guessing is expensive. Use this step-by-step version before requesting pricing or samples.
- Gather actual product samples. Do not build packaging from estimated spreadsheet dimensions. Measure filled tubes, capped jars, sealed sachets, labeled droppers, and final accessories.
- Decide the first reveal. Should the customer see a branded plastic bag, an arranged product set, a message card, or a clean paperboard display when the carton opens?
- Measure each item. Record width, height, depth, weight, and fragile points such as pumps, caps, seals, glass edges, label seams, and sachet crimps.
- Choose the bag format. Select flat bag, adhesive flap, zipper pouch, header bag, or frosted pouch based on leak control, resealability, retail display, and fulfillment grouping.
- Choose the insert structure. Pick paperboard divider, die-cut tray, tuck-in platform, molded pulp, or hybrid support based on movement control and packing speed.
- Confirm carton size last. Test the loaded bag and insert concept together before locking the outer carton dimensions.
- Prepare artwork files. Include dielines, bleed, color references, logo placement, regulatory text, barcode zones, warnings, claims, and batch-code windows.
- Request a written spec sheet. It should list materials, thicknesses, dimensions, tolerances, print method, packing method, MOQ, lead time, quote validity, and freight terms.
Fulfillment notes belong in the brief, too. Confirm whether components arrive flat, nested, bundled, pre-formed, or pre-packed. A gorgeous insert that takes 45 seconds to assemble can add serious labor across 10,000 kits. Multiply before approving. Math is rude, but useful.
Include packing sequence. Which product loads first? Does the tube face up or down? Is the lot code visible? Does the card sit above or below the pouch? Does the zipper face the carton opening? These sound like tiny details until half the kits open one way and half open another.
Common Mistakes That Make Skincare Trial Kits Look Cheap
First mistake: using a stock plastic bag that is technically large enough but visually sloppy. Extra air space makes a premium sample set look like a sandwich bag situation. If the product swims inside the bag, resize the bag or give it a real job.
Second mistake: ignoring weight. A thick cream tube and a glass vial need different containment than a flat foil sachet. Weight changes insert depth, board choice, closure stress, master carton count, and transit risk.
Third mistake: designing the carton before deciding the insert. That often creates dead space, crushed corners, or awkward hand assembly. The insert is not an accessory. It is part of the structure.
Fourth mistake: overprinting the bag when the carton already carries the main brand story. Sometimes the bag should support the system, not compete with it. A small logo, soft tint, or simple use instruction may look more expensive than full-coverage print on thin film.
Fifth mistake: choosing an insert that slows packing to a crawl. If workers need tweezers, perfect lighting, and emotional support to load it, the design is too precious. For hand packing, time one trained person loading 25 kits, then calculate labor honestly.
Sixth mistake: skipping leak and transit checks. Skincare samples can sweat, loosen, crack, or smear during shipping, especially oils, gels, pump products, and formulas filled close to a seal area. Test packed kits, not just empty packaging.
Seventh mistake: forgetting operational basics such as SKU separation, lot tracking, barcode scanning, master carton counts, and whether packaging arrives nested or flat. If the fulfillment center has to decode your packing logic, you have not written instructions. You have written a puzzle.
Eighth mistake: chasing the lowest unit price without checking material feel, seal strength, print registration, zipper function, or supplier communication. A $0.04 saving does not matter if 8% of kits arrive scuffed, crushed, or leaking.
Final Approval Checks Before Production
Before production approval, finalize product samples, confirm kit contents, approve the structure, and decide whether the plastic bag is functional, decorative, or both. That decision affects film, print, closure, insert clearance, and carton sizing.
Request a physical fit sample whenever the kit includes multiple products, glass, pumps, droppers, or tight carton inserts. Photos help. They do not replace a loaded sample. Ask the supplier to send the carton flat and assembled if your team or fulfillment center will handle final packing.
Compare the final spec sheet against the purchase order before paying deposits or releasing mass production. Check material grade, film thickness, dimensions, tolerances, print method, finish, closure type, insert style, packing method, MOQ, price, tooling, lead time, and freight terms. Boring? Yes. Cheaper than reprinting? Also yes.
Put QC checkpoints in writing: bag dimensions, seal strength, print color, zipper function if used, insert fit, carton closure, product movement, barcode scan, packed kit appearance, and master case packing. For parcel shipment, check carton compression and product movement inside the case. ASTM packaging test methods and ISTA procedures can help define formal testing when the distribution risk is high.
Review packing instructions with photos or diagrams so the supplier, production team, or fulfillment center loads every kit the same way. Include product order, orientation, lot-code visibility, card placement, bag closure position, and final carton orientation. Clear instructions prevent “creative” packing. Creative packing is rarely a compliment.
If the launch is important or the kit is complex, approve a small pilot run before the full run. It costs more upfront, but it can catch slow loading, product rub, carton bowing, insert cracking, zipper bulk, poor barcode placement, or confusing opening direction before thousands of units are made.
Small kits still need grown-up specifications. The best trial packaging looks intentional, packs efficiently, and survives the trip without turning the product story into a damage claim.
FAQ
What should be included in a skincare sample kit plastic bag and carton insert checklist?
Include product dimensions, product weight, bag style, film material, film thickness, closure type, print requirements, carton size, insert structure, cavity dimensions, packing method, MOQ, unit cost, lead time, and QC checkpoints. Add real product samples or accurate physical prototypes whenever possible. Supplier guesses are not a packaging strategy.
Do skincare trial plastic bags need to be custom printed?
Not always. Custom printing makes sense when the bag is part of the customer experience, retail display, influencer mailer, shade identification, or brand presentation. Plain or lightly branded bags work when the carton carries the main design and the bag mainly provides leak protection, tamper cue, or SKU grouping.
How do I choose the right insert for skincare trial packaging?
Choose the insert based on product shape, weight, fragility, reveal, packing speed, and budget. Paperboard die-cut inserts work well for lightweight tubes and sachets. Heavier or fragile items may need deeper cavities, stronger board, dividers, molded pulp, or micro-corrugated support.
What affects the cost of skincare trial plastic bags and carton inserts the most?
The biggest cost drivers are order quantity, bag material, film thickness, print colors, closure type, carton board grade, insert complexity, tooling, assembly labor, and freight. Ask for quantity breaks and separate setup fees so you can compare landed unit cost instead of headline piece price.
How long does custom skincare trial packaging usually take?
First custom orders often take several weeks once dielines, sampling, proofing, production, QC, and freight are included. Repeat orders are faster when specifications, artwork, tooling, and packing instructions stay unchanged. Changes to formulas, claims, barcodes, or component dimensions can restart parts of the approval process.


