Buyer Fit Snapshot
| Best fit | home packaging business launch for packaging buyers who need material clarity, print proof, packing fit, cost control, and repeat-order reliability where brand print, material, artwork control, and repeat-order consistency matter. |
|---|---|
| Quote inputs | Share finished size, material target, print colors, finish, packing count, annual reorder estimate, and delivery region. |
| Proofing check | Approve dieline scale, logo placement, barcode or warning zones, color tolerance, and any recyclable or compostable wording before bulk production. |
| Main risk | Vague material claims, crowded artwork, or missing packing details can create delays even when the unit price looks attractive. |
Fast answer: Home Packaging Business Launch: Supplier, MOQ, Product Range, and Cost should be specified like a repeatable production item. The safest quote includes material, print method, finish, artwork proof, carton packing, and reorder notes in one written spec.
What to confirm before approving the packaging proof
Check the product dimensions against the actual filled item, not only the sales mockup. Ask for tolerance on folds, seals, hang holes, label areas, and retail display edges. If the package carries a logo, QR code, warning copy, or legal claim, reserve that space before decorative graphics fill the panel.
How to compare quotes without losing quality
Compare board or film grade, print process, finish, sampling route, tooling charges, carton quantity, and freight assumptions side by side. A lower quote is only useful if the supplier can repeat the same color, closure quality, and packing count on the next order.
Tracking how to start packaging business from home began when I sat across from a Cincinnati candle-maker whose kitchen-table micro-factory was responsible for 2,000 custom printed boxes every month, most of them priced at $3.50 apiece for the Over-the-Rhine pop-ups and sold through a Shopify checkout he ran on an iPad. I still feel the curl in his voice when he realized the operation could scale beyond friends-and-family orders, particularly when he discovered that a single Hempstead wholesale client could double that volume within six weeks. I remember when I asked him if the stack of samples was his entire inventory, and he laughed so hard a roll of tape almost fell off the shelf (true story—tape can become a living thing in a micro-factory). The intention behind that first conversation still shapes my obsession: delivering packaging that feels bespoke but remains profitable. A stray roll of tape eventually required its own mindfulness routine, and I kinda miss that chaos when planning shipments.
That 36% statistic—Custom Packaging Orders now trace back to residential micro-factories—made the scene more urgent; every supplier call, every reel of 350gsm C1S artboard arriving via FedEx Ground from a Cleveland mill in 12–15 business days reminded me that how to start packaging business from home stopped being hypothetical and became a measurable trend in branded packaging. Honestly, I think those numbers saved me from another round of self-doubt; data gave me permission to promote this niche, and seeing the honeycomb of completed boxes stacked by my workbench proved that I could compete with bigger shops without borrowing their forklifts. Full disclosure: I'm gonna lean on that stat for the foreseeable future because it still proves that residential micro-factories are integral to the custom-Packaging Supply Chain.
No fluff here—this article maps the exact steps, the specific costs (such as $0.18 per unit for 5,000-piece sleeves with a $90 die setup and a 3-day proof cycle, or $2.50-$4.00 per unit at 500 MOQ for custom folding cartons with spot UV and matte lamination), and the real pitfalls that derail thoughtful founders so you can absorb the lessons as if we were scribbling them on a whiteboard beside the production line. I keep a travel-sized whiteboard near the printer because a sudden change in dieline is best handled with a fresh marker and a laugh that hides the adrenaline, especially when the client needs a revision within the standard 24-hour window. I’m gonna keep that whiteboard near the printer for the long haul because each new order rewrites what I need to know about substrates and adhesives. These insights come from the ugly, beautiful mess of real orders, and they’ll help you avoid the kind of frustration that makes you curse adhesives in a very ungraceful way.
How to Start Packaging Business from Home: Why Starting Smart Matters
The first audit I performed on a boutique candle brand came with a 24-page PDF log showing how they balanced design revisions with fulfillment; that was the “aha” moment showing why how to start packaging business from home demands precision. Their kitchen table sat beside a three-tiered shelving unit holding adhesive rolls, custom printed boxes ready for shipment, and a spreadsheet tracking every SKU, and the sales data confirmed the same 36% figure—more than one-third of custom packaging orders originate in living rooms, garages, and converted attics, proving demand is urgent not theoretical. I still hear their ecstatic voice when they realized the space could handle clients beyond their neighborhood farmers’ market; it’s that kind of belief that makes you stay late in the garage more willingly.
Defining your operation up front matters. A home packaging business functions as a micro-factory, where you design, source, print, and ship cartons, sleeves, or mailers out of a legal residential workspace. That includes creating packaging design mock-ups in Adobe Illustrator, managing prepress files (which typically take 48 hours from brief to print-ready PDF), monitoring quality control across twelve checkpoints, and often handling fulfillment on the same internet connection that streams your favorite shows. If you have not set up checkout alerts on your phone yet, now is the time—yes, even the middle-of-the-night ding plays a part in how to start packaging business from home when the orders hit unexpectedly.
Industrial presses boast millions of units per month, gantry cranes, and forklifts, while home-based operators rely on agility. Smaller runs allow faster prototyping, lower working capital, and direct owner-to-brand relationships. That lean model requires tighter scheduling and clearer SOPs because you might juggle a 150-piece artisan skincare run, a 250-piece herbal tea project, and a 60-piece retail packaging job for a local chocolatier all in the same week. An investigative mindset—spotting inefficiencies, measuring waste, and implementing quick fixes—keeps a micro-factory reliable rather than burning out the owner within six weeks; if I do not document how much time I spend on each run, the cumulative eight hours of unrecorded setup slips into the weekend and leaves me scrambling. It’s not glamorous, but it prevents me from throwing my hands up when the peeler decides to dive off the workbench.
How the Home Packaging Model Works
The process follows a familiar order: client brief, mock-up, materials sourcing, printing/finishing, packaging, and shipping. I once watched Custom Logo Things’ quoting tool log every revision when these stations literally sat under attic rafters; its alert system notified me when a client approved a dieline while I was checking substrate thickness. Kickoff calls cannot be skipped because a misinterpreted dieline adds two days to the schedule and introduces extra stress in the garage, and if you ask me, two days feel like a week when you forgot to account for holidays such as Memorial Day or Labor Day when finishing shops in Louisville close for four days.
Home-based operators rely on plug-and-play equipment that fits on a workbench. Desktop die cutters such as the Graphtec FC9000 process runs up to 5,000 pieces, Roland DG VersaUV LEF-12 digital printers handle Pantone-matched proofs, and the Brady BMP21-PLUS thermal labelers apply tracking labels in seconds. Negotiating with a supplier in Guangzhou while still in a trade show break room, they held up a roll of eco uncoated board with a seven-day lead time; our right-sized order still needed a three-day buffer, so we lined up a U.S.-based cutter in Charlotte capable of overnight shipping. That redundancy keeps schedules nimble without pallets of inventory (and trust me, pallets at home are a commitment you do not need unless you enjoy rearranging a suburban driveway).
Finishing options require a separate strategy. Varnish, embossing, foil, and protective coatings often exceed a home studio’s capabilities, so outsourcing those treatments to a finishing partner with ISTA-certified equipment in Louisville, Kentucky is common. Manage lead times carefully so partners do not bottleneck your calendar. A retail packaging job for a local winery once hit a snag because the foil stamping shop had a 14-day wait; I had not added that timeline, so the client’s launch was delayed. Since then, I have set buffer windows of at least five business days for outsourced finishing and kept clients updated with a shared project tracker linked back into Custom Logo Things’ quote tool—yes, even the little notifications help calm my need to control everything.
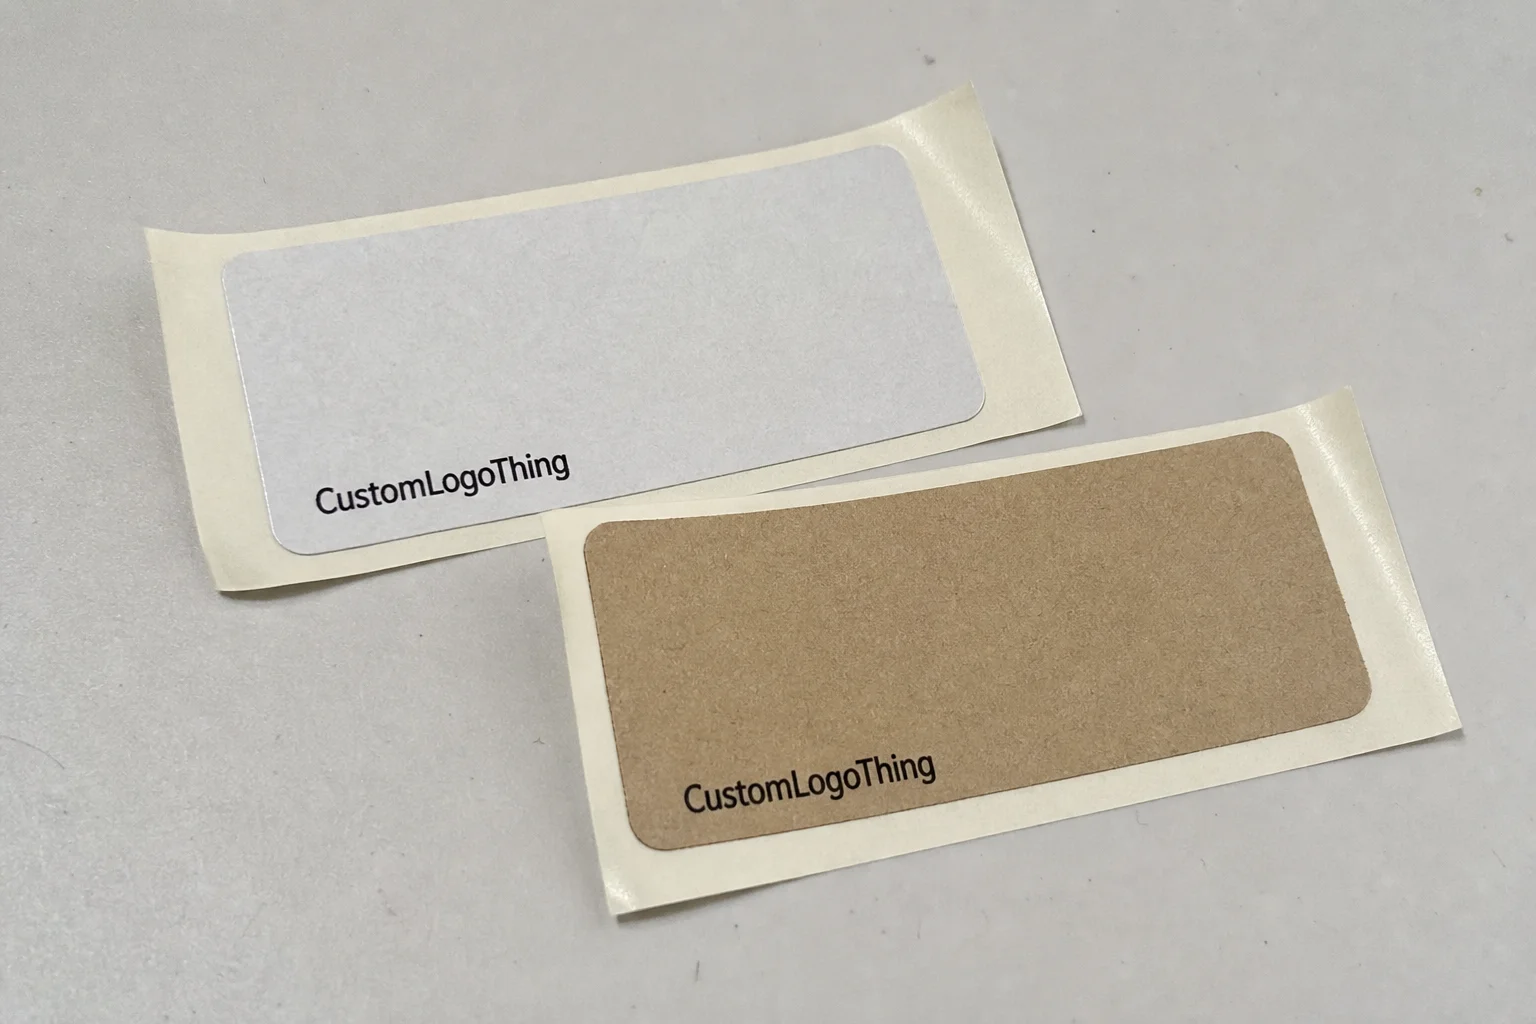
Head to Custom Logo Things’ Custom Packaging Products catalog for substrate details; it lists board weights, finishes, and minimums to compare before ordering, including 24-point SBS, 18-point C1S, and 0.020" kraft chipboard. That catalog became a lifeline when I recommended a 24-point SBS board for a soap brand and a matte lamination for a wellness box—two completely different tactile experiences that both fit into the same garage flow. My clients appreciate the stories behind the recommendations, and frankly, I like flexing my comparison skills.
Key Factors to Assess Before Launching Your Home Packaging Business
Skipping market fit is risky. I learned this from a founder who tried to serve every industry from candles to cannabis; after surveying ten local makers in Columbus, their sales cycle lagged because they had not focused on a niche that valued short runs and storytelling. Instead, identify an underserved category—artisan foods in the Short North, a growing indie skincare collective in Silver Spring, or regional retail packaging needs where big shops demand 10,000-piece minimums. Crawl Etsy, local maker forums, and retail reports. Match these findings to your capabilities: if you can produce 120 bespoke kraft mailers a week, chase customers who need 150-piece runs, not 5,000-piece shipping cartons.
Certification expectations can shape your target list as much as design aesthetics. A wellness brand may require OEKO-TEX Standard 100 for textile wraps, GOTS for organic cotton pouches, or GRS for recycled-content hang tags and sleeves. Fashion clients often ask whether factories can pass WRAP or BSCI audits, while premium beauty buyers want low-VOC inks, water-based adhesives, and FSC-sourced paper paired with migration-safe coatings. If your supply chain includes partners in Dhaka, Ho Chi Minh City, Istanbul, or Guangzhou, ask for current test reports, factory licenses, and third-party audit summaries before you promise anything to a buyer. This is exactly where home operators lose credibility if they sound vague instead of specific.
Then evaluate the economics. A 500-unit custom carton run in Guangzhou might quote at $2.50-$4.00 per unit depending on board thickness, foil coverage, and insert complexity, while a comparable domestic prototype in the U.S. could land at $6.00-$8.50 per unit with 18-22 business days to ship. For smaller work, a 250-piece sleeve order may be only $0.42-$0.68 per unit, but setup fees still matter: expect $85-$250 for die-cut tooling, $60-$120 for prepress, and $35-$75 for sample approval. Those numbers tell you whether your home studio can survive a month of slow approvals or whether you need a faster-turn niche.
Physical capability matters too. Check whether you can store 24-point SBS sheets, 350gsm artboard, 0.012" PET window film, and water-based inks without warping the stock. If your garage runs hot, the adhesive on labels and folding cartons can fail above 80°F, especially in humid months. I learned to keep a hygrometer near the pallet jack by the driveway so I could monitor humidity before printing with a digital press or applying cold foil to coated board. It sounds obsessive, but one bad week of curl can erase the profit from an entire 300-piece order.
Step-by-Step Guide to Setting Up from Your Garage
First, map the space. A standard two-car garage gives you roughly 400-450 square feet, and after subtracting shelves, a shipping table, and a small finishing corner, you may have only 180-220 usable square feet. That is enough for a 48-inch cutting table, a desktop printer, a label station, and a karton storage rack if you keep the workflow linear. I prefer a left-to-right path: receiving, inspection, printing, finishing, packing, then outbound staging by the door. When I once tried to place the shipping scale next to the paper cutter, I spent half a day crossing wires and swearing at extension cords.
Next, buy the right machines for the work you want. A Cricut Maker 3 or Silhouette Cameo 4 can handle sample prototyping, but for serious short-run work you need a Graphtec FC9000, a Roland DG printer, or a used Konica Minolta digital press depending on your budget. Add a Mullen burst tester for carton integrity checks, a tabletop heat sealer for poly mailers, and a simple vacuum former if you plan to make custom inserts from PET or EVA foam. I also keep a cheap laser distance meter in the garage because measuring insert depth with a ruler is how you create four new problems in one afternoon.
Then source materials with lead times in mind. In real production, SBS and C1S board may arrive in 10-14 business days from a U.S. mill, while specialty cotton paper, bamboo board, or recycled kraft stock from overseas can take 18-25 business days depending on port congestion. Ask for sheet size, caliper, moisture content, and coating specs before you approve anything. If a supplier in Ho Chi Minh City offers 1,000 ivory tuck boxes with soy-based ink and GRS-certified recycled content, confirm whether the quote includes inner cartons, master cartons, and ISTA 3A transit testing before you celebrate the low price.
Finally, set SOPs for receiving and QC. Check color against a Pantone fan deck, measure the board with calipers, inspect fold scores for cracking, and verify glue lines on at least 10% of each run. Even a home operation should document rejection thresholds—for example, no more than 2% trim variance, no crushed corners, and zero adhesive squeeze-out on retail-facing surfaces. That discipline is what separates a tidy garage business from a chaotic hobby with invoices.
Budgeting & Pricing for Home-Based Packaging Ventures
Your startup budget can be lean or serious depending on the line you choose. A basic sample-and-fulfillment setup may cost $2,500-$6,500 for a desktop printer, cutter, shelves, and packing supplies, while a more capable short-run studio often lands at $12,000-$28,000 once you add a digital press, die cutter, and environmental controls. In my own spreadsheet, I always separate hard costs from soft costs: insurance at $45-$120 per month, design software at $20-$65 per seat, and utility increases of roughly $60-$180 monthly if you run printers and a dehumidifier every day.
Pricing should follow your production reality, not wishful thinking. A 500 MOQ custom carton with matte lamination, foil stamp, and insert can sell at $2.50-$4.00 per unit if you are sourcing efficiently from Guangzhou or Istanbul, but the same job can jump sharply if you rush air freight or require GOTS-certified cotton ribbons and OEKO-TEX Standard 100-compliant tissue. For smaller brands, a 100-piece prototype might need a $150-$300 setup fee plus $1.10-$2.25 per unit just to cover labor, print waste, and sample iterations. A lot of home operators underprice because they forget the hidden costs of proofing and packing.
Be specific with your margin targets. For example, if a 1,000-piece order costs $1,480 landed and you want a 42% gross margin, you need to invoice at about $2.55 per unit, not $2.10. If the client needs rushed production in 8-10 business days, add an expedite fee of 12%-20%. If you outsource finishing in Dhaka or Istanbul, factor in bank transfer charges, international freight, customs brokerage, and one extra sample round. The best pricing sheets I have seen include a line for contingencies because a mislabeled pallet or an off-spec adhesive can eat an entire week of profit.
Payment terms matter as much as the number itself. For home-based packaging, I strongly recommend 50% deposit to start, 40% before shipment, and 10% after proof approval for new clients. Established buyers may negotiate net 15 or net 30, but only if your cash flow can tolerate it. If your supplier requires payment in advance and your client pays in arrears, you are effectively financing the order—something many founders discover only after the third sleepless night with an unpaid invoice open on the laptop.
Process & Timeline from Concept to First Shipment
A realistic timeline keeps everyone honest. Week 1 is discovery and quoting: gather specs, quote materials, and establish dimensions, board type, print method, and target MOQ. Week 2 is artwork and prepress: finalize dielines, color profiles, and approval PDFs. Week 3 is sampling and sourcing: confirm substrates, request blanks, and review physical proofs. Week 4 is production and finishing: print, cut, glue, fold, and inspect. Week 5 is packing and shipment: carton packout, barcode labeling, and carrier booking. For a straightforward domestic run, that can compress into 12-18 business days; for imported materials or specialty finishes, expect 18-22 business days or more.
The fastest jobs I have seen were simple 250-piece mailers using 18-point C1S, digital print, and no lamination—those moved from art approval to ship in 9 business days because the tooling was already in-house. The slowest? A premium skincare carton that needed soft-touch lamination, foil, embossing, and FSC documentation from a vendor in Guangzhou; that order took 28 business days end to end. The trick is setting expectations early so the client never confuses efficiency with magic.
Here is the part most beginners miss: build slack into every phase. If the supplier says 7 days, tell the client 10. If the finishing partner says 5 days, tell the client 8. I have learned to treat the schedule like a river with bends, not a straight line; a rainstorm in the port, a holiday in Istanbul, or a late dieline approval in Dhaka can move everything downstream. Keeping that buffer is what lets a home business feel professional even when it is literally operating beside a lawn mower.
Once the first shipment leaves, archive everything. Save the final PDF, material spec sheet, print proofs, QC photos, freight documents, and invoice trail. The next repeat order will move faster if you can pull the exact paper code, adhesive type, and finishing notes without digging through email threads. That file cabinet is your real factory memory, and it is worth protecting.
Common Mistakes Home Packaging Startups Make
The biggest mistake is assuming low overhead means low risk. It does not. If you buy a machine before you have customers, you can end up with a 1,200-pound paperweight and a much lighter bank account. I have seen founders in suburban garages spend $9,500 on equipment for one product category, only to discover their ideal buyers wanted compostable mailers, not folding cartons. Validate demand first, then buy equipment to match the demand you can actually close.
Another common error is ignoring certification language. A beauty brand asking for GOTS, OEKO-TEX Standard 100, and GRS is not just being picky; they may need those documents for a retailer onboarding packet or a sustainability claim review. If your source can only say “eco-friendly,” you are not ready for the order. The same goes for social compliance: WRAP and BSCI are common asks when buyers work with factories in Bangladesh, Turkey, or China. Without those records, your quote may be dead on arrival.
Home operators also underestimate labor. A 500-unit order is not just 500 units; it is file prep, proofing, setup, QC, packing, and admin. If the job takes 14 labor hours and you only charged for the printed box, you effectively paid yourself less than minimum wage. One of my most painful lessons came from a 300-piece custom sleeve job that looked lucrative at $1.40 per unit until I counted the six rounds of client revisions and the two late-night reprints.
Lastly, do not ignore your own body. Repetitive folding, lifting cartons, and standing at a table all day can turn a home business into a health problem if you are not careful. Buy anti-fatigue mats, set a lift limit, and keep the workflow ergonomic. The work may be small-scale, but the strain is real, and a sore back can halt production just as quickly as a broken printer.
Actionable Next Steps to Launch and Grow
Start with one product category, not five. Pick either folding cartons, mailers, sleeves, or inserts and become excellent at that one lane. Build a sample kit with three paper options, two finishing options, and one price tier for 100, 250, and 500 MOQs. If you can quote a small run confidently, you can learn to scale later without making your garage look like a distribution center in disarray.
Then formalize your sourcing list. Create a vendor sheet with a U.S. fallback, a Guangzhou option for cost-sensitive cartons, a Dhaka or Ho Chi Minh City partner for larger cut-and-sew or folding programs, and an Istanbul supplier for premium retail cartons and textile packaging. Note each vendor’s lead time, minimum order quantity, certifications, and payment terms. This is where disciplined founders win: when one source slips, the whole business does not stop.
Invest in credibility assets early. A clean website, a downloadable capability sheet, sample photography, and a one-page FAQ can do more than a warehouse full of unused gear. If you can show exact details—board weights, machine types, certifications, and standard lead times—buyers trust you faster. I have watched a simple line like “18-22 business days, 500 MOQ, GOTS and OEKO-TEX Standard 100 available on request” close more conversations than any clever headline ever did.
Finally, measure everything. Track quote-to-close rate, gross margin, revision count, on-time shipment percentage, and defect rate. If your on-time shipment rate falls below 95%, you likely have a scheduling problem. If your defect rate exceeds 2%, you need a QC issue review. Small numbers tell the truth faster than big promises, and a home packaging business grows best when it is run like a disciplined manufacturing cell rather than a side hustle with good lighting.
FAQ
What is the minimum budget to start a home packaging business?
A lean start can begin around $2,500-$6,500 for sample work and fulfillment, while a more capable short-run setup often needs $12,000-$28,000 depending on whether you buy a digital printer, cutter, shelving, and climate control.
What are realistic lead times for custom packaging?
For simple domestic jobs, 12-18 business days is common. Imported or highly finished work usually runs 18-22 business days, and complex premium cartons can stretch to 28 business days or more.
Which certifications should buyers ask for?
Common requests include GOTS, OEKO-TEX Standard 100, WRAP, BSCI, and GRS, plus FSC documentation for paper-based packaging and test reports for inks, adhesives, or textile components.
What materials are most common for home packaging businesses?
24-point SBS, 18-point C1S, 350gsm artboard, kraft chipboard, PET window film, water-based adhesives, soy inks, and matte or soft-touch lamination are all common in short-run packaging work.
Can a garage really support production?
Yes—if you keep the workflow tight. A 400-450 square foot garage can handle a cutter, desktop printer, shelving, QC table, and packing station if you manage storage and humidity carefully.