Buyer Fit Snapshot
| Best fit | Luxury Sleeve Design That Feel Truly Premium projects where brand print, material claims, artwork control, MOQ, and repeat-order consistency need to be specified before quoting. |
|---|---|
| Quote inputs | Share finished size, material target, print colors, finish, packing count, annual reorder estimate, ship-to region, and any compliance wording. |
| Proofing check | Approve dieline scale, logo placement, barcode or warning zones, color tolerance, closure strength, and carton packing before bulk production. |
| Main risk | Vague material claims, crowded artwork, missing packing details, or unclear freight terms can make a low unit price expensive after revisions. |
Fast answer: Luxury Sleeve Design That Feel Truly Premium: Material, Print, Proofing, and Reorder Risk should be specified like a repeatable production item. The safest quote records material, print method, finish, artwork proof, packing count, and reorder notes in one written spec.
Production checks before approval
Compare the actual filled-product size with the drawing, then confirm tolerance on folds, seals, hang holes, label areas, and retail display edges. Reserve space for logos, QR codes, warning copy, and material claims before decorative graphics fill the panel.
Quote comparison points
Review material grade, print process, finish, sampling route, tooling charges, carton quantity, and freight assumptions side by side. A quote is only useful when the supplier can repeat the same color, closure quality, and packing count on the next order.
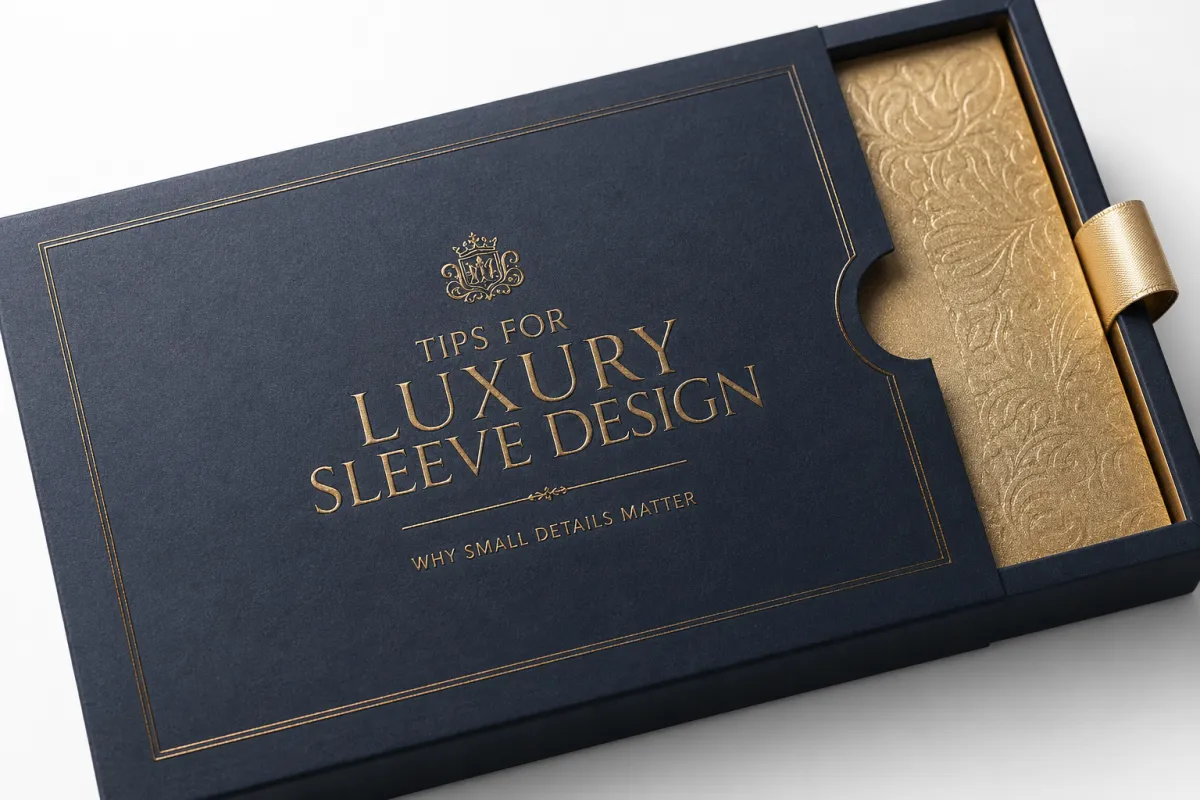
If you are looking for Tips for Luxury sleeve design that hold up under press checks, line trials, and the reality of a busy packing floor, the small details are where the real value lives. I have stood in prepress rooms in New Jersey and on factory floors in Shenzhen long enough to see a sleeve feel expensive because the fit landed within 1 millimeter of perfect, and I have also watched a beautiful concept lose its premium edge because the coating was too flat, the type was too tight, or the fold line missed its mark by a fraction. That is the heart of tips for luxury sleeve design: structure, finish, and restraint working together so the package feels deliberate before anyone opens it, even on a 350gsm C1S artboard or a 16 pt SBS sheet. For brands that want premium packaging to look intentional from the first shelf view to the final unboxing, these tips for luxury sleeve design are a practical starting point.
A luxury sleeve is not just decoration wrapped around a product. It is a precision-printed outer layer that slides over a bottle, carton, tube, jar, or rigid box to create a richer first impression without rebuilding the primary package from scratch. In cosmetics, candles, spirits, and specialty foods, I have seen sleeves do more visual work than a full carton because they add depth, texture, and shelf presence with less material and a faster changeover, often on runs of 3,000 to 10,000 pieces in Dongguan, Ningbo, or Guangdong. The strongest sleeves do not shout. They frame, refine, and make the whole package feel thought-through, which is why good sleeve design tends to age better on shelf than trendy graphics that try too hard.
How Luxury Sleeve Design Works in Production
Production changes the conversation pretty quickly, because a sleeve that looks stunning on a flat mockup can behave very differently once it is die-cut, scored, folded, and loaded by hand or by machine. Luxury sleeve design usually starts with a clean dieline, a locked product size, and a decision about how the sleeve will sit: snug around a carton, wrapped as a belly band, or held with a tuck, lock, or adhesive strip. If those basics are loose, the whole thing gets wobbly fast.
Most premium sleeves are printed on coated SBS, C1S, or specialty paper stocks with enough stiffness to hold sharp edges without feeling cardboard-thick. A soft-touch aqueous coating can add that velvety hand feel that buyers associate with higher price points, while matte varnish, spot UV, blind embossing, hot foil, and microtext can bring in layers of detail without turning the surface into a cluttered billboard. I still remember a fragrance project where the client wanted four different embellishments on a single sleeve; once we reduced it to one foil line, one raised logo, and a restrained uncoated field, the package looked more expensive. That kind of restraint is kinda the point.
Registration matters too. Foil drift, ink spread, and score placement are not small production issues; they are the things customers subconsciously read as quality or sloppiness. On a tight luxury sleeve, a 0.5 mm shift in a border can make the whole piece look off-center, and if the score is too deep, the fold can crack on a coated stock. In practice, that means prepress files need exact bleed, safe zones, and trap values, plus realistic expectations about what the chosen factory can hold on press. A good supplier in Shenzhen or Suzhou can usually guide those tolerances, but the brand still needs to approve with the final substrate in hand, not just on screen.
Key Factors That Shape a Luxury Sleeve Design
The first factor is fit. A sleeve that floats even slightly can make an expensive product look underdeveloped, while one that is too tight can wrinkle, scuff, or split during application. Designers should work from verified sample dimensions, not assumption, and they should ask whether the inner pack is changing at all, because a 2 mm adjustment in carton width can throw off a whole run. I have seen teams approve art before the bottle neck finish was final, and that usually ends with a late-stage redraw nobody wants.
The second factor is visual hierarchy. Luxury does not mean busy; it usually means disciplined. The brand mark needs room to breathe, secondary copy should be smaller than the design instinct first wants to make it, and the materials should carry some of the story. A deep navy sheet with a blind-embossed crest and a narrow silver foil edge can feel more premium than a crowded layout with six type sizes and three competing claims. If every element is trying to be the hero, none of it is.
The third factor is finish selection. Soft-touch coatings suggest calm and tactility, but they can scuff if the supply chain is rough and the sleeve is packed too early. High-gloss UV can pop on shelf, though it can also look loud if the brand is built around quiet luxury. Foil stamping brings drama, but the foil color must match the product story, not just the mood board. Warm gold on a heritage tea line can feel right; the same gold on a minimalist skincare sleeve may feel dated. Material choice has to match category language, otherwise the package looks borrowed.
The fourth factor is the printing process itself. Offset lithography gives crisp detail and strong color control for larger runs, while digital printing can make shorter batches and seasonal launches easier to test. If the line includes gradients, skin tones, or fine serif type, the printer’s screening method and coating behavior matter more than people think. I always ask for a press proof or at least a calibrated sample from the same factory, because paper, ink, and light all change the read of a design once it leaves the monitor. And yes, that extra proof step can feel fussy, but it saves a lot of money later.
Luxury Sleeve Design Process and Timeline From Brief to Approval
The process usually begins with a brief that covers the product dimensions, brand story, expected retail environment, and the application method. That part sounds simple, but the best briefs are specific about where the sleeve will be seen: under warm boutique lighting, behind glass in a department store, or stacked in a subscription box. Each setting changes how much contrast, texture, and type weight the design really needs.
From there, the design team builds the dieline, lays out the copy, and creates a first mockup. This is where a lot of problems show up early if people are honest about them. A logo that looks refined at 100 percent may become too thin after foil reduction. A border that feels balanced on screen may collapse into the score line once folded. If the package includes a window cut-out, the image behind it has to be considered as part of the composition, not an afterthought.
Prototype testing comes next. In a real production setting, that means folding samples by hand, checking for glue squeeze, loading the sleeve onto the actual product, and looking at it from several distances. I have watched teams focus only on the close-up sample and miss the fact that the top edge disappears on a shelf at three feet. The visual read from across the room matters just as much as the detail work up close.
Timelines vary. A basic sleeve with standard print and no special finishes can move quickly, while a fully customized design with embossing, foil, and a special coating usually needs more lead time for plates, dies, and sampling. If a brand is trying to launch around a holiday window or a trade show, the schedule gets tight in a hurry. My honest advice: build in enough time for one ugly surprise, because packaging almost always finds one.
Luxury Sleeve Design Costs, Pricing, and Budget Drivers
Cost is shaped less by the idea on the page than by the number of manufacturing steps behind it. Paper stock, print method, coatings, die-cut complexity, foil coverage, emboss depth, and final packing all influence the final price. A simple sleeve on standard SBS with a single-color print may be economical, while a sleeve with multi-pass foil, soft-touch coating, and tight registration can move into a much higher bracket, especially on smaller quantities.
Quantity matters a lot. Setup costs are spread across the run, so 20,000 sleeves often price more efficiently per unit than 3,000, even if the design is the same. That said, bigger volume does not automatically mean better value if the brand still needs seasonal changes, regional variants, or last-minute copy edits. I have seen teams save money on paper only to lose it on rework because the SKU architecture was not settled before quoting. That is a classic trap.
Material availability also affects pricing. Specialty papers and custom board grades can carry longer lead times, particularly when sourced through mills that are already committed to packaging, publishing, or commercial print demand. If a premium stock is unavailable, the team may need to choose between a close substitute or a schedule delay. There is no magic fix for that. A good production partner will tell you early if a stock is risky instead of pretending it will show up on time.
There is also the hidden cost of poor planning. If a sleeve is designed without considering the exact pack dimensions, the factory may need revised dies, new proofs, or a second sampling round. That extra cycle can cost more than the embellishment the brand was trying to avoid. The cleaner the technical handoff, the more predictable the budget, and the easier it is to protect the premium details that actually matter.
Common Mistakes in Luxury Sleeve Design
One common mistake is trying to use every luxury cue at once. Foil, emboss, spot gloss, a dramatic serif, a textured stock, a metallic ink, and a window cut can all be effective on their own, but together they can turn a refined sleeve into something busy and forgettable. Luxury packaging usually wins through editing, not accumulation.
Another mistake is using typography that is too light or too compressed for production. Fine hairlines and delicate letterforms can disappear on certain stocks, especially if the press gain is a little heavier than expected. If the brand name is the one thing the customer needs to read from arm’s length, the type has to stay legible under real print conditions, not just in the mockup.
Brands also get tripped up by weak alignment rules. A sleeve can look crooked even when it is technically within tolerance if the logo, border, and fold line do not share a clear grid. Once that happens, the eye starts hunting for what feels off, and the whole package loses confidence. I always tell clients that precision is emotional; people may not measure the shift, but they will feel it.
Finally, some teams forget the inside of the box or sleeve completely. If the outer layer is elegant but the interior opens to plain white board with no print, no message, and no finishing touch, the premium story stops too soon. That does not mean every interior needs to be elaborate, but a small reveal, a color echo, or a quiet line of copy can make the unboxing feel finished instead of abrupt.
What Are the Best Tips for Luxury Sleeve Design?
If I had to narrow the best tips for luxury sleeve design down to a working checklist, I would start with five things: fit, restraint, finish, proofing, and shelf test. Fit keeps the sleeve honest. Restraint keeps the design from feeling loud or manufactured. Finish adds tactility and depth. Proofing catches the problems nobody wants to discover on the production floor. And the shelf test tells you whether the package still feels premium from a few feet away, not just in a PDF.
Use the simplest design move that still carries the brand. That might mean one color on a textured stock instead of four inks on plain board. It might mean blind embossing instead of more artwork. It might mean leaving a larger field of negative space so the product feels quieter and more expensive. The right choice depends on the category, but the principle stays steady: luxury needs confidence, not noise.
Work closely with the printer early, not after the art is done. Ask about the best stock for the application, the coatings that will survive handling, and the tolerances on foil and scoring. A factory in Shenzhen, Dongguan, or Xiamen can usually spot a production problem long before a design team sees it, and that advice is worth listening to. If a supplier says a finish is likely to crack, scuff, or shift on the chosen substrate, believe them and adjust.
Keep the brand story visible, but do not explain everything. Good luxury sleeve design leaves a little room for discovery. A tactile surface, a precise foil line, or a hidden message inside the fold can do more than paragraphs of copy. The package should invite touch and attention, then get out of the way.
Most of all, test on the actual product. A sleeve that looks polished on a flat sheet can collapse once it is wrapped, handled, or stacked. That is why the final approval should always include the real carton, jar, or bottle, the real lighting environment if possible, and at least one sample that has been opened, closed, and handled a few times. It is a little mundane, sure, but that is how the good stuff survives.
Frequently Asked Questions
What makes a luxury sleeve look premium?
A premium sleeve usually combines precise fit, disciplined typography, high-quality paper or board, and one or two well-chosen finishes such as foil or embossing. The effect comes from control, not excess.
Should luxury sleeve design always use foil?
No. Foil can be beautiful, but it is not required. Some of the strongest premium sleeves rely on texture, structure, and color balance alone. If foil does not support the brand story, skip it.
What stock works best for luxury sleeves?
Coated SBS, C1S, and specialty papers are common choices because they hold detail well and can support refined finishing. The best stock depends on the product weight, application method, and desired hand feel.
How far in advance should sleeve design be finalized?
For a simple sleeve, allow enough time for dieline review, sampling, and one production proof. For a higher-end design with foil, embossing, or custom coatings, start earlier so there is room for corrections before launch.
Can a sleeve make a low-cost product feel luxury?
Yes, within reason. A sleeve can improve shelf presence and perception, but it cannot fully replace product quality or a weak brand story. Packaging helps, but it should never be doing all the heavy lifting alone.
The clearest takeaway is this: the best tips for luxury sleeve design are the ones that protect both the visual idea and the production reality. If the sleeve fits tightly, prints cleanly, and uses finishes with purpose, the package will feel more expensive before a customer even lifts it from the shelf. Start with the dieline, choose materials that match the brand’s voice, test the sleeve on the real product, and keep trimming away anything that does not earn its place.