Buyer Fit Snapshot
| Best fit | Reducing Void Space Mailers That Cut Waste Fast projects where brand print, material claims, artwork control, MOQ, and repeat-order consistency need to be specified before quoting. |
|---|---|
| Quote inputs | Share finished size, material target, print colors, finish, packing count, annual reorder estimate, ship-to region, and any compliance wording. |
| Proofing check | Approve dieline scale, logo placement, barcode or warning zones, color tolerance, closure strength, and carton packing before bulk production. |
| Main risk | Vague material claims, crowded artwork, missing packing details, or unclear freight terms can make a low unit price expensive after revisions. |
Fast answer: Reducing Void Space Mailers That Cut Waste Fast: Film, Print, MOQ, and Carton Packing should be specified like a repeatable production item. The safest quote records material, print method, finish, artwork proof, packing count, and reorder notes in one written spec.
Production checks before approval
Compare the actual filled-product size with the drawing, then confirm tolerance on folds, seals, hang holes, label areas, and retail display edges. Reserve space for logos, QR codes, warning copy, and material claims before decorative graphics fill the panel.
Quote comparison points
Review material grade, print process, finish, sampling route, tooling charges, carton quantity, and freight assumptions side by side. A quote is only useful when the supplier can repeat the same color, closure quality, and packing count on the next order.
I remember standing on a Midwest packing line in Joliet, Illinois on a Tuesday morning, watching a supervisor lift a finished mailer, squeeze it once, and give me that half-smile you only see when a package looks light in the hand but lands heavy on the scale. That mismatch is exactly why Tips for Reducing void space mailers matter, and why a few inches of unused room can quietly drain money from every pallet, every carton, and every truckload. I have seen the same pattern in apparel, cosmetics, and small electronics, and it never gets old in the annoying way: the pack looks tidy on the bench, then the carrier invoice comes back with dimensional charges and the customer opens a pouch that looks inflated instead of intentional. Nobody is thrilled. The warehouse is irritated, finance is irritated, and the package is still full of air.
At Custom Logo Things, brand teams bring me this problem constantly from Chicago, Charlotte, and Dallas. They are not asking for a packaging theory seminar; they want Tips for Reducing void space mailers that hold up on a real line with 500 orders before lunch, one tape gun that keeps sticking, and a packing crew that needs a clear choice rather than a 12-step playbook. Honestly, I think that is the right instinct. The best fixes usually come from better sizing, cleaner loading, and tighter standards, not from expensive equipment that takes half a year to justify while everyone pretends the spreadsheet will eventually calm down. It rarely does on its own, especially when the line is running at 220 to 260 packs per hour.
What follows is a floor-level look at Tips for Reducing void space mailers, with enough detail to help a shipping manager, a procurement lead, or a small e-commerce owner make a sharper decision without turning the back room into a lab. I love a good lab when there is one, but most shipping departments I have seen run on coffee, marker boards, a $29 digital scale, and one person who remembers where the spare rolls are hidden behind the carton erector.
Tips for reducing void space mailers: what they are and why it matters

Void space is the unused volume inside a mailer after the product goes in, and in plain terms it is the air pocket that adds nothing except size, slack, and cost. The strongest tips for reducing void space mailers begin with that simple definition, because once empty volume is treated as a billable problem instead of a harmless gap, the whole packing conversation changes. I have stood beside lines where a 10 x 13 poly mailer held a 6 x 9 folded item with nearly two inches of extra headroom, and the team thought the pack looked clean until we put it on a carrier scale and the dimensional weight told a very different story. The scale, as usual, had the last laugh.
Why does this matter beyond freight? A loose mailer shifts during transit, and a product that slides two or three inches inside the bag can crease, scuff, or sit crooked when the customer opens it. The package can also look less polished; one retail client in Charlotte called it "the pillow effect" after a return center reported customers posting unboxing photos of a saggy pouch with a product floating in the middle. That is not the look anyone wants after investing in print, color matching, and a nice seal. There is a labor angle, too. Tips for reducing void space mailers can improve pack-out speed because the right size and the right fold remove the guesswork that slows a station by 4 or 5 seconds per unit, which feels tiny until you are standing there watching the clock and the stack of orders climb.
The carrier side is just as unforgiving. A mailer that looks fine on the bench can still trigger dimensional weight pricing if the outer envelope is too wide or too tall for the payload. Ship thousands of units a month and even a half-inch of excess height can push a parcel into the next pricing tier. I have seen teams save $0.18 to $0.42 per shipment simply by tightening the format, which sounds small until you multiply it by 12,000 orders and realize you are paying for air. I have also seen managers stare at that math like it insulted them personally. Fair enough, really.
The most common mistake is treating void space like a design preference rather than an operational metric. The most useful tips for reducing void space mailers are not fancy; they are about matching the mailer footprint to the finished packed envelope, then verifying that choice on an actual line, with actual packers, under actual time pressure. That is where the real answer lives, not in a mockup that only behaves nicely under 72-degree fluorescent light and good intentions during a 10-minute bench test.
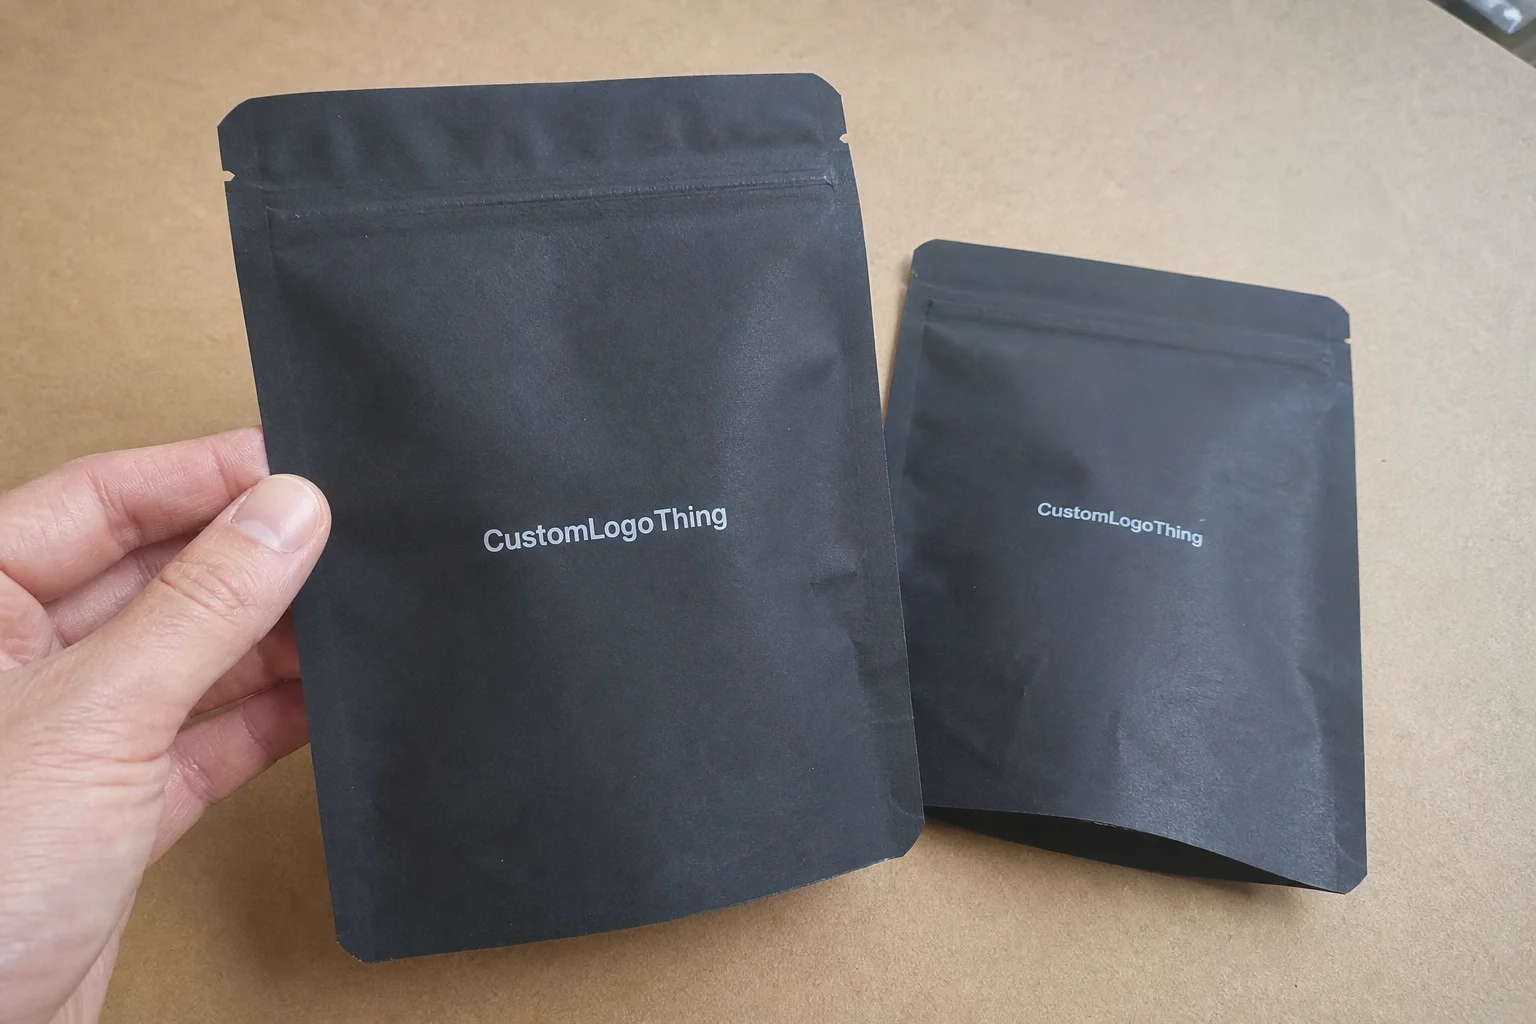
For brand teams comparing stock formats and printed formats, it helps to look at the broader packaging mix too. Our Custom Packaging Products range and our Custom Poly Mailers page show the kind of size and print options that can make a close fit easier to maintain across SKUs from 6 x 9 sleeves to 14 x 18 apparel packs. I like showing both sides of the equation, because the right fit is rarely just about one bag; it is about the whole routine around that bag.
"We stopped guessing by product name and started measuring the finished pack, and the shipping bill dropped on the next lane review." - shipping manager, apparel client, 800-piece daily run
How do you reduce void space in mailers?
The short answer is to measure the finished packed item, choose the smallest mailer that still allows a clean seal, and standardize the fold and loading motion so the product does not wander inside the pouch. The longer answer, which is usually the one that saves money, is to test a few sizes on the actual packing line, compare dimensional weight and visible slack, and lock the best result into a simple SOP. Those are the most practical tips for reducing void space mailers because they turn guesswork into a repeatable process. If the mailer looks tidy but still shifts during a shake test, the fit is not really done yet.
I tell teams to think about three pieces at once: the product envelope, the film behavior, and the seal position. If any one of those is off, the finished pack can carry extra air pockets, corner volume, or a loose top flap that makes the whole unit look sloppy. The good news is that the fix is usually not complicated. A 0.25-inch change in clearance, a different loading orientation, or a lower seal line can remove a surprising amount of dead space. That is why tips for reducing void space mailers work best when they are grounded in measurements instead of opinions. The line is usually honest, even when people are not.
How void space mailers work on a real packing line
On a packing line, a mailer behaves with less neatness than a catalog drawing suggests. The product footprint, the flat width of the bag, the amount of slack in the film, and the location of the seal all interact in real time, which is why tips for reducing void space mailers have to account for more than a length-and-width chart. If the article is 8.75 inches wide and the bag is 10 inches wide before closure, the extra 1.25 inches on each side can disappear neatly or stay trapped as visible bulge, depending on how the item lands in the pouch. The difference can be a tidy ship unit or a package that looks like it swallowed a beach ball.
I have watched operators on a folding table line in Chattanooga place the same T-shirt bundle three different ways: centered, offset left, and folded with the seam at the top. Each placement gave a slightly different final profile, and the bag that looked acceptable in the first minute showed wrinkling and corner slack once the contents were pressed down and sealed. Loading orientation is part of every serious set of tips for reducing void space mailers because the geometry of the pack is not fixed until the seal is made. Anyone who has ever tried to explain this to a tired crew on a Friday afternoon knows the look you get. It says, "I hear you, but the orders are still here."
Three void types show up again and again. Headspace is the empty area above the product near the top seal. Side slack is the loose room along the left and right edges, especially on soft items like folded garments or sachet packs. Corner volume appears when the item is inserted off-center or folded unevenly, leaving a triangular pocket that keeps the mailer from lying flat. Good tips for reducing void space mailers deal with all three, not just the obvious top gap. I have seen teams obsess over the top seal and completely ignore the corners, which is a little like cleaning the windshield and leaving the tires flat.
Flexible poly material behaves differently from rigid cartons, and that matters. A 2.0 mil LDPE mailer will stretch and hug a product more readily than a stiffer 2.5 mil film, but the lighter gauge can also wrinkle if the item is narrow or if the seal lands too high. In one supplier meeting, I compared a coextruded 2.25 mil sample against a 3.0 mil mailer for a cosmetics kit, and the thicker film looked cleaner on the bench but trapped more dead air around the corners. The client chose the thinner film because the product was flat, not fragile, and the final profile dropped by nearly 12 percent. That was one of those moments where the prettier sample lost to the smarter one, and honestly, that happens a lot if you let the line tell the truth.
Transit compression adds another wrinkle. A package that is snug at pack-out can loosen after a few impacts in the carrier network, especially if the contents are soft or the adhesive seal is too close to the edge. That is why I always tell teams that tips for reducing void space mailers should include a quick movement check: shake the sealed mailer lightly, press the face panel, and see whether the product slides an inch or more. If it does, the pack is not truly snug, even if it looked good on the bench. That little test has saved me from more bad assumptions than I can count, and it takes about as long as finding the tape gun that someone "just had."
The simplest line example I use is this: a 7 x 10 folded insert in a 9 x 12 mailer may protect the item just fine, but if the insert drifts 1.5 inches after sealing, you still end up with a package that feels bloated, carries visible air pockets, and wastes film. That is the real lesson behind tips for reducing void space mailers: protection alone is not enough if the final shape is sloppy. Customers may not use the phrase "dimensional inefficiency," but they definitely notice when a mailer looks like it was packed by a gust of wind.
Key factors behind tips for reducing void space mailers
The first factor is the true finished size of the packed item, not the product in isolation. A folded hoodie, a boxed lip balm set, or a carded accessory can all gain thickness after inserts, tissue, labels, dust covers, or a return insert are added, and those extra layers matter. When I audited a subscription clothing pack in New Jersey, the product itself measured 0.75 inch thick, but the finished bundle after tissue and a prepaid return label was a full 1.1 inches. That 0.35-inch difference changed the recommended mailer size and fixed a recurring loose-corner problem. The best tips for reducing void space mailers always begin with the real envelope of the item, not the fantasy version that lives in a product sheet.
Film behavior is the second factor. A softer film can conform to a product and reduce trapped air, while a stiffer film may resist folding and leave empty shoulders or side pillows. The wrong gauge does not just affect feel; it changes how much pressure is needed to close the bag cleanly. In my experience, 1.8 mil to 2.25 mil works well for many apparel and accessory packs, while heavier films are better when puncture risk or corner abrasion is high. That tradeoff belongs in every set of tips for reducing void space mailers because material stiffness and void space are tied together. You can usually hear it in the shop, too: the lighter film sounds more forgiving, while the heavy stuff sounds like it plans to argue with you.
Closure design matters more than most people expect. A top strip that lands too high, a liner that peels unevenly, or a fold that traps excess film can add visible slack even when the product size is correct. I have seen a team in Ohio solve a chronic bulge problem simply by shifting the seal line down 0.4 inch and standardizing the fold-over method. The mailer itself did not change, but the finish looked tighter and the pack-out became more repeatable. Small geometry changes like that are exactly why tips for reducing void space mailers should be treated like process work, not guesswork. A half-inch of discipline is often worth more than a pallet of wishful thinking.
Pack-station consistency is the fourth factor. Two skilled packers can use the same mailer and still produce different results if one loads from the left, one loads from the right, and one presses the contents flat before sealing while the other does not. I learned this the hard way in a client meeting near Atlanta when a procurement manager blamed the supplier for "bad bag size," but the real culprit was a rotating temp crew and no loading standard. After we posted a simple visual board with the approved fold pattern, the variation dropped in a single shift. That is a classic example of tips for reducing void space mailers paying off through discipline, not material spend. It is also a good reminder that humans are wonderfully inventive and also extremely good at inventing five different ways to do the same job slightly wrong.
Carrier thresholds are the fifth factor, and they are not optional. DIM rules, zone pricing, and service class all influence the best format, which means the smallest bag is not always the right bag. Sometimes a slightly larger mailer wins if it eliminates a second seal, lowers damage risk, or keeps the pack under a carrier's dimensional threshold. I always tell teams to compare protection, appearance, and billing together. If you are evaluating materials, standards bodies like the ISTA testing framework, including ISTA 3A and 3B profiles, and sustainability resources from the EPA are useful reference points for packaging decisions that need to hold up under real distribution conditions from Memphis to Milwaukee.
| Option | Typical unit cost | Best fit | Void space control | Notes |
|---|---|---|---|---|
| Stock poly mailer | $0.08-$0.11 at 5,000 pieces | Stable SKUs with consistent thickness | Good if sizing is close | Fast to source, limited print control |
| Custom poly mailer | $0.15 per unit at 5,000 pieces | High-volume branded shipping | Very good when size is matched | Print setup and MOQ can affect startup cost |
| Padded mailer | $0.19-$0.38 at 5,000 pieces | Fragile or edge-sensitive products | Moderate, depending on insert size | More protection, more weight, more material |
That table is where tips for reducing void space mailers get practical for purchasing teams. A stock poly mailer may look cheapest on paper at $0.09 per unit, but if it drives a 7 percent DIM charge increase, the total landed cost can be worse than a custom format priced at $0.15 or $0.16. I have seen this exact tradeoff during supplier negotiations in Shenzhen and Monterrey, where a 5,000-piece print run with 12 to 15 business days from proof approval beat a cheaper stock buy simply because the better fit saved more in freight than it cost in print setup. The moment the finance team sees that math side by side, the room changes a little; people sit up straighter and stop arguing about cents in a vacuum.
Cost and pricing impacts of reducing void space mailers
The money side is usually where the conversation gets real. Excess space can push a package into a higher dimensional-weight tier, which means you are paying for cubic inches instead of actual product. A mailer that grows from 9 x 12 to 10 x 13 inches may not seem dramatic, but over 1,000 shipments, that difference can change the average billed weight enough to wipe out your margin on a low-ticket item. That is why tips for reducing void space mailers belong in every shipping-cost review, not just in packaging design meetings. I have seen a pricing analyst in Dallas go very quiet after seeing how quickly a few extra inches turned into a real monthly expense.
There is a strong temptation to focus only on unit price, and I understand why. A procurement spreadsheet is easy to read when one bag costs $0.08 and another costs $0.13. The lower-cost option can still be the more expensive choice once freight, handling, and claims are counted. In a recent client review, the "cheap" bag saved $250 on material in a month but created $1,100 in additional freight charges and 14 damaged orders. That is a rough lesson, but it is exactly why tips for reducing void space mailers need a total-cost view. Cheap packaging that makes shipping expensive is not cheap; it is just hiding the bill in a different column.
Custom mailers can absolutely save money at scale, but they are not magic. Minimum order quantities, print plates, proof rounds, and freight from the converter all affect early economics. I have negotiated runs where a custom poly mailer came in at $0.18 per unit for 10,000 pieces, with 3-color print and a 2-week production window, and another where the same project landed closer to $0.23 because the art changed after approval. Honest planning matters. If a team wants branded mailers plus a tighter fit, tips for reducing void space mailers should include a realistic timeline and a clear approval path so there are no surprises. Nothing derails a clean rollout faster than someone discovering a revised logo file after production has already been queued in Dongguan.
The hidden cost of loose packs is damage and returns. A product that moves in transit can scuff, crease, or arrive with a bent corner, and those losses often show up in a return center weeks after the original shipment. I have seen an accessory brand spend more than $8,000 in reverse logistics over one quarter because oversized mailers let product shift inside the bag. The finance team thought the mailer change was a packaging tweak; the warehouse knew it was a margin issue. That gap in perception is why tips for reducing void space mailers matter across operations, not just on the dock. The package is only "just a bag" until it starts creating exceptions.
A simple cost model helps everyone speak the same language. Use four line items: mailer price, shipping expense, packing labor, and claim rate. Then compare the current format to one or two tighter alternatives. A 30-day snapshot that includes average billable weight, average order value, and the percentage of packs with visible slack gives you a real baseline. Once those numbers are in front of the team, tips for reducing void space mailers become measurable rather than theoretical. People stop arguing about vibes and start arguing about data, which is much more productive and only slightly less loud.
For teams exploring broader packaging choices, our Custom Packaging Products selection can help frame the tradeoff between material spend and ship-ready efficiency. If a printed format is on the table, our Custom Poly Mailers page is the right place to compare sizes before you commit to a print run or a stock buy. I like putting options side by side because it keeps the conversation honest.
Step-by-step process for reducing void space mailers
Start with a SKU audit. Measure the actual packed product, not just the catalog spec, because the real pack often changes once inserts, sleeves, labels, or protective wrap are added. I have seen teams skip this step and end up ordering a mailer based on a 6 x 9 product that actually packed out to 6.75 x 9.5 once the barcode card and care insert were included. The most reliable tips for reducing void space mailers begin with a ruler, a caliper, and a sample set from the line. If you can, measure three versions of the pack, because the "average" one is often not the one that gives you trouble.
Next, choose a target clearance range. You want enough room for easy insertion and a clean seal, but not so much room that the item floats. For many flat products, I like to see roughly 0.25 to 0.5 inch of practical clearance on the shortest side and enough top room for the adhesive to land without creasing the product. That range is not universal, and it depends on film strength and product hardness, but it gives teams a starting point. Good tips for reducing void space mailers are specific enough to guide the bench while leaving room for product variation. Nobody needs a formula so rigid that it breaks the first time the product changes shape by a hair.
Then test several sizes side by side. Put three or four candidate mailers on the packing table, run 20 units through each, and compare fit, seal quality, and final profile. In one cosmetics trial, a 9 x 12 mailer looked fine on paper, but the 8.5 x 11.5 option cut visible slack enough that the customer service team stopped hearing complaints about "puffy packaging" within two weeks. That kind of bench test is the heart of tips for reducing void space mailers because it turns opinion into evidence. I trust a stack of tested samples far more than I trust the confident tone someone uses while waving at a spec sheet.
Standardize the loading sequence. Write down which edge goes in first, how the item is folded, where the fold line sits relative to the adhesive strip, and how much pressure the packer should use before sealing. If one worker folds the same item lengthwise and another folds it tri-fold, the finished profile will vary by more than half an inch. I once helped a fashion client post a 4-step loading sheet at each station, and the line improved simply because every packer used the same motion. That is the kind of small, human detail that makes tips for reducing void space mailers durable in daily work. It is not glamorous, but neither is reworking a shipment because half the line packed it one way and half packed it another.
Run a short transit check. You do not need a huge lab to see whether the pack is stable. A basic shake test, a 3-foot drop test, and a look at the seal after compression will tell you a lot. For higher-value items, follow recognized test methods like ISTA procedures or ASTM D5276 drop testing so your pack decision is rooted in distribution reality, not bench intuition. When the package survives motion without creating extra bulges, you have a better indicator that tips for reducing void space mailers are actually working. The carrier network has a way of exposing weak assumptions in a hurry.
Finally, write a simple SOP and a quality check. A one-page sheet with the approved mailer size, fold pattern, and escalation rule is often enough. Add a start-of-shift sample check with 5 packs and a weekly review of billable weight or damage claims. I have seen plants spend six figures on automation and still drift back into sloppy pack-out because nobody documented the process. The smartest tips for reducing void space mailers are the ones that stick after the first busy Friday, the first sick day, and the first time the supervisor gets pulled into another fire.
Here is a compact way to think about the rollout:
- Measure current packs by SKU and note the actual finished thickness.
- Test 2 or 3 alternate mailer sizes with real packers on the line.
- Record DIM weight, seal quality, and customer-facing appearance.
- Choose the format that reduces void space without slowing the station.
- Lock it into a one-page SOP and review it weekly for the first month.
Common mistakes and expert tips for void space mailers
The biggest mistake is choosing a mailer by habit or by product name instead of by finished geometry. I have heard people say, "We always use a 10 x 13 for that line," even when the product changed six months ago and the insert got thicker by 0.2 inch. That kind of routine is exactly how void space creeps back in. The best tips for reducing void space mailers force the team to look at the real pack, not the old assumption. Old habits are comforting, sure, but they are also expensive little gremlins.
Another common error is overusing filler materials. Inserts, tissue, foam, and paper can help stabilize an odd shape, but if they are there just to make a loose pack look fuller, they usually add cost, weight, and time. I once walked a site where the packers were adding two folded sheets of kraft paper to every mailer because "it feels safer," but the material was costing more than the product protection it provided. If the item can be snugged down by size alone, that is usually the cleaner choice. Honest tips for reducing void space mailers should encourage fit first, filler second. I am not against filler when it has a job to do; I just dislike filler pretending to be a strategy.
Ignoring SKU variation is another trap. A single product line may include a thin version, a bundle pack, and a seasonal gift set, and all three need different treatment. I remember a client in a contract meeting who wanted one universal mailer for 18 SKUs. It sounded efficient until we measured the thickest bundle and realized the universal bag would create nearly 20 percent more void on the smallest item. That is why practical tips for reducing void space mailers often involve a small family of approved sizes rather than one oversized compromise. "One size fits all" is charming on a T-shirt, less charming on a shipping budget.
Here are a few expert habits I learned on factory floors and in supplier reviews:
- Use a fit template with the approved folded dimensions, such as 6.75 x 9.5 and 8.5 x 11.5, taped to the bench.
- Check 5 random packs at the start of each shift for slack, seal position, and corner fill.
- Keep a reference board with one "good" sample and one rejected sample, each labeled with the order code and pack date.
- Train new packers with a real 20-unit test and a 30-minute signoff, not a verbal handoff.
Sealing mistakes deserve special attention because they create the most visible voids. If the adhesive strip lands too high, the top flap arches and makes the pack look inflated even when the product fit is correct. If the seal is crooked, the contents can shift toward one side and leave a wedge of open air on the other. I have watched a 0.5-inch seal correction improve the entire appearance of a mailer line without changing the bag itself. That is a reminder that tips for reducing void space mailers are not only about size; they are also about closure discipline. A slightly crooked seal has a way of announcing itself like it owns the place.
One more point from the floor: do not let "close enough" become the standard. A pack that is only slightly loose on Monday becomes a habit by Thursday, and by the time the monthly review happens, the team has normalized waste. A quick 10-minute review at the start of the week is often enough to keep the line honest. In my experience, that small ritual saves more money than a long quarterly audit because it catches drift while it is still small. That is one of the simplest tips for reducing void space mailers I know, and it saves everyone from the slow creep of "good enough," which is usually just another word for hidden waste.
Rollout timeline and next steps for void space mailers
A realistic rollout usually takes three phases. Week one is for measuring current pack-outs and identifying the worst offenders, week two is for sampling and side-by-side comparison, and week three is for training and SOP updates. I have seen teams try to convert every SKU in one afternoon, and it usually ends with confusion, mixed inventory, and a few wrong-size packs sitting on the line. The better approach is smaller and cleaner. That is where tips for reducing void space mailers have the highest chance of sticking, because the crew can actually remember what changed and why.
Start with a pilot. Pick one high-volume SKU, one medium-volume SKU, and one troublemaker that ships oddly shaped or gets frequent customer complaints. Run the current mailer against two alternatives for 50 to 100 units each. Measure average ship cost, visible slack, rejected packs, and damage claims. A pilot does not need to be fancy; a spreadsheet and a scale are enough. The point is to prove that the tips for reducing void space mailers improve both fit and cost before you touch every item in inventory. I prefer proof over enthusiasm because enthusiasm does not pay freight invoices.
I like a simple scorecard with four columns: mailer size, average shipping cost, pack-out speed, and customer feedback. If the tighter option saves 6 cents on freight but slows the line by 2 seconds per order, you may still take it for a high-value product, but not for a low-margin subscription item. That kind of decision is exactly why tips for reducing void space mailers should be evaluated with both operations and finance in the room. One team cares about throughput, the other cares about margin, and both are right. The trick is getting them to look at the same numbers without launching a small war.
After the pilot, update the SOP, brief the packers, and lock the approved sizes into purchasing so the wrong carton or mailer does not creep back in because someone ordered from an old item code. I have seen that happen at least a dozen times, usually after a turnover in the shipping office. A clean handoff prevents drift. It also keeps the gains from your tips for reducing void space mailers from disappearing the moment volume picks up. There is nothing quite like discovering six cases of the wrong mailer because a spreadsheet tab was never updated. That kind of surprise could ruin anybody's afternoon.
Here is the short version of what I would do this week: measure three products today, test two alternate mailer sizes by Friday, and review the results with your shipping team before ordering the next pallet. If you need branded material, ask for quoted options at 5,000 and 10,000 pieces, and compare unit price against freight savings instead of judging the bags by print alone. In my experience, that combination of measurement, testing, and buying discipline is the real engine behind tips for reducing void space mailers, and it is how a small packaging change turns into a measurable waste reduction program. It sounds simple because, honestly, the best fixes usually are. The hard part is doing them consistently, especially on a line that runs from 7:00 a.m. to 6:30 p.m.
The teams that win here usually treat packaging like a repeatable process, not a one-time purchase. When the measurements are right, the seal is consistent, and the mailer fits the product envelope, the result is cleaner, cheaper, and easier for the customer to open. That is the real value of tips for reducing void space mailers: less waste, less freight drag, and fewer surprises on the dock. I have watched that shift happen enough times to trust it, and I still get a small kick out of seeing a packaging problem get solved by better habits instead of bigger budgets.
How do I know if my mailers have too much void space?
Shake the sealed mailer lightly and see whether the product moves, then look for bulky corners, a loose top seal, or a profile that feels much larger than the contents. If the billable weight keeps climbing faster than the product weight, you are probably paying for empty space. That quick check is one of the fastest tips for reducing void space mailers to use on a busy line, especially when nobody has time for a long debate. A 1-inch shift inside a 9 x 12 bag is usually enough to justify a size review.
What size poly mailer should I use to reduce void space?
Measure the finished packed item, not just the flat product dimensions, then pick the smallest mailer that still allows easy insertion, a clean seal, and safe handling. A trial run with 20 units per size is usually enough to show whether the fit is truly tight. That is one of the most practical tips for reducing void space mailers because it replaces guessing with a real sample. I trust that approach a lot more than "we think it should fit," especially when the pack already includes a 350gsm C1S artboard insert or a folded return card.
Do inserts or fillers help with void space in mailers?
They can help for fragile or uneven items, especially when the product needs extra stabilization, but they also add cost, weight, and packing time. If sizing alone can tighten the fit, that is usually the cleaner route. In other words, use fillers only when the movement problem is real, not as a habit. I have seen too many mailers stuffed with paper that only made the situation look busy, and a 0.15-inch paper shim is not a substitute for the right bag size.
How fast can a warehouse improve void space in mailers?
A basic audit and test sample can happen in a few days if the SKUs are organized, while a full rollout usually takes one to three weeks depending on training and approval cycles. The quickest savings usually come from the highest-volume items first. That is why tips for reducing void space mailers work best when the team starts with the top movers, not the whole catalog. Trying to fix everything at once usually turns into a very expensive episode of confusion, especially if the new size needs proof approval and a 12- to 15-business-day production window.
Will reducing void space in mailers actually lower shipping costs?
Often yes, because tighter packs can reduce dimensional weight and lower carrier charges, especially when the current bag is substantially larger than the product envelope. Just compare freight savings against any increase in mailer price, inserts, or labor before you switch. If the numbers line up, tips for reducing void space mailers can improve both margin and customer presentation in the same move. That is the sweet spot, and it is worth chasing, particularly on routes where a DIM divisor of 139 makes every extra inch expensive.
For brands that ship every day, tips for reducing void space mailers are not a trendy packaging idea; they are a practical way to cut waste, lower freight costs, and make every pouch or mailer look more deliberate from the first label to the final seal. I have seen the payoff in apparel rooms, cosmetics lines, and small parts operations from Tennessee to southern California, and the pattern never changes: measure the real pack, Choose the Right size, standardize the motion, and keep checking the numbers. Do that well, and tips for reducing void space mailers become a simple habit that saves money on every shipment. It is not flashy, but it works, and frankly, shipping departments have enough drama already.