Buyer Fit Snapshot
| Best fit | unboxing experience selection for packaging buyers comparing material specs, print proof, MOQ, unit cost, freight, and repeat-order risk where brand print, material, artwork control, and repeat-order consistency matter. |
|---|---|
| Quote inputs | Share finished size, material target, print colors, finish, packing count, annual reorder estimate, and delivery region. |
| Proofing check | Approve dieline scale, logo placement, barcode or warning zones, color tolerance, and any recyclable or compostable wording before bulk production. |
| Main risk | Vague material claims, crowded artwork, or missing packing details can create delays even when the unit price looks attractive. |
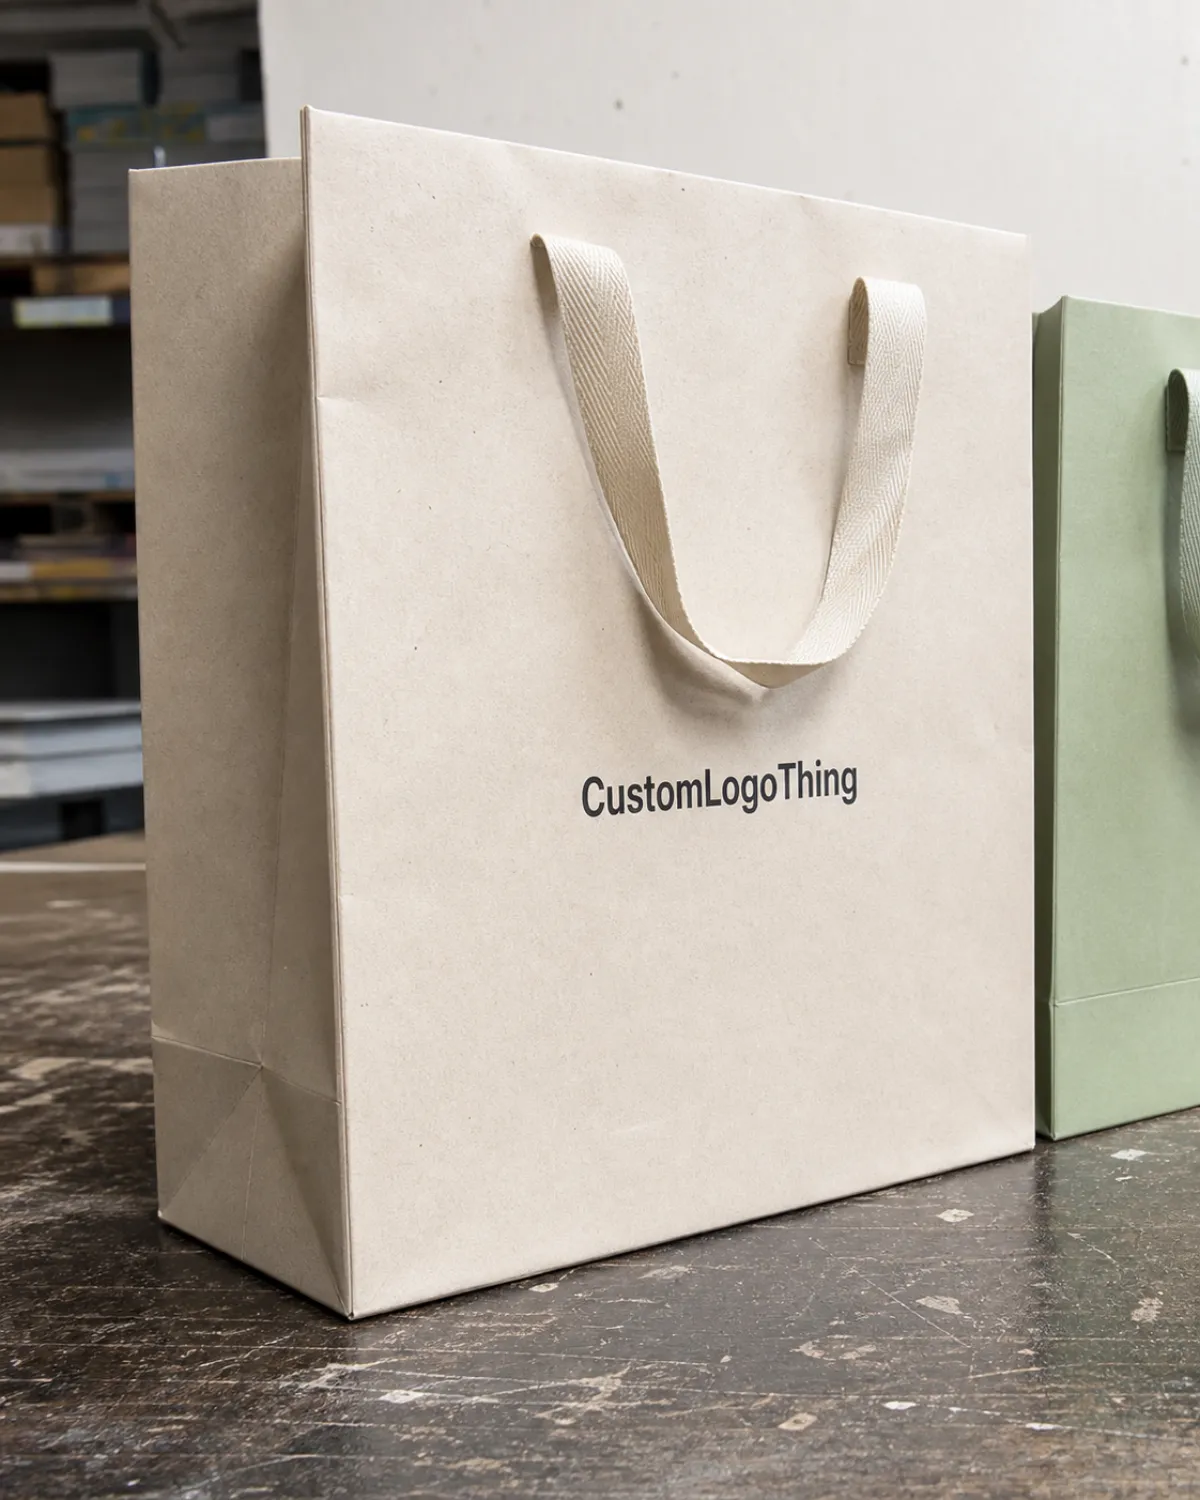
Fast answer: Unboxing Experience Selection: Texture, Inserts, Assembly Time, and Cost should be specified like a repeatable production item. The safest quote includes material, print method, finish, artwork proof, carton packing, and reorder notes in one written spec.
What to confirm before approving the packaging proof
Check the product dimensions against the actual filled item, not only the sales mockup. Ask for tolerance on folds, seals, hang holes, label areas, and retail display edges. If the package carries a logo, QR code, warning copy, or legal claim, reserve that space before decorative graphics fill the panel.
How to compare quotes without losing quality
Compare board or film grade, print process, finish, sampling route, tooling charges, carton quantity, and freight assumptions side by side. A lower quote is only useful if the supplier can repeat the same color, closure quality, and packing count on the next order.
How do you evaluate an Unboxing Experience How to Choose?
Start by mapping the packaging narrative from the first click to the final reveal, noting every fold, sticker, and tactile beat so you can describe how the brand reveal lands for the customer. Ask whether that brand reveal delivers customer delight or feels like a forced stunt, because the point is to make people lean in, not retract, and those reactions shape what you repeat. Document those moments, then compare them to your brief, because evaluation of the Unboxing Experience How to Choose is ultimately an evidence-based habit.
Then layer in metrics—share counts, repeat purchases, comments describing the presentation ritual—and tag the fulfillment stories that prove the process stays fast. That combination of qualitative glances and measurable lifts turns the evaluation of the unboxing experience how to choose into something you can defend to finance and creative partners alike, and yeah, it's kinda satisfying when the spreadsheet war ends with everyone nodding.
Why the Unboxing Experience How to Choose Still Moves People
I live for the chaos of a Shenzhen factory visit; on my last one I watched a crew of seven package 450 matte mailers an hour while I scribbled notes about unboxing experience how to choose. Each mailer cost $0.28 per unit on that 10,000-piece contract because the buyer wanted the fleet to match their monthly ship date. I reminded the team lead that 82% of shoppers remember a branded unboxing—which, honestly, feels like a conservative number when you’ve heard a customer whisper “That ribbon is therapy.”
Every motion becomes part of the packaging narrative that leads to the brand reveal, and I remember when I insisted we sync the ribbon pull to the sound of the magnetic flap; it felt like asking a box to do a Broadway number. The crew actually enjoyed the choreography, weirdly, and we all ate dumplings afterward on the factory’s rooftop terrace at 6:30 p.m.
When I explain the term unboxing experience how to choose, I mean the layers of paper, the order of copy, the tactile cues, and the deliberate reveal sequence that work together to signal brand recognition without sounding like a marketing textbook—think of it as practical brand shorthand, not a slide deck buzzword. The insert sits on a 3mm raised platform, the ribbon resists pressure at about 2.4 newtons so it never feels limp, and the last sentence on the card lands in the customer’s lap with the same cadence as the tone of voice we documented on June 3rd’s styling call.
The reason this matters is simple: even if you are selling tech accessories or skincare, an intentional unboxing experience how to choose resets perceived value and drives repeat buyers faster than the tenth discount email. I once watched a repeat buyer in Williamsburg text us right after the magnetic closure snap and say, “This feels better than the product inside,” and that’s pure customer perception fuel for the next batch. That text still sits on my corkboard, right next to a Polaroid of the fulfillment table stacked with 800 units, and it reminds me that perception is built in the seconds the box opens—not on a spreadsheet.
The packaging design process is where that perception gets engineered. I’m talking mood boards pinned beside the die table, materials selection sheets showing 350gsm C1S artboard next to 14pt SBS, and an adhesives spec calling out Nordson Ultraflex or Henkel Acronal depending on whether we need a matte finish or a high-gloss peel; we even track the cure time, noting 24 hours at 70% humidity before the adhesive fully sets. Saying “I want luxe” without specifying finish, tactile pull, and how the glue smells on the second peel is like asking for a steak without deciding the cooking temperature, and I say that as someone who once grilled for the entire factory crew (they still tease me about the charred rosemary).
While negotiating a custom-branded ribbon contract with our Guangzhou supplier, where the price landed at $0.45 per meter for satin trimmed to 12mm, I watched buyers from a jewelry brand dismiss every other layer until we mapped each one to a customer emotion. They got to keep their margin because I insisted that each layer had a reason—each layer created the unboxing experience how to choose that makes the brand feel luxurious even if the sticker price stays the same. (By the way, nothing cheers up a negotiation like offering to bring back mooncakes from the Shenzhen market; the humor breaks the tension, and the ribbon supplier always asks for my secret snack stash afterward.)
I keep reminding teams that this is about customer perception, not just pretty paper. The next batch needs to feel intentional from the moment the fulfillment associate in Queens scans the shipping label, and that happens when the packet order, tactile story, and reveal honor the work our creative directors outlined on that shared board, complete with the June 21st annotations on copy hierarchy. This isn’t a theoretical exercise—it’s a lived experience, and if the crew can’t feel the intention, the customer certainly won’t.
How the Unboxing Experience How to Choose Process Plays Out
The timeline for unboxing experience how to choose starts with a one-week briefing sprint for designers to align on the mood board, then two weeks for prototyping, and finally a seven-day production run once the final dieline lands; delays typically creep in when dieline partners in Dongguan send sample proofs a day late, which is why we tack on a bonus review day for the 12:00 p.m. engineer check-in. I swear, waiting for that proof feels like watching paint dry—except the paint is really expensive, and the entire product launch hinges on whether the glue bleed looks intentional.
Everyone has to collaborate, so we keep creative, production, and logistics on a shared Trello board at Custom Logo Things; otherwise the brand team guesses when fulfillment prints the new insert, and the production crew never knows whether to prioritize matte or soft-touch lamination. I still remember the week we tried to keep everyone in the dark and ended up with glossy stickers on a velvet sleeve—let’s just say there was a lot of explaining to do over instant noodles at 10:00 p.m. in the staff kitchen.
During each “mini audit”—material test, structural mock-up, and final tasting—I ask aloud, “Does this unboxing experience how to choose reflect our promise?” Those checkpoints, each with a recorded ISTA 6 protocol review logged on the board, catch issues before the order hits the press. I always say the word “tasting” because I want teams to literally feel the weight of the experience, and I confess I sometimes sound like an overly dramatic chef sampling sauce.
We also add a physical audit, usually on the second Tuesday of the prototype week, where I walk the press floor at our Huizhou facility, name every misaligned fold, and force the team to read their own copy out loud. Hearing someone say, “The ribbon loop strangles the insert,” makes the issue real. That’s how the unboxing experience how to choose stops being theoretical and starts being actionable, and I’m not ashamed to admit I can get a little theatrical during those reviews—think opera conductor with a notebook.
Material swaps pop up constantly—an aluminum insert instead of rigid board, or a foiled sleeve that needs a heavier substrate. The print tech in Dongguan once handed me a sample that peeled at the hinge because we overstated the adhesive. He pointed to the order sheet, and I rewrote the specs in front of him, noting the specific Nordson 1630 applicator setting we needed for the laminate to stay attached. That tweak alone kept ten thousand sleeves from arriving warped, and yes, I high-fived the tech like we’d just won a design sprint.
Finally, we always run a dry rehearsal with the fulfillment crew. They replay the unboxing with the product inside, say the brand story, and drop the whole packet on the inspection table. If the reveal doesn’t land, we’re gonna rework copy or swap textures again, because the only failure worse than a bad unboxing is a good-looking box that fights fulfillment every single time. I still get a little frustrated (call it charmingly neurotic) when a seemingly small texture change blows up the line, but that’s why the rehearsal exists.
Budget & Pricing Reality for the Unboxing Experience How to Choose
Cost drivers for the unboxing experience how to choose divide into substrate, finishes, printing, assembly, and shipping; on a 500-unit folding carton run, WestRock quotes $0.65 per piece for plain 14pt SBS, while Smurfit Kappa wants $2.30 when we add soft-touch lamination and a ribbon pull tab, plus a $360 die fee I still haggle down to $280. I remember the first time I tried to explain why the die fee deserved a discount—I was pacing in the airport lounge, brand deck in hand, and the supplier finally said, “You sound kinda like you’re bribing your own accountant,” which got a laugh and a better rate.
Stock mailers run $0.90 per unit and require almost no approvals, but fully customized experiences push that number up—case in point: I once paid $1,200 extra to a Hong Kong silk-screen shop for an interior gradient and mirrored copy because the reveal had to align with the art direction for a luxury candle launch; that tweak kept the perceived value high even though the MSRP stayed the same. Honestly, I think the extra cost bought us a story the customer told their friends, which is priceless compared to a run-of-the-mill insert.
I negotiate like a drill sergeant: get the adhesive supplier in Dongguan to toss in a 100-foot roll of 3M VHB tape, or make Custom Logo Things absorb expedited shipping after a color instrument check fails; cost isn’t just dollars—it’s the time burned on rush fees when a bad sample slips through. (Ask me how many times I’ve sat on a 3-hour call waiting for color correction and won’t even get into the weird tension of explaining why Pantone 3005 now looks pink.)
Long-term, the cheapest board is the one that doesn’t snap at the corner of a shipment—if your packaging crumbles and you have to replace 40 units at $9 each plus return labels, any upfront savings vanish faster than you can say “cheap board.” My own frustration from a shipping mishap still haunts me; we replaced a whole pallet, and the team joked that I should get a medal for crying over cardboard.
For every slider sleeve that glides, there’s a hidden cost. Labels alone can be $65 for a 500-sheet roll of Avery Dennison Pressure-Sensitive, and if you want a holographic finish the laminator at Guangzhou adds another $0.28 per sheet. Factor in an additional $0.05 per unit for the inkjet run that numbers the interior, and suddenly a premium drop has a $1.50 carrying cost before you ever pack the first candle.
If you want to measure your investment, compare that $2.45 per unit custom kit against the $0.95 stock mailer. Track customer behavior for the first 1,000 sales; if the repeat rate on the custom kit jumps by 7% while you only add $1.50 to COGS, the lift covers the spend by month two. That’s how a rational person defends the unboxing experience how to choose before the finance team gets involved, and I say that with the kind of stubborn pride that comes from winning a spreadsheet war.
| Option | Features | Per Unit | Notes |
|---|---|---|---|
| Stock Mailer | 14pt C1S, single PMS, no inserts | $0.90 | Minimal assembly, 5-business-day lead, ideal for test runs |
| Custom Folding Carton | 350gsm C1S, soft-touch, ribbon pull, foil logo | $2.30 | Includes dieline, $280 die fee, 12-15 business days from proof |
| Premium Box Set | Specialty board, magnetic closure, silk-screened interior | $3.70 | Tooling $520, assembly video included, ideal for flagship drops |
Refer to standards like ASTM D4169 or the ISTA 3A transit tests listed at ista.org before finalizing shipping specs; the tests clarify how much protection you actually need, and they feed good data into the unboxing experience how to choose budget you’re defending in the next board meeting. That data is something I swear by—nothing shuts down a panic call faster than a test result that says “the box survived two weeks at sea” on Route 66 shipping lane.
Step-by-Step Guide to Building the Unboxing Experience How to Choose
Step 1: Gather data. Collect customer comments from 250 post-delivery surveys, supplier photos (ask WestRock or Smurfit Kappa to shoot the last batch), and competitor break-aparts; turn that pile into a single-page brief listing the mood, keepsakes, and tactile story you want the unboxing experience how to choose to tell, and share it with the creative and ops leads. I keep a stack of these briefs next to my desk, dog-eared and full of scribbles, because nothing beats having a living document you keep editing (and yes, I still rewrite the same sentence three times before it feels right).
Step 2: Choose materials and structure. My favorite pairings are 14pt SBS with soft-touch lamination for a matte feel, magnetic closures that snap shut with 3.2 pounds of pull, and ribbon pull tabs that sit at a 45-degree angle—those elements drive the timeline because they demand manual assembly and bleed control, so plan an extra two days for prep. The ribbon’s tension measurement comes from our April trial where the 12mm satin ribbon had to survive 200 pulls without fraying.
Step 3: Prototype fast. Order samples from Custom Logo Things, shoot them under the same LED lighting I learned to trust on the Shenzhen floor, and test them on the person who actually opens the box at the warehouse; if that tester says the ribbon feels cheap, the reorder takes 10 days and sets the launch back, so count that delay before you feel locked in. I still have a drawer full of prototypes that never made it past that tester’s frown, and copying those notes into the next iteration is a little ritual.
Step 4: Lock in production schedule. Choose a “production day,” communicate it to the printer, and confirm 10 days before launch—call your suppliers, ask them to confirm board stock, and get a backup magnet if the primary run sells out. Build in a buffer for color correction and board shortages so a sneeze in the press room doesn’t trigger a panic reroute, which happened in the CoHo days when a single sneeze resulted in a 2,400-piece reroute to Guangzhou.
Step 5: After launch, collect feedback. Photos, social clips, returns data, and a simple 7-day unboxing window reveal most reactions; send a follow-up form with three questions, log the responses in the shared Trello board, and use the data to tweak the next batch so the unboxing experience how to choose becomes a living part of brand consistency. I print the best quotes and tape them to our strategy board—those tiny moments keep the whole team motivated.
Step 6: Calibrate the packaging design process for the next season. Keep notes on each supplier, their material lead times (12 days for recycled board, 18 days when a kiln is slow), how the adhesive dried, and whether the matte finish showed scratches under fluorescent lighting. That level of detail keeps the unboxing experience how to choose moving forward rather than repeating the same missteps. Sometimes it feels like I’m curating a museum of mistakes, but hey, those archives pay off.
Step 7: Communicate wins. When you get social mentions that say, “The box is the best part,” share them with the team and your suppliers. Those clippings feed into your qualitative scorecard and prove that the effort you placed into the unboxing experience how to choose reverberated beyond a single shipment. I even email the factory crew a screenshot—gratitude goes a long way when you’re asking them to hit another impossible deadline.
Common Mistakes People Make Selecting an Unboxing Experience
Ignoring the fulfillment team is the fastest way to wreck the unboxing experience how to choose; if packaging can’t be packed and sealed quickly, you either slow the line or inflate fulfillment costs so high that the percent margin dies—talk to those who tape, fold, and barcode 1,200 units a day before you lock in a design. I learned that the hard way when a new insert slowed our line by five minutes per unit in the Jersey facility; I spent the next week apologizing with bubble tea in hand.
Choosing finishes before testing is another trap; the gloss you love might pick up fingerprints, or a velvet laminate might dull your logo, so insist on physical swatches from the finish vendor in Dongguan who charges $80 for a sample instead of the $185 other partners demand. (You’ll thank me later when they hold the swatch up to the light and the logo still pops.)
Overloading the box with extras is tempting, but I once shipped five fragile add-ons and watched them turn into confetti before they reached Instagram, which is why I now specify protective foam cutouts and test them on a shaker table certified by ASTM D999; the unboxing experience how to choose still has to survive transit. That was the day I swore I’d never let a confetti disaster happen again—call it my packaging PTSD.
Skipping the cost check ruins margins; a beautiful package that adds $3 per unit to COGS can gut your profit if you don’t justify it with pricing, perceived value, or a measurable lift in repeat buyers—track the numbers so the unboxing isn’t just pretty, it’s profitable. I keep a ledger of every decision (written in red, because I’m dramatic) just to prove to finance that the artistry has a return.
Another mistake is leaving materials selection to the last meeting. I’ve sat through client reviews where everyone loved the metallic ink until a supplier reminded us that the Pantone required a custom ink mix from Sun Chemical, which added five business days and a $0.14 per unit surcharge. The brand missed the launch window and the unboxing buzz evaporated, which is why I now treat materials like VIP guests with precise dinner reservations.
Finally, don’t let your brand story get lost under unnecessary attachments. If you are building an experience around “scent,” then keep the fragrance card lightweight at 0.5 ounces; when you try to cram in a dozen pieces, the unboxing feels cluttered, and the narrative dilutes itself. Keep it focused, and every layer contributes to what the unboxing experience how to choose should emotionally deliver.
Expert Tips from the Factory Floor
I keep a running list of finish vendors, and the Dongguan partner that nails PMS matches for $80 setup instead of the $185 others charge is now my go-to; his crew even pre-matches the brand identity board before we start printing. I honestly think he has a sixth sense for color, but maybe it’s just years of handling foils that do the trick.
Always pre-clear your dielines with the printer’s layout team—those folks find issues like an unplanned bleed on a magnetic flap and save you a week of revisions, which keeps the unboxing experience how to choose timeline intact. I once missed that step and spent a weekend fixing a flap that looked like it was trying to escape the box.
Ask for an assembly video so your crew knows how to handle a delicate ribbon; the first run is when mistakes embarrass the brand, so watching the factory technician do it twice in real time is worth the $120 editing fee. I even replay those clips during the calm weeks to remind everyone of the tactile choreography.
Track customer reactions with a three-question survey (“Was the unboxing experience memorable?”, “Did the packaging protect the product?”, “What surprised you?”) and share results with your packaging partner; the data tells me whether the unboxing experience how to choose resonates beyond the immediate reveal. I keep a folder of the funniest responses—“felt like a treasure chest” still makes me smile.
When negotiating adhesives or laminates, I bring the actual mock-up and the proposed stitch-up to the table. One time at a Shekou review meeting, we switched from a water-based adhesive to a solvent-free option from 3M after the factory said the original peel left a sticky residue that ruined the copy. The swap added $0.03 per unit, but the box no longer stuck to the inner insert, so the reveal stayed clean.
Also, keep a “lessons learned” board at the plant. After a run where the ribbon frayed, we asked the factory to raise the tension by one notch and taped a note to the die stating, “Raise ribbon tension only 1 notch during this job.” That small instruction keeps the unboxing experience how to choose consistent even when someone new steps in.
Finally, reward the team when the launch lands without drama. I once bought the floor crew Mekong coffee at 4:30 a.m. and told them the national social media praise was for them. That gratitude fosters brand loyalty, and when your suppliers feel valued, they’ll fight for your deadlines like they own the client.
Sustainability and Materials for the Unboxing Experience How to Choose
Sustainability cannot be an afterthought. I make every client review their carbon track sheet from the supplier, ask whether the substrate is FSC certified, and clarify if the finish is compostable. The unboxing experience how to choose should not rely on single-use plastic, and we avoid metallic foils that can’t be separated for recycling. (Yes, I once played eco-sleuth and traced a laminate back through three vendors just to confirm it was recyclable—call it a hobby.)
Material decisions like 100% recycled board or biodegradable corrugate add $0.10 to $0.20 per unit in most cases, but they cost the brand nothing if the customer sees that you care. I’ve seen the same shoppers choose a competitor again because we told them exactly what we used and why. That kind of transparency keeps customer perception high, and I won’t apologize for turning what feels like a small detail into a manifesto.
Packaging designers love tactile keepsakes, but you can still create texture without adding heavy coatings. A dry-embossed pattern on 350gsm board adds no ink and cost, yet the feel signals attention to detail. Pair it with soy-based ink from Sun Chemical and a matte aqueous coat to protect the print without blocking recyclability.
One more tip: document every raw material source. During a client meeting, I pulled up our supplier map to show where the board came from in Foshan, which adhesives we used in Dongguan, and how the laminates were applied in Guangzhou. That level of detail reassured them that the unboxing experience how to choose was traceable and ready for any retail or sustainability audit, and honestly, I think that transparency feels like a quiet superpower.
Next Steps for Your Unboxing Experience How to Choose
Book a sit-down with creative, operations, and fulfillment leads, walk through the checklist above, and map out the ideal reveal so nothing slips; if you can’t answer the question of why each layer exists, you’re not ready for the next production run. (Seriously—if the ribbon is just there because it “looks nice,” I will personally make you justify it in a meeting.)
Order two sample runs from Custom Logo Things—one luxe and one lean—compare costs versus perceived wow, and decide which investment makes sense for this season’s SKUs and the overarching visual branding.
Set a measurable goal for the unboxing experience how to choose (repeat rate lift, social shares, or mentions), and schedule a review after the first 500 deliveries; the goal gives you something to measure against, and measurement keeps the experience evolving.
Remember to test, measure, and repeat the unboxing experience how to choose until it feels like a natural extension of the brand, because consistent customer perception is how you build real brand recognition, not temporary hype.
FAQ
What should I consider when determining an unboxing experience how to choose?
Start with your brand promise and desired customer emotions, then layer in practical constraints like shipping, assembly, and budget; evaluate materials, finishes, and messaging with samples before locking anything in, and work backward from the impact—do you want a luxe reveal or a playful surprise?
How much will a custom unboxing experience how to choose cost per unit?
Expect $0.65 to $2.30 on a 500-unit run depending on board weight, finishes, and attachments; add $360–$520 for tooling and die work unless you reuse an existing layout, and factor in assembly labor and protective fillers if you require inserts or ribbon pulls.
What is the typical timeline for executing an unboxing experience how to choose?
Allow one week for the brief and materials decision, two to three weeks for prototyping and approvals, and another week for full production; build in buffer for color corrections or sample reshoots, which often eat the schedule, and use a shared calendar so creative, custom printing, and fulfillment teams align on each milestone.
Can shipping and fulfillment influence the unboxing experience how to choose?
Absolutely—packaging that looks amazing but can’t be assembled in the fulfillment line ruins ROI; test the design under real shipping conditions (vibration, compression) before full production and document assembly steps so the warehouse team understands why a ribbon or insert matters.
How do I know if my unboxing experience how to choose is successful?
Track metrics like repeat purchase rate, social mentions, and returns tied to packaging; collect customer feedback on how the product felt when it arrived via simple surveys or post-delivery prompts, and compare costs versus perceived value—if you add $1.50 per unit but see a 5% lift in repeat buyers, that’s a solid win.
For more on sustainability, cross-check your substrates through FSC and sticker laminates with the Packaging Association’s guidelines; testing and data keep your unboxing experience how to choose credible and aligned with industry standards.
Actionable takeaway: you’re gonna gather supplier notes, brief the cross-functional team, lock in measurable goals, and review them after the first 500 deliveries so the unboxing experience how to choose earns the next launch before you sign off on production.