Buyer Fit Snapshot
| Best fit | Unboxing Experience Pricing projects where brand print, material claims, artwork control, MOQ, and repeat-order consistency need to be specified before quoting. |
|---|---|
| Quote inputs | Share finished size, material target, print colors, finish, packing count, annual reorder estimate, ship-to region, and any compliance wording. |
| Proofing check | Approve dieline scale, logo placement, barcode or warning zones, color tolerance, closure strength, and carton packing before bulk production. |
| Main risk | Vague material claims, crowded artwork, missing packing details, or unclear freight terms can make a low unit price expensive after revisions. |
Fast answer: Unboxing Experience Pricing: Board, Finish, Dieline, and Unit Cost should be specified like a repeatable production item. The safest quote records material, print method, finish, artwork proof, packing count, and reorder notes in one written spec.
Production checks before approval
Compare the actual filled-product size with the drawing, then confirm tolerance on folds, seals, hang holes, label areas, and retail display edges. Reserve space for logos, QR codes, warning copy, and material claims before decorative graphics fill the panel.
Quote comparison points
Review material grade, print process, finish, sampling route, tooling charges, carton quantity, and freight assumptions side by side. A quote is only useful when the supplier can repeat the same color, closure quality, and packing count on the next order.
What an Unboxing Experience Really Includes
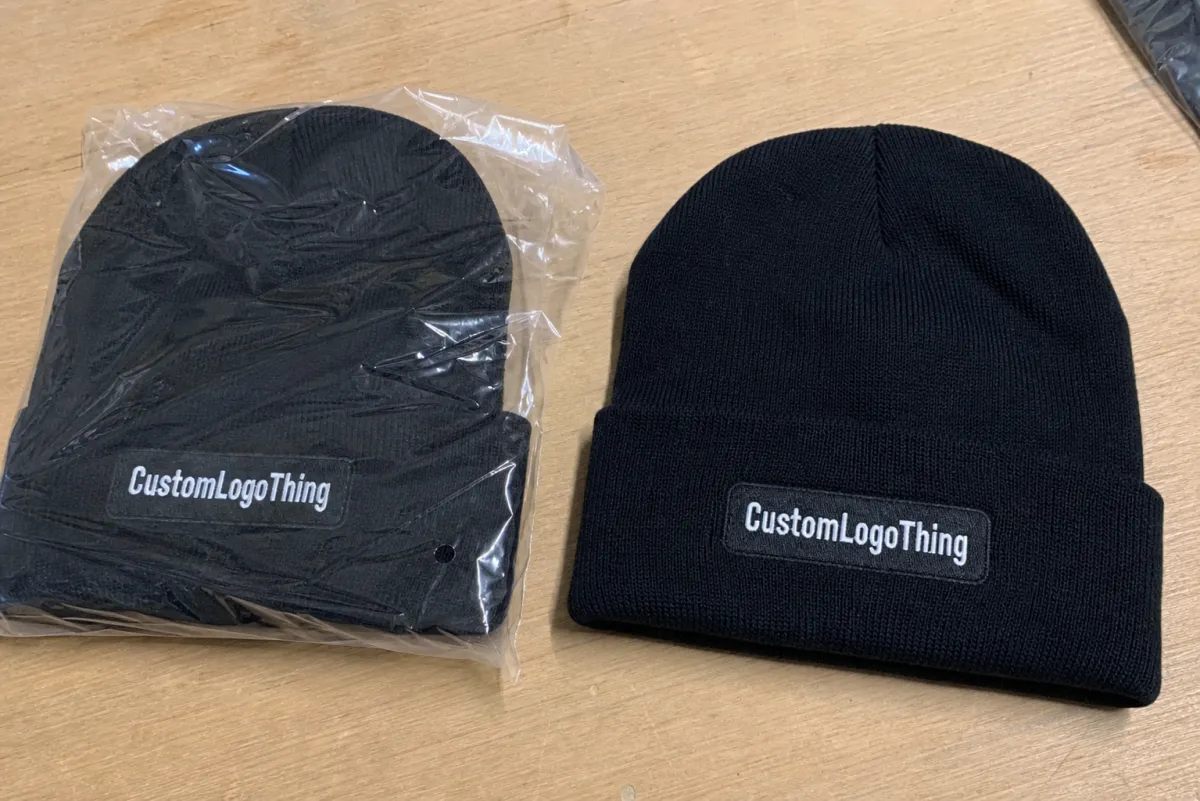
The first time I walked a customer through an unboxing experience pricing guide conversation on a corrugator floor in Dongguan, I watched two packages sit side by side on the bench and look almost identical from six feet away, yet one landed at nearly triple the cost because it used a rigid setup box, a molded pulp insert, and a soft-touch coating, while the other was just a printed mailer with a paper spacer. That kind of gap surprises people every single week, and honestly, it is exactly why an unboxing experience pricing guide has to go beyond box price and talk about the whole packaging system instead of pretending the outer carton is the whole story.
An unboxing experience is the full sequence a customer sees, touches, and remembers: the outer shipper that survives parcel handling, the branded mailer or carton, tissue or wrap, the insert that holds the product in place, the reveal moment when the item is lifted out, and any finishing detail such as foil stamping, embossing, debossing, custom tape, or a printed thank-you card. In practical packaging terms, it is visual branding mixed with physical protection, and that combination shapes customer perception in the first 10 to 30 seconds after the parcel is opened. I still remember a sample review where the whole room went quiet because the insert lifted the product like a little stage; no one said anything for a second, which in packaging meetings is basically a standing ovation.
Brands invest in this because the payoff can be very real. A clean reveal can raise perceived value on a $25 skincare item, support repeat purchase on subscription goods, and create a social-media-friendly moment that customers actually photograph with a phone in one hand. I have seen a modest candle company in Ohio go from plain brown mailers to a two-piece SBS carton with a kraft paper insert and one-color inside print, and the customer service team told me returns from shipping damage dropped by 18% after the change because the product stopped rattling in transit. That was one of those meetings where everyone suddenly starts talking more enthusiastically than they did five minutes earlier, which, in my experience, usually means the package is doing something right.
Here is the part most people get wrong: decoration is not the same thing as system design. A package can have beautiful foil and still fail if the product shifts around in transit, and a package can be plain but highly effective if the board grade, insert geometry, and closure method are doing the heavy lifting. That is why a real unboxing experience pricing guide has to cover both the presentation layer and the protection layer, because the final unit cost changes the moment the packaging must stage, protect, and present instead of merely contain. I have a soft spot for the simple solutions, to be honest; they tend to survive the factory floor better than the “let’s add one more effect” versions that look amazing in a PDF and turn into a headache in production.
“The box itself is only half the story. If the insert is wrong by 3 millimeters, the whole premium feeling disappears the first time the customer opens it.”
How Unboxing Experience Pricing Is Structured
A good unboxing experience pricing guide starts with the way quotes are actually built inside a packaging plant. In most factories, whether I am standing beside an offset press in Shenzhen or watching a converting line in Illinois, the price is assembled from a few core buckets: structural design, prepress, print method, material selection, inserts, finishing, assembly, and freight. If any one of those buckets changes, the quote shifts, sometimes by a little, sometimes by a lot. I’ve seen a buyer argue over a five-cent difference while ignoring a freight jump that was eating the savings alive, and yes, that conversation was about as fun as trying to tape a lid shut with one hand.
There is usually a setup cost, a per-unit cost, tooling charges for dies or embossing plates, and minimum order quantities that protect the plant from running a 500-piece job at the same burden rate as a 50,000-piece job. A rigid box with a wrapped chipboard shell might carry a higher tooling cost than a folding carton, but if you are running 20,000 units, the unit cost can flatten out nicely. A small run of 1,000 units, though, often looks expensive because the setup is spread over fewer pieces, and that is the sort of detail a careful unboxing experience pricing guide should make very clear. I remember a startup founder staring at the quote like it had personally offended him; technically, the quote was just doing math, but I understood the emotion.
Factory process matters too. Offset printing usually gives the best detail and color control for premium presentation boxes, especially when matching a brand book with tight tolerances, but it tends to carry plate, make-ready, and waste implications that digital printing may avoid on shorter runs. Flexographic printing can make a lot of sense for corrugated shippers and custom tape, while digital printing is often the quickest route for variable artwork, short production windows, or test launches. Die cutting affects waste and nesting efficiency, and hand assembly lines can quietly become the largest labor line item when a design asks for ribbon pulls, double inserts, or manual kitting. That last part is where dreams go to meet a stopwatch.
I remember a buyer in a subscription beauty meeting who kept comparing two quotes and insisting the box price was the full story. We finally laid out the whole sequence on a table: outer carton, inner divider, tissue wrap, product tray, instruction card, and a separate sample envelope. Once we added 14 seconds of hand assembly per unit at the plant, the “cheap” option turned into the more expensive one. That is why the best unboxing experience pricing guide never stops at unit price; it shows how the packaging line, not just the artwork, drives cost.
Here is a simple way to think about it:
- Setup costs cover artwork prep, dielines, proofing, and tooling.
- Per-unit costs cover board, paper, print, inserts, and labor.
- Finishing costs include foil, coatings, lamination, embossing, and special effects.
- Freight costs depend on pallet density, box volume, and shipping lane.
If you compare quotes without separating those pieces, the numbers can mislead you. A box that costs $0.62/unit ex-works may land closer to $0.91/unit after assembly and freight, while a cleaner structure at $0.74/unit might total less once you factor in better nesting and lower dimensional weight. That is the kind of math an honest unboxing experience pricing guide should teach, because smart budgeting lives in the total landed cost, not the flashy headline price. I have honestly lost count of how many times a “budget-friendly” sample got quietly expensive the moment it met a pallet jack and a freight invoice.
Key Factors That Change the Price
The biggest cost drivers in an unboxing experience pricing guide usually start with materials. Corrugated mailers are economical and tough, SBS paperboard gives a cleaner print surface for retail-style presentation, rigid chipboard delivers that dense, premium feel, and kraft can communicate sustainability or a handmade aesthetic depending on how it is printed and finished. Specialty papers, recycled liners, and FSC-certified substrates can improve brand story and support compliance goals, but they also change price and sometimes sourcing time. If you want a reference point for responsible sourcing, the FSC site is useful for understanding certified fiber options.
Print complexity moves the number more than many buyers expect. Spot colors need careful ink control, CMYK builds can look rich but require disciplined color management, and finishes such as soft-touch lamination, spot UV, foil stamping, embossing, and debossing each add process steps. Inside printing often feels subtle to the customer, yet it can add another pass through press and finishing. I once helped a skincare brand simplify a six-effect lid down to foil on the top face only, and they saved enough to upgrade the insert from plain board to a velvet-finish tray without increasing the total budget. That is a classic unboxing experience pricing guide tradeoff: spend where the customer notices most, not where the mood board gets the most applause.
Size and structure are quieter drivers, but they are powerful. Larger footprints consume more board and corrugated sheet area, magnetic closures add components, telescoping lids require tighter dimensional control, and custom inserts often need die-cut molds or extra converting time. A magnetic rigid box for a perfume set might look elegant on a render, yet the hidden cost sits in the magnet placement, wrap labor, and added thickness that increases freight. If your shipping carton needs to protect that box, the secondary packaging must also be sized around it, which is how one premium choice can affect three cost centers instead of one. Packaging has a funny way of multiplying like that; one tiny design flourish and suddenly three departments want to talk.
Order quantity changes the curve, but not in a perfectly linear way. Higher volume usually lowers unit cost because setup spreads over more pieces, yet certain premium designs become harder to run efficiently at scale because spoilage increases and tolerances tighten. A project that runs beautifully at 2,000 units with manual assembly might become messy at 50,000 unless the structure is simplified or partially automated. That is why an experienced supplier will talk to you about scrap rate, nesting yield, and carton count per master case, not just the print surface. A serious unboxing experience pricing guide has to reflect that reality, even if it bruises a few egos along the way.
Brand requirements matter too. Beauty packaging often needs a more refined feel because the customer is buying texture, color, and mood along with the product. Beverage packaging may need moisture resistance and stronger board. Electronics packaging often requires better cushioning and fit retention because a damaged device leads to replacement cost, chargebacks, and unhappy reviews. In my view, this is where many teams underbudget: they price the presentation but forget the product category rules that govern protection and performance. Nobody wants to explain to a customer why the box looked luxurious right up until the product arrived in pieces.
A few factors that frequently change the price in a meaningful way:
- Rigid versus folding construction and the amount of chipboard or SBS used.
- Insert type, whether paperboard, molded pulp, EPE foam, or custom thermoformed tray.
- Finish level, especially foil, emboss, and specialty coating combinations.
- Assembly intensity, including ribbon pulls, hand folding, or multi-piece kitting.
- Shipping profile, which affects carton size, cube efficiency, and freight class.
If you are building an unboxing experience pricing guide for internal approval, I would always recommend separating “nice to have” effects from structural requirements. That distinction saves meetings, and it usually saves money too. It also saves that one person on the call from launching into a ten-minute speech about luxury finishes when the product really just needs to stop wobbling in transit.
Step-by-Step: Build a Budget for Your Packaging Program
Step one is to define the customer moment you want to create. Is this luxury, sustainability, giftability, or an “open and share” reveal designed for social media? A candle brand in Nashville may want warm, tactile kraft and low-ink coverage, while a premium tea company may want a crisp white board, gold foil, and a resealable inner pouch. The budget changes depending on the feeling you want, and a good unboxing experience pricing guide should start with the emotion, not the embellishment. If you skip that part, you end up buying effects first and strategy second, which is a very expensive order of operations.
Step two is to list every component in the stack. Write down the outer shipper, the printed mailer, the inner carton, tissue, sticker, insert, instruction card, sample packet, and any void fill. I have seen teams ask for “a box quote” only to discover they also need a belly band, a window patch, and a tamper seal. That is how budgets slip. A complete unboxing experience pricing guide forces the whole system onto one page. I once had a client whisper, “We may have forgotten one or two things,” which turned out to mean six components and a minor panic attack.
Step three is to rank features by impact. If you have $1.00 to spend on packaging, would you rather put 25 cents into foil, 20 cents into a better insert, 15 cents into thicker board, or 10 cents into custom tape and the rest into print upgrades? The honest answer depends on product category and brand identity. For a jewelry set, the insert may Matter More Than the outer print. For a subscription box, the reveal sequence may matter more than the closure mechanism. That kind of prioritization is what turns a loose idea into a practical unboxing experience pricing guide.
Step four is to request physical samples. I would not approve a premium launch on screenshots alone, and I say that after watching a client in a Chicago showroom approve a design that looked beautiful on a PDF but arrived with a hinge that cracked at the score line because the board caliper was 0.2 mm too light. Ask for a structural comp, a white sample, or a printed prototype. Test fit, strength, and presentation. If the box is for mail order, run a drop test and compression test. If you want an industry benchmark, the ISTA site has useful information on transit testing, and those methods can save you from costly surprises later.
Step five is to build a landed-cost view. That means packaging, fulfillment, and shipping all in one place. A heavier rigid box may cost more to buy, but if a lighter structure reduces cubic shipping charges and is faster to assemble, the total system may be cheaper. I have seen brands save 9% overall by moving from a dense rigid setup to a well-designed folding carton with a paperboard insert and smarter shipper sizing. The unboxing experience pricing guide that wins approval is the one that explains how the economics work from dock to doorstep. Frankly, it is much easier to defend a budget when the math includes the people actually handling the box, not just the design team’s favorite render.
A practical budget worksheet should include these lines:
- Outer packaging unit cost
- Inner insert unit cost
- Print and finishing charges
- Tooling and setup
- Assembly labor
- Freight to warehouse or fulfillment center
- Spare units for spoilage and quality control
If you include a 3% to 5% spoilage allowance and a small sample reserve, your unboxing experience pricing guide will be much closer to reality, especially on first runs where color matching and insert fit still need calibration.
Timeline and Production Process: What Happens After You Approve the Design
Once you approve the design, the process usually moves through a predictable chain: design brief, dieline development, artwork setup, proofing, sampling, production, finishing, assembly, and delivery. On paper that looks simple. On a factory floor, there are dozens of small checks, and each one can add or save days depending on how disciplined the project is. Any strong unboxing experience pricing guide should make it clear that time and cost are tied together much more tightly than most buyers expect.
Lead time depends on print method, material sourcing, and whether the project requires hand work or automated converting. A straightforward digital print mailer may move in 7 to 12 business days after proof approval, while a rigid box with foil stamping and a wrapped insert can stretch into 20 to 35 business days, especially if tooling or imported paper is involved. If the plant is running full speed for seasonal retail programs, you can feel that congestion on the floor. I once stood near a gluer in a packaging line outside Guangzhou where five launch programs were stacked in queue, and every extra changeover added real calendar days. That is why a practical unboxing experience pricing guide must talk about the production calendar, not just the invoice.
Late artwork changes are a classic source of delay. Change a logo lockup after proof sign-off, and you may need a new plate or a fresh digital proof. Special coatings can require longer curing windows. Imported specialty paper may sit in customs. Even something as ordinary as a revised barcode can force a last-minute reproof. The best way to avoid this is to plan backward from launch. If your marketing team needs product photography two weeks before launch, fulfillment needs stock before photography, and production needs approval before fulfillment can receive cartons. That chain should be visible in the unboxing experience pricing guide you share internally.
Here is the workflow I recommend mapping:
- Confirm product dimensions and packaging goals.
- Approve structural concept and insert style.
- Review dielines and print-safe areas.
- Sign off on color proof and finishing samples.
- Run production with agreed QC checks.
- Inspect first cartons off the line before full release.
- Schedule freight and receiving at the warehouse.
That process sounds formal, but it protects both the brand and the budget. A delay on the front end is annoying; a rejected shipment at the end is expensive. If your unboxing experience pricing guide includes a timeline column, you will make better choices about material availability, finish complexity, and launch date realism. And yes, a timeline column saves a lot of “why is this not here yet?” emails, which are never anybody’s favorite part of the job.
Common Costly Mistakes Brands Make
The first expensive mistake is over-designing the package. I know the temptation. Foil on the lid, embossing on the side panel, custom tissue, printed insert, satin ribbon, magnet closure, and a pull tab with a debossed logo. It sounds luxurious, but not every embellishment improves the customer experience enough to justify its cost. In many projects, one premium touch does more for the brand than four minor effects, and that is a hard lesson a lot of teams only learn after a first production run. A disciplined unboxing experience pricing guide keeps the focus on impact, not decoration for its own sake.
The second mistake is ignoring shipping strength. A box that looks beautiful on a studio table can arrive with crushed corners if the board grade is too light, the flute is wrong, or the insert fails to suspend the product. I have seen return rates climb because the package was designed for the Instagram shot and not for a 24-inch drop or a vibration event in a parcel network. If your package is going to face distribution abuse, test it. The EPA has solid recycling and materials guidance, but transit durability still has to be engineered into the structure itself.
The third mistake is underestimating assembly time. A design may look clean in a mockup and still demand 25 seconds of hand labor per unit because the insert has three folds, the card needs threading, or the tissue must be pre-creased. On a run of 10,000 units, that becomes a real expense. I once reviewed a premium gift set where the printed box was inexpensive, but the manual kitting consumed more labor than the board and print combined. That is the sort of line item a serious unboxing experience pricing guide should never hide, because the plant will absolutely find a way to charge for every extra second (and they should).
The fourth mistake is skipping prototypes. A prototype catches weak closures, improper fit, and print mismatch before the full run begins. It also reveals whether the “premium black” you approved actually prints as a deep charcoal on uncoated board. In the factory, I have seen beautiful renderings get humbled by real ink, real caliper, and real glue. Prototype early, and you get room to fix it; skip it, and you pay for mistakes in both cash and time. I still laugh a little at how often a perfect render turns into a mildly grumpy real-world box.
The fifth mistake is comparing the wrong numbers. A cheaper component can cost more once freight, spoilage, and labor are included. A rigid box might appear expensive at first glance, while a folding carton looks safe, but if the folding carton needs custom inserts, extra packing time, and heavier shippers to protect the product, the total system can tilt the other way. A thorough unboxing experience pricing guide always compares like with like: total system cost, not just the prettiest quote line.
Expert Tips to Get Better Value Without Losing Impact
If you want better value, use premium details selectively. A foil logo on the lid can carry more brand presence than foil on every panel. A custom insert can elevate the reveal even if the outer shipper stays simple. A clean interior print can feel richer than a full outside decoration package because the customer actually sees it at the reveal moment. That is one of the most reliable lessons I have learned after years of standing beside finishing lines: focus the budget where the hand and eye meet. A smart unboxing experience pricing guide should help you decide where to concentrate the spend.
Match the structure to the product and the shipping conditions. Not every project needs rigid packaging. Not every item needs foam. A good paperboard carton with the right flute shipper and a well-cut insert can outperform a heavier box when the product is light, the route is short, and the brand wants a cleaner sustainability story. I visited a skincare co-packer that switched from rigid to a reinforced folding carton and shaved 14% off total packaging spend, mostly because the new design was faster to pack and easier to palletize. That kind of choice is exactly what a practical unboxing experience pricing guide should help you see.
Standardize box sizes across SKUs where possible. If three products can share one outer size with different inserts, you reduce tooling, simplify inventory, and make reordering easier. You also give your fulfillment team fewer chances to grab the wrong carton. I’ve seen this work especially well in apparel, beauty, and accessory lines where product dimensions vary only slightly. Standardization is not glamorous, but it pays dividends in both cost and brand consistency. I know, I know — “standardized packaging” does not exactly make the marketing team cheer, but the warehouse will thank you, which in my book counts for a lot.
Ask for alternate material and print options during quoting. A responsible supplier should show you a value version, a middle version, and a premium version so you can compare them side by side. Maybe the value version uses a matte aqueous coating, the middle option adds spot UV, and the premium version adds foil plus embossing. Maybe the insert changes from rigid board to molded pulp. You will learn a lot from that comparison, and your unboxing experience pricing guide becomes a decision tool instead of a static estimate.
Plan scalability early. A design that works beautifully at 1,500 units can become a headache at 15,000 if the glue pattern, insert tolerance, or print process is too labor heavy. If you expect growth, tell the supplier now so they can design for future volume. That may mean choosing a more automated construction, simplifying the number of components, or making the artwork compatible with both short-run digital and longer-run offset production. The best unboxing experience pricing guide is one that protects future volume without forcing you to overbuy today.
“The cheapest quote is not always the cheapest program. Once you count rework, freight, and hand assembly, the smarter design usually wins.”
How to Decide What to Do Next
The smartest next step is to create a short packaging brief with product dimensions, brand goals, quantity targets, and a realistic budget range. If you can add product weight, shipping method, and the type of customer experience you want, a packaging supplier can give you a quote that is grounded in real conditions instead of guesswork. That is the foundation of a usable unboxing experience pricing guide.
I also recommend gathering physical samples of packaging you like. Bring in a beauty box, a subscription mailer, a rigid jewelry case, or a beverage carrier that matches your desired feel. A supplier can read those samples quickly and tell you whether the structure is a paperboard tuck end, a two-piece rigid setup, a mailer with a locked tab, or something more complex. Samples cut through vague language fast. They also help the manufacturer identify board type, coating style, and likely assembly method with far less back-and-forth, which speeds up the entire unboxing experience pricing guide process.
Ask for at least two options in the quote: one value-focused version and one premium version. The spread between them teaches you where the real cost drivers sit, and that makes tradeoffs much easier to evaluate. I’ve had clients save thousands simply by seeing that a certain foil effect added more cost than a better insert, or that a printed sleeve delivered nearly the same visual brand recognition as a fully wrapped rigid box. That kind of clarity is strangely satisfying; it’s the rare moment when a spreadsheet actually makes your life better.
Before you approve production, review the design with fulfillment, operations, and customer service. Those three teams know things the design team often misses. Fulfillment knows whether the carton stacks cleanly on a pallet. Operations knows whether a glue flap will slow packing. Customer service knows where damage complaints typically start. If they all sign off, your odds of a smooth launch rise dramatically. That last alignment step belongs in every serious unboxing experience pricing guide because the cheapest packaging is the one that does not create downstream problems.
If I had to boil the whole decision down to one practical sentence, it would be this: the best unboxing experience pricing guide decisions balance brand impact, production reality, and repeatability. That means choosing materials that fit the product, finishes that matter to the customer, and a structure the factory can run consistently month after month.
For Custom Logo Things, that is really the heart of the matter. A strong package is not just a container; it is a working part of your brand identity, a tool for brand recognition, and a quiet signal that the company understands the details. A thoughtful unboxing experience pricing guide helps you spend with confidence, quote with clarity, and launch with fewer surprises. If you build it from real samples, real specs, and real production limits, you will usually end up with a better package and a better bottom line.
The clearest takeaway is simple: do not price the box in isolation. Price the full system, compare the landed cost, and test the sample before you commit. That is the quickest path to an unboxing program That Feels Premium, ships safely, and stays inside budget without any last-minute drama.
Unboxing Experience Pricing: decision table
| Decision area | Best fit | What to verify | Risk if skipped |
|---|---|---|---|
| Board or flute choice | Product protection, stacking strength, and shipping distance | Caliper/flute, crush resistance, and sample fit | Weak structure or oversized cartons increase damage and freight cost |
| Print and finish | Retail presentation, unboxing, and shelf recognition | Color proof, coating, scuff resistance, and logo placement | A good dieline can still look cheap if finish and color drift |
| Packing method | Hand packing, ecommerce fulfillment, or retail-ready cartons | Inner count, master carton, label position, and warehouse handling | Good packaging slows operations if pack-out is ignored |
FAQ
How much does an unboxing experience cost per unit?
Cost varies widely based on structure, print method, insert type, and finish, so there is no universal per-unit number. A simple printed mailer will usually cost far less than a rigid box with foam or Molded Pulp Inserts and premium finishing. The best way to estimate cost is to quote the full packaging system, not just the outer box, and that is exactly why a good unboxing experience pricing guide should break out every component.
What is the biggest factor in unboxing experience pricing?
Material and labor usually drive the biggest swings in price, especially when the design uses rigid board, specialty inserts, or manual assembly. Premium finishes like foil, embossing, and soft-touch coating can also add meaningful cost. Higher quantities often lower unit costs, but only if the structure is efficient to produce. A practical unboxing experience pricing guide should show these tradeoffs in plain language.
How long does it take to produce custom unboxing packaging?
Timeline depends on sampling, artwork approval, print method, and finishing complexity. Straightforward packaging may move faster, while custom structures with special inserts or coatings usually take longer. Building in time for proofing and sampling helps avoid costly delays later, and any serious unboxing experience pricing guide should include lead time as part of budgeting.
Can I create a premium unboxing experience on a smaller budget?
Yes, by prioritizing one or two high-impact elements instead of adding expensive finishes everywhere. A well-designed insert, clean print layout, and thoughtful product reveal can feel premium without excessive decoration. Standardizing sizes and simplifying the structure can also preserve budget, which is one of the smartest lessons inside a realistic unboxing experience pricing guide.
What should I ask a packaging supplier before requesting a quote?
Ask about available materials, minimum order quantities, sample options, lead times, and assembly requirements. Provide product dimensions, weight, shipping method, and brand goals so the quote reflects real-world use. Request at least one cost-saving alternative and one premium option for comparison, because that comparison is the fastest way to make an unboxing experience pricing guide useful.