Buyer’s Unstructured Dad Hat Embroidery Backing Guide starts with a production truth that is easy to overlook: the soft, relaxed crown that makes a dad hat comfortable is also the reason embroidery needs more care. A structured cap has a firm front panel that helps hold stitches in place. A dad hat usually does not. The fabric can shift under the needle, the crown can collapse slightly in the frame, and a logo that looked clean in a digital mockup can sew with puckered edges, uneven lettering, or a front panel that suddenly feels too stiff.
In real production, a typical dad hat order uses 100% cotton twill, washed chino cotton, pigment-dyed cotton, or cotton/poly blends, with 40 wt polyester thread on a 6- or 12-head machine such as a Tajima or Barudan. A standard first-round sample usually costs $35-75 and takes 3-5 business days, while bulk production commonly runs 18-22 business days after art approval and deposit, depending on order size, stitch count, and whether the cap is supplied or factory-made. If the mill or trim supplier is GOTS, OEKO-TEX Standard 100, WRAP, BSCI, or GRS certified, that can help with material traceability, but it does not replace the need for a proper backing plan.
Good backing is not a magic patch placed behind bad artwork. It is one part of a setup that includes fabric weight, stitch density, digitizing, hooping or framing, thread choice, placement, and the finished hand feel of the cap. The goal is simple but not always easy: keep the embroidery readable and durable while preserving the soft shape that made the buyer choose an unstructured dad hat in the first place.
Most problems show up after the first sew-out, but the better decisions happen earlier. If the logo is too dense, the lettering too small, or the stabilizer too light for the fabric, the cap will tell you. If the backing is too heavy or layered without reason, the hat may look technically acceptable and still feel wrong on the forehead. A clean finished piece comes from balancing support with wearability. A good factory will usually confirm the logo size, stitch count, thread type, backing type, and placement by sending a sew-out photo before bulk starts, then check seam clearance, crown deformation, and thread tension on the first article.
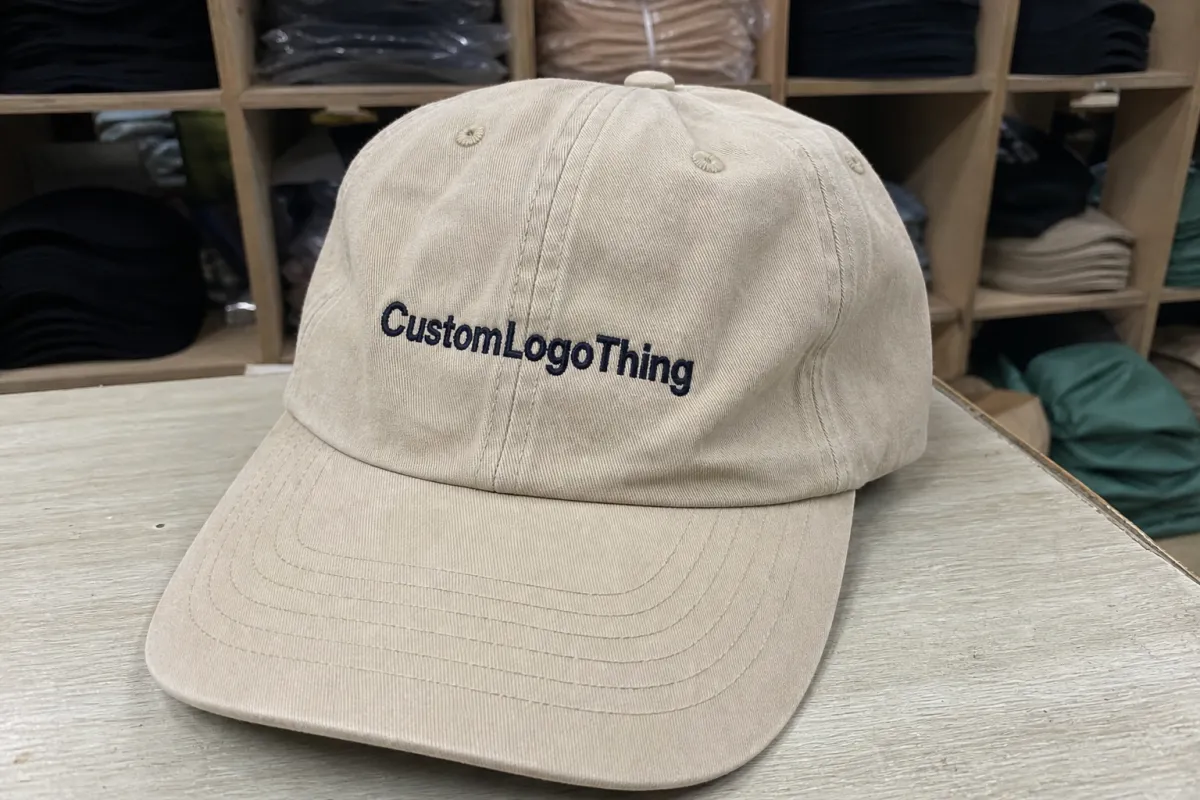
Unstructured Dad Hat Embroidery Backing Guide: Why Soft Caps Need Different Support
The first mistake buyers often make is assuming all caps behave alike under embroidery. A structured acrylic cap, a foam-front trucker, a Washed Cotton Dad Hat, and a stretch performance cap each respond differently to needle pressure, thread tension, and stitch density. The dad hat is usually the least forgiving because it has less internal structure to resist movement, especially when the front panel is only one layer of washed cotton twill or brushed chino.
Common dad hat fabrics include washed cotton twill, chino cloth, brushed cotton, pigment-dyed cotton, lightweight canvas, denim, corduroy, and cotton-blend performance materials. Each one has its own stability. A tightly woven 7.0-8.5 oz cotton twill may hold a modest front logo with standard tearaway backing. A softer 6.0-7.0 oz washed fabric may need more control. A stretch blend may require support that remains behind the stitches so the logo does not distort as the cap is worn. If the panel has been garment washed, the front can be more relaxed but also more prone to seam ripple, so many factories will test a 1:1 logo sew-out before approving bulk.
Embroidery backing is the stabilizing material placed behind the cap fabric. During sewing, it gives the needle and thread a steadier foundation. After sewing, depending on the backing type, it may be removed almost entirely or left partly in place to help the embroidery keep its shape. On a tote bag or flat patch, the fabric itself does more of the work. On a relaxed cap crown, the backing carries more responsibility. In practice, many shops pair the backing with a water-soluble topper for textured or brushed fabrics so the stitches do not sink into the nap.
The buyer’s real inspection should go beyond the outside of the logo. Small lettering needs to stay open. Borders should sit flat instead of tunneling or waving. The cap should still bend naturally in the hand. If the front panel feels like a shield, the stabilizer or stitch plan may have gone too far. If the logo ripples after light handling, the setup did not go far enough. A common checkpoint is a 24-hour rest after sewing, because some puckering only appears once the crown relaxes off the hoop.
That middle ground is why backing should be discussed before artwork approval. It affects comfort, machine speed, reject rate, and reorder consistency. In a good setup, the stabilizer supports the embroidery while visually disappearing into the finished cap. It also affects line speed: a clean, well-digitized cap logo can sew at 600-800 stitches per minute on lighter fills, while dense text or satin columns often needs a slower 450-650 SPM to avoid needle heat and fabric creep.
A clean sew-out starts with the file, not the backing. If the artwork is too dense for the cap, extra stabilizer may hide the problem briefly, but it rarely solves it.
How Backing Works Inside a Relaxed Crown
Every needle penetration pushes and pulls on the cap fabric. On a firm front panel, that movement is partly absorbed by the cap structure. On an unstructured crown, the fabric can stretch, creep, or compress as the machine builds the design. Backing limits that movement so the stitches land where the digitized file expects them to land. Most factories will run a 3-point checkpoint here: hoop tension, stitch registration, and post-sew fabric recovery.
The main options are tearaway, cutaway, and lightweight specialty stabilizers. Tearaway backing is common for standard cotton dad hats with moderate stitch counts because it supports the design during sewing and can be removed afterward. It leaves less material behind, which helps preserve a softer hand feel. It is not always enough for unstable fabrics or dense fills. A single-sheet medium-weight tearaway is often enough for a 2,000-4,000 stitch logo on a stable cotton twill cap, but larger logos can need a second layer or a different construction altogether.
Cutaway backing is used when the fabric needs support after the machine stops. Stretchier caps, thinner blends, and dense logos often benefit from some stabilizer remaining behind the embroidery. The tradeoff is feel. Cutaway can make the front of the crown slightly firmer, especially if the design is large or if the trimming is rough. For some orders, that is acceptable. For a cap meant to feel broken-in from the first wear, it needs to be handled carefully. On higher-density pieces, factories may pair a soft cutaway with a wash-away top film to prevent the stitches from sinking during production.
Light specialty stabilizers can help when comfort is a major requirement and the logo is not overly demanding. These are not a universal upgrade; they work best when the cap fabric and stitch plan allow a lighter hand. If the design has heavy fills, tight outlines, or small text stacked into a compact area, a delicate stabilizer may not provide enough control. In those cases, a 2.5-3.5 oz cutaway or a layered tearaway-and-topping combination is often more predictable than trying to force a minimal backing to do everything.
Backing also interacts with cap framing, needle size, thread weight, bobbin tension, underlay, stitch direction, and machine speed. A good digitized file for a dad hat does not treat the front panel like a flat piece of fabric. It accounts for curve, seam, fabric movement, and the way stitches pull toward or away from one another. Underlay can help lock the fabric down before visible stitches build on top. Pull compensation can keep letters from shrinking or borders from drifting inward. A common production needle spec is 75/11 for standard polyester thread and 80/12 when the fabric is heavier or the design uses thicker thread.
More backing is not automatically better. Too much material can create bulk behind the embroidery, irritate the wearer near the forehead, or flatten the relaxed silhouette. The goal is controlled support, not a rigid patch hiding inside a soft cap. Most QC teams will check the inside seam line, sweatband edge, and front crown softness after trimming to make sure the stabilizer is not creating a hard ridge.
Key Factors That Decide Backing Choice
Three variables usually decide the backing direction first: cap fabric, logo size, and stitch density. Fabric determines how much the crown moves. Logo size determines how much area is under stress. Stitch density determines how much thread is being forced into that area. In production terms, anything above roughly 4,500-5,500 stitches on a soft crown starts to move from simple support into true stabilization planning.
Washed cotton twill may be forgiving with a clean, medium-sized logo. Pigment-dyed cotton can feel softer and sometimes less stable, especially after garment washing. Corduroy has texture that affects edge clarity. Denim can be firm but still bulky at seams. Performance blends may stretch enough that a tearaway-only approach allows the design to distort over time. None of these fabrics is “bad” for embroidery, but each one needs an honest setup. If the cap is being sourced under a WRAP- or BSCI-audited program, the factory may still need to source the correct stabilizer separately because certification on the garment does not guarantee identical behavior across trims and backings.
Dense artwork causes the most trouble. Large fill areas, stacked outlines, tiny letters, and narrow negative spaces concentrate tension. As the machine adds thread, the fabric tries to move. If the backing is too light, the design puckers. If the backing is strong but the file is poorly digitized, the cap may still distort because the stitch plan is fighting the fabric. A clean mockup does not reveal those forces. A good pre-production sample usually includes a close photo of the center-front seam, the underside of the backing, and the logo after trimming so buyers can inspect density and hand feel before bulk approval.
Placement changes the calculation. Center-front embroidery is common and usually the easiest to plan, but the crown curve and center seam still matter. Side panel embroidery wraps across a different shape and may have less stable framing. Back arch embroidery can run close to the opening or strap area, where access and tension are more limited. A design that works on one placement may need resizing or re-digitizing for another. For example, a 2.5 inch tall center-front wordmark may need to be reduced to 2.0 inches on a side panel to avoid seam drag and needle deflection.
Thread and needle choices add another layer. Metallic thread can be less forgiving. Thicker thread changes coverage and tension. Very fine lettering may require adjustments to thread weight, density, or even the artwork itself. Buyers do not need to specify every machine setting, but they should understand that the backing recommendation is tied to these choices. A 40 wt polyester thread is the default for most dad hat logos, while rayon may look slightly softer but is less common for washable retail caps.
The practical tradeoff is clear: stronger stabilization can produce cleaner embroidery, but the cap still has to feel like a dad hat. If the crown loses its soft drape, the decoration may be technically clean and commercially wrong.
| Backing option | Best use | Feel after embroidery | Typical cost impact | Notes |
|---|---|---|---|---|
| Tearaway | Standard cotton dad hats with moderate stitch counts | Soft to moderate | Lowest; often included in base embroidery pricing | Best for cleaner fabrics, 2,000-4,000 stitch logos, and one-piece front designs. Often paired with a quick post-sew tear and brush-off inspection. |
| Cutaway | Stretch blends, dense logos, or soft crowns that need lasting support | Moderate to firmer | +$0.15-0.45 per cap | Useful when the front panel needs permanent reinforcement. Usually checked for edge trim quality, seam clearance, and wearer comfort at the forehead. |
| Light specialty stabilizer | Comfort-first projects with low-to-mid stitch density | Softest | +$0.10-0.30 per cap | Works best with simple logos, lighter thread coverage, and fabrics that already hold shape well. May require a sample sew-out before bulk approval. |
Process and Timeline
A reliable cap embroidery workflow usually starts with artwork cleanup and digitizing, then moves to backing selection, sample sew-out, buyer approval, bulk production, trimming, inspection, and packing. For most factories, the sample step takes 3-5 business days, and the full production run takes 18-22 business days once the sample is approved. If caps are stock blank and the logo is simple, the timeline can tighten. If the order includes custom dyeing, special washing, or mixed colorways, the timeline usually extends by several days.
Digitizing is where the backing decision really begins. A simple left-chest style logo might need a lighter underlay and a single layer of tearaway. A dense, centered badge may need underlay changes, pull compensation, and a stronger stabilizer to keep the crown from collapsing. Many factories will quote the embroidery by stitch count bands, such as under 5,000 stitches, 5,000-8,000 stitches, and over 8,000 stitches, because those bands often correlate with machine time and stabilizer load.
The sample sew-out should never be treated as decoration only. It is the chance to inspect stitch density, thread sheen, registration on the curved panel, backing visibility from the inside, and how the cap feels after handling. Buyers should ask for front, side, and inside photos, plus a close-up of the logo edge and a photo of the sweatband area if the design sits near the seam. If the order will use OEKO-TEX Standard 100-certified thread or stabilizer, the sample packet should identify that clearly so there is no substitution at bulk stage.
During bulk production, the shop should run in-process checks on the first 3-5 caps from each colorway. Typical checkpoints include needle breakage, bobbin tension, puckering, thread trim quality, and placement consistency from cap to cap. A final inspection should confirm logo dimensions within about +/- 2 mm, clean thread tails, no backing residue at the edges, and no hard spots that would bother the wearer. If the order is destined for retail or a corporate program, a carton-level inspection using AQL 2.5 or 4.0 is common, depending on the buyer’s tolerance and the order size.
After sewing, the cap should be cooled and rested before final packing, especially when dense embroidery and heat-sensitive fabrics are involved. Some factories add a light steam press from the inside or use a cap finisher to restore shape, but overpressing can flatten the relaxed crown and make the cap feel more structured than intended. The best result is usually the least intervention that still meets the buyer’s quality target.
Cost and Quote Variables
Backing choice is only one piece of the quote. The final price also depends on blank cap quality, material composition, stitch count, number of thread colors, placement complexity, sample requirements, carton packing, and whether the order needs custom labeling or hangtags. In many supplier quotes, a simple embroidered dad hat at 500 MOQ lands around $2.50-4.00 per unit for the cap plus embroidery, while smaller runs at 100-300 pieces can price higher because setup time is spread over fewer units.
For buyers comparing offers, the cheapest quote is not always the best value. A low bid may assume a single tearaway layer even for a dense logo, which can lead to higher reject rates or post-approval rework. A slightly higher quote may include a stronger stabilizer, slower machine speed, and a proper sample approval cycle, which usually saves money once the order is in bulk. If the factory is quoting GRS recycled content, GOTS cotton, or OEKO-TEX Standard 100 materials, the price may also reflect documented sourcing and added compliance paperwork.
Other common quote variables include embroidery position count, rush fees, labeling, and packaging. A single logo at center front is usually the least expensive option. Adding a side logo, woven label, or custom polybag can add $0.15-0.60 per unit depending on the spec. Rush production often adds 10%-20% to the order total, especially when the sample window is compressed to under 48 hours. Buyers should ask whether the quote includes one sample sew-out or whether extra revisions are charged separately.
MOQ matters too. Many factories will accept 100-200 pieces for a test run, but the cleanest pricing usually starts at 300-500 pieces. At 1,000 pieces and above, the per-unit embroidery cost usually drops because machine setup, digitizing review, and backing selection are amortized more efficiently. If the buyer needs mixed sizes or mixed colors, the factory may still quote the same MOQ but ask for a higher color break minimum per shade.
The most accurate quote comes after the factory sees the artwork in vector form, knows the cap material, and understands the target hand feel. That lets the supplier choose the backing and stitch plan together, instead of guessing at both.
Common Backing Mistakes
One common mistake is choosing the heaviest stabilizer available and assuming that will guarantee quality. In practice, too much backing can make the crown stiff, expose the wearer to scratchy residue, and leave a flat spot where the cap should drape. Another mistake is using a light tearaway on a high-density design and then blaming the machine when the logo puckers. The backing and the stitch plan have to match the fabric.
Another frequent issue is ignoring seam placement. Many dad hats have a center seam or seam reinforcement that can interfere with the top of a logo. If the artwork crosses that area without re-digitizing, the stitches may sit differently on either side of the seam. Buyers should confirm whether the logo sits above, across, or below the seam line, because that changes the amount of pull compensation needed. A logo that looks centered in a mockup can still be technically wrong if the seam interrupts the stitch field.
Some buyers also approve artwork without a sew-out because the file “looks simple.” Even simple art can fail if the letters are too small, the satin columns are too narrow, or the spacing between elements is too tight for the chosen cap fabric. As a rule of thumb, very small text under about 0.2 inch high is risky on a soft crown unless the digitizer simplifies it. The best prevention is an approved sample, not a post-production fix.
Finally, buyers sometimes focus only on the outside appearance and ignore the inside finish. Loose backing threads, rough trim, and exposed stabilizer edges can all affect comfort and perceived quality. A good factory will inspect the interior, not just the visible logo, because a retail-ready dad hat should feel clean on the inside as well as the outside.
Expert Tips for Cleaner Embroidery
Ask for a sew-out on the actual fabric, not just a generic test cloth. A black washed cotton dad hat and a navy brushed cotton dad hat can behave differently even when they are built from similar specs. If the factory cannot sew the sample on the real material, at least request a fabric swatch test with the same backing and thread type before bulk approval.
Keep the logo simple when the crown is soft. Bold lettering, open shapes, and moderate spacing usually hold better than tiny details or compressed badge designs. If the brand mark is very detailed, consider reducing the size or splitting it into two placements rather than forcing all of the detail into one small front panel. A reduction from 5,000 stitches to 3,500 stitches can often improve both softness and consistency.
Use the sample stage to test not just appearance, but hand feel and recovery. Fold the crown, press the logo lightly, and check whether the front panel rebounds without a hard crease. If the backing can be felt immediately through the fabric, the setup may be too heavy for a relaxed dad hat. Also ask the factory to show the trimmed underside, because a clean back finish often predicts a cleaner retail result.
Confirm the inspection checkpoints before production begins. A practical checklist should include logo size, placement from the center seam, stitch count tolerance, thread color match, backing type, cut quality, and package presentation. If the buyer needs compliance support, ask for material declarations or test reports up front, especially for OEKO-TEX Standard 100, GOTS, or GRS-related claims. That helps avoid surprises after the caps are already sewn.
When in doubt, favor the simplest setup that passes the sample. The right stabilizer is the one that gives the logo enough support to stay crisp without turning the hat into a structured cap.
Next Steps Before Approval
Before you approve a dad hat embroidery order, verify four things: the artwork size, the backing type, the sample result, and the final production timeline. Ask the factory to confirm whether the quote assumes tearaway, cutaway, or a specialty stabilizer, and whether that choice is included in the unit price or billed separately. If the design has dense fills or fine text, request a sew-out photo and an inside-back photo before giving the go-ahead.
If the order is for retail, promotions, or resale, confirm packaging and carton labeling too. Some buyers need individual polybags, size stickers, or barcodes, while others prefer bulk packing to reduce cost and plastic use. Packaging can also affect how the crown looks when the cap is first unpacked, so it is worth defining early rather than after production starts.
The fastest way to avoid disappointment is to treat the sample as a decision point, not a formality. If the sample feels too rigid, ask for a lighter backing or a revised digitizing file. If it puckers, ask for stronger stabilization or a looser stitch density. The best factories expect that conversation and can usually recommend a fix within one revision cycle.
Once the sample is approved, lock the spec sheet. That should include cap fabric, embroidery placement, logo dimensions, thread color references, backing type, and packing details. A locked spec sheet protects both sides and makes reorder consistency much easier when the next batch comes in.
FAQ
What backing is best for a standard dad hat?
For most 100% cotton dad hats with moderate-size logos, a medium tearaway is the most common starting point. If the fabric is very soft or the design is dense, a cutaway or layered approach may be better.
How much does embroidery usually add to a dad hat?
At 500 MOQ, a simple embroidered dad hat often lands around $2.50-4.00 per unit for cap plus embroidery, before premium packaging or rush charges. Smaller quantities usually cost more per piece.
How long does production take?
A sample usually takes 3-5 business days, and bulk production commonly takes 18-22 business days after sample approval. Complex art, custom colors, or special certifications can extend the timeline.
Do certifications matter for backing?
Yes, if the buyer needs documented sourcing or compliance. GOTS, OEKO-TEX Standard 100, WRAP, BSCI, and GRS can apply to different parts of the supply chain, but buyers should still confirm the exact stabilizer, thread, and blank cap used in production.
What should I check on the sew-out?
Check logo size, edge crispness, crown distortion, thread tension, backing visibility, inside trim quality, and how the cap feels after handling. The inside matters as much as the outside for a soft crown.


