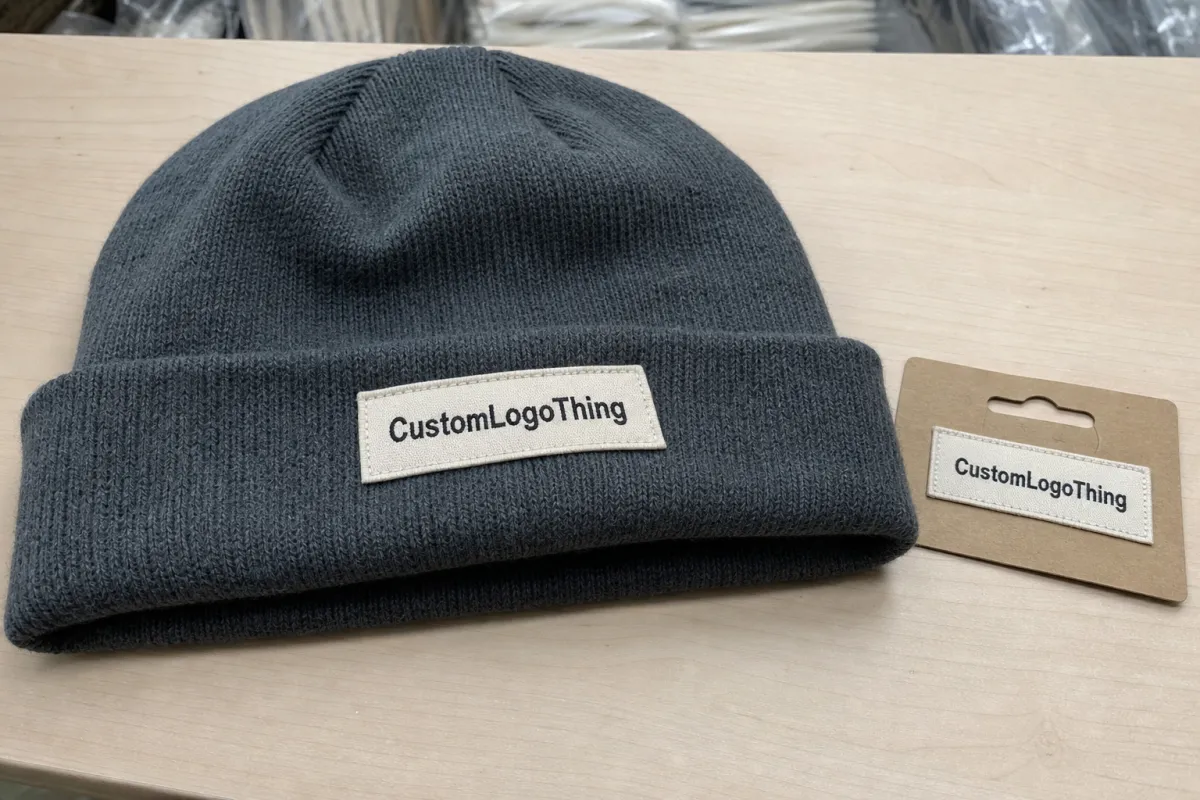
A beanie can look clean on a screen and still miss the mark in hand. The knit might feel too stiff, the logo patch may sit heavier than expected, or the cuff can lose its shape after a few stretches. That gap is why a beauty Logo Patch Beanies material sample guide matters. It gives buyers a real way to judge hand feel, drape, stretch recovery, and logo presence before a bulk order is locked.
Beauty brands care about the finish because the hat usually sits next to skincare, cosmetics, and gift sets that already promise a certain level of polish. If the beanie looks expensive in a render but feels cheap on the table, the whole set drops a notch. Customers notice that faster than brands like to admit.
The sample is not just a color check. It is the point where the knit body, patch material, backing, and attachment method meet. Change one of those pieces and the entire piece can shift in weight, flexibility, and how it wears. A good sample reduces risk before the order turns into inventory.
A sample that only looks right on camera can still fail on the head. If the patch fights the knit, buyers notice the fit before they notice the logo.
Why one patch sample can change the whole beanie order
A beanie can pass the first visual test and still miss the mark once it is handled. I have seen a neat-looking patch make a cuff sit too rigid, and I have seen a soft knit lose its drape the moment a thick logo patch was sewn on. For a beauty label, that is not a minor issue. The hat is usually part of a polished bundle, not a throwaway accessory.
Most buyers underestimate how the patch and the knit body work together. A dense faux leather patch on a soft rib knit can read as upscale, but if the patch is too large or backed too aggressively, it can pull the fabric and make the front panel feel crowded. A thinner woven label keeps the beanie more flexible, but it can disappear if the brand wants stronger shelf presence.
The beauty Logo Patch Beanies Material Sample guide should be treated as a decision tool, not paperwork. The sample shows how the logo reads at arm’s length, how the fabric recovers after it is stretched, and whether the silhouette still feels right for a premium beauty assortment. Buyers who judge only the artwork usually miss the comfort and fit issues that customers feel first.
There is also a production reason to take the sample seriously. Once it is approved, the bulk run usually follows the same knit structure, patch size, and attachment method. If the sample is weak, vague, or built from substitute materials, the final order can drift. That leads to arguments nobody needs.
How the beauty logo patch beanies material sample guide is built
A useful sample starts with one rule: it should represent the final product, not a rough concept. That means the same yarn blend, the same knit gauge, the same cuff height, the same patch size, and the same decoration method whenever possible. If the bulk run will be a 1x1 rib beanie with a 2.5-inch cuff, the sample should not be a different knit just because it is quicker to make.
The build usually follows a sequence. First comes the body construction, often in acrylic, acrylic-wool blend, recycled polyester, or a similar cold-weather yarn. Then the patch is prepared, whether that patch is faux leather, woven twill, silicone, rubber, or embroidery. After that, the decoration is attached by sewing, heat pressing, or another production method so the buyer can judge the relationship between logo surface and knit stretch.
Some details lock early. Patch size, placement, overall silhouette, and logo orientation usually need to be fixed first. Thread color, edge stitch style, backing film, label placement, and even the sheen on the patch can still move if the buyer wants to compare two or three realistic directions before signoff.
The best samples make branding easy to read without making the hat feel overbuilt. That balance is the job. If the patch is too heavy, the cuff loses flexibility. If the patch is too small or too flat, the logo can disappear on the shelf. A production-intent sample should answer both problems at once.
There is also a scale issue that gets ignored too often. A patch that looks balanced on a 3D mockup may feel oversized on an actual 11-inch beanie. The difference is not subtle. Print scale, stitch density, and the seam line around the cuff all change how large the logo feels in real life.
Key material factors that affect feel, stretch, and durability
The body fabric matters as much as the patch. Acrylic is common because it is soft, cost-effective, and warm enough for most retail beanies, but lower-grade yarns can pill after repeated wear. Acrylic-wool blends usually feel a little richer and hold warmth better. Recycled polyester blends often give cleaner recovery and better shape retention, especially when the beanie needs to sit neatly on a merch display.
For beauty buyers, the patch material is often the louder style decision. Faux leather reads premium and clean. Woven twill looks crisp and controlled. Silicone gives a sportier tactile feel. Embroidery feels softer and more classic. None of those is automatically better. The right choice depends on whether the brand wants polished, minimal, sporty, or giftable.
- Faux leather - smooth, upscale, and good for high-contrast branding, but it can feel firmer on stretch knits.
- Woven twill - lightweight, clean-edged, and practical when the art has fine text or tight detail.
- Silicone or rubber - tactile and modern, with strong logo presence, though usually more casual in tone.
- Embroidery patch - softer in hand, familiar to many buyers, and useful when the beanie should stay flexible.
Thickness, backing, and edge finish matter just as much as the artwork. A patch that is 1 mm thicker than planned can change the way the cuff folds, and a stiff adhesive backing can reduce recovery after stretch. Even sheen changes the read. A glossy finish can make the same artwork feel more beauty-forward, while a matte surface pushes it toward utility.
Color accuracy is another trap. A black patch on a charcoal beanie may look nearly identical in photos, but under store lighting one can read flat while the other flashes slightly. Buyers should ask for physical swatches or clear Pantone references whenever color precision matters. Screen images alone rarely settle it.
Yarn weight deserves a quick check too. Many custom beanies sit somewhere around 70 to 120 grams depending on gauge, cuff depth, and yarn blend. Lighter units usually feel softer and pack smaller. Heavier units often hold shape better. Neither is right for every program.
The useful question is not just "Does it look premium?" It is "Will this still look premium after shipping, folding, unpacking, and a few wears?" That is the standard a sample needs to meet.
Step-by-step process and lead time from brief to approval
The cleanest sample process starts with a tight brief. The buyer sends artwork, target quantity, intended use, packaging needs, and the preferred look of the patch. From there, the supplier reviews the file, confirms stitchability or printability, and proposes the knit and patch construction that best fits the budget and brand position.
- Brief and artwork review: confirm logo size, placement, file quality, and any minimum line-weight limits.
- Material selection: choose the body yarn, patch type, and backing style that match the hand feel and price target.
- Sample build: produce the knit, finish the patch, and attach it using the intended production method.
- Proofing: review photos or the physical sample, checking fit, stretch, color, and logo balance.
- Revision: adjust what is actually needed, then keep the rest locked so the benchmark stays clear.
- Final signoff: freeze the spec sheet, approved artwork, and packaging notes before bulk production starts.
Lead time usually expands in three places: when a special patch material needs sourcing, when the artwork needs reshaping to fit the patch surface, and when the buyer takes too long to reply. A simple sample can often be turned in 7 to 12 business days after artwork approval. Specialty finishes or custom molded patches can push that closer to 15 to 20 business days. Bulk production often lands in the 20 to 30 business day range once the sample is approved, though that depends on knit capacity and order size.
One more detail gets missed often: revision timing is not just about the factory. If the buyer takes three days to answer a simple placement question, the schedule moves whether anyone likes it or not. Sample timelines are a chain. Every slow link adds up.
If shipping matters, ask how the sample will be packed and tested. For transit logic, many teams use ISTA methods as a reference point, especially when the beanies ship with retail inserts or more delicate box presentations. That is not overkill. It is a practical way to think about how the sample should arrive in the same condition the bulk order should maintain.
Cost, pricing, MOQ, and quote variables to compare
Quotes get easier to compare when buyers separate the moving parts. A sample fee is not the same as production pricing, and neither one includes every packaging or freight detail. For a custom beanie with a logo patch, sample charges often sit around $25 to $85 per piece. A custom patch tool, mold, or embroidery program may add another $40 to $180 depending on the decoration style.
| Patch option | Typical unit impact | MOQ pressure | Brand feel |
|---|---|---|---|
| Faux leather patch | +$0.30 to $0.65 | 100 to 300 pcs | Polished, beauty-forward, slightly structured |
| Woven twill patch | +$0.18 to $0.40 | 100 to 500 pcs | Clean, lightweight, and easy to read |
| Silicone or rubber patch | +$0.40 to $0.80 | 300 pcs and up for custom molds | Modern, tactile, and a little sportier |
| Embroidered patch | +$0.25 to $0.55 | 100 to 300 pcs | Soft hand, classic, and comfortable on the cuff |
MOQ changes the math quickly. A simpler woven patch may keep the threshold lower, while a custom molded silicone patch can push the minimum higher because the tool cost has to be spread over more units. That is why a low unit price is not enough on its own. A quote with a lower sticker price but higher revision fees, higher sample charges, or a steeper minimum can be more expensive in real life.
Packaging can move the quote too. If the beanies ship in folded packs with inserts, ask whether the outer carton is corrugated cardboard, whether the mailer uses kraft paper, and whether any printed cards are FSC certified. For brands with sustainability claims, recycled materials and post-consumer waste content should be specified clearly, because those details affect both price and credibility. Biodegradable packaging can make sense for light accessory kits, but only if it still protects the product and survives the freight lane.
The cleanest comparison is always like for like. Same patch size, same knit weight, same cuff depth, same packaging format, same freight method. If one supplier is quoting a 2-layer patch and another is quoting a single-layer patch, the lowest number is not really the cheapest option. It is a different build pretending to be the same.
Ask for a unit price broken out by quantity tier, not one vague number. Sample fee, setup fee, patch tooling, and freight should all sit on the same page. If they do not, the quote is hiding something, even if nobody says that out loud.
Common sample mistakes that create weak approvals
A sample can look finished and still be a weak approval if the buyer only studies the logo placement. That mistake comes up often. The patch may be centered perfectly, but the beanie can still feel too rigid, too shallow, or too loose at the crown. Once the order scales up, those comfort issues become expensive to fix.
If the sample only proves the artwork, it does not prove the product.
- Vague material language: words like "soft" or "premium" do not help unless the fiber blend, finish, and patch type are named.
- Color references from screens only: digital images drift, especially on black, beige, blush, and muted taupe tones.
- Logo reshaping late in the process: moving the mark after the patch is already sized can force a second sample and delay production.
- Backing changes without re-checking fit: switching adhesives or sew-down methods can alter stretch recovery and cuff comfort.
Another common miss is approving a sample in flat lay only. A beanie needs to be seen on a head form, on a table, and in hand, because the same patch can read elegant in one view and oversized in another. I also recommend checking the sample under the lighting it will face in real use, whether that is a vanity display, a trade show shelf, or a photo studio with hard white light.
Custom artwork can also create quiet problems. Thin scripts, tiny negative spaces, and over-detailed logos often look better at mockup size than they do on a patch. If the mark needs to be shrunk to fit the beanie, simplify it before production, not after. Sewing around tiny details is where a pretty concept starts to fall apart.
Finally, do not approve a sample while assuming bulk will "just be better." Bulk production is consistent only when the sample already reflects production intent. Hope is not a control method.
Expert tips for cleaner approvals and fewer revisions
The easiest way to reduce revisions is to build a small approval checklist and use it every time. Keep it simple: hand feel, stretch recovery, patch alignment, edge finish, logo clarity, and overall fit. A buyer who reviews those six points in the same order tends to make faster, cleaner decisions than someone who comments based on general impressions alone.
It also helps to compare the sample in the same condition it will be sold in. If the final pack-out includes a fold, a belly band, or a small insert card, test the sample that way before signing off. A lot of beauty brands want the opening experience to feel considered, so the shipment should be packed neatly, often in corrugated cardboard with kraft paper dunnage or a protective sleeve. If the supplier offers a more premium unboxing setup, ask whether the carton and inserts are FSC certified and whether the paper components use recycled materials or post-consumer waste content.
For source control and transit standards, I like to point buyers to FSC when paper claims matter, especially if the outer packaging needs to support a sustainability story. That does not mean every order needs every label. It means the claim should match the actual material.
- Ask for one production-intent sample instead of several conflicting test versions.
- Approve the sample in the same light you expect customers to see it under.
- Leave a narrow tolerance for tiny visual differences, but lock the critical brand points.
- Keep comments specific, such as "patch is 4 mm too wide" rather than "logo feels off."
- Save the approved spec sheet, artwork file, and packaging note together so nothing gets lost between teams.
A good beauty logo patch Beanies Material Sample guide gives the buyer one stable reference point. If every sample version looks different, the approval becomes a guessing game. If the sample is built with the right knit, the right patch, and the right finish, the buyer can make a confident call quickly and move into bulk with less friction.
One practical habit helps more than people expect: keep a small photo set of the sample from multiple angles, then write down what was approved and what was still pending. A week later, nobody remembers the exact shade of gray or whether the patch edge was meant to be matte or satin. The file record does.
Next steps after the sample lands on your desk
Once the sample arrives, inspect it in a practical order. Start with the knit body, then check the patch alignment, then test the stretch, then look at the edge finish and any label or packaging details. After that, compare the sample directly against the original brief, not against memory. Memory is where missed details hide.
Mark up the sample or the photos with three categories: must-fix issues, nice-to-have changes, and approved details. That distinction keeps the conversation clear. A buyer who says everything is "kind of okay" usually ends up with slow revisions, while a buyer who separates core issues from minor preferences gets to a final answer faster.
If the changes affect fit, patch construction, or unit cost, ask for a revision before moving forward. If the changes are cosmetic and the sample already matches the retail position, bulk can often proceed with a clean signoff. Keep the approved sample, the written notes, and the final art file together, because those three pieces become the standard for the order.
That file set matters even more if the packaging includes printed cards, kraft paper wraps, or FSC certified inserts. For buyers who care about sustainability language, it is worth keeping the carton spec, recycled materials note, and any biodegradable packaging claim in the same approval folder. That way, the product, the package, and the story stay aligned when the order moves into production.
Handled well, a beauty Logo Patch Beanies material sample guide does more than approve a hat. It gives the buyer a reliable way to compare hand feel, branding, pricing, and lead time before the bulk run starts, which is exactly what protects the final result.
Frequently Asked Questions
What should a beauty logo patch beanies material sample include?
It should show the final beanie body, the intended patch material, and the real attachment method, not just a loose logo proof. Ask for the actual color, backing, and edge finish so you can judge hand feel, stretch, and durability together.
How do I compare patch materials on beanie samples?
Check softness, thickness, sheen, and how the patch behaves when the beanie stretches or folds at the cuff. Compare faux leather, woven, embroidery, and silicone side by side under the same lighting so the finish reads consistently.
What affects the lead time for a sample and revision?
Lead time usually shifts when the artwork changes, a new patch material is sourced, or the backing method needs to be rebuilt. Fast feedback from the buyer keeps the process moving, while delayed approvals usually add more time than the build itself.
How many samples do I need before bulk production?
In most cases, one production-intent sample is enough if the artwork, material, and fit are already locked. Request another sample only when the patch material, colorway, or construction changes in a way that affects the final standard.
What should I ask for in a quote for these beanies?
Ask for sample cost, unit price by quantity, MOQ, setup fees, revision policy, and freight so the full landed cost is visible. Make sure every quote uses the same patch size, knit spec, and decoration method, or the pricing comparison will not be reliable.


